Create and Manage Client Computer Backups on Windows Server
- Case: How to back up client computers to a server?
- How to back up client computers in a domain?
- Part 1. Install the Windows Server Essentials Dashboard
- Part 2. Configure Windows Server Essentials
- Part 3. Connect computers to Windows Server Essentials Domain
- Part 4. Detailed steps to back up client computers in a domain
- Easier way to back up all client computers from a central server
- Conclusion
Case: How to back up client computers to a server?
In a client-server architecture, the client computers rely on the server for various services, including backup services. The client computers interact with the server to complete the backup process, and the administrator can configure the backup settings centrally.
In Windows Server 2012, 2012 R2, 2016, and later versions, creating and managing client computer backups is a crucial task for system administrators. Here's a step-by-step guide on how to create and manage client computer backups in these operating systems.
How to back up client computers in a domain?
To back up client computers in a domain, install the Windows Server Essentials Dashboard first, connect all client computers to the Windows Server Essentials domain, and then open the Dashboard to configure client computer backup. The following example uses Windows Server 2012 client backup.
Part 1. Install the Windows Server Essentials Dashboard
To install and configure Windows Server Essentials on Windows Server 2012, follow these steps:
1. Launch Server Manager and click Add Roles and Features
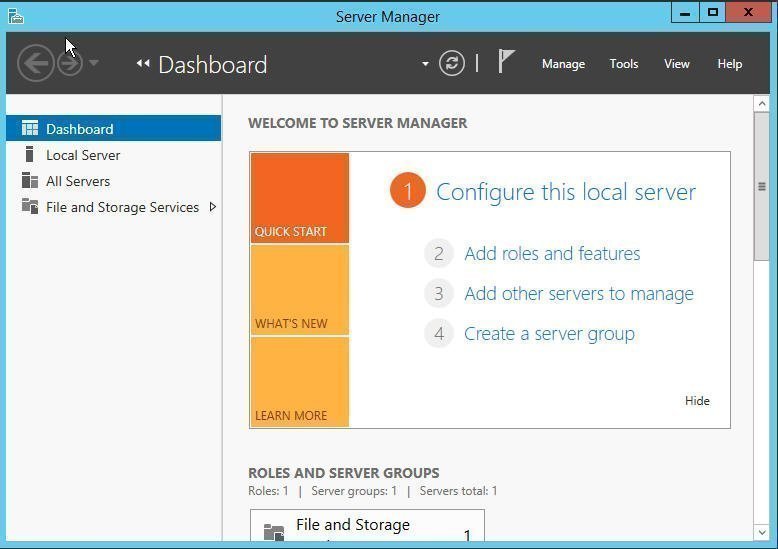
2. Click Next to continue.
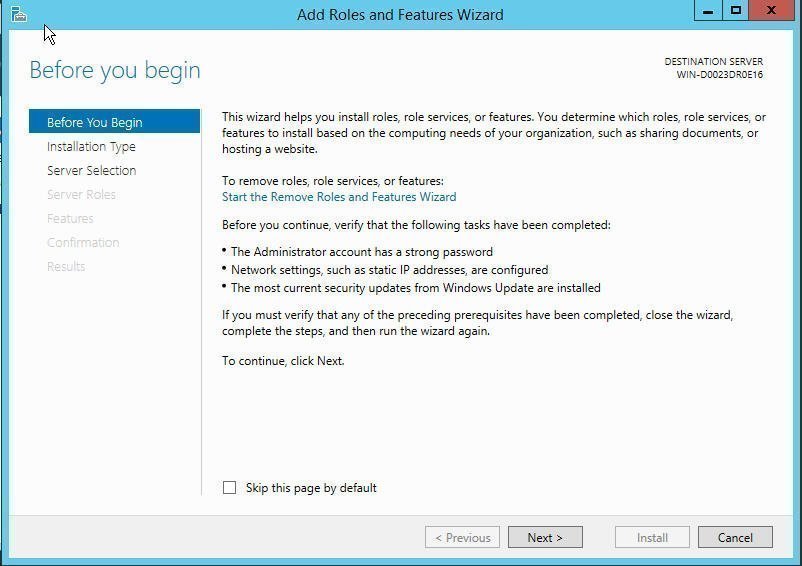
3. Select Installation Type -> server -> Server Roles: Windows Server Essentials Experience, then add features that are required for Windows Server Essentials Experience.
4. Follow the prompt until the last step and click Install.
Part 2. Configure Windows Server Essentials
1. To configure Windows Server Essentials on Windows Server 2012, follow these steps:
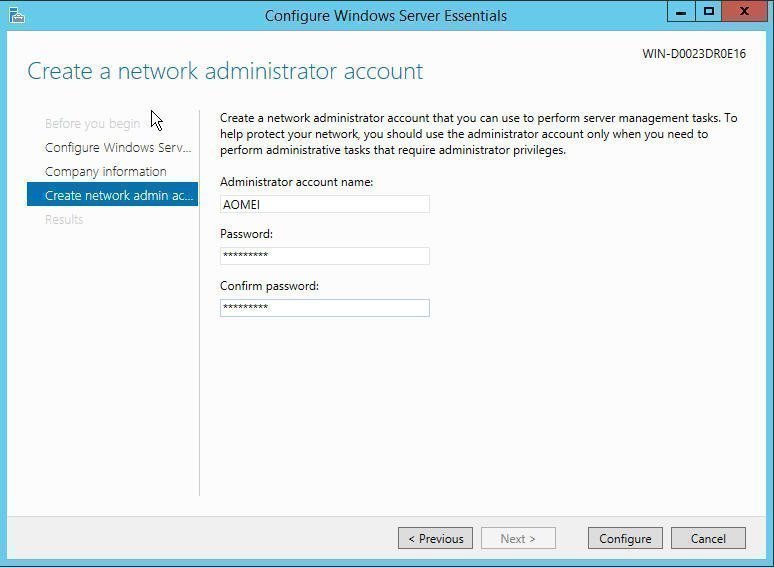
2. Click Next until you reach the Create a network administrator account window. Type the Administrator account name and password. Finally, click Configure and wait for the process to finish.
Part 3. Connect computers to Windows Server Essentials Domain
When you connect a computer to a server, you need to ensure that your client computer has a valid connection to the Internet.
To connect all client computers to your server, follow the steps below.
1. Log on to the computer that you want to connect to the server.
2. Open an Internet browser, such as Internet Explorer.
3. Type https:///connect or https:///connect in the address bar and then press Enter.
4. Click Download software for Windows in the Connect your computer to the server page.
5. Run the Connector application and follow the wizard to join the client computer to the domain.
Part 4. Detailed steps to back up client computers in a domain
1. Launch Windows Server Essentials Dashboard and click DEVICES.
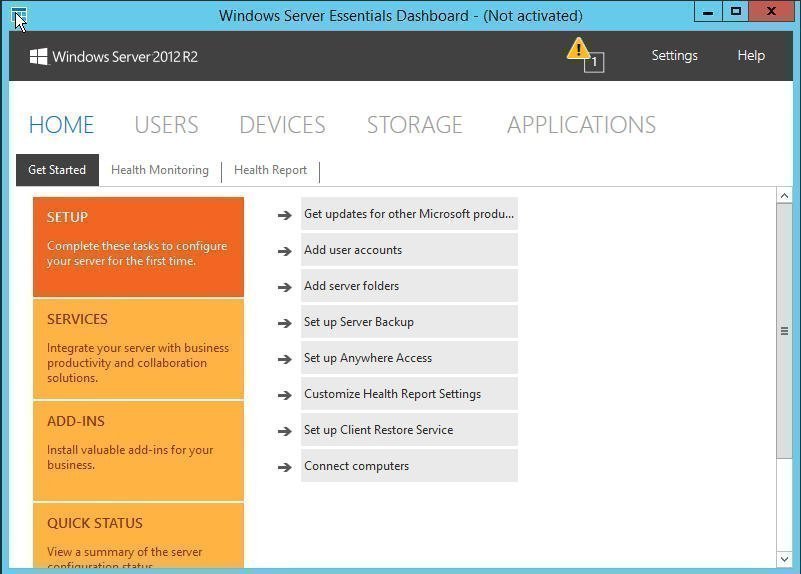
2. Click Client computer backup tasks under Computers tasks tab
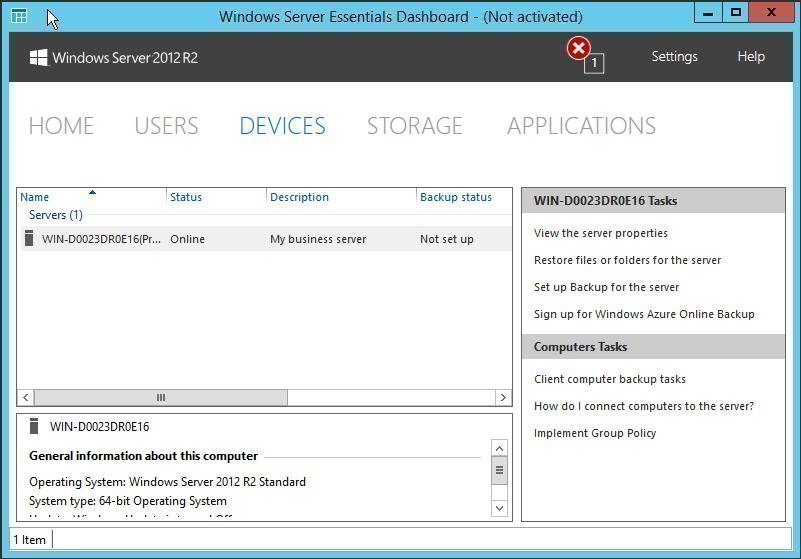
3. To set up a client computer backup schedule and retention policy, follow these steps:
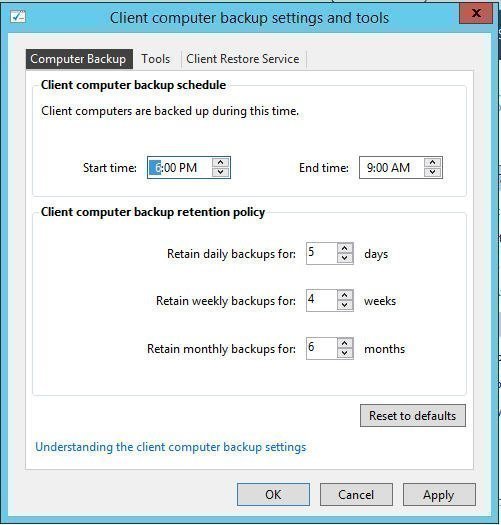
Backing up client computers in a domain can be a complex process, especially if you're not familiar with Windows Server Essentials. However, with the right steps, you can set up a reliable backup system for your clients.
Easier way to back up all client computers from a central server
If you do not want to go through the complex setup of a traditional backup system, you can use centralized backup software like Qiling Backup to perform client-server backup. It provides a simpler way to back up client computers from one central server.
With a few clicks, you can create file backup, system backup, partition backup, or disk backup tasks for all computers within a LAN. Supported systems include Windows Server 2019/2016/2012 (R2)/2008 (R2)/2003 (R2), Microsoft Windows Home Server (WHS) 2011, Windows Small Business Server (SBS) 2011, and Windows 10/8.1/8/7/Vista/XP.
Qiling Backup allows you to create, manage, and restore backups from a central machine. It also includes advanced options for scheduling, storage management, and backup monitoring.
In recent versions, the software has also added SQL Server Backup, giving users another tool to manage database backups centrally.
Here's a 30-day free trial for you:
Install and set up the software properly
1. Download Qiling Backup and install it on the central server as the management console.
2. It will detect available client computers on the network. Select the computers you want to manage, and Install client program on them remotely or manually.
3. After that, you can Request Control for computers you want to back up, and then create centralized backup tasks after the request is confirmed.
Now, you can use this centralized backup solution to create client backup for Windows Server 2012, 2016, 2019, etc.
How to create and manage client computer backups
1. After getting control over the client computers, you can switch to Tasks tab, click New Task and choose the task type as you need. Here choose Disk Backup as an example.
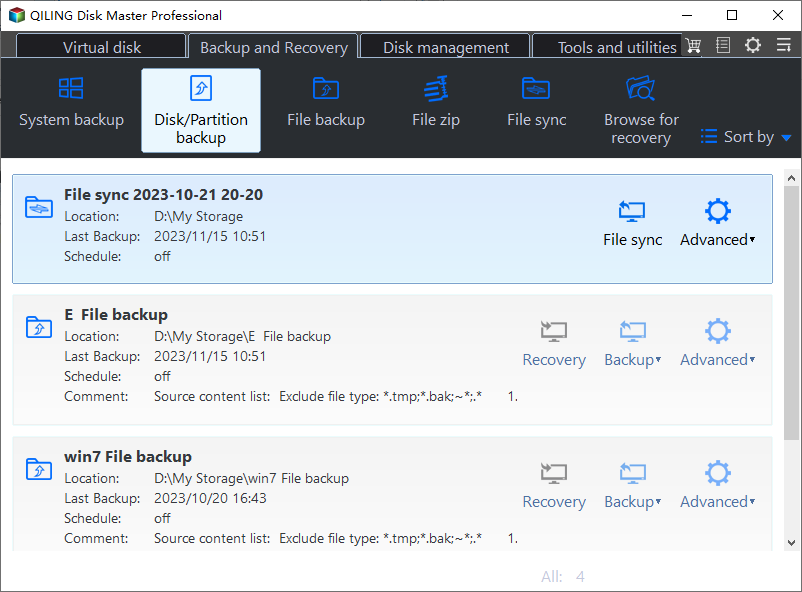
2. The backup setup screen is divided into several sections. In Step 1, click + Add Computers to detect controlled computers and select the ones you want to back up.
3. In Step 2, you can either Select data based on a client (manual selection), or Select data based on backup rules (auto selection).
4. Click the destination step, and click Add Storage to enter the network path of a share or NAS. Then specify a folder in it as the target directory.
5. After the basic setup, you can manage Settings, or create a Schedule, Scheme to customize the backup, then click Proceed to create and execute the task.
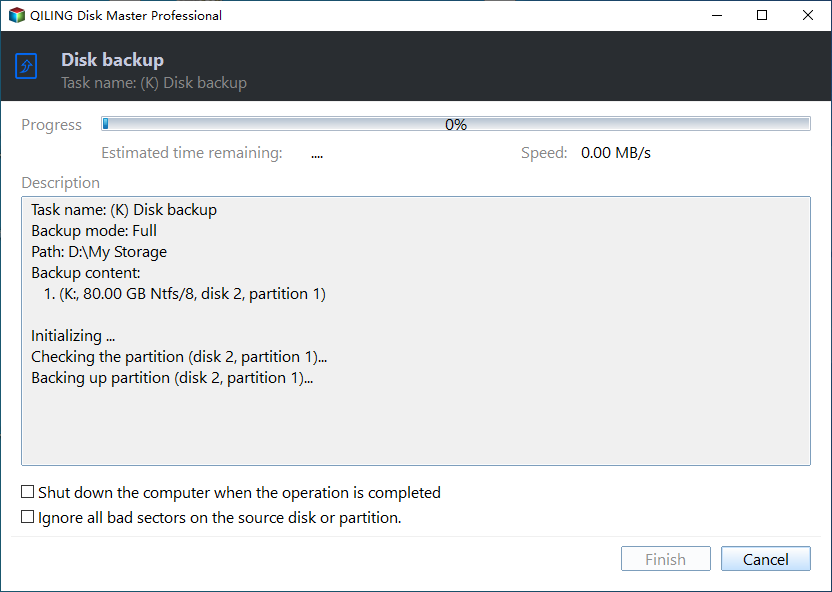
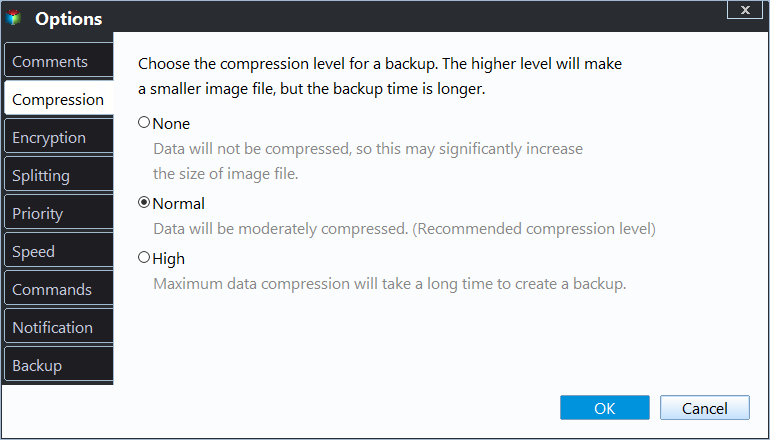
Setting: Manage compression level, image splitting, backup mode (intelligent sector or exact backup), notifications, etc.
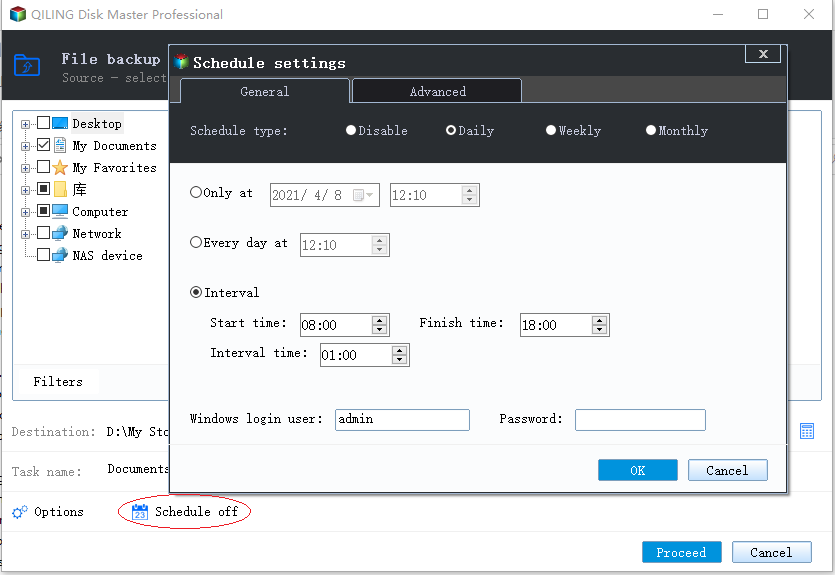
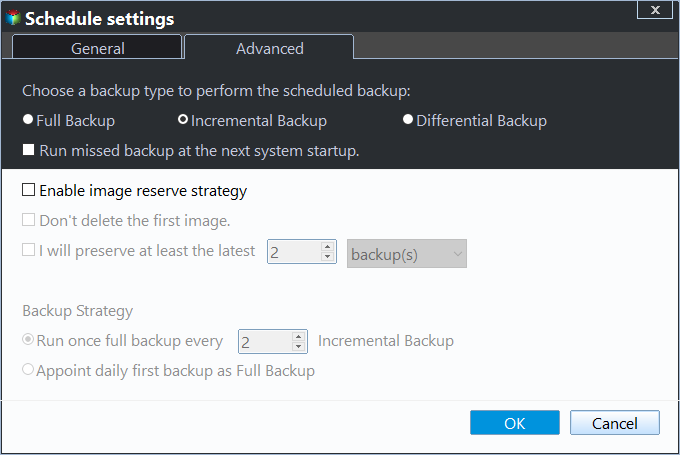
Schedule: Set up automatic backup Once/Daily/Weekly/Monthly, and choose to perform Full Backup/Incremental Backup/Differential Backup.
Scheme: To optimize storage space and maintain a tidy backup system, it's essential to implement an auto-delete rule for backups. This rule will automatically delete backups that are older than a specified number of days, ensuring that only the most recent and relevant backups are retained.
6. Created backup tasks will be listed under the Tasks tab, giving you one place to manage, monitor, run, edit, or restore them.
Conclusion
Managing client computer backups can be complex, but the right tool can make the process more efficient. Windows Server Essentials Dashboard can create and manage client computer backups, though it requires domain and dashboard configuration.
For a simpler centralized backup workflow, Qiling Backup allows you to create and manage backups for multiple client computers from one server, even when you do not want to rely on the Windows Server Essentials domain process.
Related Articles
- Comparison: Should You Backup to Cloud or Hard Drive
The file backup destinations common to most users are cloud drives and external hard drives. This article will compare the two backup methods based on universal access, security, and cost and recommend the best for you. - Best Cloud Transfer App: MultCloud, cloudHQ, CloudFuze, Cloudsfer, Odrive
This cloud transfer article focuses on cloud-to-cloud migration. The article introduces the five best cloud transfer applications and the how-to steps. - Best HDD for Backup in 2022 [Most Comprehensive Guide]
This passage will recommend the best HDD for backup and list their pros and cons. So, you can choose one of them to protect your data. And you will also know how to back up your computer to HDD. - What's The Best Way to Backup A Nas? We Compared 3 Free Ways
Set up what is The Best Way to Backup A Nas We Compared 3 Free Ways with practical backup or sync options, storage checks, and safer ways to protect files. - How to Backup Dropbox to External Drive [2 Tested Ways]
Learn how to Backup Dropbox to External Drive with clear steps, key checks, and practical tips. - How to Copy MS Office from Laptop to Pen Drive (Including Word, Excel, PPT)
Learn how to Copy MS Office from Laptop to Pen Drive (Including Word, Excel, PPT) with clear steps, key checks, and practical tips. - (Easiest Way) How to Move MySQL Database to Another Server
In this article, you will get methods to move/migrate MySQL database to another server. The easiest way to migrate database from one server to another is Qiling Disk Master - a professional database moving software. - [2 Solutions] How to Transfer Autocad to New Computer
In this article, you will see how to transfer autocad to new computer. We will introduce 2 solutions to move autocad in Windows 10, 8, 7, which applies to transfer all settings, even autocad license transfer.
Products
Articles & Tutorials
- Data Recovery
- Data Backup
- File Recovery
- File Backup
- File synchronize
- System Backup and Restore
- Disk and Partition Clone
- Technical articles
- Disk Master Help
- Windows Deleted File and Disk Recovery Tutorials
- Windows File and Data Recovery Tutorials
- More Windows Tutorials for Install, Security, Files, and PC Tips
- Windows Boot, Repair, and Recovery Environment Tutorials
- Windows Backup Tutorials
- Windows Restore Tutorials
- Windows Clone and Migration Tutorials
- Windows Server Backup, Recovery, and Management Tutorials
- Windows Disk, Partition, and Storage Management Tutorials