How to Clone a GPT Disk via Clonezilla Step by Step
Quick Navigation:
- Why to do GPT disk clone via Clonezilla?
- How to clone a GPT disk via Clonezilla live
- An easier way to clone a GPT disk in Windows
- Wrapping things up
Why to do GPT disk clone via Clonezilla?
Nowadays, many modern computers come with GPT disks. You may want to clone a GPT disk either to upgrade to a larger hard drive or to prepare an identical disk for emergency use. Clonezilla, a free disk cloning and imaging program, can help you a lot in this situation.
Clonezilla is a free and open-source disk imaging and cloning software that supports various file systems, including ext2, ext3, ext4 in Linux, FAT16, FAT32, NTFS in Windows, and HFS+ in Mac. It uses "Partclone" to save and restore only used blocks in a partition, making it an efficient and reliable choice for cloning a GPT disk.
How to clone a GPT disk via Clonezilla live
Clonezilla is a free and open-source disk imaging and cloning software that supports various file systems, including ext2, ext3, ext4 in Linux, FAT16, FAT32, NTFS in Windows, and HFS+ in Mac. It uses "Partclone" to save and restore only used blocks in a partition, making it an efficient and reliable choice for cloning a UEFI disk.
1. Download Clonezilla and prepare boot media.
Clonezilla is a free and open-source disk imaging and cloning software that supports various file systems, including ext2, ext3, ext4 in Linux, FAT16, FAT32, NTFS in Windows, and HFS+ in Mac. It uses "Partclone" to save and restore only used blocks in a partition, making it an efficient and reliable choice for cloning a disk.
2. Prepare target drive and boot Clonezilla.
• Connect the target drive to your machine, making sure it is equal to or larger than the internal hard drive. Backup files on the target drive in advance because they will be overwritten during the cloning process.
• Insert your Clonezilla Live USB or DVD and boot your computer from it. When Clonezilla first loads, press Enter to accept the default settings.
3. Start the wizard.
Select your language from the list. Then, select Don't touch keymap and Proceedzilla.
4. Select mode.
Select device-device to directly clone the partitions of one drive to another. Then, choose Beginner mode to accept the default options.
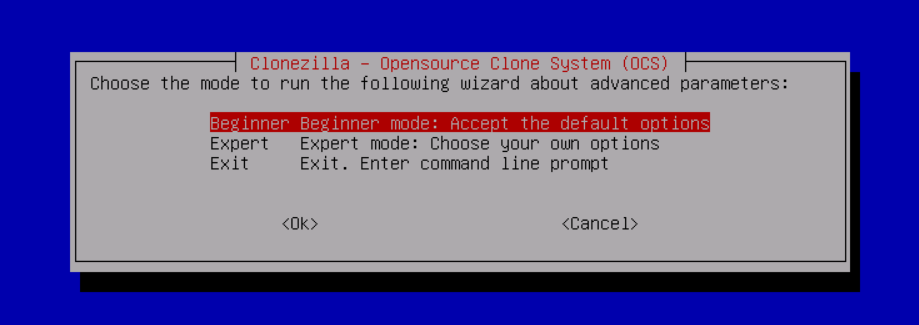
Note: By default, Clonezilla will clone the "same" size of source disk to target disk. Therefore, there would be unallocated space left on the target disk if you are cloning a smaller drive to a larger drive. To make full use of the target disk size, you can enter Expert mode and choose option -k1.
5. Choose the "disk_to_local_disk" cloning method.
6. Select the source GPT disk and the target disk successively.
To clone a hard drive using Clonezilla, follow these steps:
• Select if the source file system need to be checked or not before cloning. The default option is to skip this step.
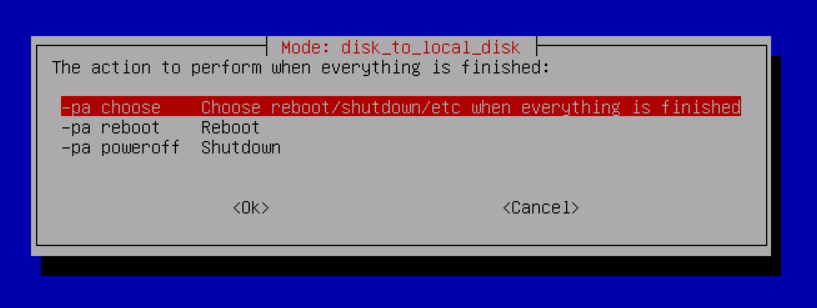
7. Select what to do after cloning.
The default option is Choose reboot/shutdown/etc when everything is finished. You can also choose directly reboot or shutdown once the copy process is complete.
8. Confirm operations.
• Clonezilla will display a warning that any data already on the target drive will be deleted during the cloning process. Type "Y" and press Enter to proceed.
• Clonezilla will now ask you if you want to clone the local disk's boot loader. If you want to make an exact copy of the drive, type "Y" and press Enter.
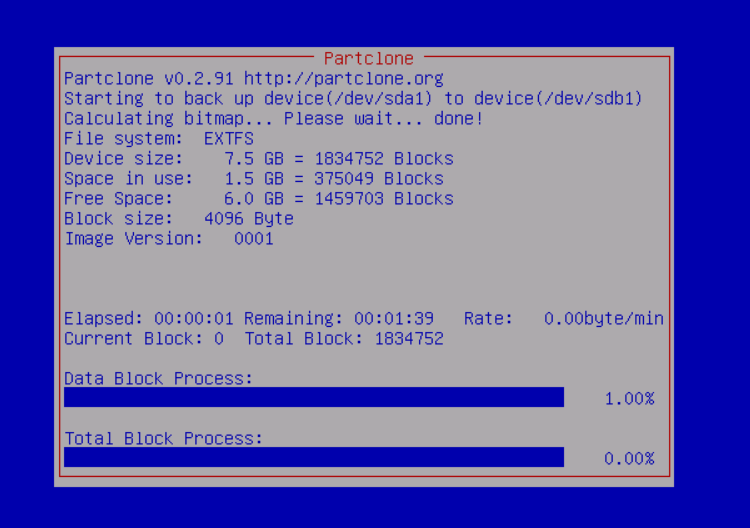
9. Start cloning.
Clonezilla will create partition table on the destination disk and Partclone will launch automatically to clone the data from source disk to target disk.
10. Disk is cloned.
• Clonezilla will either prompt you to shut down or restart or do it automatically depending on the settings you chose in the previous step.
• Remove your Clonezilla Live USB or DVD. Replace the old GPT disk with new disk. If the new disk is also a GPT disk, you can boot from it directly. If the new disk is an MBR disk, you should change boot mode from UEFI to Legacy to boot from it.
Clonezilla can clone GPT disks, but the process is complex and may be limited by disk size, partition layout, and boot mode. If you prefer a simpler method in Windows, you can use a dedicated disk cloning tool.
An easier way to clone a GPT disk in Windows
Qiling Disk Master provides a more direct way to clone GPT disks in Windows. It supports cloning to larger or smaller disks, GPT and MBR disks, and SSD alignment when the target disk is an SSD.
✧ Clone an SSD to a larger SSD or clone a larger HDD to a smaller SSD when the used space can fit on the target disk.
✧ Clone disks in Windows with a graphical interface instead of booting into Clonezilla.
✧ Support GPT and MBR disks, so you can choose the proper target disk for your boot mode.
✧ Use SSD Alignment to improve SSD performance after cloning.
Follow the steps below to clone a GPT disk with Qiling Disk Master.
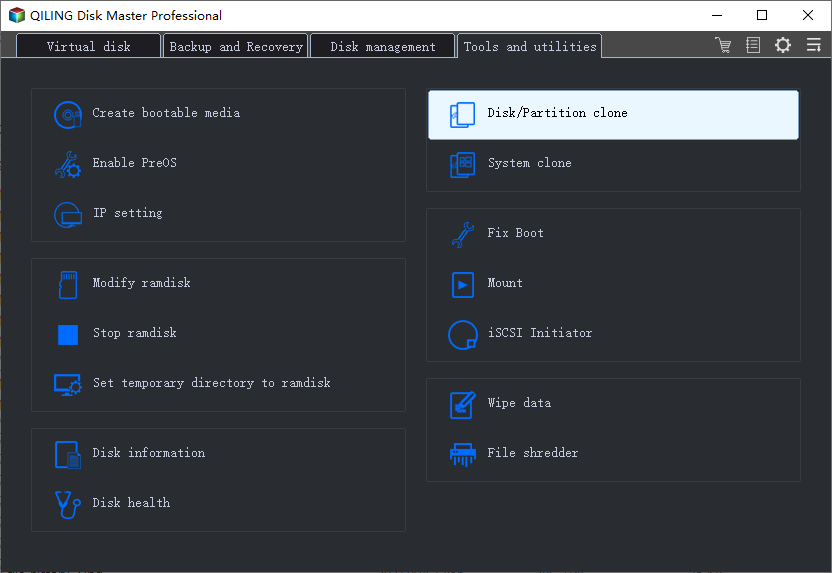
Step 1. Install and launch Qiling Disk Master. Open the Clone tab and choose Disk Clone.
Step 2. Select the GPT disk you want to clone as the source disk, and then click Next.
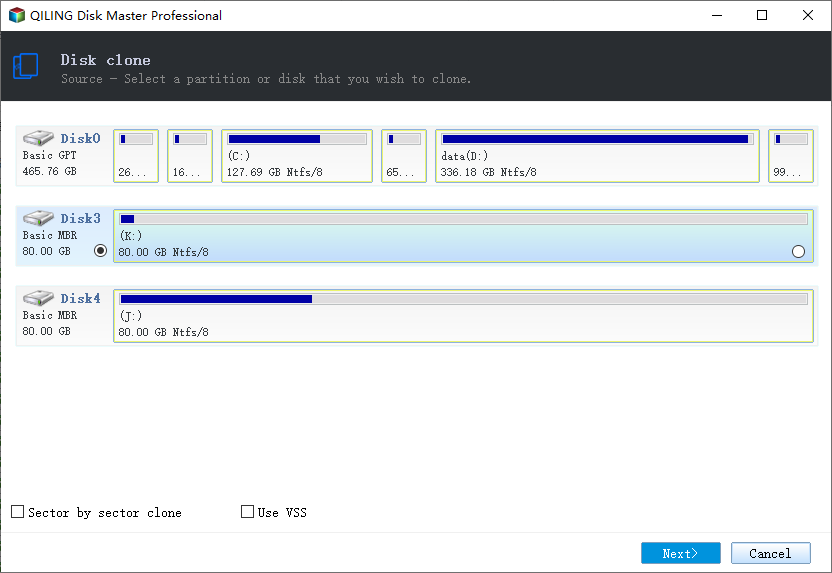
Step 3. Select the destination disk that will receive the cloned data, and then click Next.
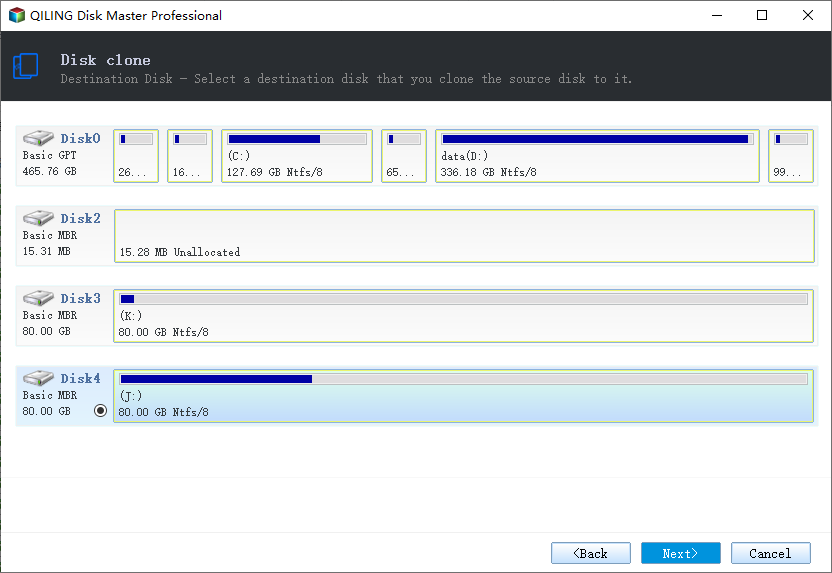
Step 4. Preview the operation summary and confirm that the source and destination disks are correct.
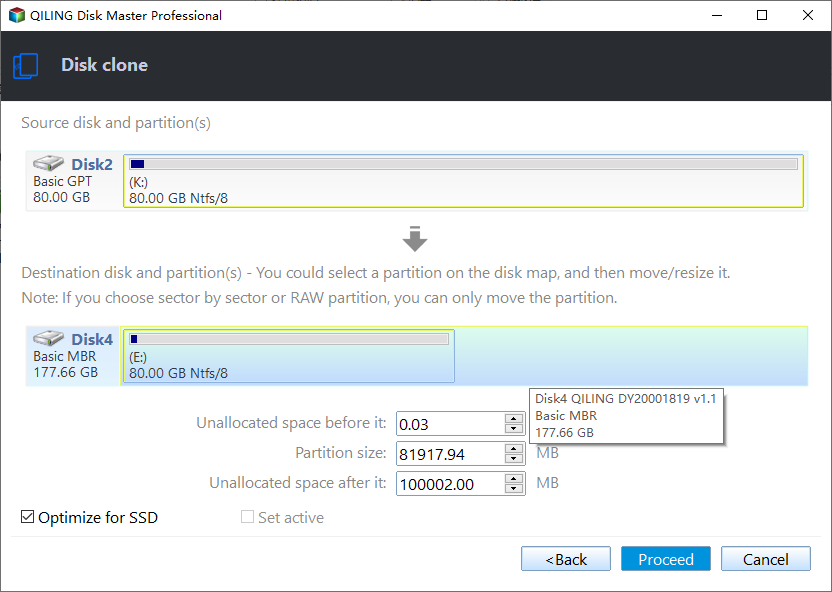
Step 5. If the destination disk is an SSD, tick SSD Alignment to improve reading and writing performance. Then click Proceed to start cloning.
After cloning, you may need to adjust partition size or boot mode depending on the target disk and firmware settings.
#1: The cloned drive not show full capacity.
If the cloned drive does not show full capacity, use Edit Partitions before cloning or adjust partitions after cloning.
👉 Add unused space to all partitions: Distribute unallocated space automatically across partitions on the destination disk.
👉 Manually adjust partition size: Extend unallocated space to the partition you choose on the destination disk.
#2: The cloned drive not bootable after cloning.
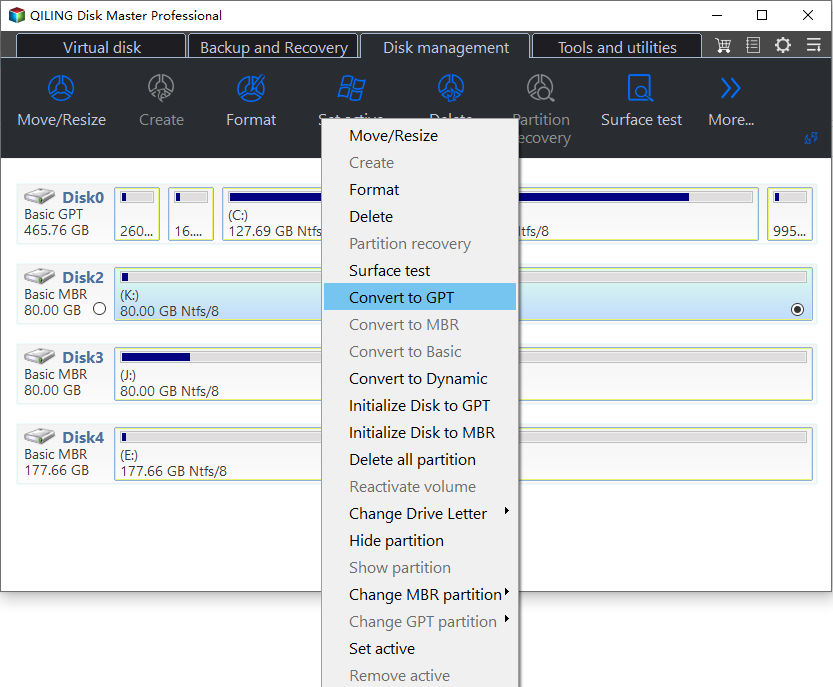
If the cloned drive is not bootable, check whether the partition style matches the boot mode. GPT disks usually boot in UEFI mode, while MBR disks usually boot in Legacy BIOS mode.
Wrapping things up
Clonezilla can handle GPT disk cloning, but Qiling Disk Master is easier for users who prefer to clone disks directly in Windows with clearer options for SSD alignment, partition adjustment, and boot compatibility.
Related Articles
- Clonezilla Clone Larger Disk to Smaller Disk-Workaround
- Best Free Clonezilla Similar Software for Windows 10
- Clonezilla This Disk Contains Mismatched GPT And MBR Partition-Explained
- Clone mSATA SSD to mSATA SSD Safely in 5 Steps
In this article, you will learn the best way to clone mSATA SSD to mSATA SSD, and some useful tips to ensure successful cloning. - Free Corsair Data Migration Software for Cloning
This guide explains Free Corsair Data Migration Software for Cloning with clear steps, key checks, and practical tips. - The Best Free Crucial SSD Data Transfer Software
The best free Crucial SSD data transfer software can transfer data to Crucial SSD and ensure the cloned disk boot securely. Please keep reading.
Products
Articles & Tutorials
- Data Recovery
- Data Backup
- File Recovery
- File Backup
- File synchronize
- System Backup and Restore
- Disk and Partition Clone
- Technical articles
- Disk Master Help
- Windows Deleted File and Disk Recovery Tutorials
- Windows File and Data Recovery Tutorials
- More Windows Tutorials for Install, Security, Files, and PC Tips
- Windows Boot, Repair, and Recovery Environment Tutorials
- Windows Backup Tutorials
- Windows Restore Tutorials
- Windows Clone and Migration Tutorials
- Windows Server Backup, Recovery, and Management Tutorials
- Windows Disk, Partition, and Storage Management Tutorials