Copy HP Recovery Partition to an External Drive
An HP recovery partition stores factory recovery tools and Windows recovery files. Copying it to an external drive can protect it before disk replacement, repartitioning, or system migration.
Understand the problem
The recovery partition is usually hidden and should not be copied with ordinary drag-and-drop. A partition-level clone keeps the structure, boot-related files, and hidden attributes more reliably.
- Confirm the exact disk, partition, drive letter, file system, and capacity before changing anything.
- Back up or recover important files before formatting, deleting, converting, resizing, or recreating partitions.
- For boot-related changes, check BIOS or UEFI mode, boot order, and system partition status before editing disk layout.
Use Windows built-in tools
Windows can show whether the recovery partition exists, but it cannot easily copy a hidden recovery partition as a usable partition.
- Open Disk Management and locate the HP recovery partition by size and position.
- Do not assign a drive letter or format the partition unless you only want to inspect it temporarily.
- Use HP recovery media creation if it is available for your model.
- If you are replacing the disk, prepare an external disk with enough free space before cloning the recovery partition.
Use Qiling tools for guided steps
 Qiling Disk Master
Clone the HP recovery partition to an external drive while preserving the partition layout.
Function. Clone with a visible disk layout
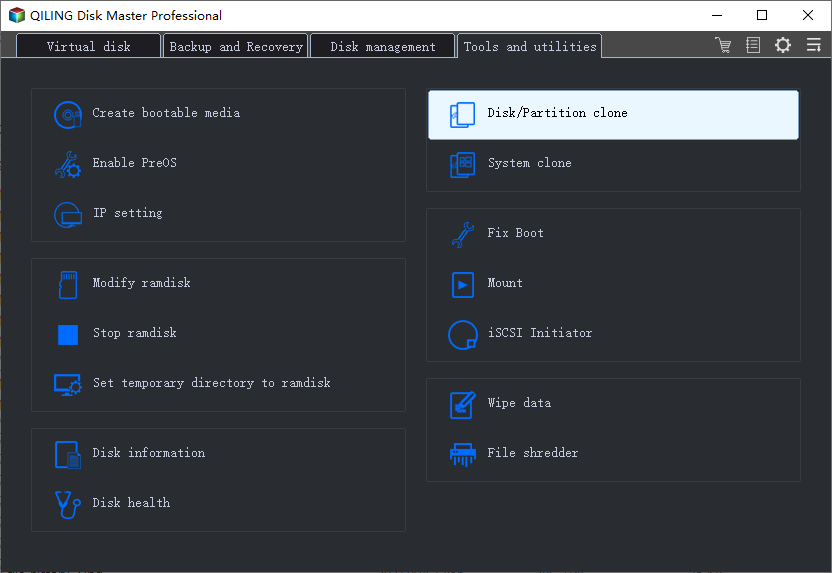
Step 1. Connect the external drive to the computer. Open Qiling Disk Master, choose Clone, and select Disk/Partition clone.
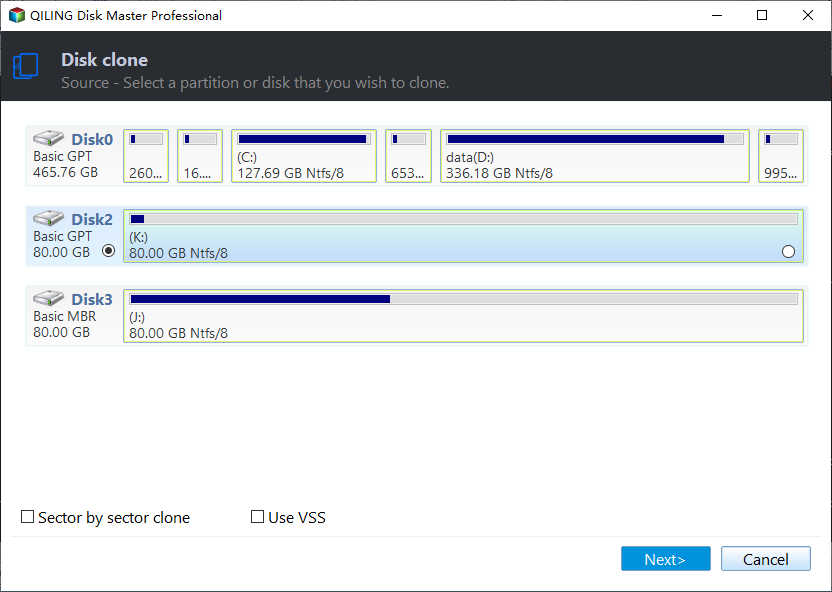
Step 2. Select the HP recovery partition as the source. Check the disk number, partition size, file system, and label so you do not clone the wrong volume.
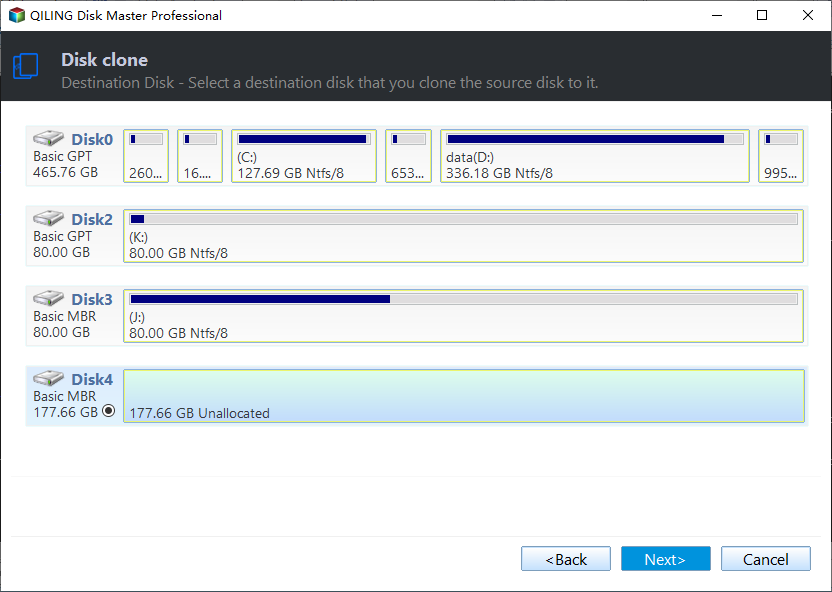
Step 3. Select the external drive as the destination. The destination may be overwritten, so confirm that important files on it have already been backed up.
Step 4. Preview the target layout. Keep required recovery, EFI, or system partitions when factory recovery depends on boot or factory recovery.
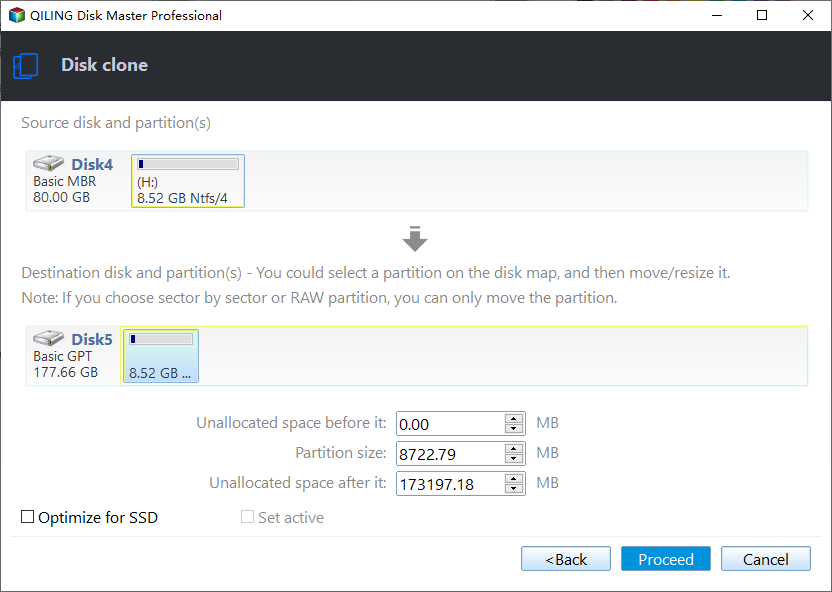
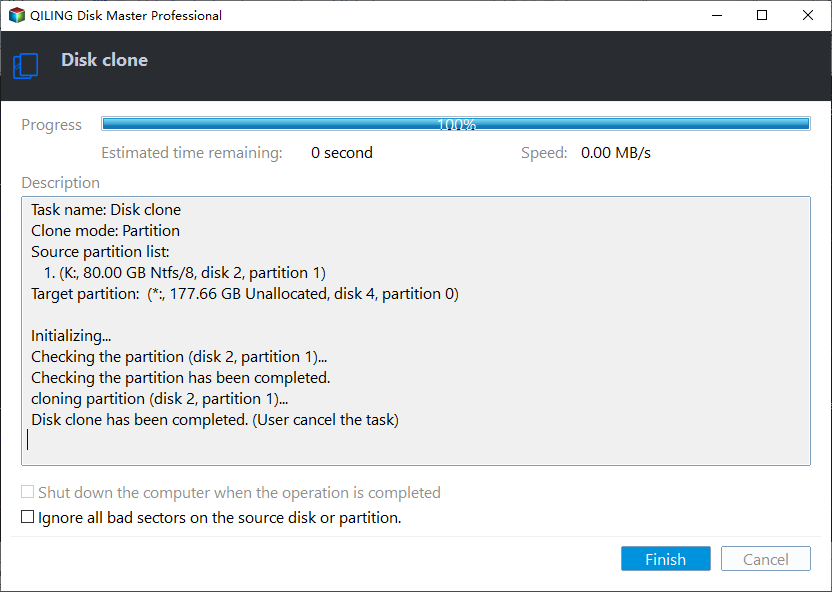
Step 5. Click Proceed to start cloning. Keep the computer powered on until the clone finishes.
Step 6. After completion, open the destination disk and verify the copied partitions or files. For a boot disk, set the cloned disk first in BIOS or UEFI and test startup.
Check the result
Connect the external drive, open Disk Management, and confirm the copied partition size and position. Keep the original recovery partition until the external copy is verified.
Related Articles
-
Backup HP Recovery Partition
Protect HP recovery files before replacing a hard drive or changing partitions. -
Copy HP Recovery Partition to New Hard Drive
Move the HP recovery partition to a replacement disk with safer cloning steps.
Products
Articles & Tutorials
- Data Recovery
- Data Backup
- File Recovery
- File Backup
- File synchronize
- System Backup and Restore
- Disk and Partition Clone
- Technical articles
- Disk Master Help
- Windows Deleted File and Disk Recovery Tutorials
- Windows File and Data Recovery Tutorials
- More Windows Tutorials for Install, Security, Files, and PC Tips
- Windows Boot, Repair, and Recovery Environment Tutorials
- Windows Backup Tutorials
- Windows Restore Tutorials
- Windows Clone and Migration Tutorials
- Windows Server Backup, Recovery, and Management Tutorials
- Windows Disk, Partition, and Storage Management Tutorials