How Do I Recover Permanently Deleted Folders?
- How do I recover permanently deleted folders in Windows 10?
- How to recover permanently deleted folders in Windows 10?
- Method 1. Recover permanently deleted folders through File History
- Method 2. Recover permanently deleted folders using System Restore Point
- Method 3. Recover permanently deleted folders with Windows Backup and Restore
- Method 4. Recover permanently deleted folders with Windows File Recovery
- Alternative 100% free software: WinfrGUI
- Method 5. Recover permanently deleted folders via data recovery software
- Wrapping up
How do I recover permanently deleted folders in Windows 10?
Hi, everyone! I accidentally deleted my document folders several days ago. What's worse, I can't find it in the recycle bin. And I have some important files in this folder. So how do I recover permanently deleted folders? Thanks.
- A user from Linux Mint
A folder typically contains more data than a single document, making data loss more significant when it occurs. Unintentional deletion is a major factor, but intentional deletion, such as emptying the Recycle Bin or pressing Shift + Delete, can be even more problematic for recovering the deleted folder.
How to recover permanently deleted folders in Windows 10?
To permanently recover deleted folders, you can restore them from backups if you've used Windows features like Backup and Restore, File History, or OneDrive. Alternatively, you can use data recovery software to recover your needed folders.
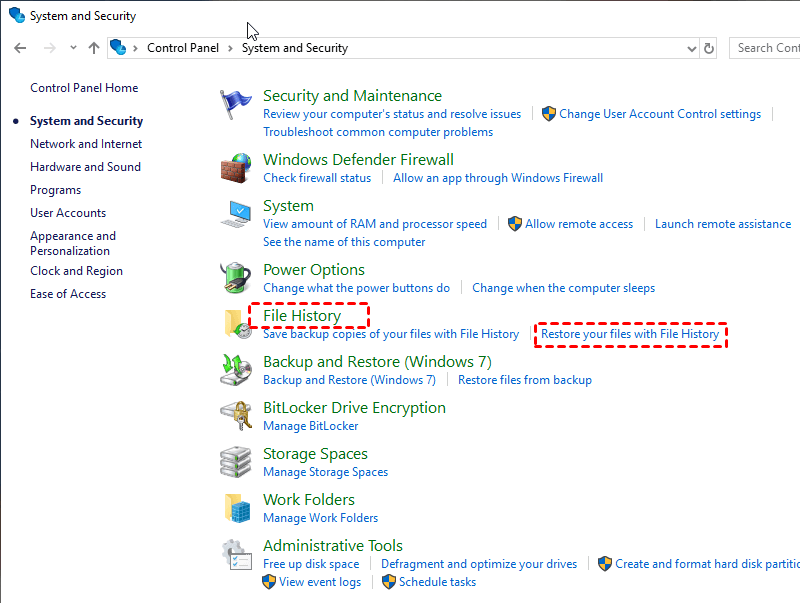
Method 1. Recover permanently deleted folders through File History
In Windows 10, you can recover permanently deleted folders using File History, which was first introduced in Windows 8.0. This feature not only saves copies of Desktop folders but also files in the Documents, Music, Pictures, and Videos folders. Even if files are deleted, lost, or damaged, you can still restore the original versions using File History.
Step 1. To restore your files, start by clicking on "File History" and then select "Restore your files with File History".
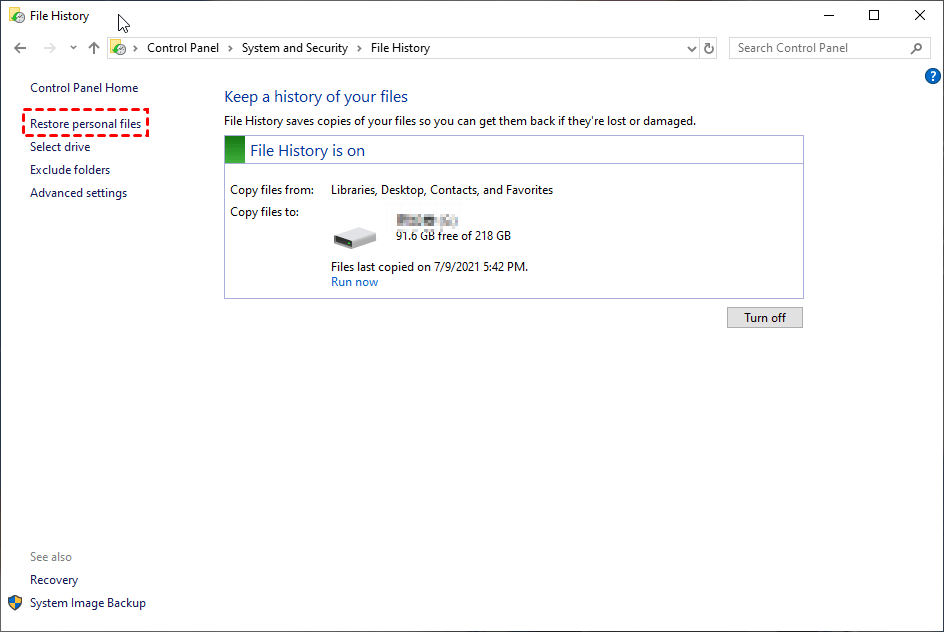
Step 2. Click "Restore personal files".
Step 3. To locate a specific folder in this directory, you can either browse through all the contents or simply input the file name of the folder you're looking for, and it will be displayed for your reference.
Step 4. To restore your desired folders to their original location, click the "Restore" button.
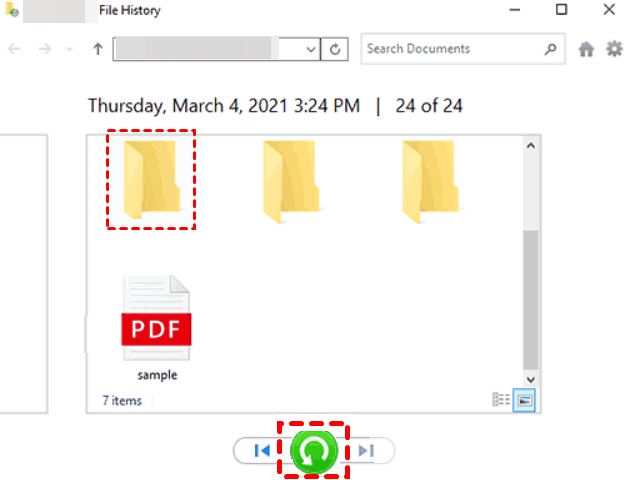
To change the destination location for recovered folders, right-click on the "Restore" button, click "Restore to," and then select a new location to save the recovered folders.

Method 2. Recover permanently deleted folders using System Restore Point
System Restore can take your PC to a previous point in time, but for Win10/11, you need to turn it on manually. When installing new software or drivers, restore points are created automatically. You can then recover deleted files with System Restore, which has two parts: enabling your System Restore Point and restoring data from your selected Restore Point.
- ★Tips:
- The restoration process won't affect personal files, but will remove newly added apps and drivers after the restore point.
- The system is only allowed to keep a restore point for a maximum of 90 days.
▶Part 1: Enable your System Restore Point
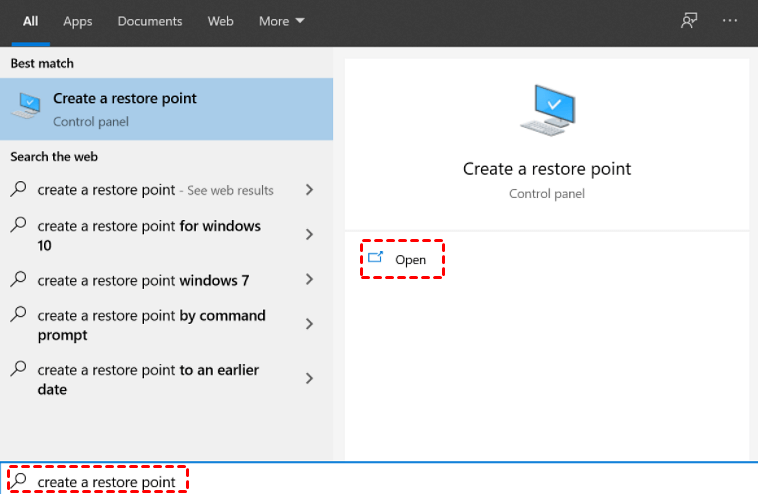
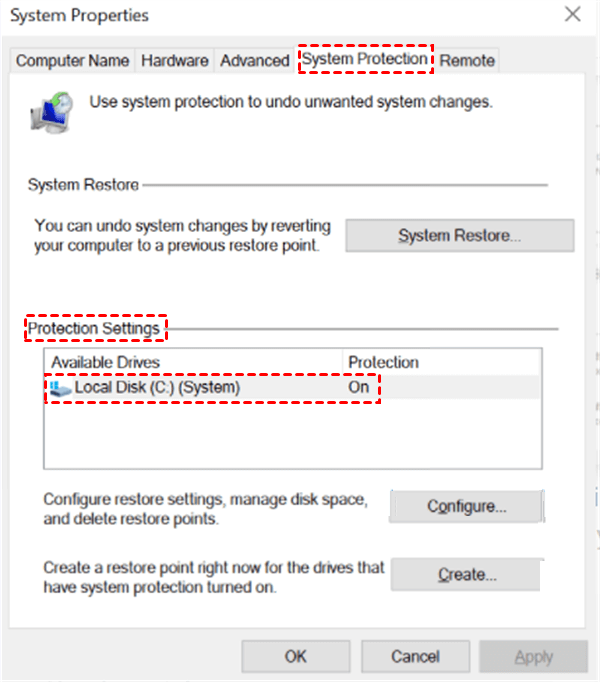
Step 1. Press the Winkey/Start key to start, enter "Create a restore point" in the search bar, then click "Open".
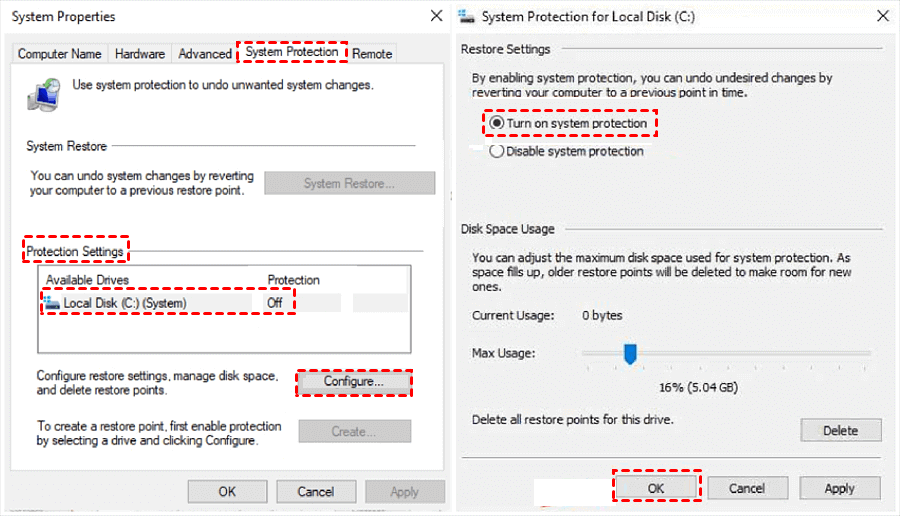
Step 2. To check if System Protection is enabled on your system drive, navigate to System Protection, then click on Protection Settings. This will show you whether your system drive is enabled or not.
Step 3. If your system drive shows as On, it means your system restore point is activated.
If your system drive shows as "Off", it means system restore points are disabled. To enable them, click on your system drive, then click "Configure", and select "Turn on system protection". You can then set the maximum disk space to be used for system restore points and click "OK".
▶Part 2: Restore your PC from a Restore Point
Step 1. To create a system restore point, press the Windows key/Start button, type "Create a restore point" in the search box, and then click "Open".
Step 2. Click "System Restore" > "Next".

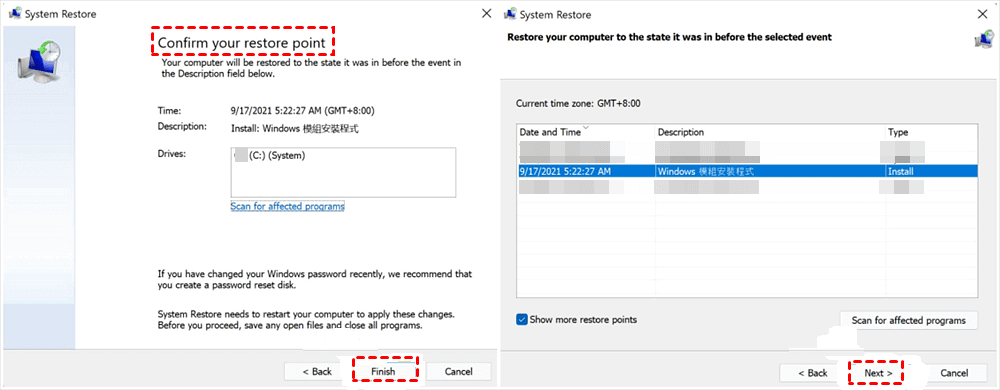
Step 3. To restore your computer to a previous state, select a desired restore point from the list, and click "Scan for affected programs" to view a list of items that will be deleted if you proceed with the restoration. After reviewing the list, close the window.

Step 4. Click on the "Next" button. Then confirm your selected restore point again and click "Finish".
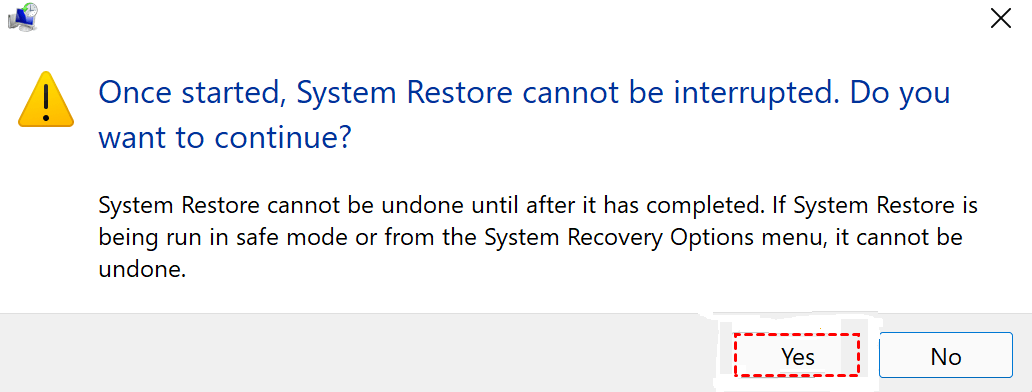
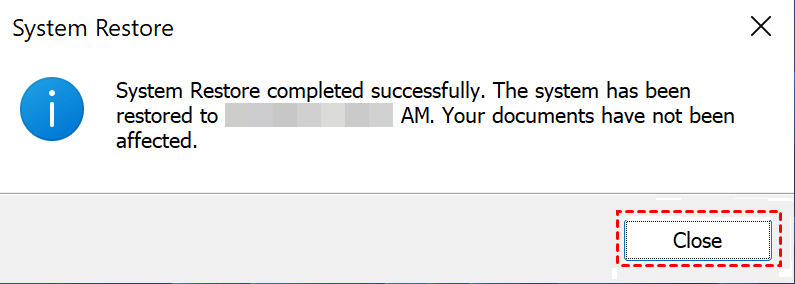
Step 5. Click the "Yes" button to restore your PC from your selected restore point. This will then reboot your PC.
Step 6. System Restore is complete after the computer restarts. Close the window.
Method 3. Recover permanently deleted folders with Windows Backup and Restore
In Windows 7, Backup and Restore allows you to back up files and folders, which is useful when you need to recover deleted folders later.
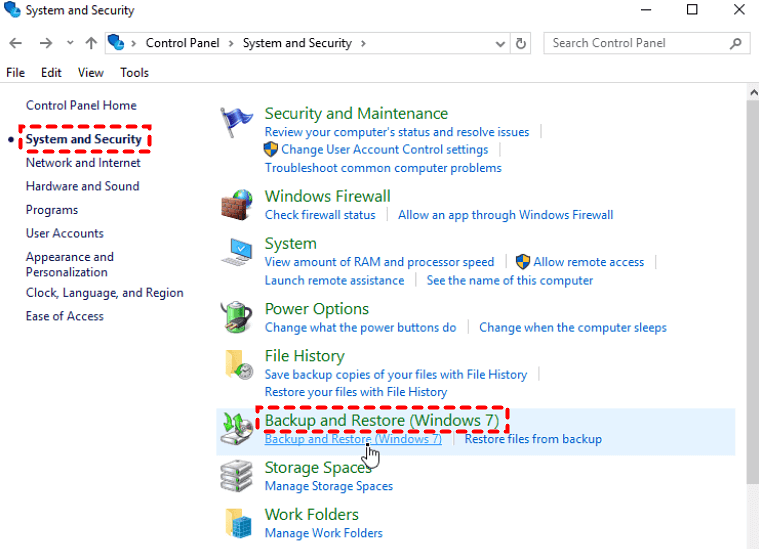
Step 1. To start, press the "Winkey/Start" button, then select "Control Panel" and finally "System and Security" (Windows 7).
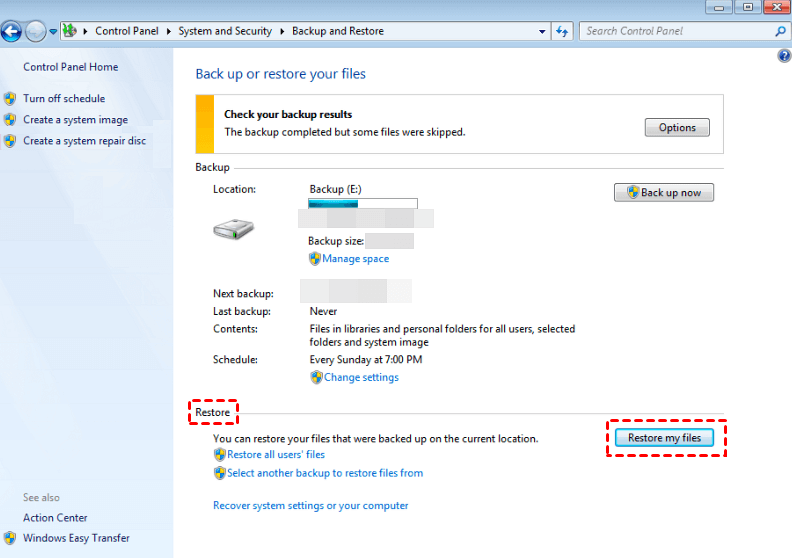
Step 2. Under the Restore tab, click the "Restore my files" button.
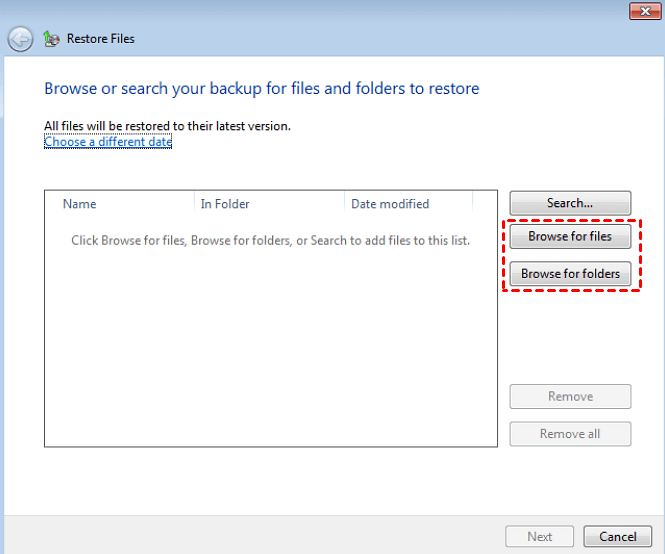
Step 3. To retrieve a permanent folder, select "Browse for folders" and choose the permanent folder you want to retrieve.
Step 4. Save the recovered folders in your original location or in your destination place as your preference after recovering them.
Method 4. Recover permanently deleted folders with Windows File Recovery
As a command-Windows File Recovery is a utility that specializes in file recovery, allowing users to recover lost files from local hard disks, USB flash drives, and to some extent, solid-state drives (SSD).
To recover deleted files without a graphical user interface, you'll need to use the Command Prompt to modify the basic command format winfr source-drive: destination-drive: [/mode] [/switches] with your chosen mode and switches.
- Notes:✎...
- Please stop using your local storage devices and don't add new data to them after data loss.
- This software can recover lost files such as Word documents, PowerPoint presentations, Excel spreadsheets, ZIP archives, PDFs, images, and videos, among others.
- The software supports four modes: two basic (Extensive and Regular) and two advanced (Segment and Signature) modes, which enable it to handle various file systems, including NFTS, FAT, exFAT, and ReFS.
- Ensure the source drive is different from the destination drive.
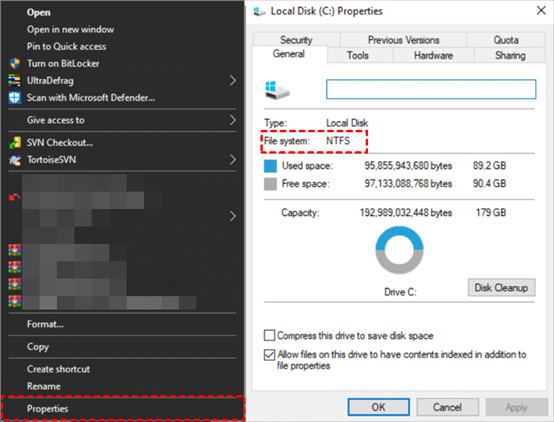
- To check the file system of your source drive, click "This PC", right-click on the USB, and then click "Properties".
Step 1. The recommended mode for recovering data from a source drive with a file system check and data loss scenarios is to select a mode from the provided form.
Scenarios for data loss
|
File system |
Circumstances |
Recommended mode |
|
NTFS |
Deleted recently |
Regular |
|
NTFS |
Deleted a while ago |
Extensive |
|
NTFS |
After formatting a disk |
Extensive |
|
NTFS |
A corrupted disk |
Extensive |
|
FAT and exFAT |
Any |
Extensive |
Step 2. Resemble the corresponding command lines with some common switches below. If you need more, please refer to Microsoft official support.
|
Switches |
Meaning |
Supported mode(s) |
|
/n |
The command "filter the scan range" can be used to scan for a specific file with its file name/path/type, etc. This command is used to narrow down the search scope and speed up the scanning process by only searching for a particular file or set of files that match the specified criteria. |
All |
|
/y: |
Recover specific extension groups. |
Signature |
|
/k |
Recovers system files. |
NTFS Segment |
|
/u |
Recovers undeleted files, for example, from the Recycle Bin. |
NTFS Segment |
Step 3. To download Windows File Recovery, search for "Windows File Recovery" in the Microsoft Store, click "Get" to download it, install it, and then open it on your PC.

Step 4. Let's perform how to restore the recently deleted folder from the source drive (E drive) to the destination drive (D drive).
the basic command format: winfr source-drive: destination-drive: [/mode] [/switches]
the adjusted command lines: winfr E: D: /regular /n *.ZIP
Copy the adjusted command lines in the command prompt window.
Step 5. To recover your folders, press "y" to continue, and the program will start the recovery process. After it's done, you can open the destination drive to find your retrieved folders. If you need to stop the process, press Ctrl + C to cancel.
Alternative 100% free software: WinfrGUI
Windows File Recovery is a powerful tool for Windows data recovery, but its complexity can be overwhelming for new users. Fortunately, the free WinfrGUI (Windows File Recovery GUI) offers a more user-friendly alternative, making it easier for those who are not familiar with the original tool to recover their lost files.
This software provides a user-friendly graphical interface and has all the functions of Windows File Recovery, making it accessible and efficient for users.
Get the software now and use it to recover deleted or lost media files, office files, and ZIP files.
Method 5. Recover permanently deleted folders via data recovery software
How to recover permanently deleted folders in Windows 10/11 without backups? Compared with Windows File Recovery, WinfrGUI seems as a better choice for non-tech users to restore folders. However, you'll be prompted to open the recovered folders to check their contents because WInfrGUI cannot retain the original path and filenames.
Deep Data Recovery is a powerful and user-friendly software that can help you recover lost data from various storage devices. Its highlights include a user-friendly interface, high success rate, and ability to recover data from formatted, corrupted, or deleted storage devices. It also supports multiple file formats and can recover data from various storage devices, including hard drives, solid-state drives, and USB drives. Additionally, it has a built-in preview feature that allows you to preview your recovered data before saving it.
- Besides HDD, the software can also be used to recover deleted/lost files from portable devices such as SSD, USB, and other storage devices.
- You can recover over 200 types of data, including documents like Word, Excel, and PPT, as well as multimedia files such as photos, audios, and videos. Additionally, you can recover emails, webpages, and compressed files.
- Run Quick Scan and Deep Scan automatically to find all the deleted files and other lost files on your computer.
- Deal with deletion, disk formatting, and other data loss scenarios.
- The software supports various file systems, including NTFS, FAT32, exFAT, and ReFS, and is compatible with Windows 11, 10, 8, 7, and Windows Server.
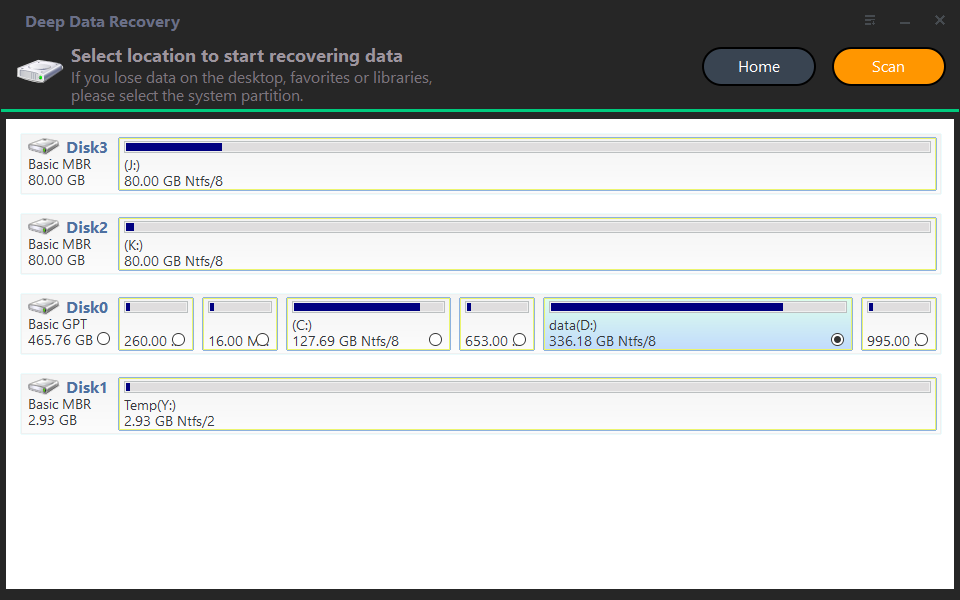
Step 1. Download Deep Data Recovery on the computer.
Step 2. After loading the disk, hover the mouse over the disk/partition that includes your needed folders before permanent deletion, then click Scan.
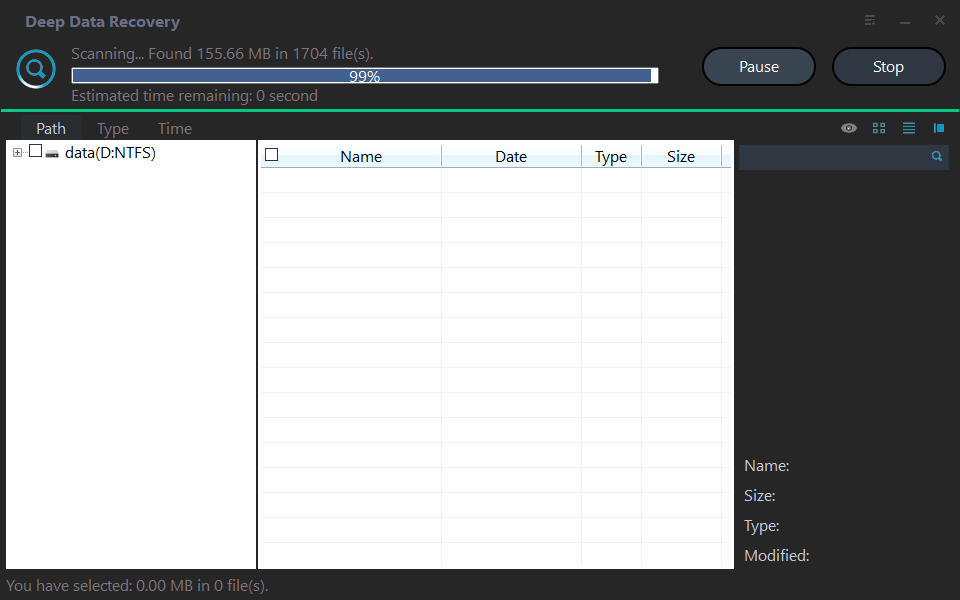
Step 3. During the scanning process, you can search for desired folders by typing the filename in the search box, and automatically, all deleted files/folders and Raw files will be displayed.
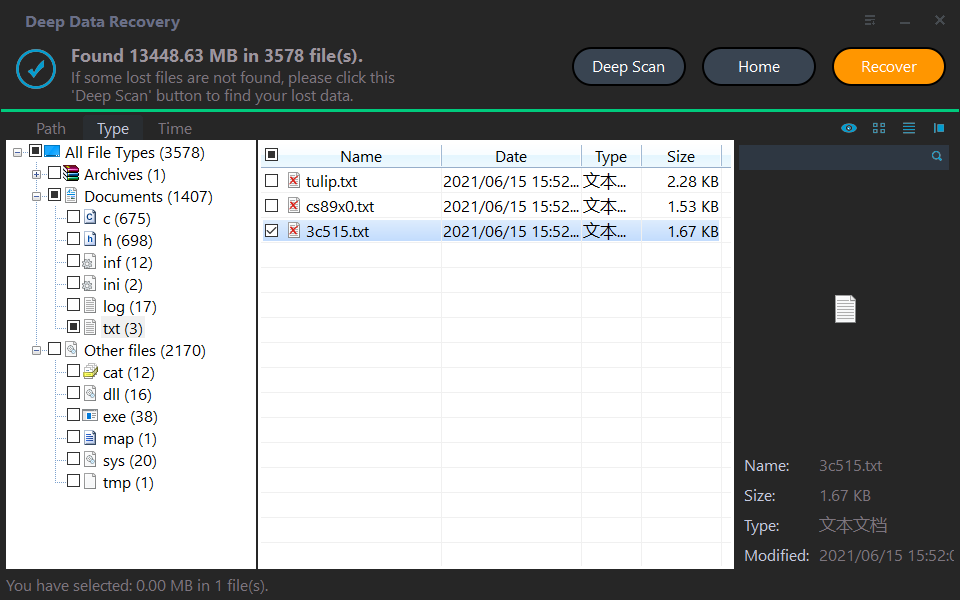
Step 4. Confirm the scanning results and click "Recover". Move the recovered folders to a new location, avoiding the external hard drive.
Wrapping up
To recover permanently deleted folders in Windows 10, you can try using Deep Data Recovery, which is a feasible method that doesn't require previous preparations like backups or complicated command lines.
To prevent data loss, create backups regularly using Windows features or free backup software like Qiling Disk Master. This will ensure that your important files are safe in case of any system crashes or other issues.
Related Articles
- How to Fix Pen Drive Shows Empty Although It Has Data - 4 Solutions
Many reasons could result in Pen drive showing empty although it has data, and this page will analyze the reasons and show you corresponding solutions. The solutions are also applicable to similar issues like USB shows empty but it is full, USB files not showing but space used, etc. - SD Card Repair on Windows 10 and Android
How to repair corrupted SD card without losing data? If you are having trouble accessing data on an SD card due to corruption or damage, do not panic. We've covered comprehensive guides on fixing a corrupted SD card with SD card repair tips or tools. - Fixed: Flash Drive Shows Up as CD Drive
This post aims to help people who saw their USB flash drive showing up as CD, DVD ROM drive on the computer. If your flash drive shows up as a CD drive and you are unable to open the USB drive in Windows 11/10/8/7, as usual, the troubleshooting here is exactly what you need. - Folder Is Not Accessible Access Is Denied
If you're experiencing issues with accessing files and folders in Windows 10/8/7, such as “Folder is not accessible. Access is Denied” errors, don't worry! - Excel Recovery Mac - How to Recover Deleted Excel on Mac
Accidentally deleted Excel files on Mac, want to Excel recovery on mac? this article will introduce to easily and quickly recover deleted Excel on Mac. - How to Recover Deleted Files after Shift + Delete
Don't be sad when you accidentally delete files with Shift + Del, as Qiling Shift Delete Recovery software can quickly assist you to recover deleted files after using the Shift + Delete key in Windows 10/8/7/XP/Vista.