How to Recover Deleted Files from Voice Recorders & Voice Recorder Apps?
- Can you retrieve deleted files from voice recorder?
- Scenario 1. How to recover deleted files from Olympus & Sony voice recorders?
- Solution 1. Recover deleted voice recordings from voice recorders via Windows File Recovery
- Solution 2. Recover deleted voice recordings from voice recorders via audio recovery software
- Scenario 2. How to recover deleted files from voice recorder apps?
- Related suggestions
Can you retrieve deleted files from voice recorder?
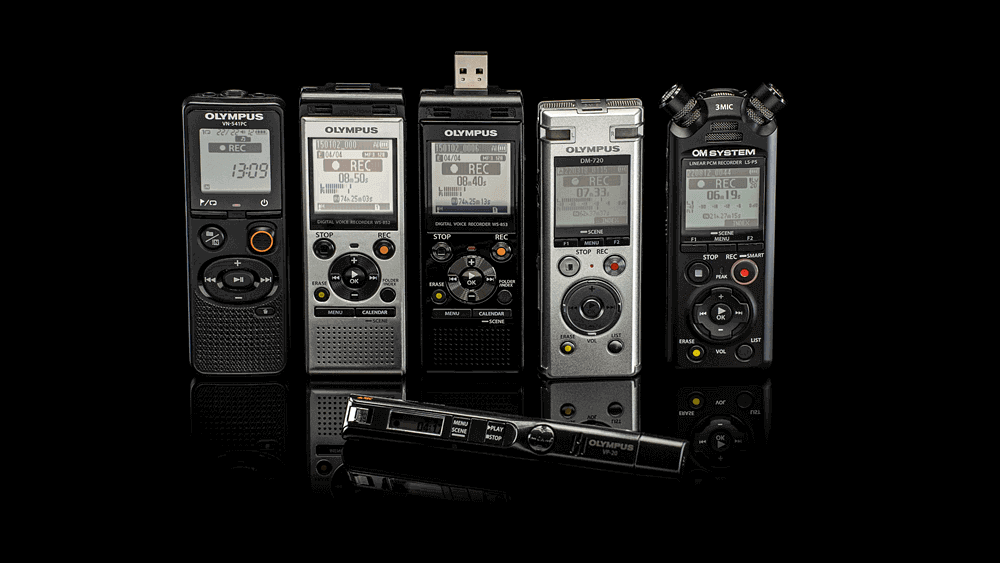
Recovering deleted voice recordings from an Olympus digital voice recorder is possible, but the success depends on various factors, including the type of recorder, file system, and extent of deletion. If the deleted files weren't immediately overwritten, specialized software or a professional data recovery service might be able to retrieve them, but prompt action is crucial as the longer you wait, the lower the chances of recovery.
To restore your iPhone from a backup without erasing your data, go to Settings > General > Transfer or Reset iPhone, then select either Restore from iCloud Backup or Restore from iTunes Backup, and follow the prompts to choose the desired backup. This will restore your voice memos and other data without deleting your existing information.
Using a voice recorder can be a helpful tool for saving energy and recording critical points, making it easier to listen to and review recordings, which can ultimately improve productivity.
To recover deleted files from a voice recorder or voice recorder app, check the device's storage for remaining audio files, look for a "recently deleted" or "trash" folder, and use data recovery software to scan the storage for recoverable files, ideally before using the device or app again.
Where do deleted voice recordings go?
Voice recorders and phone apps use different storage methods. Voice recorders use SD cards, while phone apps use the phone's internal storage or cloud storage.
You can recover recently deleted voice memos from your voice recorder or iOS device by checking the device's storage or the Voice Memos app, where deleted recordings are stored for a limited time. If not found there, you can use a data recovery tool or contact the device's manufacturer for assistance.
Even if voice recordings are permanently deleted, they can still be recovered with regular backups and specialized audio file recovery software, as long as the deleted files haven't been overwritten by new data.
Permanently deleted voice recordings may still exist on storage devices until data is overwritten, making them potentially retrievable.
Scenario 1. How to recover deleted files from Olympus & Sony voice recorders?
If you haven't created any disk backups before, you can use voice recording recovery software to recover deleted files from Olympus voice recorders.
Solution 1. Recover deleted voice recordings from voice recorders via Windows File Recovery
Windows File Recovery is a free tool released by Microsoft in 2020 that can recover lost files from various storage devices, including internal and external hard drives, USB sticks, SD cards, and SSD drives.
The software allows you to recover various file types, including Microsoft Word documents, Excel spreadsheets, PowerPoint presentations, PDF files, compressed ZIP archives, and multimedia files like images (JPG, PNG), audio files (MP3), and video files (MP4), as well as MAV files.
You can recover audio recordings using command-line software by using a basic command format with your selected mode and switches.
▶winfr source-drive: destination-drive: [/mode] [/switches]
- Notes:✎...
- Ensure the source drive, where your needed voice recordings are saved, is not the same as the destination drive, where the recovered audio files will be saved.
- Windows File Recovery is only compatible with Windows 10/11.
- Basic The software supports various file systems, including NTFS, FAT, exFAT, and ReFS, and offers four modes: Regular, Extensive, Segment, and Signature.
- This software cannot recover cloud storage files and network files.
To access the file system of your voice recorder's SD card, connect it to your computer using a USB cable, then open your computer's file explorer and navigate to the "This PC" or "Devices" section, where you'll see your voice recorder's name listed. Click on it to open its file system, and you'll see a list of folders and files on the SD card, which you can navigate through to find specific audio recordings.
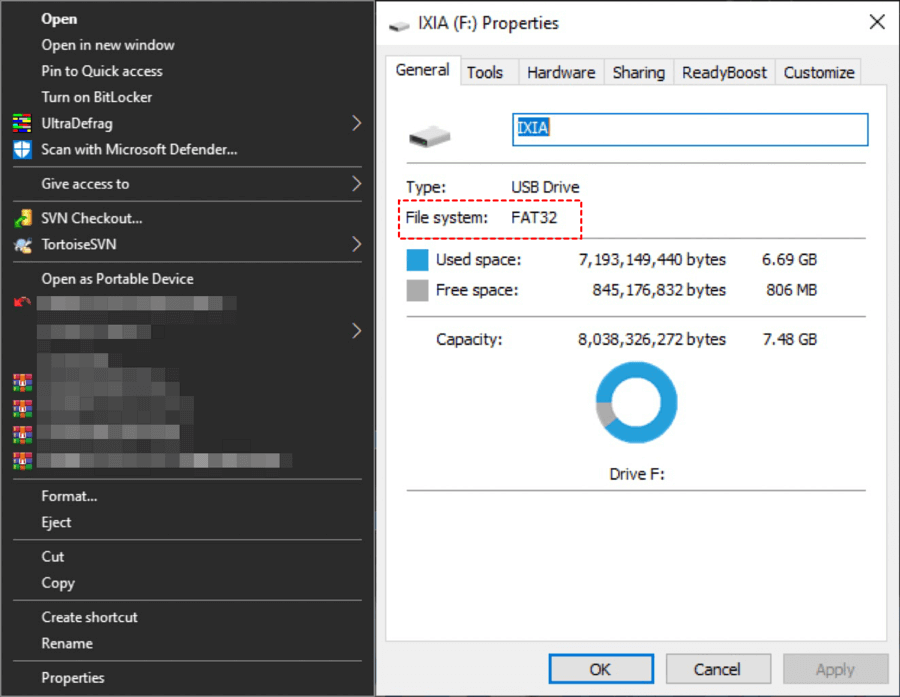
Step 1. Connect your SD card to the computer, open File Explorer by pressing "Win + E", click "This PC", right-click on your connected SD card and select "Properties".
The command to check the file system is `fsck` which can be used to check and repair file system errors, and can be run with the `-t` option to specify the file system type and the `-v` option to increase verbosity.
|
File system |
Examples |
|
FAT and exFAT |
SD cards, flash or USB drives (< 4GB) |
|
NTFS |
Computers, external hard drives, flash drives, and USB drives are all examples of storage devices that can hold large amounts of data, with capacities exceeding 4GB. |
Step 2. After learning the file system of your SD card and understanding the data loss scenarios, you can select the basic "Regular" or "Extensive" mode. This will allow you to recover your data efficiently.
|
File system |
Scenarios |
mode |
|
NTFS |
Deleted recently |
Regular |
|
NTFS |
Deleted for a while |
Extensive |
|
NTFS |
Formatted disk |
Extensive |
|
NTFS |
corrupted disk |
Extensive |
|
FAT and exFAT |
Any |
Extensive |
Step 3. Choose some switches from the following form.
|
The company is introducing a new policy to reduce its environmental impact by implementing measures to minimize waste, reduce energy consumption, and promote sustainable practices among employees. |
Description |
1. Supported modes: |
|
/y: |
Recover specific extension groups, comma-separated |
Signature |
|
/p: |
The command saves a log file of the recovery operation in a location other than the default on the recovery drive, like D:\logfile. |
All |
|
/a |
Overrides user prompts, which is useful in a script file. |
All |
|
/u |
Recovers undeleted files, for example, from the Recycle Bin. |
NTFS Segment |
|
/k |
Recovers system files. |
NTFS Segment |
|
/g |
Recovers files without primary data streams. |
NTFS Segment |
|
/e |
This switch removes the default filter on file types, allowing all file types to be included in the results. |
NTFS Segment |
|
/e: |
Specifies which file types are filtered. |
NTFS Segment |
Step 4. To download the Windows Update Troubleshooter, go to the Microsoft Store on your Windows 10/11 computer, click "Get" to download it, and then click "Open" to run it.

Step 5. To recover deleted files from a voice recorder, you can use the following command line, which is also applicable for recovering deleted MP4 files. The process involves specifying the source and destination drives, in this case, the F and D drives, respectively.
▶winfr source-drive: destination-drive: [/mode] [/switches]
▶winfr F: D: /extension /n*.mp4
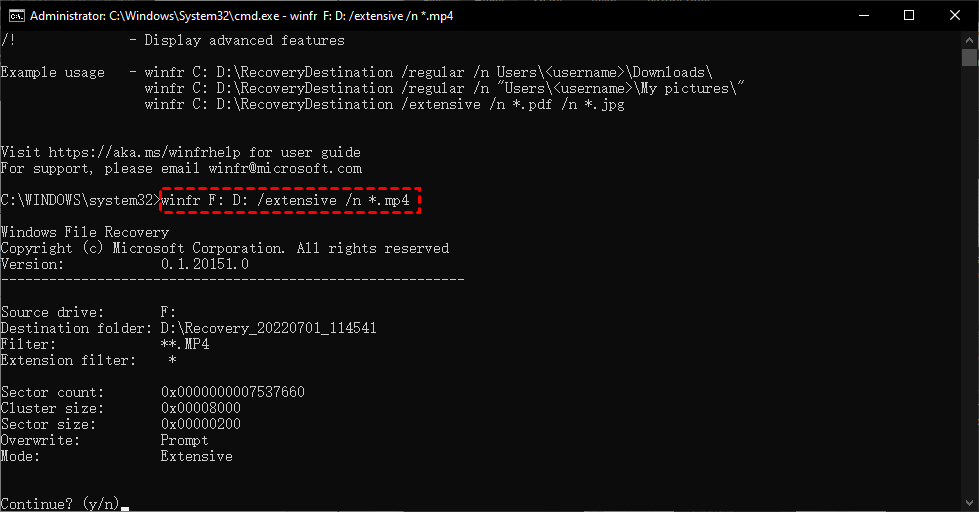
Step 6. Press the "y" key or press "Ctrl + C" to start or stop the data recovery process.
Solution 2. Recover deleted voice recordings from voice recorders via audio recovery software
The software Powerful Windows File Recovery is too complicated for non-tech users due to its lack of a graphical user interface and the need to write complex command lines. This makes it difficult for those without technical expertise to use the software.
For newcomers, it's recommended to use a user-friendly software like Deep Data Recovery, which has a graphical user interface and may recover more audio files without needing to use the command line.
- ★Tips:
- Recover deleted or lost data from various storage devices, including hard drives, USB drives, SD cards, and others, with support for over 200 file types, such as Word, Excel, PPT, PDF, photos, videos, audio, and folders.
- To maintain the integrity of deleted or lost files, keep their original format, including file name, size, date, and any other relevant information. This ensures the files can be easily identified and restored to their original state if needed.
- During Quick Scan and Deep Scan, you can search for specific voice recordings by entering filenames in the search bar, or you can wait to see all the deleted and missing files that the scan uncovers.
- Support NTFS, exFAT, FAT32, and ReFS file systems.
To recover deleted voice recordings, download Deep Data Recovery on your Windows computer, which supports Windows 11, 10, 8, 7, and Windows Server versions.
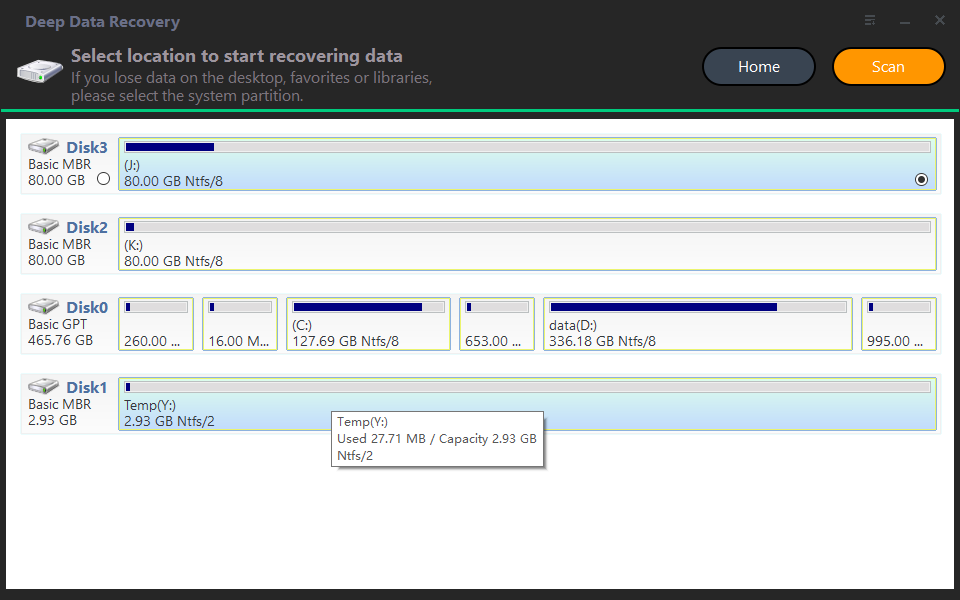
Step 1. To recover data from your SD card, launch Deep Data Recovery on your PC, connect your SD card, and click "Scan" after hovering over it.
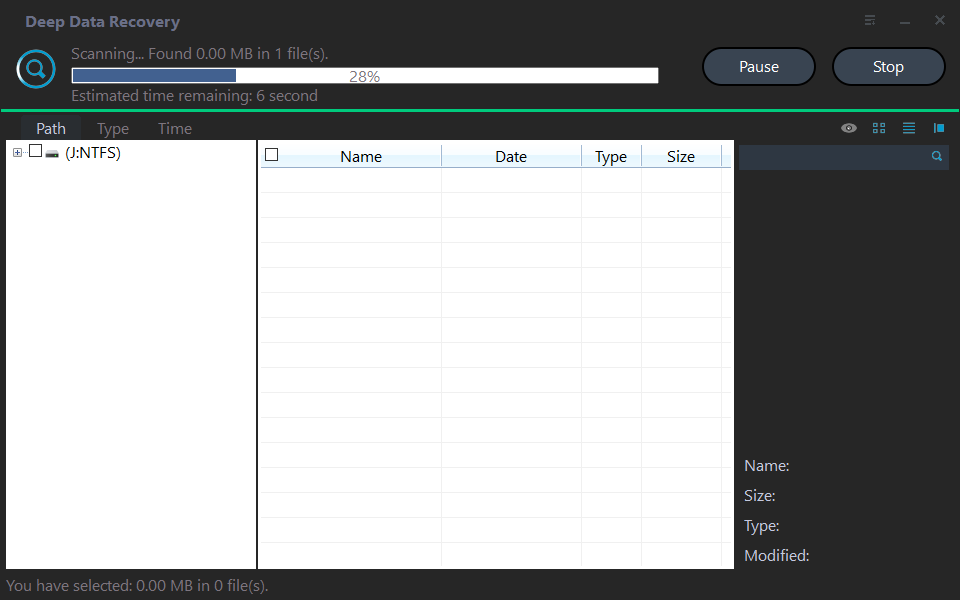
Step 2. To find your desired audio files, you can search by Name, Date, Type, Size, or Path, and then select either a Quick Scan or Deep Scan to view them, or simply wait to view all files, including Raw files.
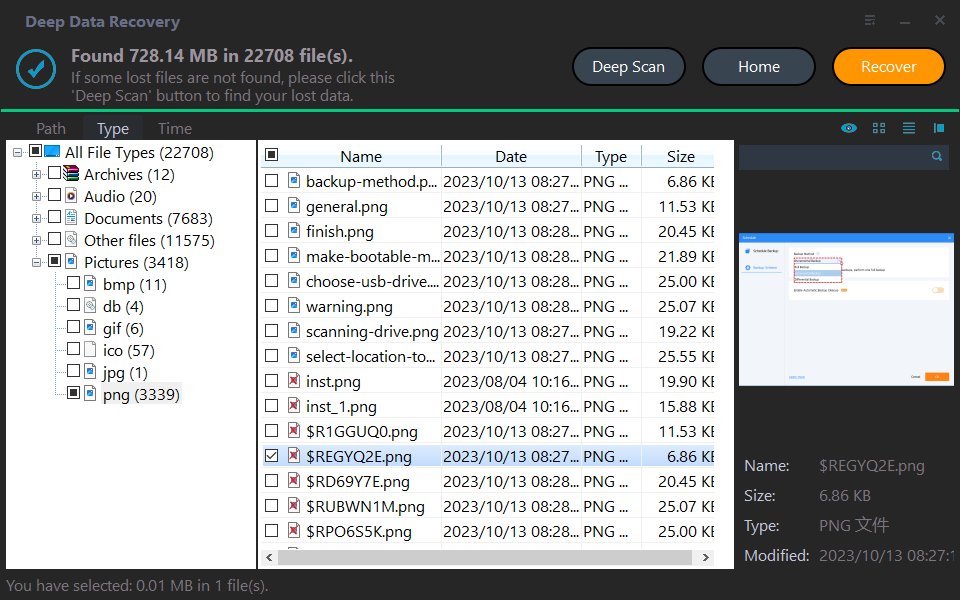
Step 3. To recover deleted audio files, go to the Deleted Files/Raw Files folder, click "Recover" to retrieve the selected files, and store them in a different location.
Scenario 2. How to recover deleted files from voice recorder apps?
Users who are accustomed to recording voice memos on their iOS devices or Android phones may find it frustrating when these recordings are deleted. To recover deleted voice recorder files, users can explore methods such as using data recovery software or checking the device's storage for residual data.
Recover deleted voice recordings with iPhone voice recording recovery software
If you can't find your voice recordings in the Recently Deleted folder, you'll need to restore your iPhone from an iCloud or iTunes backup to recover them.
To recover deleted voice recordings from an iOS device without backups, you can use professional recovery software like Qiling Data Recovery for iOS.
- ★Tips:
- With a bootable iPhone and a Windows PC, you're ready to start the iPhone data recovery process, which involves using specialized software to scan the device and recover lost or deleted files.
- There's no need to reset your iPhone and restore from backups or erase all the current data on your iOS devices.
- You can preview all files before recovery to find the desired recordings, and then restore the selected ones after recovery.
- You can recover various types of data from your iPhone, such as photos, videos, contacts, notes, reminders, WeChat history, call history, calendars, and voice memos.
- The app supports various iPhone models, iPads, and iPod Touch devices, and is compatible with iOS 10.0 and later versions.
- Lorem ipsum dolor sit amet, consectetur adipisicing elit. Esse expedita nesciunt quidem.
To recover deleted voice recordings from your iPhone 13/14, download this software on your Windows PC.
Related suggestions
To recover deleted files from voice recorders and voice recorder apps, check if the device has an "undelete" or "recover" option, and use data recovery software like Deep Data Recovery to scan for deleted files. If the recordings were synced with the cloud, check the cloud storage service for the recovered recordings.
To safeguard your voice recordings, consider implementing the following data loss prevention strategies: utilize strong passwords, enable two-factor authentication, and regularly back up your recordings to a secure location such as an external hard drive or cloud storage service. Additionally, consider using end-to-end encryption to protect your voice recordings from unauthorized access.
- Please think twice before deletion.
- Don't empty your Recycle Bin and Recently Deleted folder randomly, as it may result in losing important data.
- For Windows, right-click the Recycle Bin icon, select Properties, and adjust the custom size as needed. Then click Apply and OK to save your changes. This allows the Recycle Bin to keep larger deleted files.
- Use free backup software for Windows to back up files, folders, disks, partitions, or systems.

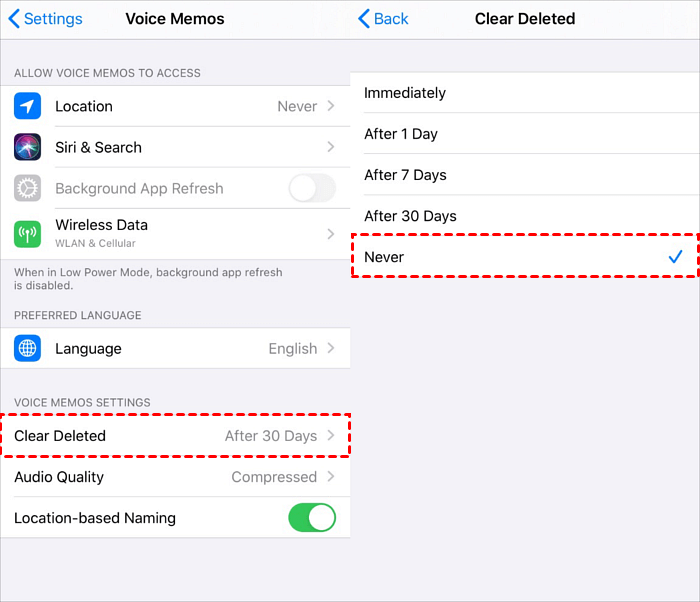
- To prevent iOS from automatically deleting audio files from the Recently Deleted folder, go to Settings, select Voice Memos, then Clear Deleted, and choose Never.
- Make backups via iCloud/iTunes/ free iOS backup and transfer tool.
- Diversify your digital storage to prevent data loss.
Related Articles
- 8 Fixes | Windows Text Not Showing up!
Learn how to fix Windows text not showing up via eight solutions and how to retrieve deleted texts via Windows features or data recovery software on this page. - MS SQL Recovery Software to Recover MDF/NDF File
MDF or NDF files can become deleted, damaged, or inaccessible due to various issues like hardware problems, SQL Server bugs, OS malfunctions, sudden system shutdowns, or virus attacks. In such cases, Qiling MS SQL Recovery can be a helpful tool to recover the MDF or NDF file with ease. - 2 Fixes to Resolve Memory SD Card Says Full But No Files On It Error
If your camera's memory SD card shows as full but doesn't display any files, don't worry! This issue can be resolved by following the instructions on this page. - Microsoft Outlook 2016/2013/2010 Not Responding in Windows 10/11 (5 Fixes)
When Outlook not responding in Windows 10, the first thing you should do is restoring the lost Outlook emails. Find effective methods here and you can restore all lost Outlook emails and repair not working Outlook with ease. - SSD Data Recovery – How to Recover Deleted Files from SSDs
Free download SSD data recovery software, allows you to recover deleted files from SSD drive easily and effectively. Check out the details to recover SSD on Windows or Mac now. - Easiest Way for How to Recover Deleted Files from a Toshiba External Hard Drive
To recover files from a Toshiba external hard drive, use Deep Data Recovery to scan the drive, preview recoverable files, and retrieve the desired data.