How to Delete All Partitions on an External Hard Drive
Deleting all partitions removes the volume layout from an external hard drive. Back up anything you need first, because this operation makes data inaccessible and can overwrite recovery information if you create new partitions afterwards.
Before deleting partitions
- Disconnect other external drives so you can identify the correct disk.
- Copy needed files to another drive and check that the copy opens.
- Confirm the disk number and capacity in Disk Management before using any delete command.
Method 1. Delete partitions with DiskPart
Step 1. Open Command Prompt as administrator, type diskpart, then run list disk.
Step 2. Run select disk N, replacing N with the external drive number. Run detail disk to verify its capacity before continuing.
Step 3. Run clean to remove all partition information. Use clean all only when you need to overwrite every sector and accept that it can take a long time.
Step 4. Open Disk Management, initialize the disk if prompted, create a New Simple Volume, then assign a letter and format it.
Method 2. Delete partitions with Qiling Disk Master
 Qiling Disk Master
Delete partitions on an external USB drive with a visible disk map and a confirmation prompt before applying changes.
Step 1. Connect the USB drive or external hard drive to the computer, then open Qiling Disk Master. Identify the external disk by capacity, drive letter, and model, and make sure it is not the Windows system disk.
Step 2. Right-click the partition you want to remove and choose Delete Partition. If the USB drive has more than one partition, repeat this action for each partition you want to delete.
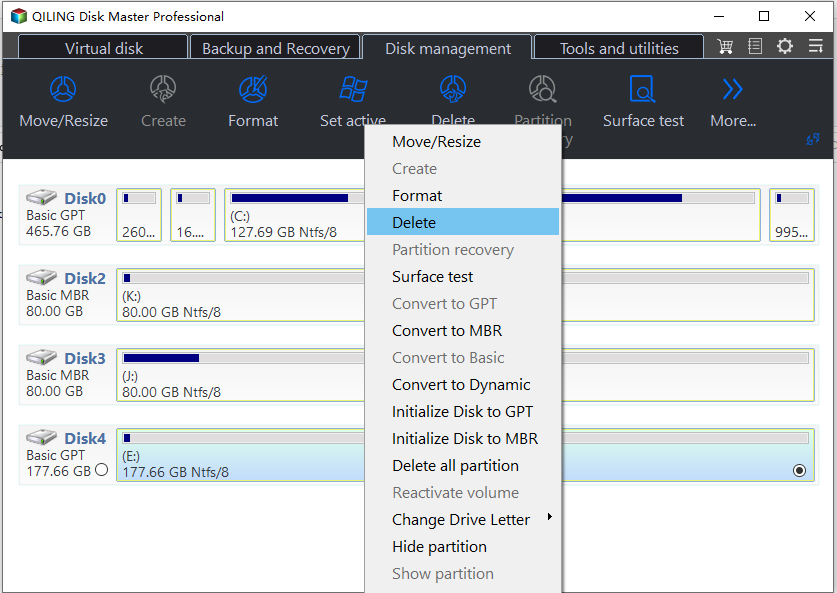
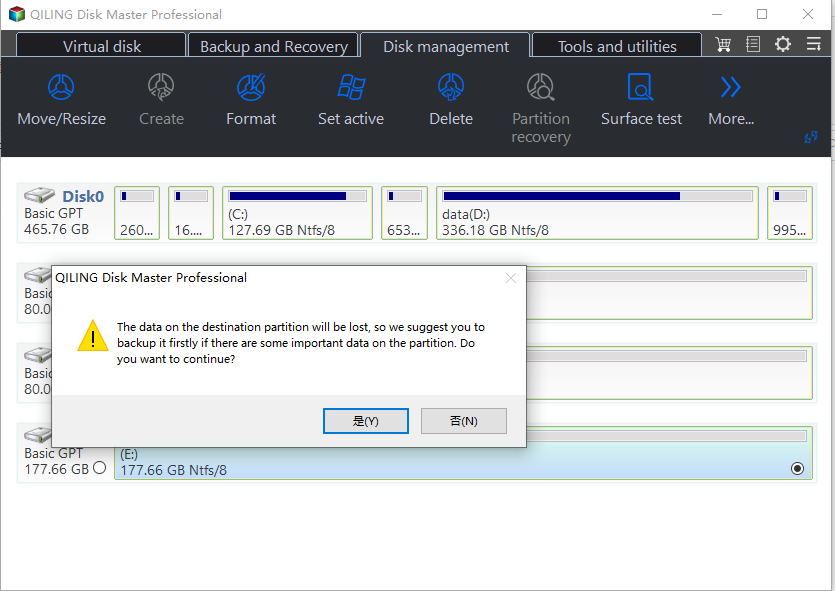
Step 3. Read the confirmation message and confirm the deletion. After all intended partitions are marked for deletion, review the disk map and click Proceed to apply the pending operation.
Create a new partition only after you are sure no more data recovery is needed.
Wipe data completely when needed
Deleting partitions does not securely erase files. Before selling, disposing of, or transferring an external hard drive, use a secure wipe method that overwrites the data. Do not use a write-zero operation on a drive that may still contain files you need to recover.
Related Articles
-
Delete Partition with Partition Assistant
Review partition deletion options before changing a disk layout.
Products
Articles & Tutorials
- Data Recovery
- Data Backup
- File Recovery
- File Backup
- File synchronize
- System Backup and Restore
- Disk and Partition Clone
- Technical articles
- Disk Master Help
- Windows Deleted File and Disk Recovery Tutorials
- Windows File and Data Recovery Tutorials
- More Windows Tutorials for Install, Security, Files, and PC Tips
- Windows Boot, Repair, and Recovery Environment Tutorials
- Windows Backup Tutorials
- Windows Restore Tutorials
- Windows Clone and Migration Tutorials
- Windows Server Backup, Recovery, and Management Tutorials
- Windows Disk, Partition, and Storage Management Tutorials