Properly Backup VMware Workstation Virtual Machine [4 Ways]
How Can You Backup VMware Workstation Virtual Machine?
The goal of backup is to keep important VM data recoverable when a virtual machine is damaged, deleted, or moved to another computer. VMware Workstation is convenient for testing and daily work, but it does not provide a complete, scheduled backup feature.
For VMware Workstation VMs, you can use four practical methods: copy the VM files, export the VM as an OVF template, clone the VM, or use a third-party backup tool. Each method has a different purpose, so choose one based on how often the VM changes and how quickly you need to restore it.
✦ Quick Navigation
☞ Way 1. Manually copying VM disk files is a direct backup method because a VMware Workstation VM is stored as a group of files. You can restore it by opening the copied VM files on the same or another workstation.
☞ Way 2. Exporting a virtual machine to an Open Virtualization Format (OVF) template makes the VM easier to move, share, or deploy on compatible platforms.
☞ Way 3. Cloning a VM creates a duplicate. A full clone is independent but takes more time and storage, while a linked clone is faster but depends on the parent VM.
☞ Way 4. You can protect a VM like a physical machine by installing a backup agent in the guest OS, which is useful for scheduled backup, granular recovery, and migration.
The word "properly" matters because some users still treat VM snapshots as backups. A snapshot is helpful for short-term rollback, but it is not a complete backup and can become risky if used as long-term protection.

VM snapshot vs backup: They cannot replace each other
VM snapshots are designed to roll a virtual machine back to an earlier state. They depend on the original virtual disk and cannot independently restore a VM after the source files are lost. Backups, on the other hand, are created for disaster recovery and can restore VM data from a separate copy.
Snapshots can also grow quickly, consume large disk space, and reduce VM performance over time. For this reason, they should be used for temporary testing or updates, not as a replacement for VMware Workstation backup.
After excluding snapshots, there are 4 proper ways to back up VMware Workstation VMs. The following sections explain how each method works.
Way 1: Manually Copy Virtual Machine Disk Files
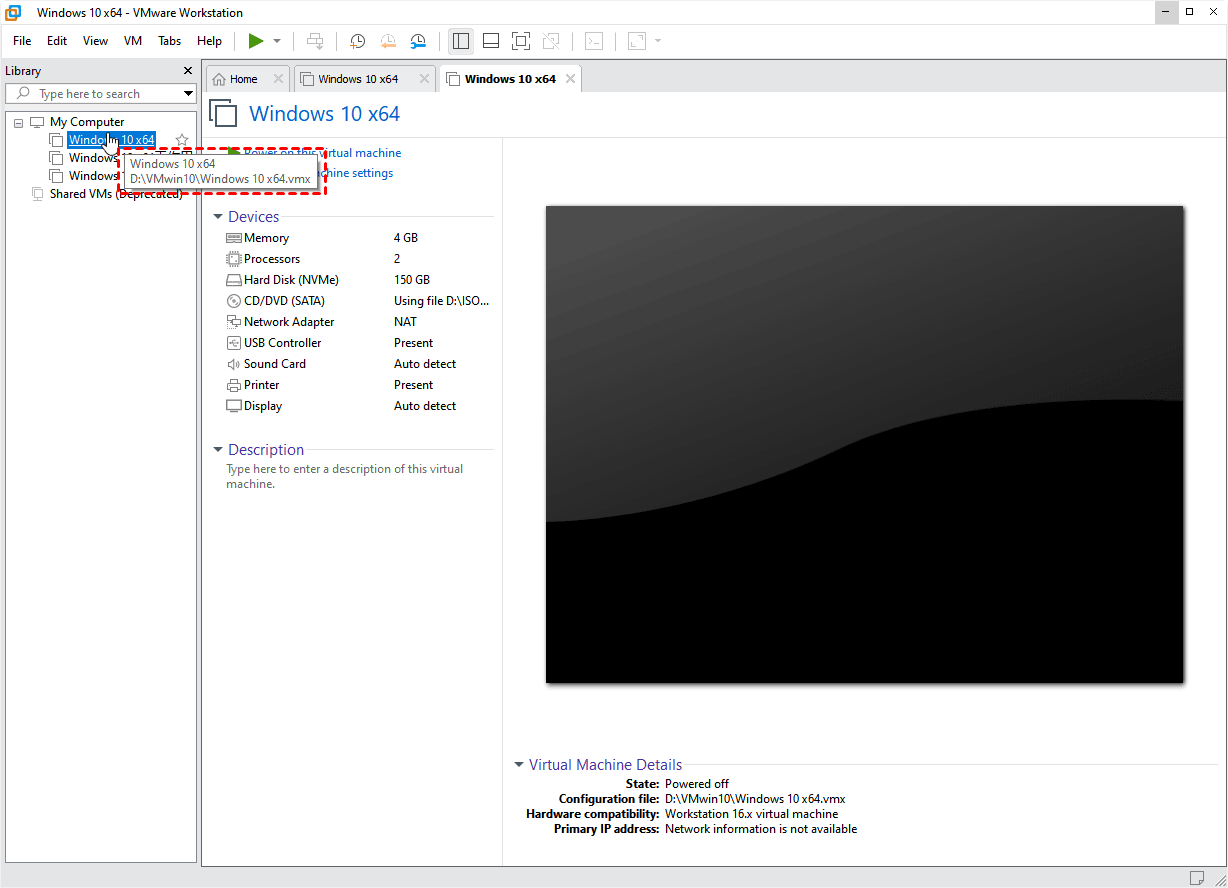
1. To back up a VM in VMware Workstation, launch the application and move the cursor to the VM name. A tooltip will show the folder path where its virtual disk files and configuration files are stored.
2. Go to the folder you want to back up, then copy all files or the whole folder to the destination location where you want to store the backup.

Note: To keep this backup current, shut down the VM first and copy the VM folder regularly. Manual copies do not update automatically when new data is added to the virtual machine.
Way 2: Export Virtual Machine to OVF Template
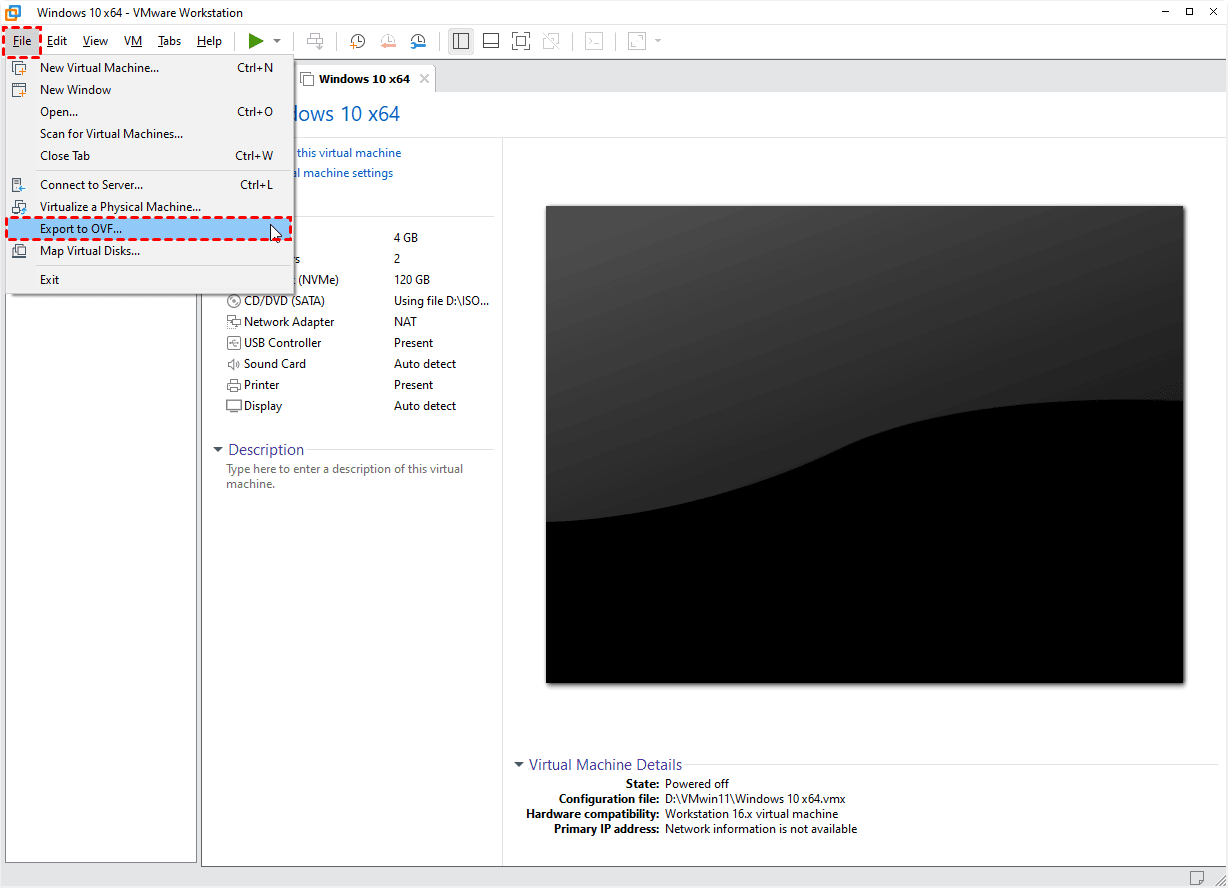
1. To export a VM in VMware Workstation, launch the application, select the VM you want to back up, click "File" on the upper bar, and choose "Export to OVF".
2. In the prompt window, select a path where you want to save the OVF template file, then click Save.

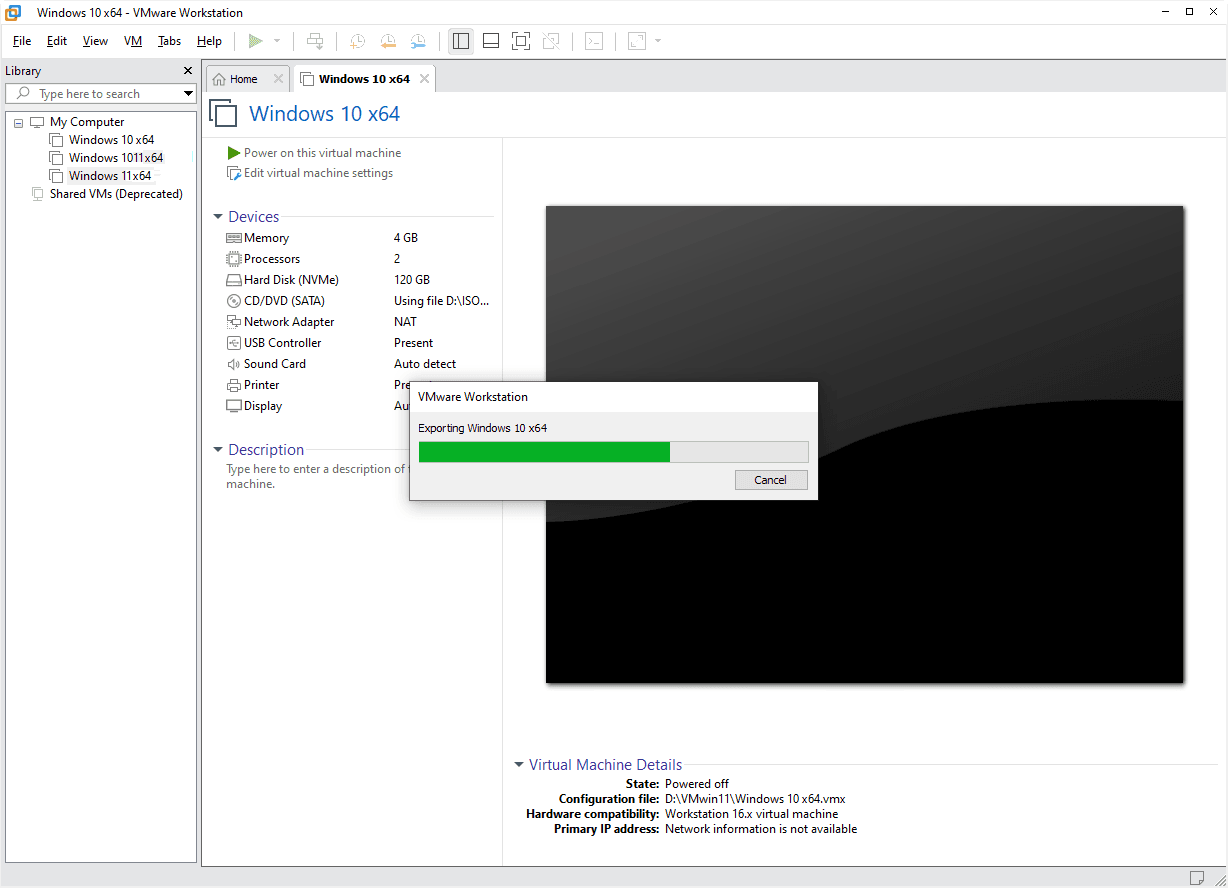
3. Wait for the export process to finish. The larger the virtual disk and the more applications installed in the guest system, the longer the export will take.
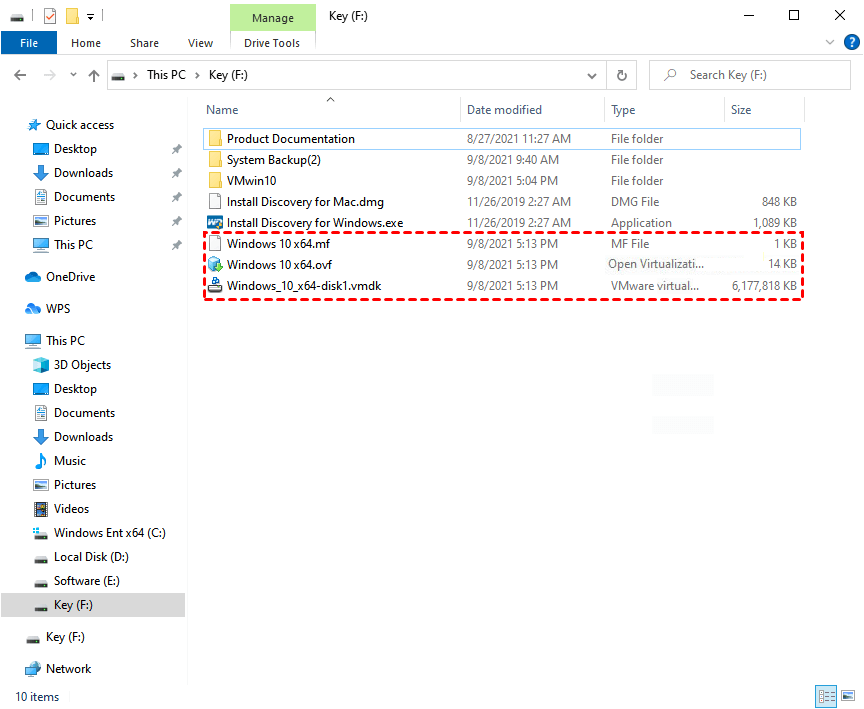
When the process is complete, you will find the exported files in the destination location: a manifest file ending with .mf, an OVF file that describes the virtual machine, and a virtual disk file ending with .vmdk.
Way 3: Clone Your Virtual Machine
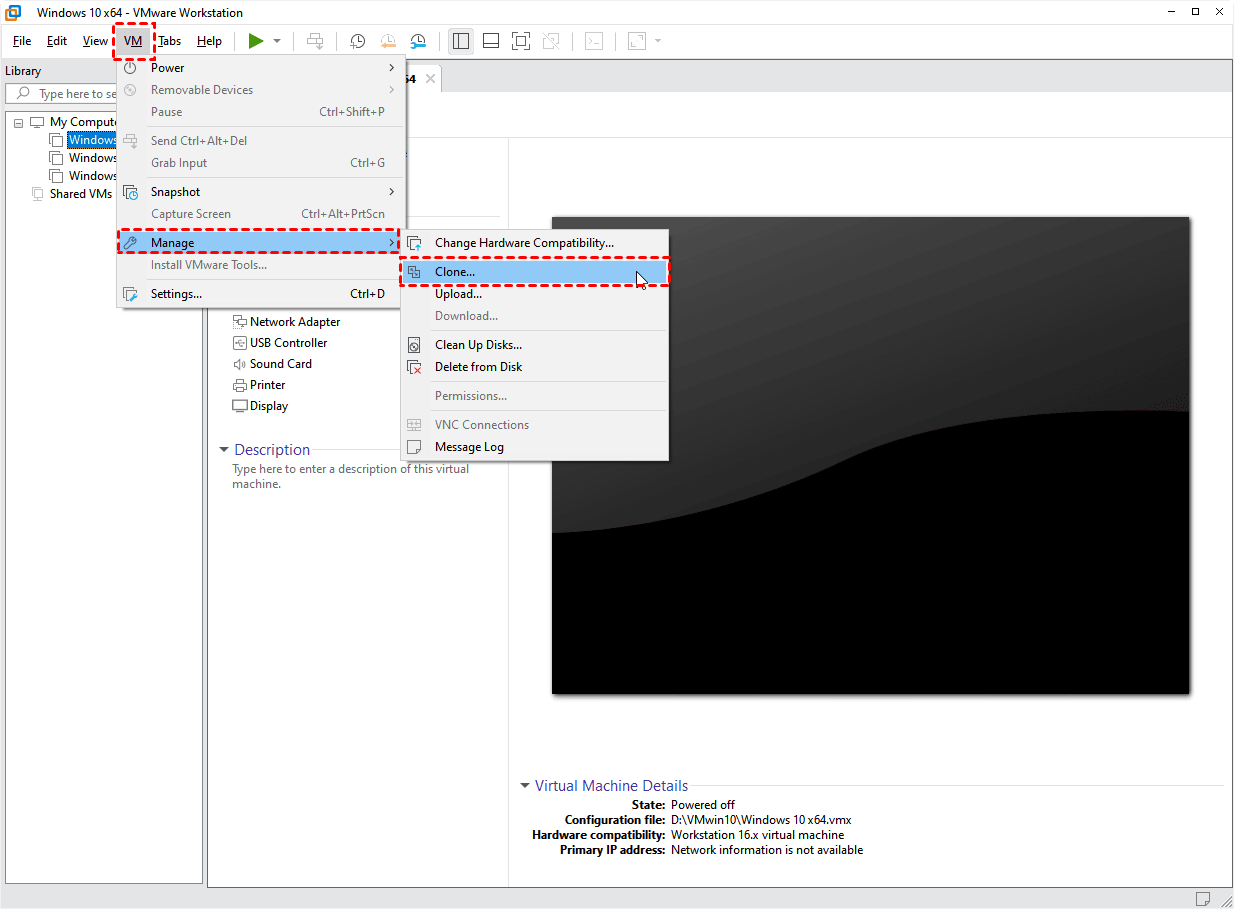
1. To clone a VM in VMware Workstation, launch the application, select the VM you want to clone, click VM on the upper bar, and select Manage > Clone... to open the Clone Virtual Machine Wizard. Then, click Next in the prompt window.
2. Select to clone from the current state in the virtual machine or from an existing snapshot (powered off only).
If you choose the top option, the workstation will create a snapshot of the original before cloning it.
The second choice will be unselectable if you don't have a usable snapshot.
Click Next.

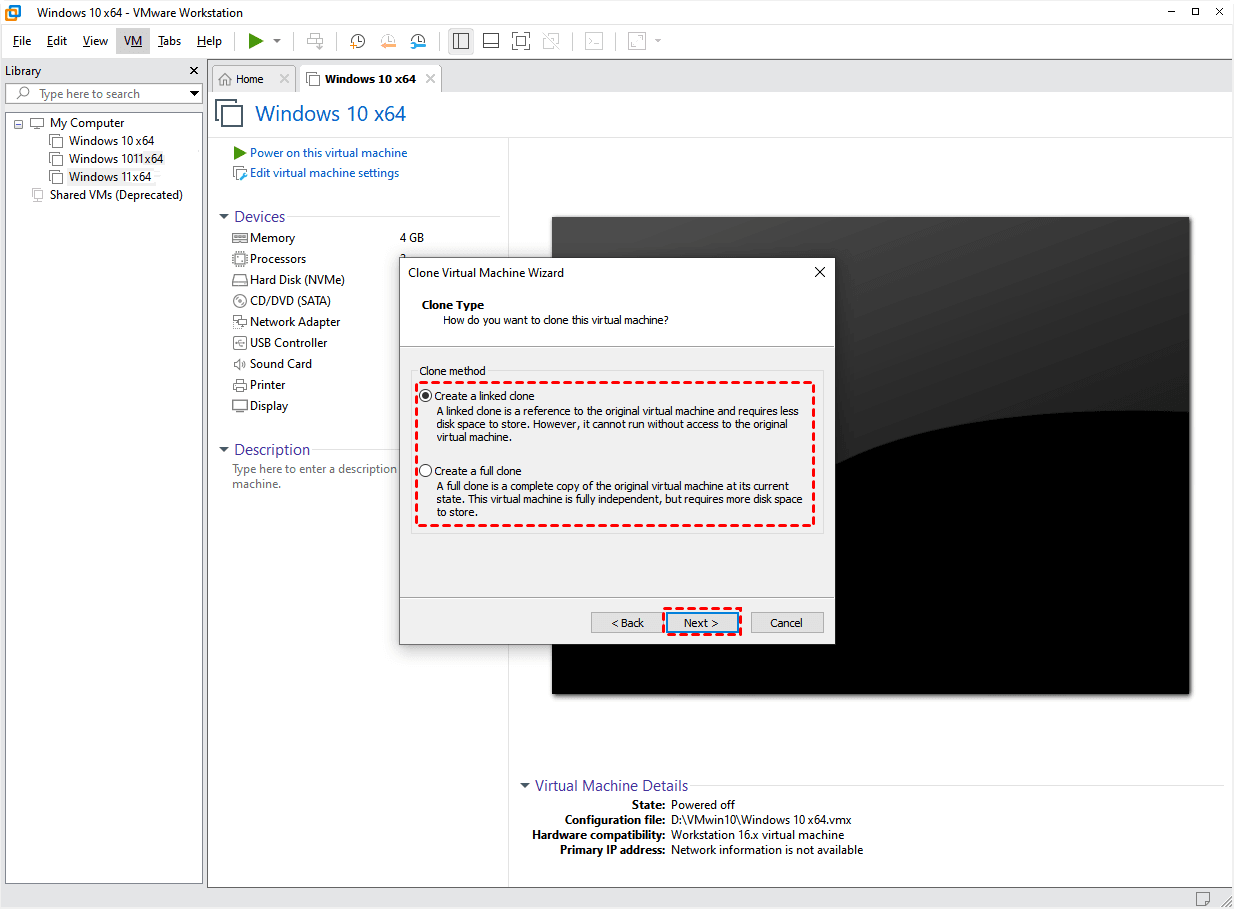
3. Choose the clone type. A linked clone is smaller and faster to create because it references the original VM, while a full clone is an independent copy with its own virtual disks.
Note:
● Linked clone: Linked clones rely on the parent virtual machine and shared virtual disks, so they are fast and space-saving. However, if the parent VM is damaged, moved, or its snapshot is lost, the linked clone may fail to run.
● Full clone: A full clone creates a complete independent copy of the original VM. It takes more time and storage space, but it is safer when you need a standalone copy.
4. Fill in the name and storage path of your clone, then click Finish.
Way 4. Backup Virtual Machine as Physical Machine (Most Flexible)
By installing a backup agent on the guest OS of a VMware Workstation virtual machine, you can treat the VM like a physical computer and back up its system, disks, partitions, or selected files. This is useful when you want scheduled backups or need to reduce backup size by excluding unnecessary data.
This method also helps when you need to migrate data between virtual and physical machines, such as moving a workload from VMware to Hyper-V or restoring a VM backup to another computer.
To back up VMware Workstation VMs more efficiently, you can use Qiling Backup, a professional backup solution for Windows systems and enterprise endpoints.
This software supports centralized backup management for multiple virtual or physical machines, including Windows PCs, workstations, and servers in a local area network (LAN). Managing tasks from one central computer can reduce repeated manual work for enterprises.
Here is a 30-day free trial for you:
To use Qiling Backup for multiple virtual or physical endpoints, install the management console on a central computer, deploy the client program on the machines you want to protect, and then create backup tasks with the required schedule and destination.
For computers where the client program is installed manually, request control first so the console can manage backup tasks on those machines.
How to Backup Multiple Virtual or Physical Machines on Qiling Backup
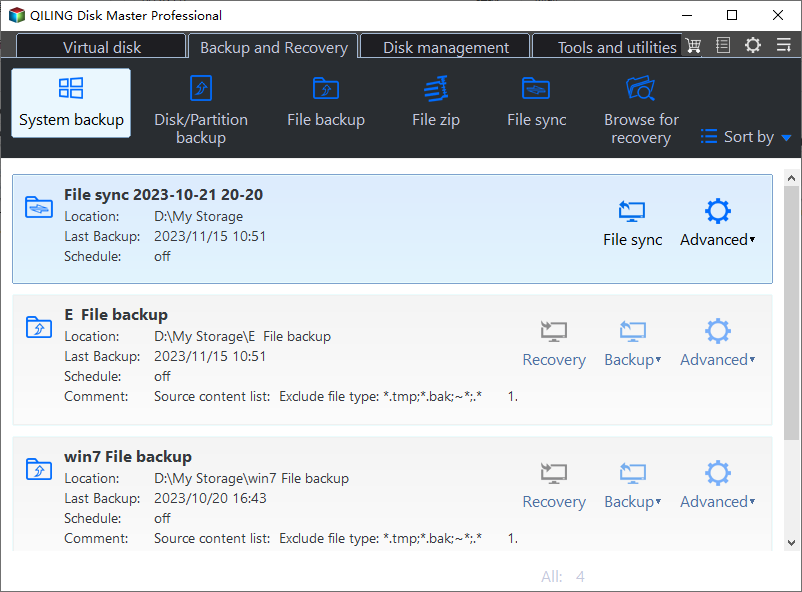
To create a new backup task, click the Backup tab and select System Backup, then follow the prompts to choose the source machines and backup destination.
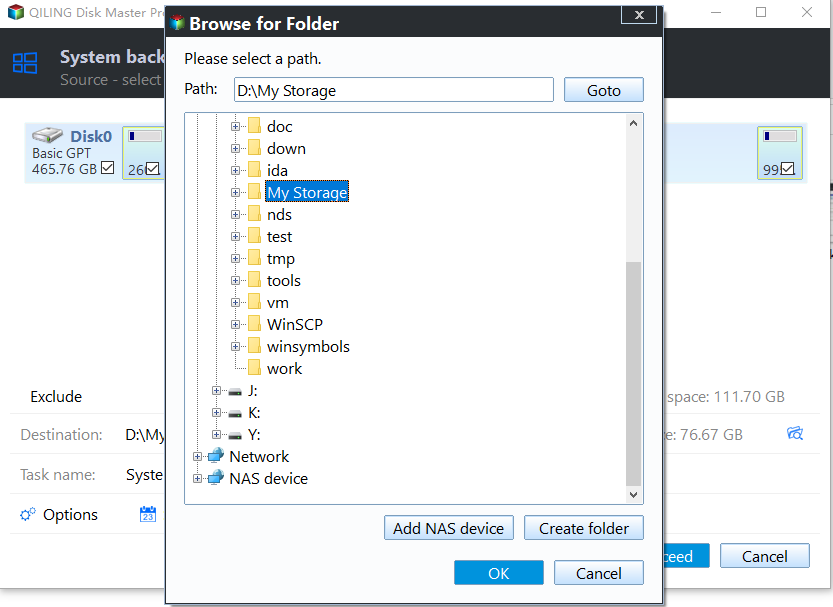
Select a location as the destination path. You can click the browse icon to add a shared folder or NAS device as the storage endpoint.
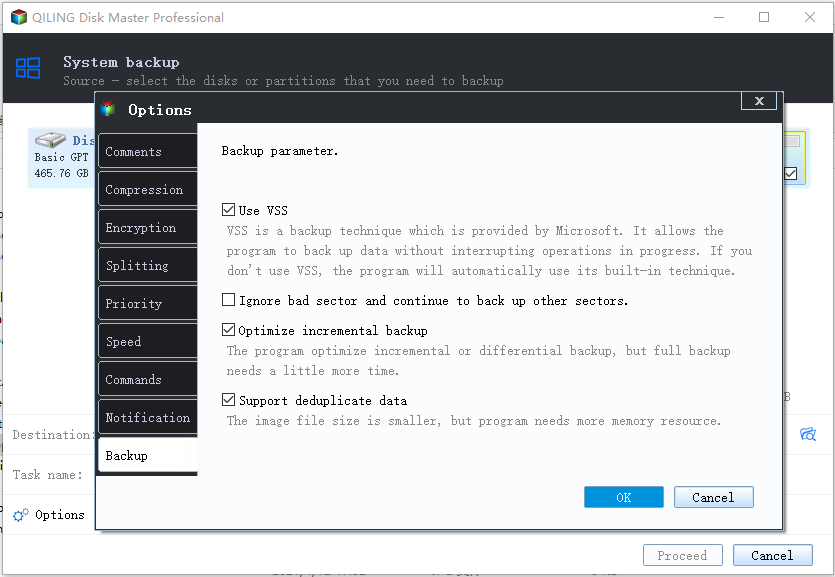
Click Settings if you need to configure options such as encryption, compression level, splitting, intelligent sector backup, and VSS.
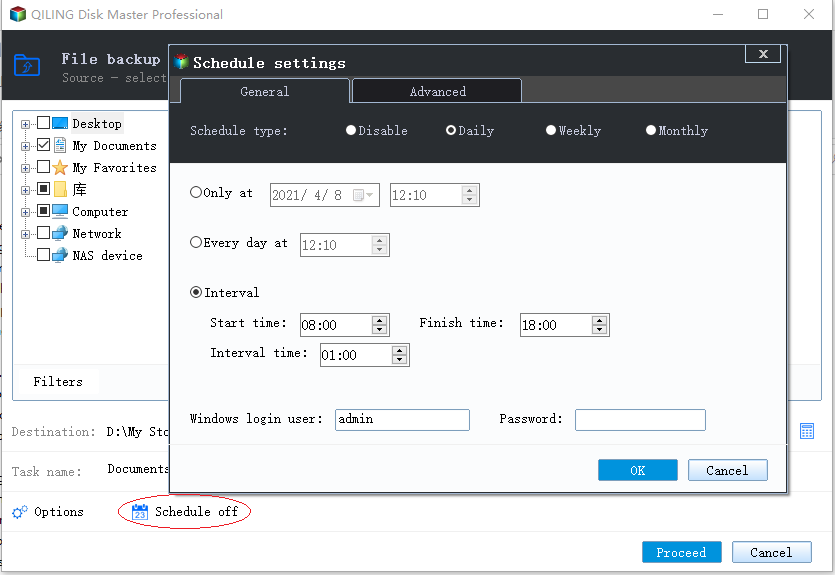
Click Schedule to set the timing and frequency of automatic backups for virtual or physical machines. A regular schedule helps keep backup images up to date.
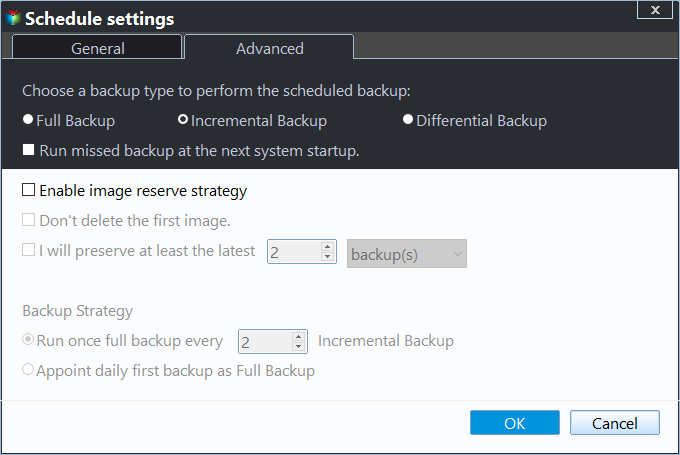
Click Scheme to enable automatic cleanup. When the rule is met, older backup images can be deleted automatically to save storage space.
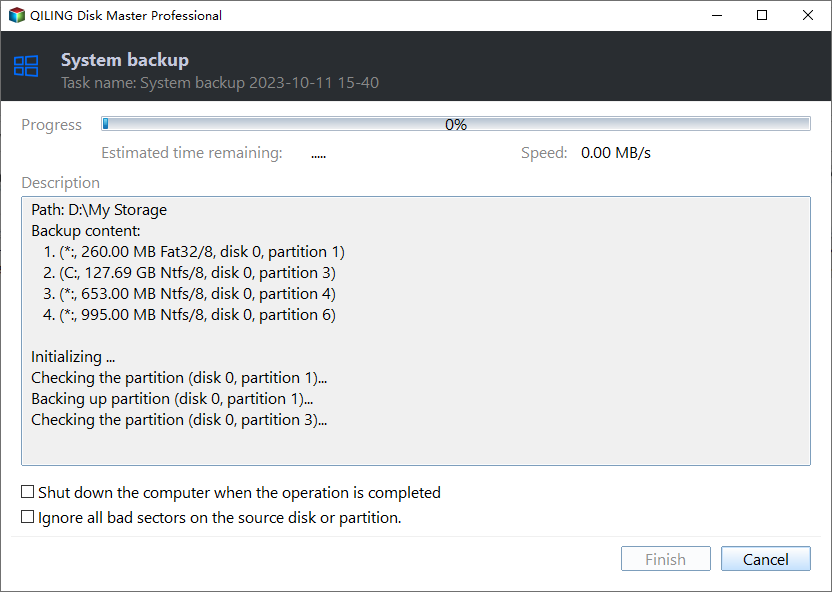
4. Click Proceed, then choose whether to only create the task or create and run it immediately.
Created tasks will appear on the Tasks page. You can edit, run, or restore a task by clicking Advanced in the upper-right corner of the task.
Summary
To protect critical VM data from loss, back up VMware Workstation virtual machines regularly and use snapshots only for short-term rollback.
The four methods above can meet different VMware Workstation backup needs. Copying VM files and exporting OVF are simple manual options, cloning is suitable for creating a duplicate VM, and Qiling Backup is more flexible for scheduled backup and centralized protection.
If you manage multiple VMs or enterprise endpoints, a professional backup tool can reduce repeated work and keep backup tasks consistent. Choose the method that best matches your recovery needs, storage space, and backup frequency.
Related Articles
- How to Delete or Create Windows Server 2022 Recovery Partition
What is Windows Server 2022 recovery partition and its purpose? Is it safe to delete the recovery partition to expand your storage? What if you don't have one, but want to create one to use when there is a problem with the system? Read on to find the answer. - How Does Windows Server Backup Compression Work?
This article explains 2 helpful ways to use Windows Server backup compression and introduces a flexible option to compress backup images more efficiently. - How to Fix Windows Server Backup Incorrect Function
You will learn 5 quick solutions to Windows Server 2012 backup incorrect function. Also, if it does not work, you can try an easy alternative to backup files, system, partition, or disk as you like. - Windows Server 2019/2016/2012 Hyper-V Backup Guide
You will learn how to create Windows Server incremental backup in Hyper -V virtual machines with WSB or a third-party tool, and then there will be no more data loss. - How to Make Windows Server Backup Mapped Network Drive
Do you encounter Windows Server Backup cannot backup mapped network drive in Server 2008 (R2)/2012/2016? Find a workaround here to make Windows Server backup mapped drive. - [Fixed] Windows Server Backup Reading data please wait
This article offers several solutions to the Windows Server Backup 'Reading data; Please wait...' issue, as well as powerful backup software for creating backup images.