How to Recover Lost Files on Mac
Losing files on Mac can be a frustrating experience, often caused by accidental deletion, emptied trash, macOS system corruption, hard drive corruption, system errors, or intentional hard drive formatting. To prevent such losses, it's essential to back up your files regularly to an external hard drive. If you do lose files, there are three simple ways to recover them on Mac, which can be done with or without the use of software.
- Quick Navigation
- Method #1. Best and Safest Way to Recover Lost Files on Mac
- Method #2. How to Find Lost Files on Mac from Trash Can
- Method #3. How to Restore Lost Files on Mac from Time Machine
Method #1. Best and Safest Way to Recover Lost Files on Mac
If you've lost files on your Mac, there are ways to find them, but the safest method is to use file recovery software. This approach prevents the lost files from being overwritten and can't be recovered. A professional tool is necessary to scan and locate the lost files, and the sooner you act, the better. If you don't rescue them quickly, they will be overwritten by new data and disappear. The lost files are still on the hard drive, just not visible, waiting to be overwritten.
I recommend using Deep Data Recovery to recover lost files from your Mac. It supports over 1000 file types, making it easy to recover commonly used files, and its user-friendly interface only requires 3 simple steps to find the target files.
Your Effective Lost File Recovery Mac Software
- It can easily recover lost or deleted files such as photos, videos, emails, documents and more from Mac and external drives.
- The software offers two scan modes to improve the effectiveness of Mac lost file recovery.
- The software is fully compatible with recovering lost files from various devices, including Mac, SD cards, USB drives, cameras, and players, among others.
Steps for How to Recover Lost Files on Mac
Here are the steps for how to use Deep Data Recovery to recover lost files on Mac: download the installation package, double-click the .dmg, and then drag the icon to the APP folder to install it. It's a secure tool and you can use it to recover lost files.
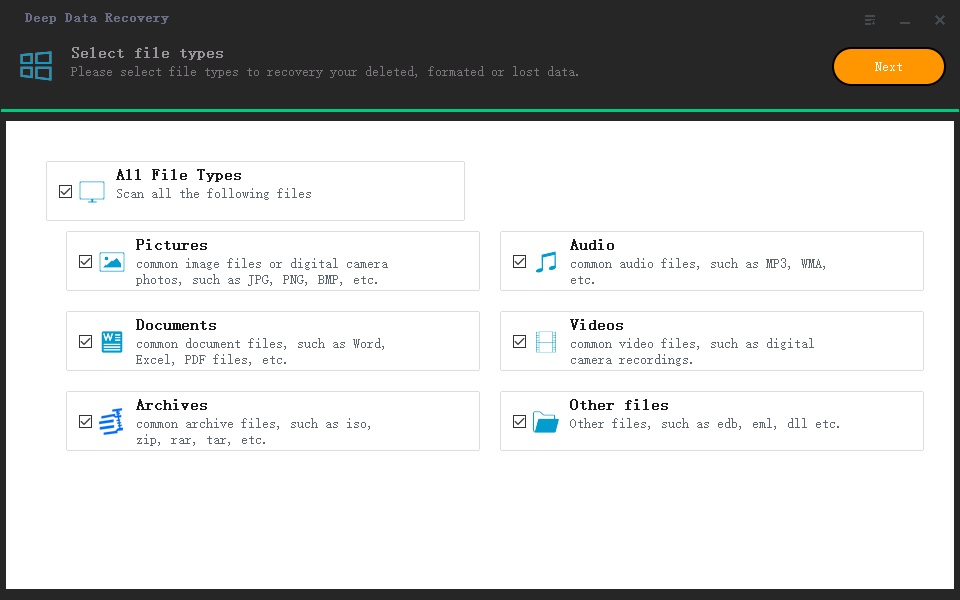
Step 1. Target the Lost File Types
Launch the lost file recovery Mac software, check the file types you need and uncheck the unwanted ones, then click "Next" to start the scanning process.
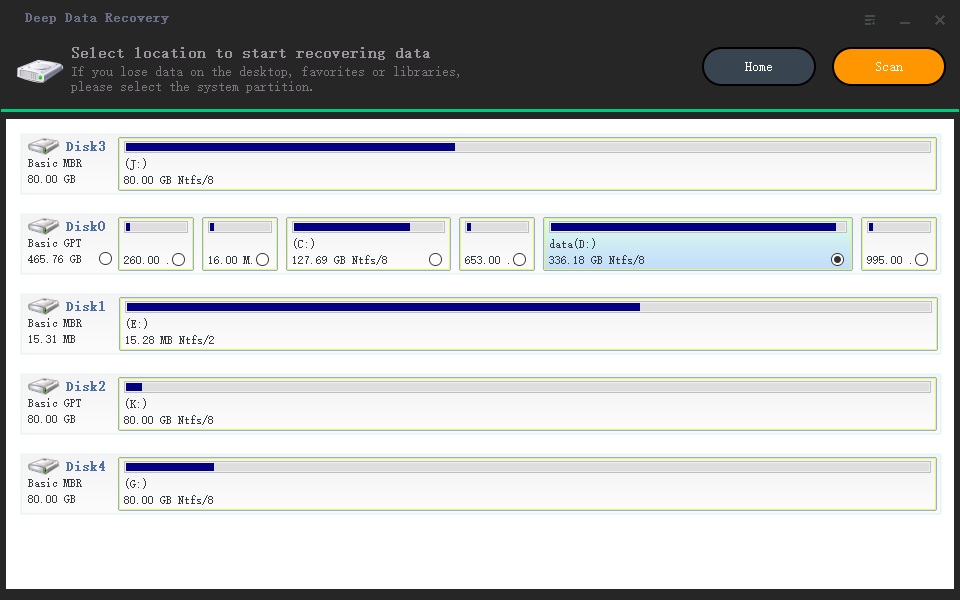
Step 2. Select Volume/Disk to Scan Lost Mac Files
After selecting the file types to scan, you're then supposed to select the volume or disk on your Mac to scan for the lost files. The main window displays all the hard disk and external devices, allowing you to choose the one where the target files are lost. Once selected, click the "Scan" button, letting the mac lost file recovery tool scan for the lost files on your Mac.
Step 3. Recover Lost Files on Mac
The software displays a progress bar during the scanning process, keeping you informed of its progress. Once scanning is complete, all found files are displayed in the main window, sorted into categories for easy viewing. To recover lost files, select the desired files on the right side and click the "Recover" button.
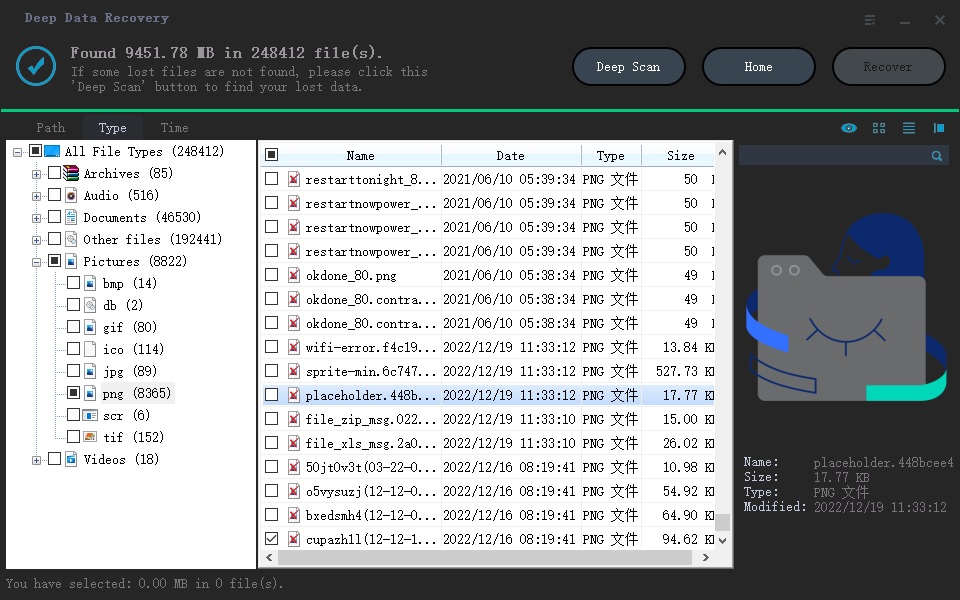
The default scanning mode is Quick Scan. If you can't find the expected result in the windows, please try "Deep Scan". It will scan deeper for the lost files for you.
Method #2. How to Find Lost Files on Mac from Trash Can
If you've lost files on your Mac, start by checking the trash can, as deleted files are stored there for up to 30 days. If you deleted the files accidentally, you may be able to recover them from the trash. To do this, open the Finder, locate the trash can, and see if the lost files are listed. If you find them, simply drag and drop them to the desktop to restore them.
If you've emptied the trash on your Mac, you can recover deleted files by clicking here to recover deleted files from emptied trash.
You can try searching for lost files in the trash can by using Spotlight. Click the Spotlight icon, type in the file name, select the files using Command + click, and then go to the "File" menu and choose "Put Back" to recover the lost files.

Method #3. How to Restore Lost Files on Mac from Time Machine
If you've emptied the trash can, you can restore lost files from Time Machine, which automatically backs up all your files regularly.
If you don't use the Time Machine to back files or not find the lost files, you can use method 1 to find lost files on Mac.
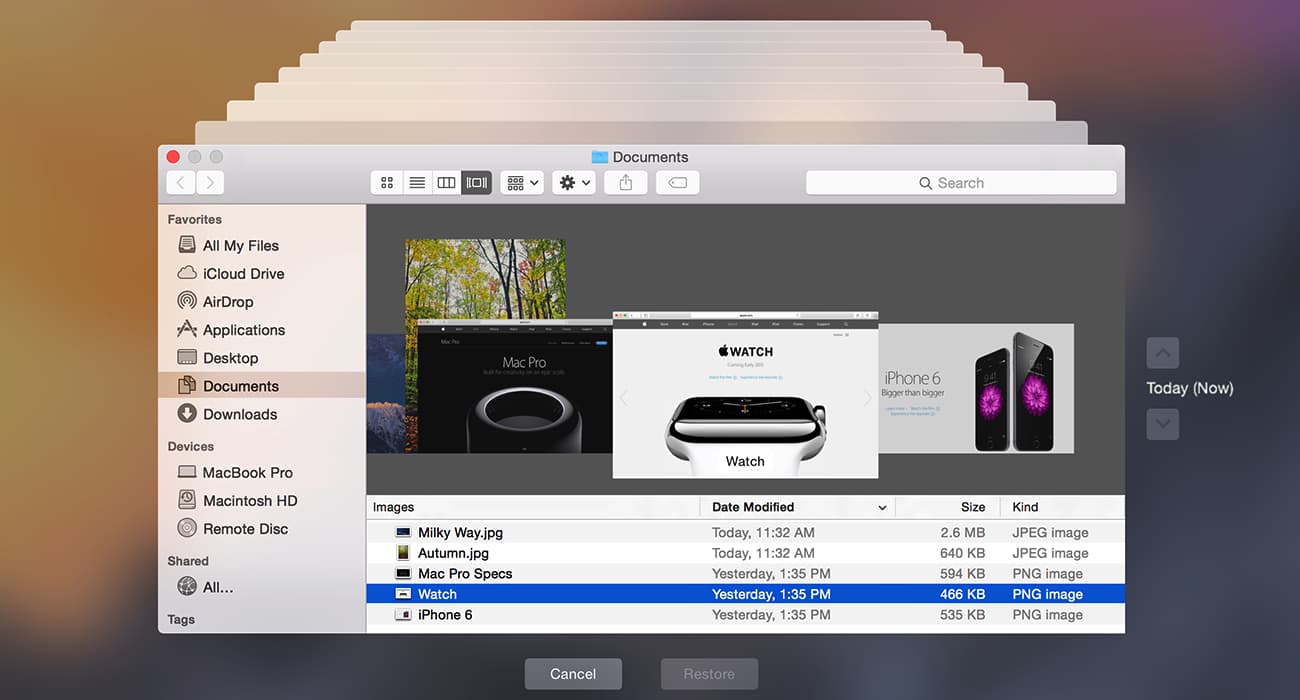
To restore a lost file using Time Machine, search for the app by typing "Time Machine" in the Spotlight search, then open it. Click on the folder where the file was originally saved, scroll down to find the lost file, select it, and click the "Restore" button. Note that the Restore button will only appear after selecting the file.
Related Articles
- How to Recover Data from Pen Drive Asking for Format
- How to Recover Deleted Files from SD Card on Mac
- How to Recover Files from External Hard Drive on Mac
- How to Recover Deleted Videos on Mac
- How to Recover Deleted/Lost Files on Memory Stick
- How to Recover Permanently Deleted Photos from SD Card
- How to Recover Unsaved/Deleted Sketch File
You can easily recover a Sketch file in a few steps. To do this, first, check if the file is saved on your computer.