Allocate Free Space to C Drive without Deleting Partition in Windows 11, 10, 8, 7
Why allocate free space in Windows 11, 10, 8, 7?
Users may encounter a "low disk space warning" on their C drive or other data drives due to poor initial partitioning. To resolve this, some users clone their hard drive to a larger one for more free space, while others prefer to allocate free space from one drive to another to distribute it more reasonably.
Here is a real user case:
If the C drive is running out of space while another partition has enough free space, you can extend the C drive instead of replacing the hard drive. Windows Disk Management can extend a partition only when adjacent unallocated space exists, so you may need to delete or shrink another partition first. A partition manager provides a safer and more direct way to allocate free space from one drive to another without deleting partitions.
In daily use, a poor partition layout can slow work down and cause repeated low disk space warnings. Allocating free space to the right partition helps balance storage, keep the system drive usable, and improve overall computer performance.
How to allocate free space to C drive with Disk Management
Windows Disk Management can help extend a partition, but only under limited conditions.
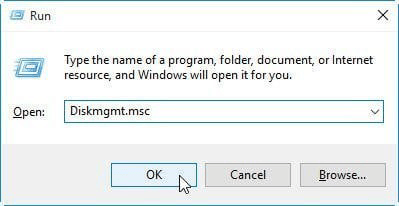
1. Press Windows + R to open the Run dialog box, type "diskmgmt.msc", and press Enter. Disk Management will open so you can view and manage your drives.
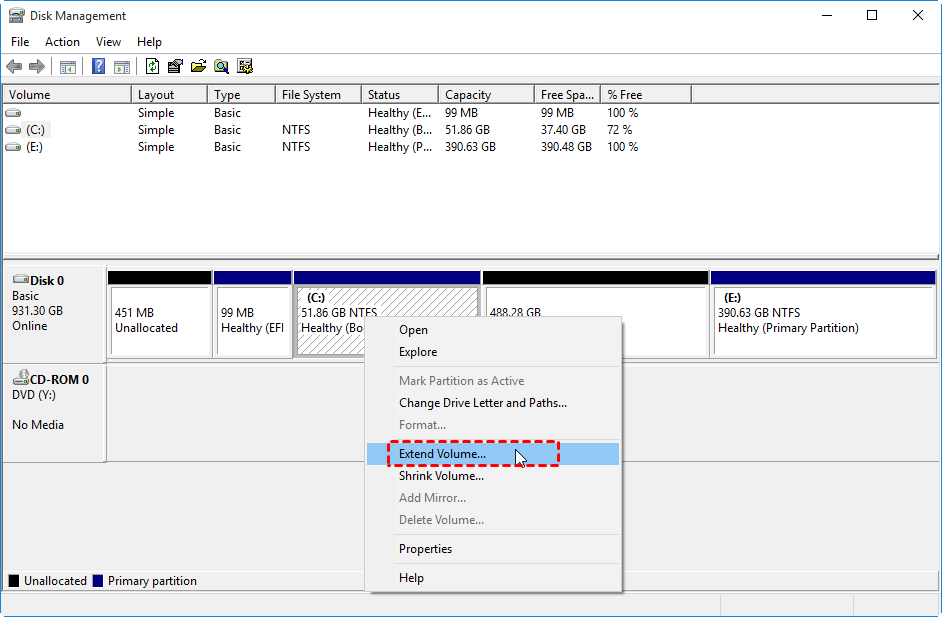
2. Right-click the target partition and select "Extend Volume". The Extend Volume Wizard can expand the partition only into adjacent unallocated space on its right side.
3. If there is no unallocated space next to the target drive, you'll need to delete the adjacent partition to free up adjacent unallocated space. Otherwise, the Extend Volume option will be grayed out.
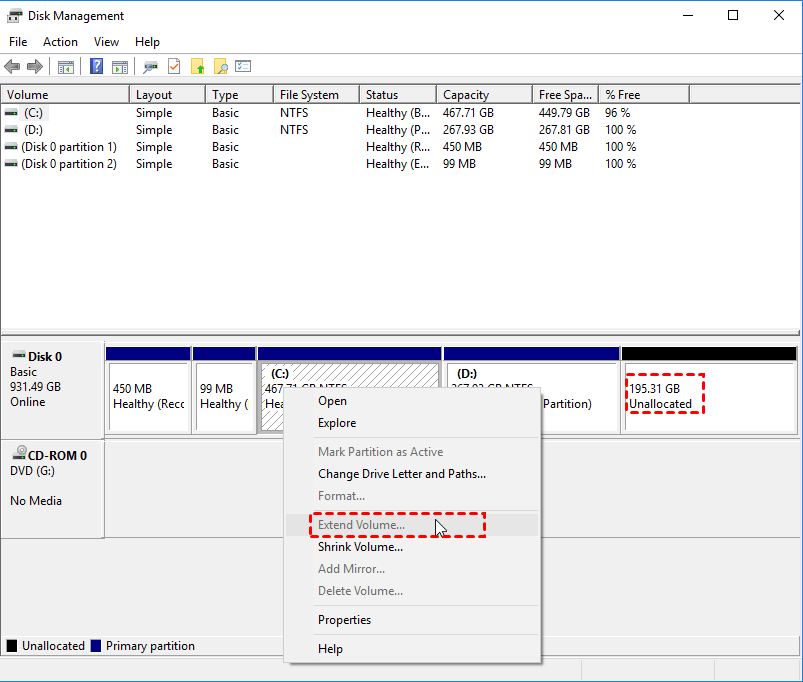
Tip: Before deleting an adjacent partition, back up its data first. Otherwise, the deleted data may not be recoverable.
In Windows 11, 10, 8, and 7, Disk Management can extend the C drive only in specific layouts. A dedicated partition manager can allocate free space to the target partition without deleting an adjacent volume, making the process safer and more efficient.
How to allocate free space to C drive easily and safely
When there is not enough space on a partition, Qiling Disk Master Professional can allocate free space from one drive to another directly. Its wizard-based interface works on Windows 7, 8, 10, and 11, so you can resize partitions without advanced technical steps.
Step 1. Install and open Qiling Disk Master Professional. Right-click the partition with enough free space, such as the D drive, and select "Allocate Free Space".
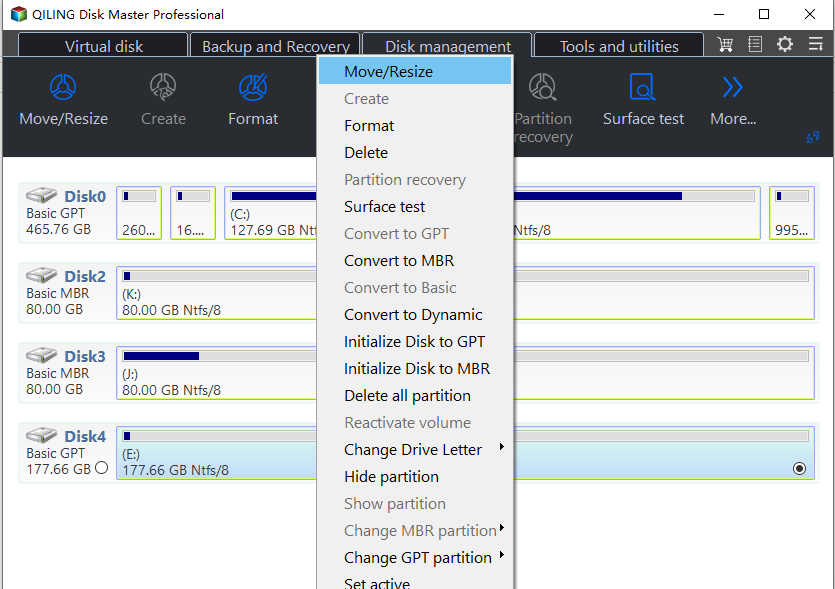
Step 2. In the new window, specify the amount of space to allocate and choose the target partition, such as the C drive.
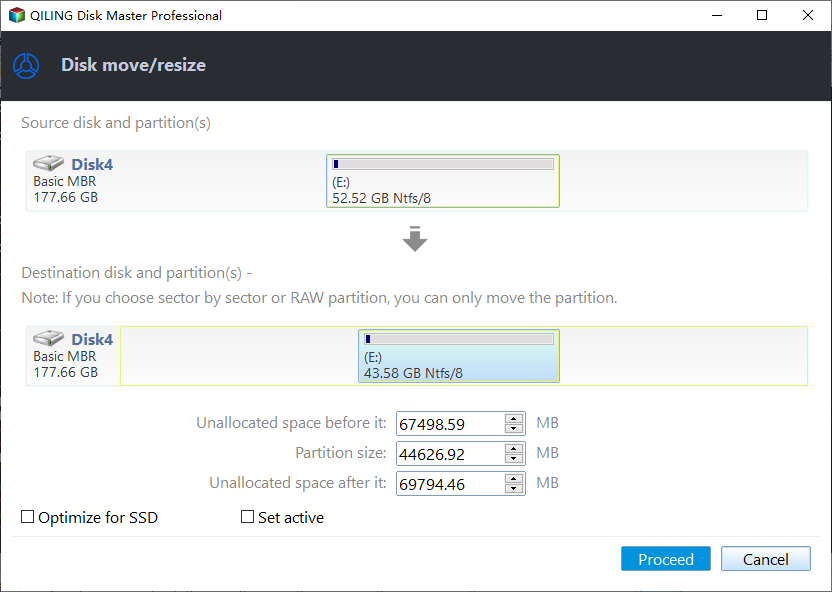
Step 3. Preview the result and confirm that the C drive will be extended. Then click Proceed to apply the changes.
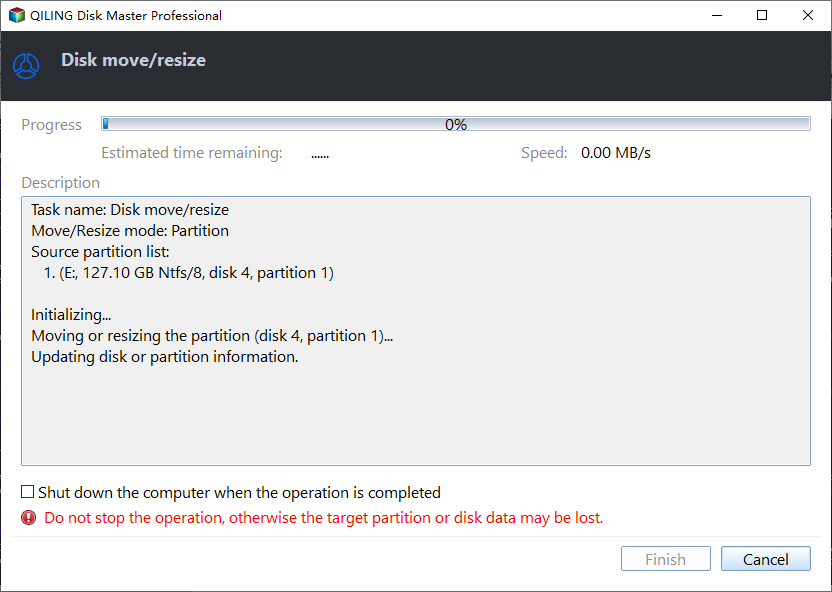
You can quickly allocate free space on Windows 11, 10, 8, and 7 without data loss. Qiling Disk Master Professional also includes features such as moving programs to another drive, deleting large files, merging partitions, wiping hard drives for reuse, and SSD secure erase.
Qiling Disk Master Server can allocate free space on Windows Server systems, including Server 2008, 2012, 2016, 2022, and later versions. It can also optimize partition layout so the server disk runs more smoothly and efficiently.
Related Articles
- Solved: Nintendo Switch Keeps Asking Format SD Card
This guide explains why Nintendo Switch keeps asking to format an SD card and provides practical solutions to fix the problem. - How to Fix Nintendo Switch Not Reading SD Card Error
If Nintendo Switch is not recognizing your SD card, learn the possible causes and follow clear steps to fix the reading error. - How to Play Xbox 360 Games From an External Hard Drive
Learn how to play Xbox 360 games from an external hard drive when internal storage is not enough. - Qiling Disk Master 16.0 Crack 2024 | Get Qiling Disk Master Crack License Key
Learn about Qiling Disk Master 16.0 and why using a safe, official partition manager is better than downloading a cracked version. - How to Fix Toshiba Laptop Black Screen | 100% Working
Resolve Toshiba laptop black screen issues with our comprehensive guide, featuring easy-to-follow steps and expert solutions to get your device up and running again. - Unable to Extend C Drive? Fix It Now
If you're having trouble extending the C drive on your Windows computer, this article can help. It provides causes and practical solutions to resolve the issue.
Products
Articles & Tutorials
- Data Recovery
- Data Backup
- File Recovery
- File Backup
- File synchronize
- System Backup and Restore
- Disk and Partition Clone
- Technical articles
- Disk Master Help
- Windows Deleted File and Disk Recovery Tutorials
- Windows File and Data Recovery Tutorials
- More Windows Tutorials for Install, Security, Files, and PC Tips
- Windows Boot, Repair, and Recovery Environment Tutorials
- Windows Backup Tutorials
- Windows Restore Tutorials
- Windows Clone and Migration Tutorials
- Windows Server Backup, Recovery, and Management Tutorials
- Windows Disk, Partition, and Storage Management Tutorials