[Detail Guide] Create Windows 10 Bootable USB from ISO
Why create Windows 10 bootable USB from ISO?
Generally, there are two reasons for you to make bootable Windows 10 USB from ISO file.
● Make Windows 10 clean installation: You can create a bootable USB of Windows 10 using Diskpart, and then boot from it to install Windows 10.
● Get a portable Windows 10 environment: You can create a portable Windows 10 environment on a USB drive from an ISO file, allowing you to use the familiar Windows 10 interface on different devices.
How to: create Windows 10 bootable USB from ISO for two purposes
To make a bootable USB drive of Windows 10 from ISO, you can choose a method that suits your needs. You can use the Windows 10 Media Creation Tool to create a bootable USB drive, or use a third-party tool like Rufus, which is a free and lightweight utility that can create a bootable USB drive from an ISO file.
PS.: You have downloaded the Windows 10 ISO file from Microsoft and have mounted the ISO file. Now, you can proceed with the installation process.
▶ Create bootable Windows USB from ISO for installing Windows
To install Windows 10 from a USB drive, you can create a bootable USB drive from an ISO file using the Diskpart utility, which allows you to install Windows 10 on an SSD or HDD.
Step 1. To prepare an empty USB drive for Windows 10, you need to ensure its capacity is sufficient for the operating system. For a 32-bit version of Windows 10, the USB drive should have a minimum capacity of 4GB, while for a 64-bit version, it should be at least 8GB. Once you have a suitable USB drive, simply connect it to your PC.
Step 2. Press Windows + R, input cmd, and press Enter.
Step 3. Run those commands:
• diskpart
• list disk
• The command to select the USB drive in the Disk Management tool is "select disk n", where n is the disk number of the USB drive. For example, if the USB drive is listed as Disk 1, the command would be "select disk 1".
• clean
• create partition primary
• select partition 1
• format fs=ntfs quick (if you plan to create UEFI bootable USB of Windows 10To create a bootable USB drive, I will be using the command `bootsect /nt52 /bootsect.exe /cmdline /bootmgr /osdevice /fixmbr /mbrsize 44032` to create a boot sector, followed by `copy bootmgr.
• active
• To assign the letter "M" to the USB drive, you can follow these steps: Open Disk Management. You can do this by searching for "Disk Management" in the Start menu, or by right-clicking on the Start button and selecting "Disk Management" from the context menu.
• exit
Step 4. Go to the boot folder of the Windows 10 ISO files by running the commands listed below:
• g:
• cd boot
Note: The drive letter of your mount drive as it appears in File Explorer is 's'.
Step 5. To resolve the issue, run the following commands in the terminal: `sudo apt update && sudo apt upgrade -y` and then `sudo apt install -y libgconf-2-0` and `sudo apt install -y libgconf2-0`. Run those commands and wait for the process to complete.
• bootsect /nt60 N:
• xcopy G:\*.* N:\ /E /F /H
Note: You should replace N and G with the right drive letters for the USB drive and Windows 10 ISO image receptively.
▶Make Windows 10 bootable USB drive from ISO for portable Windows environment
To create a Windows 10 bootable USB drive on Windows 10 Enterprise/Education/Pro edition, you can use the built-in feature Windows To Go. This allows you to create a portable version of Windows on a USB drive, which can be used to boot and run Windows on any compatible computer. To do this, go to Settings > Update & Security > Windows To Go, and follow the prompts to create a new Windows To Go workspace.
Step 1. To mount the ISO file, right-click on the file and select the option to mount it as a virtual CD/DVD drive. This will make the ISO file appear as a physical drive on your computer.
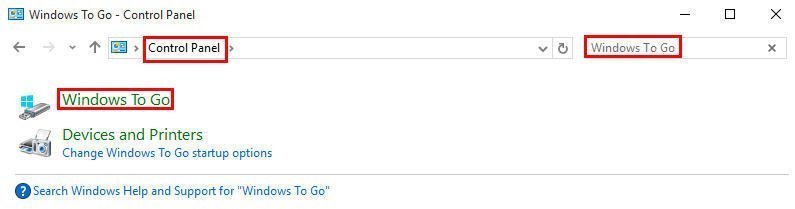
Step 2. To access Windows To Go, click the Windows button, then navigate to Control Panel > Windows To Go.
Step 3. In the Create a Windows To Go workspace window, choose the certified USB drive onto which you want to install Windows 10 and click "Next".
Step 4. To search for the Windows 10 installation ISO file, click the "Add search location" button and select the mounted ISO file.
Step 5. Choose whether to use BitLocker on the USB drive.
Step 6. Click "Create".
Step 7. Wait for the process to finish. Once the process is complete, click Yes or No to confirm that this computer should boot from the newly created Windows 10 USB drive.
Notes:
• The target USB drive should have a capacity of at least 32GB.
• This operation will erase all data on the destination USB drive, so it's recommended to back up the necessary data beforehand.
Windows 11, Windows 10 Home, Windows 8/8.1 Home/ Pro/Education, and Windows 7 users cannot create a Windows To Go workspace on a USB drive, as it requires a more advanced version of Windows. Additionally, if the USB drive's capacity is not sufficient to hold the Windows OS, it cannot be used for a Windows To Go workspace.
Here, Qiling Disk Master Standard is highly recommended. It allows you to create a Windows bootable USB for a portable environment even when using Windows Home Edition, requiring a USB drive of at least 13GB.
Verdict
After considering various methods to create a Windows 10 bootable USB from an ISO file, you can choose the one that best suits your needs. Once you've created the bootable USB, you can use it to install Windows or simply boot into the familiar Windows environment.
Related Articles
- Free Way to Create Windows 11 Bootable USBFree Way to Create Windows 11 Bootable USB
Windows To Go Creator can help you make a bootable USB from Windows 11 ISO file. After that, you can boot Windows 11 from it anywhere and anytime. - Easily Migrate Windows 10 to NVMe SSD without Reinstalling
You can migrate Windows 10 to NVME SSD without Windows reinstallation. Thus, you can boot OS from the NVME SSD to experience less boot time and higher read & write speed. - How to Recover Lost/Deleted Partition on External Hard Drive Easily?
If you lose your partition due to various reasons like accidental deletion, loss of drive letter and so on, read this article to get how to recover lost partition quickly and easily. - How to Reimage a PC? (with Screenshots)
How to reimage a PC without data loss when computer is running into serious software issues? Get all the information in the following. - Samsung Data Migration Does Not Start: Fixes and Alternative
Don't know how to deal with Samsung Data Migration does not start error? This post will give the exact answer and offer a more flexible way to migrate data. - Fixed: Samsung Data Migration Failed with External Exception
This tutorial analyzes the Samsung Data Migration external exception (e06d7363) error, provides quick fixes to the error and the best Samsung Data Migration alternative.