How to Backup Laptop Windows 10 Safely and Completely
Why a Windows 10 laptop needs a complete backup
A laptop is easy to carry, but that also makes it easier to lose, damage, or infect with malware. A Windows 10 backup should protect both personal files and the system state, so you can restore documents, photos, settings, apps, and boot files after a disk failure or wrong update.
What should be included in the backup?
- Documents, pictures, desktop files, downloads, email archives, and browser exports.
- System partitions, boot partitions, and recovery partitions if you want a full restore.
- License keys, installer files, and configuration notes for important programs.
- An external drive, NAS, or cloud-synced folder that is not always connected to the laptop.
Method 1. Back up personal files with File History
Step 1. Connect an external hard drive or large USB drive to the laptop.
Step 2. Open Settings > Update & Security > Backup.
Step 3. Click Add a drive, choose the backup disk, and turn on Automatically back up my files.
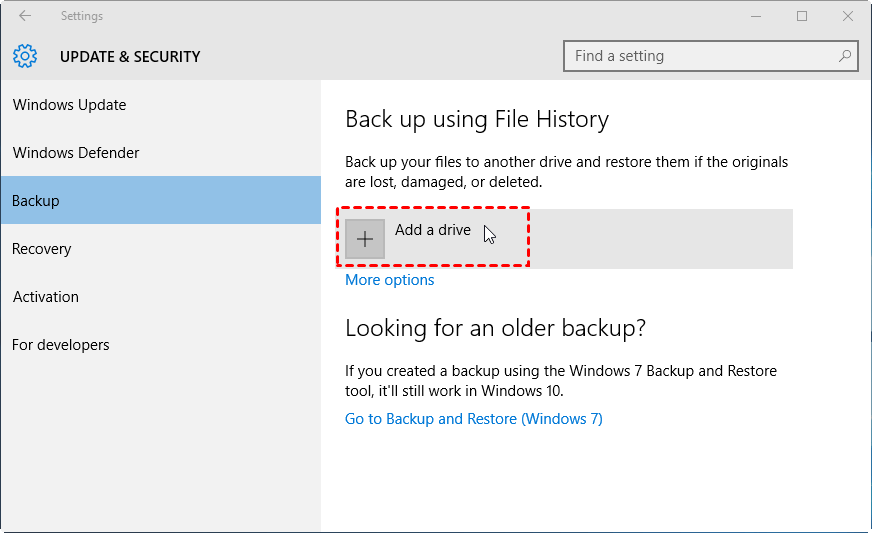
Step 4. Click More options, set the backup frequency, and add or remove folders according to your actual file locations.
Step 5. Click Back up now and wait until the first copy finishes.
Method 2. Create a system image with Backup and Restore
File History does not make the laptop bootable again after the system disk fails. For that case, create a system image.
Step 1. Open Control Panel and go to Backup and Restore (Windows 7).
Step 2. Click Create a system image.
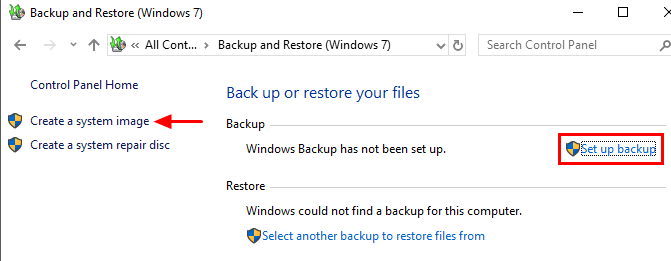
Step 3. Choose an external hard disk or network location as the destination.
Step 4. Keep the system-related partitions selected, review the settings, and click Start backup.
Method 3. Back up laptop files and system automatically
If you need scheduled backup, incremental backup, and easier restore options, use Qiling Disk Master to protect the laptop with one managed task.
 Qiling Disk Master
Qiling Disk Master helps create file backups, disk backups, and system images for Windows 10 laptops with scheduled backup and flexible restore options.
Step 1. Connect an external drive or confirm that a NAS or network location is available. The destination should have enough capacity and should not be the laptop's internal system drive.
Step 2. Open Qiling Disk Master, select Backup, then choose System Backup for Windows recovery, Disk Backup for the whole drive, or File Backup for personal folders only.
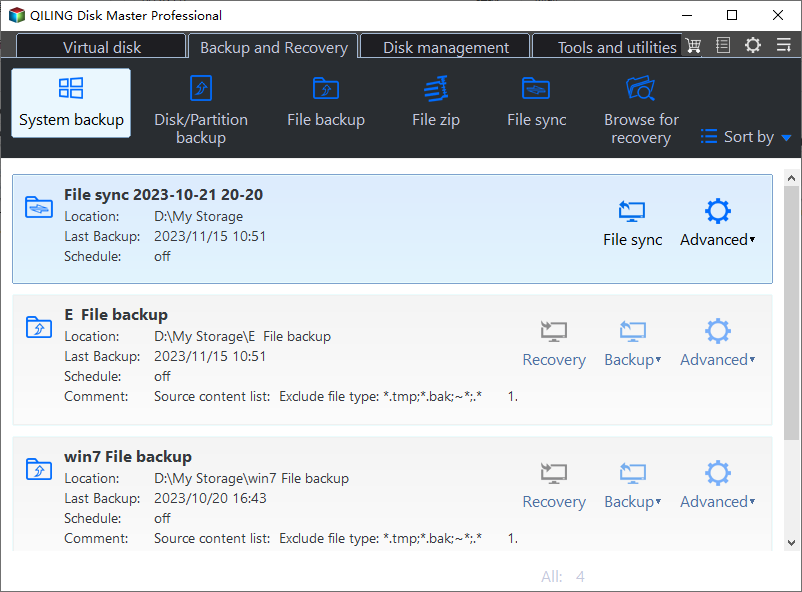
Step 3. Select the files, disks, or system partitions to protect. For a file backup, include Desktop, Documents, Pictures, Downloads, and any project folders saved outside the user profile.
Step 4. Choose the external drive or network location as the destination, then set a schedule that suits how often the laptop data changes.
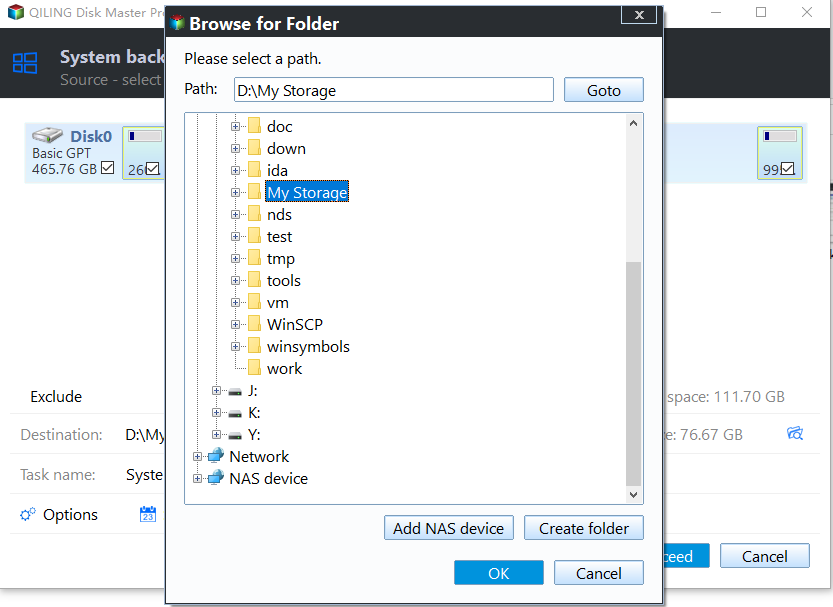
Step 5. Review the task, enable incremental backup if available, and click Proceed to run the first backup. Keep the laptop connected to power until the initial backup finishes.
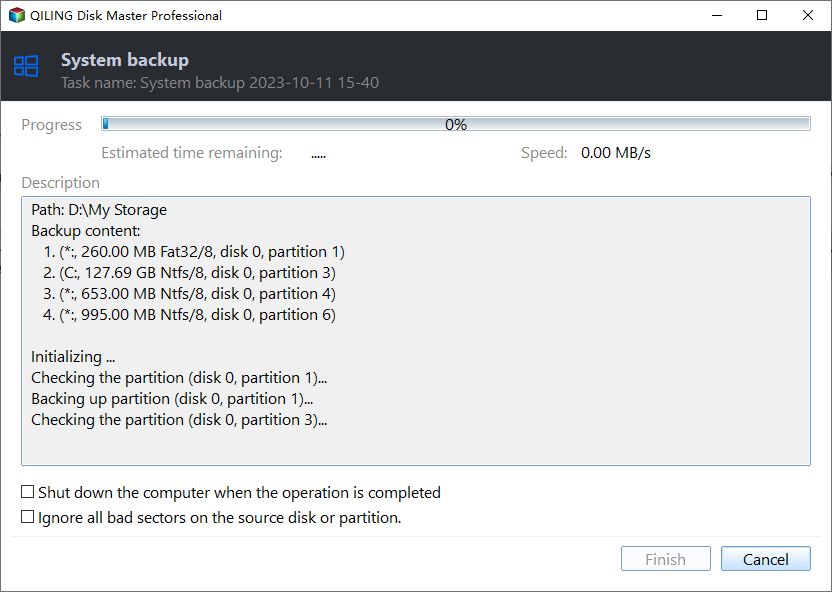
Step 6. Check the completion status and open a few backed-up files. Test a restore when convenient so you know the backup can be used before an emergency occurs.
Conclusion
For a Windows 10 laptop, File History is useful for daily files, a system image protects the operating system, and Qiling Disk Master provides a clearer way to schedule and manage both.
Related Articles
-
Best Way to Backup Laptop to Cloud in Windows - Qiling
Set up laptop cloud backup with practical file selection and recovery planning tips. -
Free Backup to External Hard Drive in Windows 10/11 (Guide)
Back up important Windows files to an external hard drive with built-in tools or backup software. -
Backup Installed Programs in Windows 11, 10, 8, 7 (3 Ways)
Protect installed applications and program data before reinstalling Windows or replacing a disk.
Products
Articles & Tutorials
- Data Recovery
- Data Backup
- File Recovery
- File Backup
- File synchronize
- System Backup and Restore
- Disk and Partition Clone
- Technical articles
- Disk Master Help
- Windows Deleted File and Disk Recovery Tutorials
- Windows File and Data Recovery Tutorials
- More Windows Tutorials for Install, Security, Files, and PC Tips
- Windows Boot, Repair, and Recovery Environment Tutorials
- Windows Backup Tutorials
- Windows Restore Tutorials
- Windows Clone and Migration Tutorials
- Windows Server Backup, Recovery, and Management Tutorials
- Windows Disk, Partition, and Storage Management Tutorials