Back Up a BitLocker Recovery Key Before Cloning a Drive
A BitLocker recovery key is a 48-digit emergency credential. Windows can request it after an SSD replacement, motherboard change, or boot-mode change. Save it before cloning, not after the old drive has been erased.
Find and store the key
Open Manage BitLocker, identify the protected operating-system drive, and use the recovery-key backup option. Keep at least one copy outside the source SSD, such as your Microsoft account and a printed or securely stored offline record. Label the copy with the PC or disk it belongs to.
Install Qiling Disk Master and clone
Qiling Disk Master is designed for disk migration. Its Disk Clone feature copies the Windows partition together with the EFI, System Reserved, and recovery partitions required to start the new SSD.
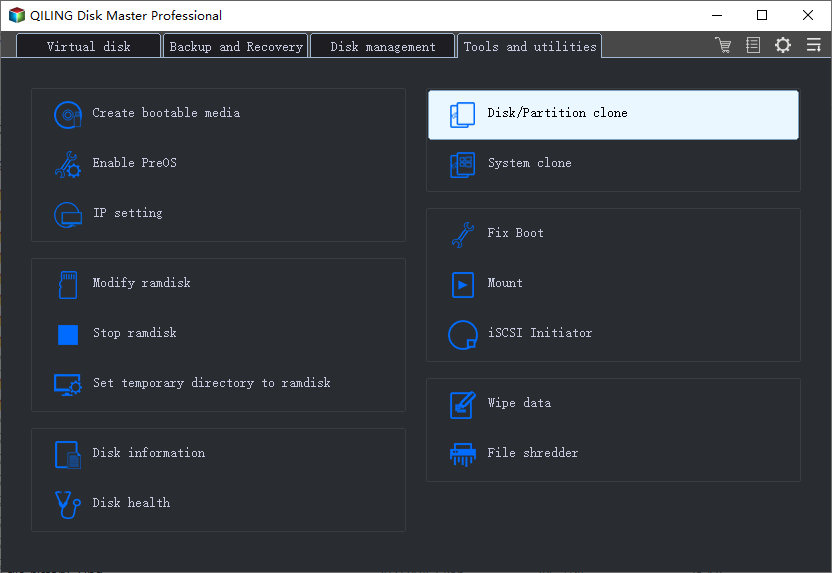
Step 1. Connect the replacement SSD and make sure it appears in Windows. Download and install Qiling Disk Master with the button above. Open the program, select Clone in the left pane, then choose Disk Clone.
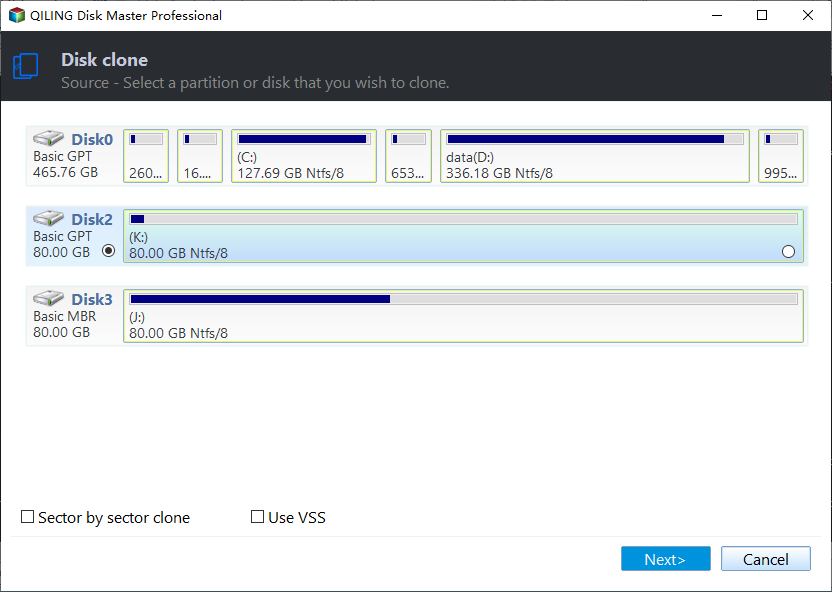
Step 2. In the source-disk list, click the current BitLocker-protected Windows disk. Confirm its capacity and model name, then click Next. Do not select the new SSD here.
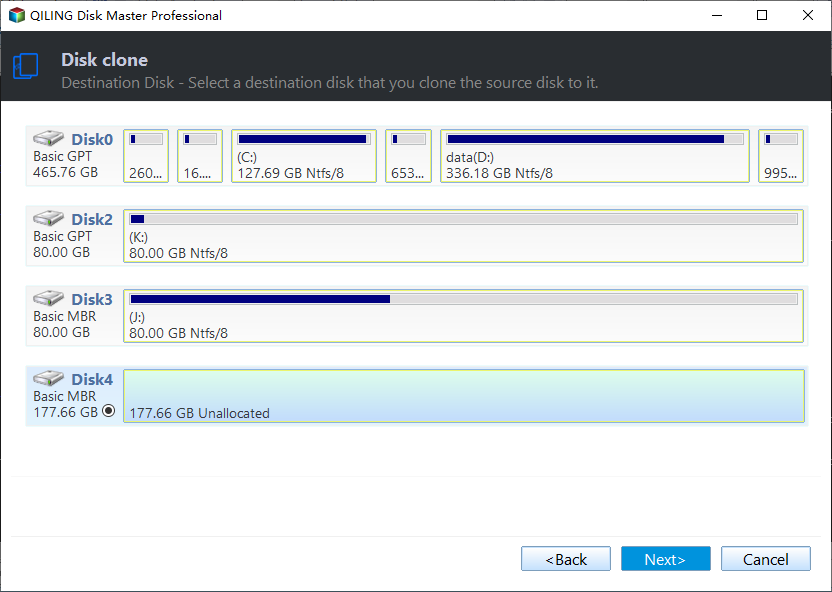
Step 3. Select the replacement SSD as the destination disk, then click Next. Read the warning carefully: the selected destination SSD will be overwritten.
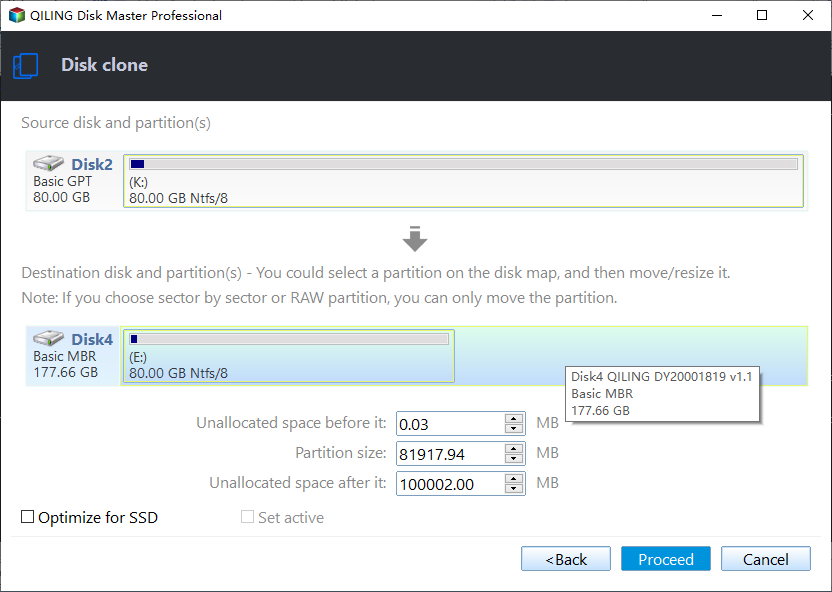
Step 4. In the operation summary, select SSD Alignment for an SSD destination. Verify that the source and destination are not reversed, then click Proceed to start the clone.
Step 5. When the clone is complete, shut down the computer. Set the replacement SSD as the first boot device, or temporarily disconnect the original SSD for the first startup test.
Test the replacement SSD
After cloning, shut down and boot from the new SSD. If Windows requests the saved recovery key, enter it. Verify that Windows and important files work before erasing the original disk, then resume BitLocker protection after the migration is stable.
Related Articles
- Suspend BitLocker Before an SSD Upgrade
Reduce avoidable recovery prompts during a planned SSD replacement. - Safely Clone a BitLocker-Encrypted Disk
Review another detailed workflow for copying a BitLocker-protected Windows disk.
Products
Articles & Tutorials
- Data Recovery
- Data Backup
- File Recovery
- File Backup
- File synchronize
- System Backup and Restore
- Disk and Partition Clone
- Technical articles
- Disk Master Help
- Windows Deleted File and Disk Recovery Tutorials
- Windows File and Data Recovery Tutorials
- More Windows Tutorials for Install, Security, Files, and PC Tips
- Windows Boot, Repair, and Recovery Environment Tutorials
- Windows Backup Tutorials
- Windows Restore Tutorials
- Windows Clone and Migration Tutorials
- Windows Server Backup, Recovery, and Management Tutorials
- Windows Disk, Partition, and Storage Management Tutorials