Suspend BitLocker Before an SSD Upgrade in Windows 11
Suspending BitLocker avoids an unnecessary recovery-key prompt while the Windows system disk is cloned to a replacement SSD. It does not decrypt the drive. Save the recovery key first and keep the original SSD until the new one has been tested.
Prepare the PC
Step 1. Search for Manage BitLocker in Windows. Find the operating-system drive and save its recovery key to a secure location outside the SSD.

Step 2. Select Suspend protection for the operating-system drive and confirm the warning. Do not discard the saved recovery key.
Clone to the new SSD with Qiling Disk Master
Qiling Disk Master Professional includes Disk Clone, which copies Windows, installed applications, and its required boot partitions to the replacement SSD.
Step 3. Download and install Qiling Disk Master. Open it, choose Clone, then select Disk Clone.
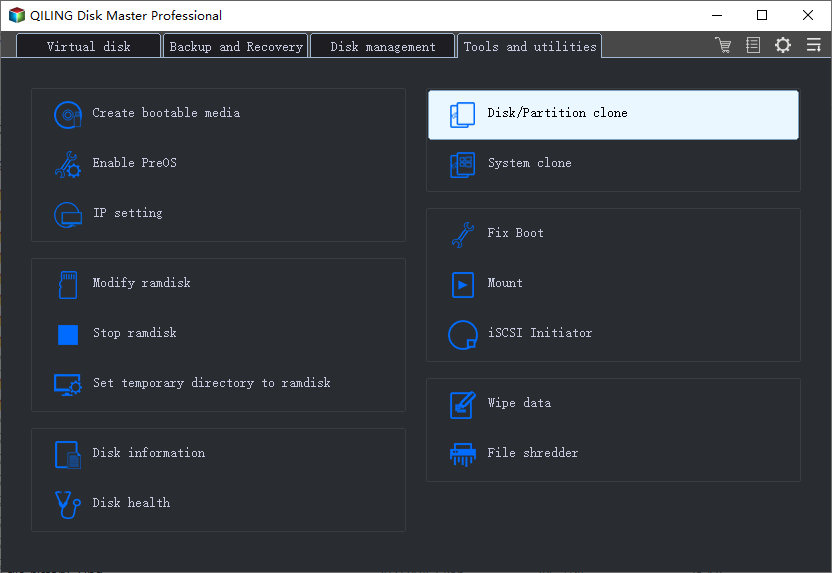
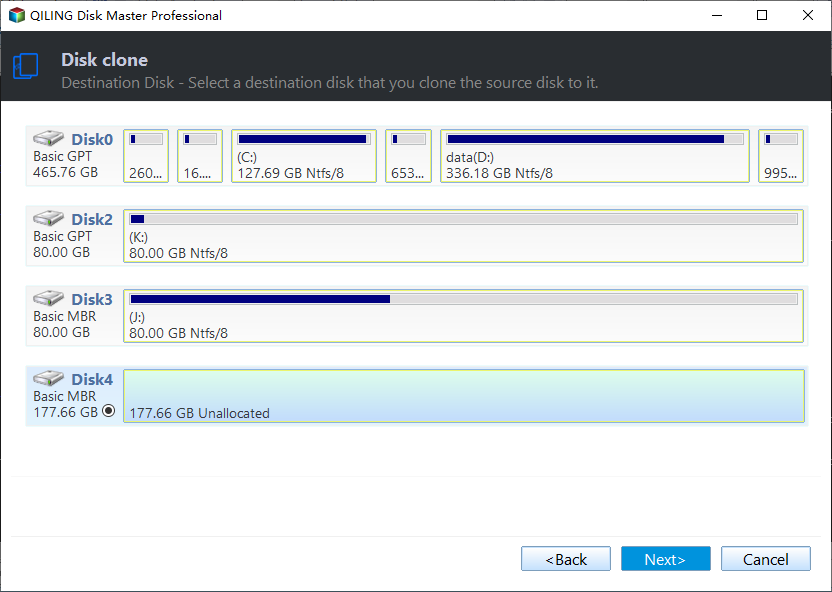
Step 4. Select the current Windows SSD as the source disk, then select the replacement SSD as the destination. Verify the disk capacity and model before continuing.
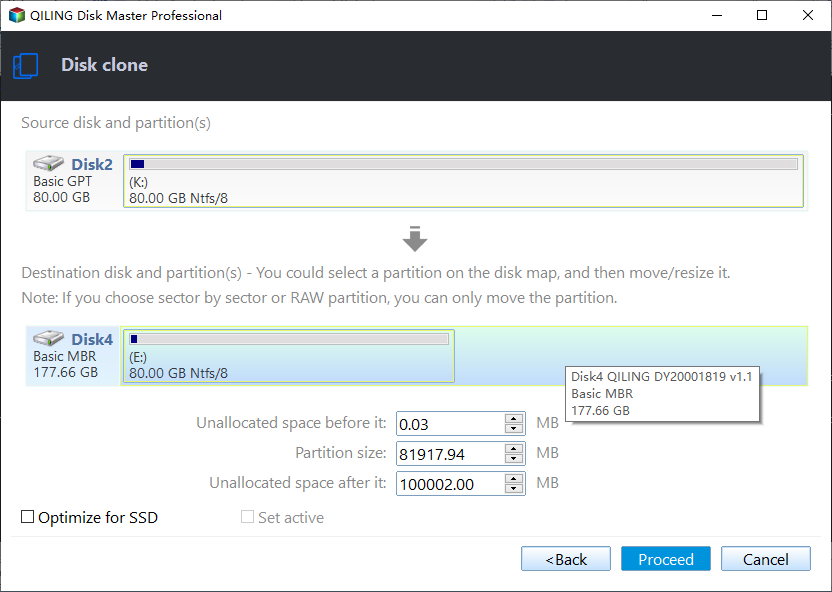
Step 5. Enable SSD Alignment, review the operation summary, and click Proceed. Keep the computer powered on until cloning finishes.
Resume protection
Step 6. Shut down, boot from the replacement SSD, and verify Windows and important files. Open Manage BitLocker again, select Resume protection, and restart once more.
Related Articles
- Windows 11 BitLocker Recovery Key
Find the recovery key before changing protected Windows hardware.
Products
Articles & Tutorials
- Data Recovery
- Data Backup
- File Recovery
- File Backup
- File synchronize
- System Backup and Restore
- Disk and Partition Clone
- Technical articles
- Disk Master Help
- Windows Deleted File and Disk Recovery Tutorials
- Windows File and Data Recovery Tutorials
- More Windows Tutorials for Install, Security, Files, and PC Tips
- Windows Boot, Repair, and Recovery Environment Tutorials
- Windows Backup Tutorials
- Windows Restore Tutorials
- Windows Clone and Migration Tutorials
- Windows Server Backup, Recovery, and Management Tutorials
- Windows Disk, Partition, and Storage Management Tutorials