Fix 'Your Organization Manages Updates on This PC' in Windows 11
The message “Your organization manages updates on this PC” means at least one update setting is controlled by a policy or management service. On a work or school device this is usually intentional. On a personal PC it can reflect an old work enrollment, a local policy, or a third-party privacy or update utility.
Determine who manages the PC
Step 1. Open Settings > Accounts > Access work or school. Check for a connected organization account. Do not disconnect an employer- or school-owned device without administrator approval; doing so can break access and compliance.
Step 2. In Settings > Windows Update, open any link to configured update policies and record the policy names. Run gpresult /r in Command Prompt to identify applied local or domain Group Policy, if you have permission.
Step 3. Separate the banner from a real update failure. If updates install normally, removing a legitimate management notice is unnecessary. If an update fails, record the error code before changing policy.
On an unmanaged personal PC
Step 1. On a personally owned, unmanaged PC, check Settings > Accounts > Access work or school. If an old work account is connected, confirm it is no longer needed before choosing Disconnect. Restart and check Windows Update again.
Step 2. If a local policy is the cause, open gpedit.msc where available and inspect Computer Configuration > Administrative Templates > Windows Components > Windows Update. Compare the policy with the gpresult /r output and note its current state. Return only a setting you recognize and previously changed to Not Configured.
Step 3. Restart or run gpupdate /force, then check both the banner and whether updates actually install. If the policy reappears, another management source is applying it; stop changing local values and contact that administrator.
If a third-party update blocker was installed, use its documented undo control or uninstall it. Do not delete the whole Windows Update registry branch or run a generic reset script.
Back up before policy changes and verify
Step 1. Confirm that this is your personally owned, unmanaged PC before changing update policy. If it belongs to work or school, ask the administrator instead. On your own PC, close open programs and connect an external drive with enough free space to hold a disk image. Keep the PC powered and the drive connected during the backup.
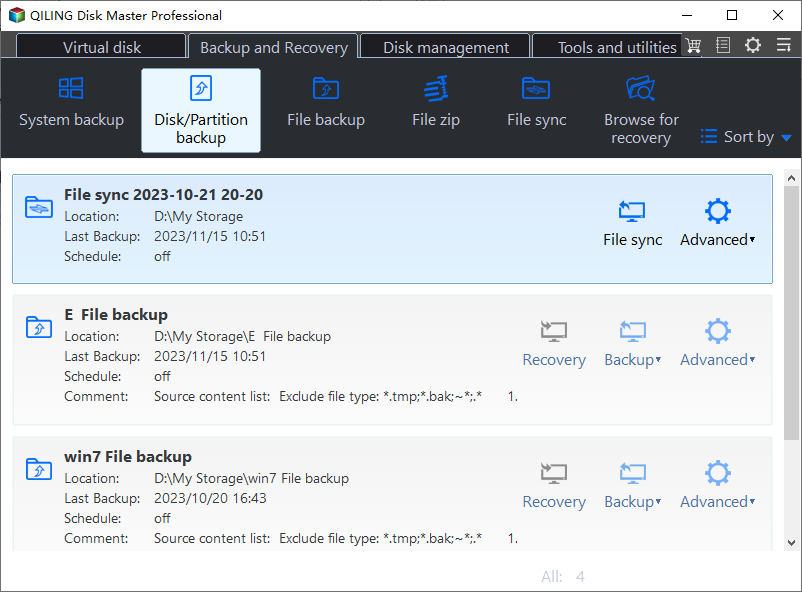
Step 2. Open Qiling Disk Master. On the Backup and Recovery tab, click Disk/Partition backup.
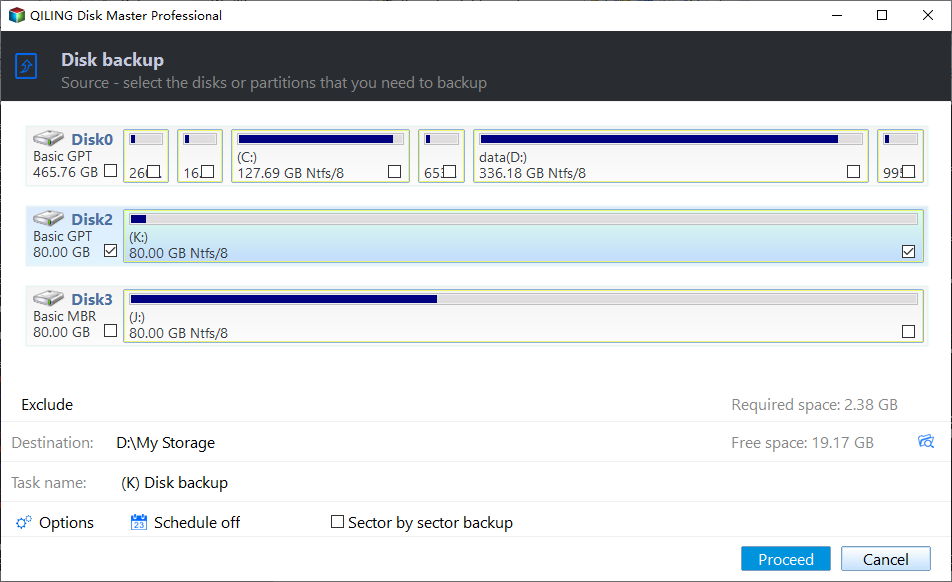
Step 3. Locate the disk containing Windows C:. Check the box beside that disk's number on the left to select the entire physical disk, including its boot and recovery partitions. Clear any unrelated disk selection. The screenshot illustrates the selection control but has a different disk checked; identify your own Windows disk by its C: partition rather than copying the example selection.
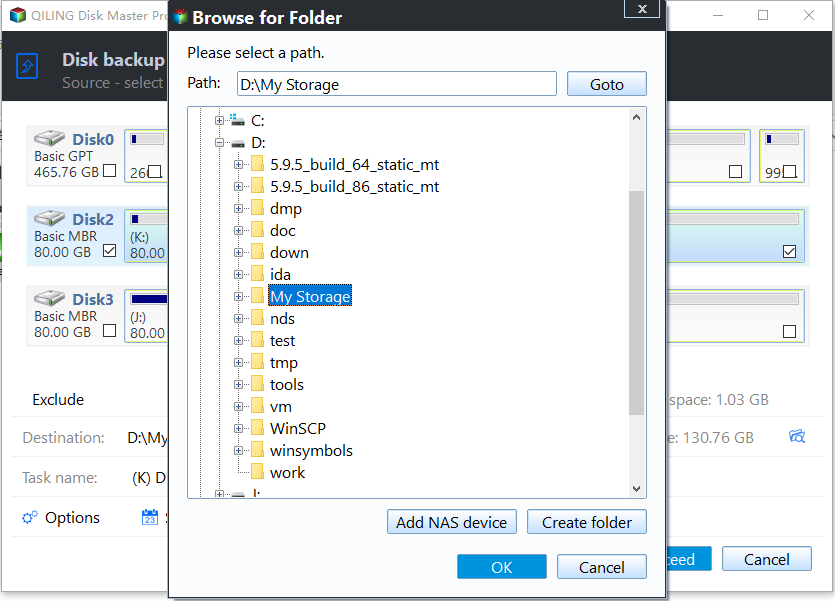
Step 4. Click the folder icon beside Destination. In Browse for Folder, choose a folder on the external drive and click OK. Confirm that the destination path points to that separate drive and that it has enough free space; do not place the image on the disk being backed up.
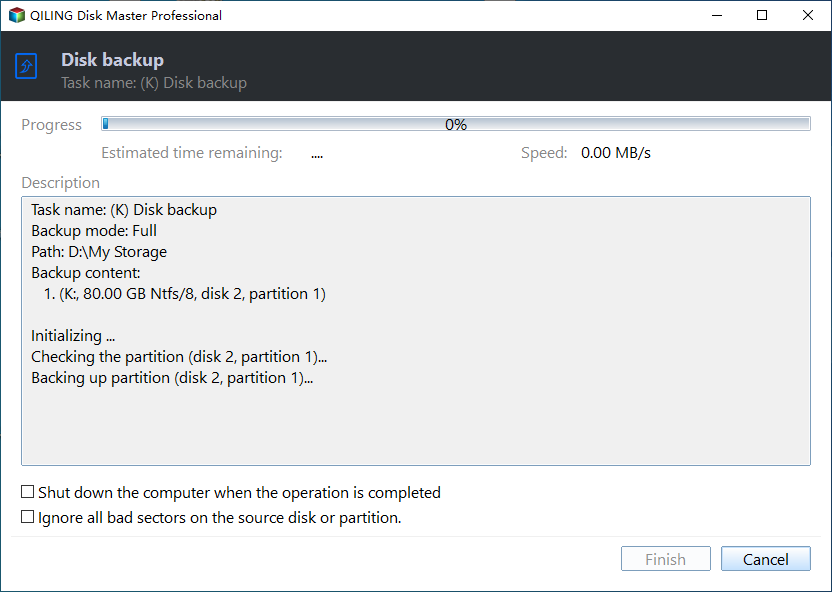
Step 5. Recheck the selected Windows disk and destination. Enter a recognizable task name if useful, then click Proceed. Wait for the backup to finish before disconnecting the external drive.
Step 6. On the Backup and Recovery tab, find the completed disk backup task and choose Advanced > Check Image. Wait for a successful check before changing any policy. Keep the external backup until you have confirmed that Windows Update and the PC still work as expected.
After the policy change, reopen Windows Update and use Check for updates. If the message returns after policy refresh, the setting is still being applied by a management source; ask that administrator rather than repeatedly removing it.
Related Articles
- Windows 11 23H2 Update
Check a Windows 11 update path after management settings are resolved. - Windows Update Registry Settings
Understand registry-based update controls before changing them.
Products
Articles & Tutorials
- Data Recovery
- Data Backup
- File Recovery
- File Backup
- File synchronize
- System Backup and Restore
- Disk and Partition Clone
- Technical articles
- Disk Master Help
- Windows Deleted File and Disk Recovery Tutorials
- Windows File and Data Recovery Tutorials
- More Windows Tutorials for Install, Security, Files, and PC Tips
- Windows Boot, Repair, and Recovery Environment Tutorials
- Windows Backup Tutorials
- Windows Restore Tutorials
- Windows Clone and Migration Tutorials
- Windows Server Backup, Recovery, and Management Tutorials
- Windows Disk, Partition, and Storage Management Tutorials