Healthy Primary Partition Has No Drive Letter in Windows
Why the partition has no drive letter
A healthy primary partition may not appear in File Explorer because it has no drive letter. This can happen after cloning, restoring an image, manually removing a letter, or connecting a disk from another computer.
When not to assign a letter
Do not assign letters to EFI, System Reserved, Recovery, or OEM partitions unless you are troubleshooting a specific boot or recovery issue. These partitions are hidden by design.
Method 1. Assign a drive letter in Disk Management
Step 1. Press Win + X and choose Disk Management.
Step 2. Find the healthy primary partition without a letter.
Step 3. Right-click it and choose Change Drive Letter and Paths.
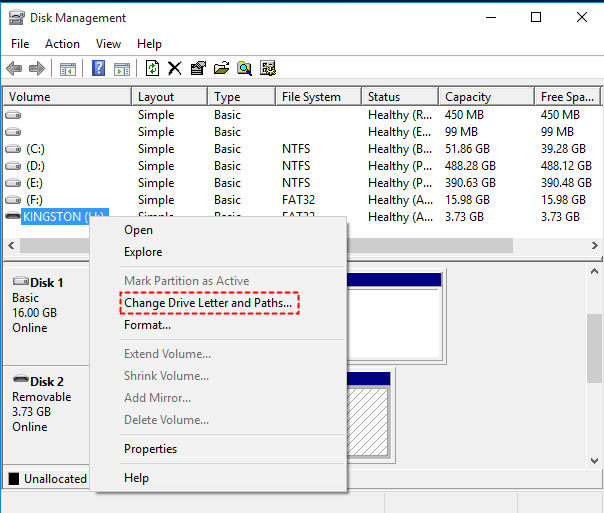
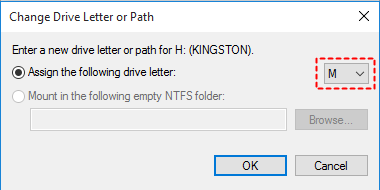
Step 4. Click Add, choose an unused letter, and click OK.
Method 2. Assign a drive letter with DiskPart
Step 1. Open Command Prompt as administrator.
Step 2. Run:
diskpart
list volume
select volume X
assign letter=R
exit
Step 3. Open File Explorer and check whether the partition appears.
Method 3. Recover files if the partition cannot open
If Windows asks you to format the partition after assigning a letter, do not format it before recovering files.
 Deep Data Recovery
Deep Data Recovery can scan a partition that appears healthy but cannot be opened after a drive letter is assigned.
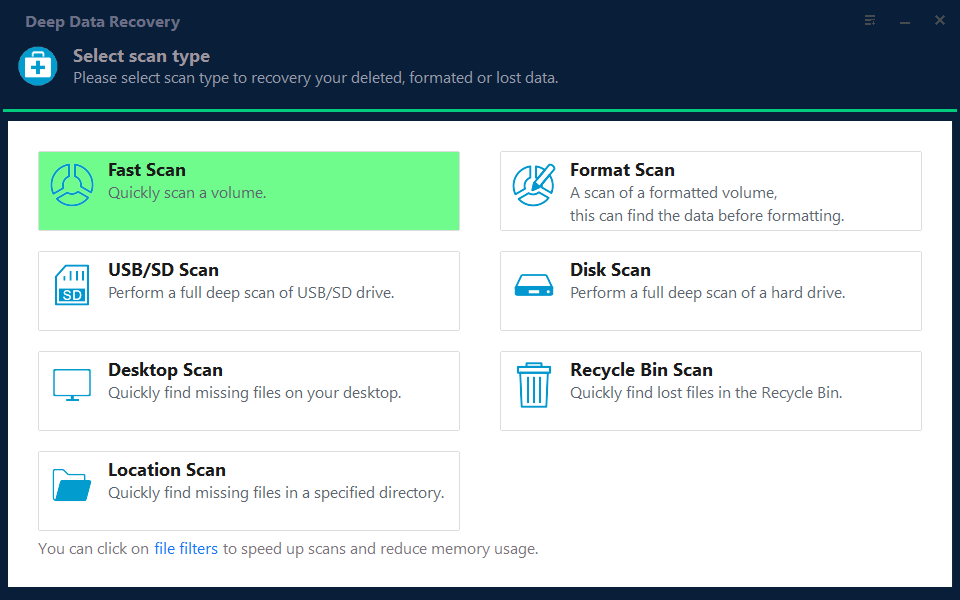
Step 1. Stop using the partition immediately. If Windows asks you to format it, close the message and do not copy new files to this disk. Open Deep Data Recovery and choose a recovery mode for lost files, such as Fast Scan, Format Scan, or another mode that matches the partition problem.
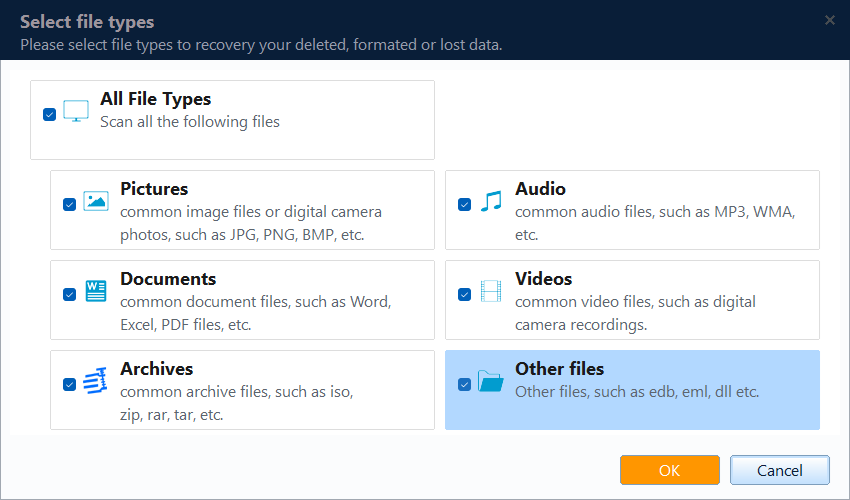
Step 2. Click File Filter to filter scan results by file type, folder, or date. Keep all file types selected if you are not sure what was stored on the partition.
Step 3. Select the partition that cannot be opened and click Scan. If the partition does not show with a normal drive letter, choose the physical disk or the lost partition entry with the matching capacity.
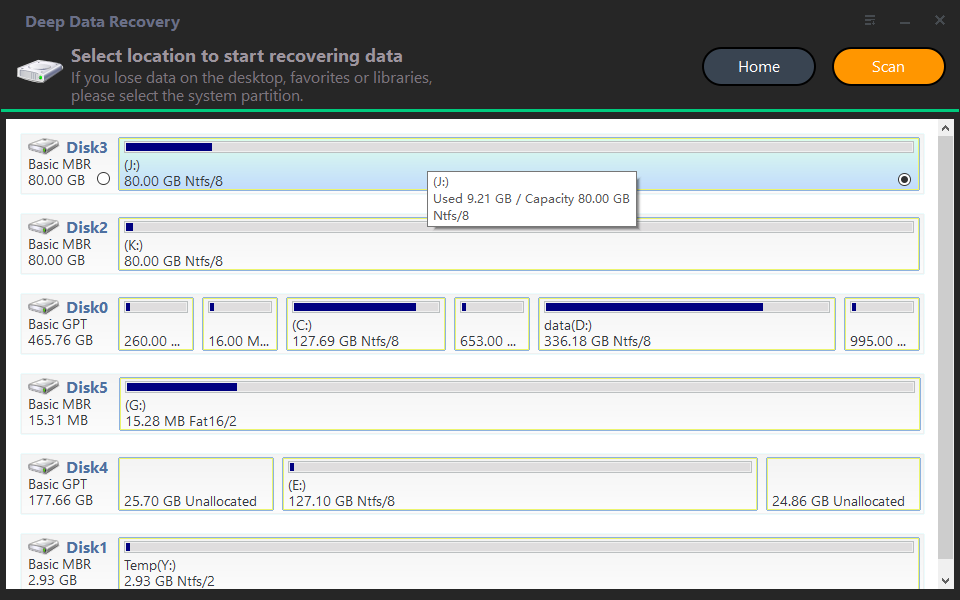
Step 4. Wait while the program scans the selected partition. You may browse found files during the scan, but if important folders are missing, allow the scan to complete first.
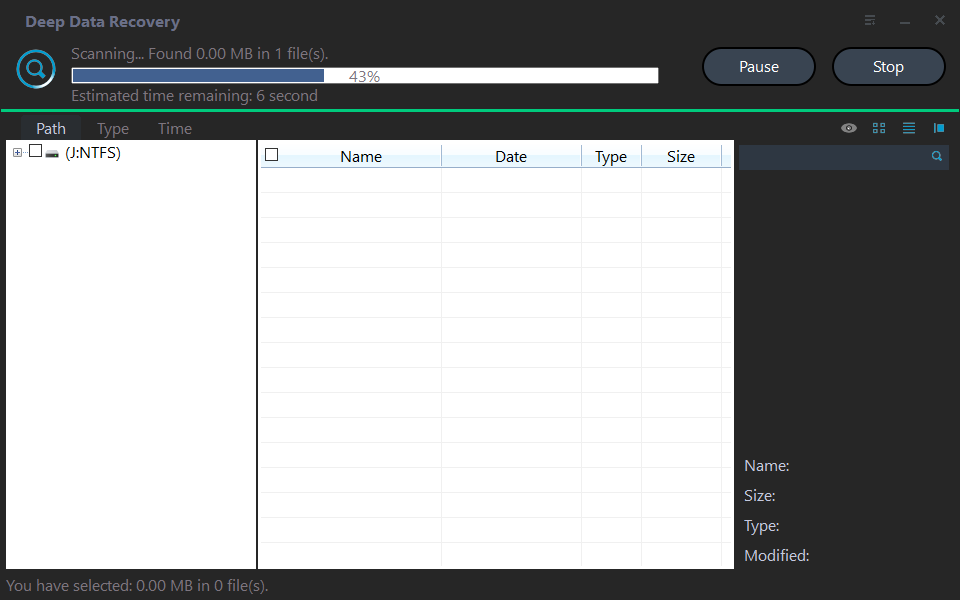
Step 5. After the scan, check files by Path or Type. If the first scan does not find the files you need, use Deep Scan to search the partition more thoroughly.
Step 6. Preview recoverable files when possible, select the files or folders you want to restore, and click Recover.
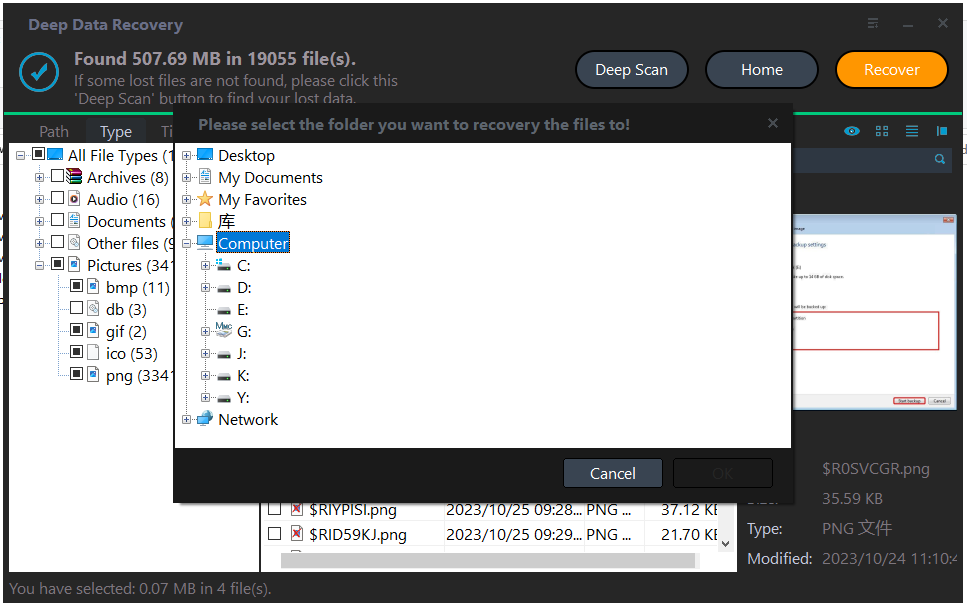
Step 7. Choose another healthy disk as the save location. Do not save recovered files back to the same partition before it is repaired. After confirming the recovered files can open, return to Disk Management and then repair, format, or recreate the original partition if needed.
Conclusion
If a healthy primary partition has no drive letter, assign one only when it is a normal data partition. Leave system, recovery, and OEM partitions hidden unless a repair guide specifically requires otherwise.
Related Articles
-
How to Change Drive Letter in Windows 11/10/8/7 with Qiling Disk Master
Change or assign a drive letter when a partition is hidden from File Explorer. -
3 Ways to Solve "Healthy Primary Partition RAW" in Windows 7, 8, 10, 11
Recover files and repair a partition that is healthy but shown as RAW. -
Recover Data from RAW Drive Free
Save files from inaccessible partitions before formatting or rebuilding file systems.
Products
Articles & Tutorials
- Data Recovery
- Data Backup
- File Recovery
- File Backup
- File synchronize
- System Backup and Restore
- Disk and Partition Clone
- Technical articles
- Disk Master Help
- Windows Deleted File and Disk Recovery Tutorials
- Windows File and Data Recovery Tutorials
- More Windows Tutorials for Install, Security, Files, and PC Tips
- Windows Boot, Repair, and Recovery Environment Tutorials
- Windows Backup Tutorials
- Windows Restore Tutorials
- Windows Clone and Migration Tutorials
- Windows Server Backup, Recovery, and Management Tutorials
- Windows Disk, Partition, and Storage Management Tutorials