How to Copy Dell Recovery Partition in Windows 11/10/8/7
- What is Dell recovery partition
- Case: transfer Dell recovery partition to new hard drive
- How to copy Dell recovery partition safely
- Method 1. Create recovery drive with Windows built-in feature
- Method 2. Clone Dell recovery partition to another drive directly
- Method 3. Create bootable USB drive or CD/DVD for system restore
- Conclusion
What is Dell recovery partition
Dell recovery partition is a hidden partition shipped with the computer, which contains required files and info to restore Dell factory settings. It’s very useful when the computer goes down and also frees you up from the physical installation CD or DVD.
Normally you can access it through a pre-installed Windows application or by pressing a specific key as the computer boots up. But what if you accidentallly delete it or you want to replace the hard drive? Can you preserve the feature by copying the recovery partition?

Case: transfer Dell recovery partition to new hard drive
I'd like to replace the original hard drive and transfer the Dell recovery partition to the new hard drive. Or, alternatively, make the new hard drive to have the Dell's factory shipped state. Could not find the clear answer yet.
A recovery partition makes it convenient to restore factory settings, but since it's shipped with Dell computer, you cannot use it after hard drive replacement. Therefore, many users would like to copy Dell recovery partition to another drive, or, clone the entire Dell hard drive with recovery partition.
Also, it's not impossible that you delete the partiton accidentally, or the Dell computer suffers from a hard drive failure so that it can't even boot. To avoid such problems, copying recovery parittion to USB drive could be a feasible solution. Thus you can load it from the removable device when accident occurs.
How to copy Dell recovery partition safely
There are several methods to copy Dell recovery partition in Windows 11/10/8/7. Normally you can use the Windows built-in tool to create a recovery USB - it enables you to access recovery options and reset/resinstall Windows. But if you want to copy Dell recovery partition to another hard drive, it's highly recommended to use a disk cloning tool, which is much easier and safer than Windows backup & restore.
- Method 1. Create recovery drive with Windows built-in feature
- Method 2. Clone Dell recovery partition to another drive directly
- Method 3. Create bootable USB drive or CD/DVD for system restore
Method 1. Create recovery drive with Windows built-in feature
Recovery Drive is a built-in feature comes with Windows 11/10/8.1/7, which enables you to copy the recovery partition to a USB drive. To make use of it, you can try following steps. Note the steps in the lastest Windows 11 may be a little difference.
Step 1. Search for Create a recovery drive in the search box beside the Start button, and open it from the search result.
Step 2. In the popping out window, check the option Back up system files to the recovery drive, and then hit Next.

Step 3. Insert a USB drive into your PC, select it and click Next.

Step 4. Click Create to start the process of copying the recovery partition to the connected USB drive.

Notes:
- The USB used as the recovery drive should be at least 16 gigabytes.
- Above steps are based on Windows 10, you can read this guide to learn more about specific operations in different OS.
- Recovery drive isn’t a system image. It doesn’t contain your personal files, settings, or programs.
Method 2. Clone Dell recovery partition to another drive directly
If the first method fails on your computer, or you want a more flexible way to copy Dell recovery partition to USB drive or another hard disk, a powerful disk cloning tool could be an easier solution.
*Clone features in free trial can only be demonstrated. Please upgrade for full functionality.
Now, let’s see how to clone Dell recovery partition with it:
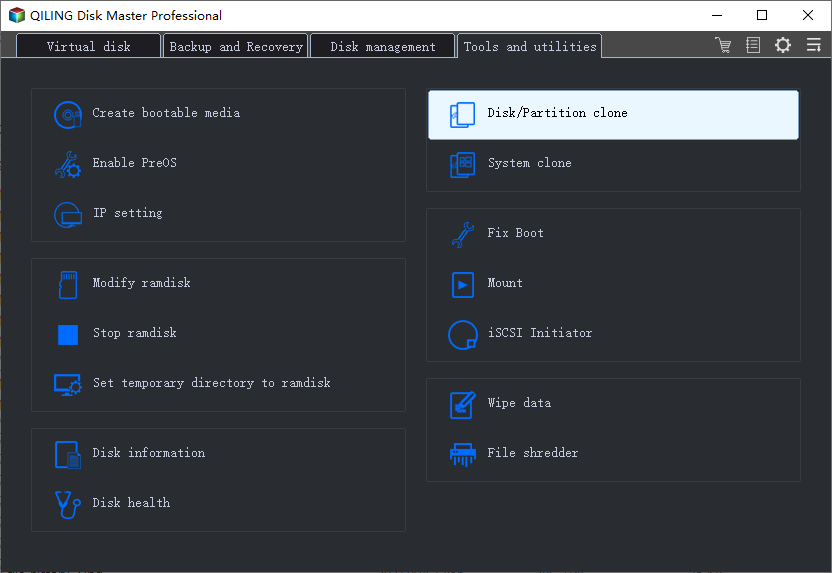
Step 1. Download, install and launch Qiling Disk Master. The data on the destination disk will be overwritten after clone, so it's recommended to make a backup first. Then, select Disk Clone under Clone tab.
In Pro edition, you can also perform a System Clone to migrate only OS to another disk without reinstalling.
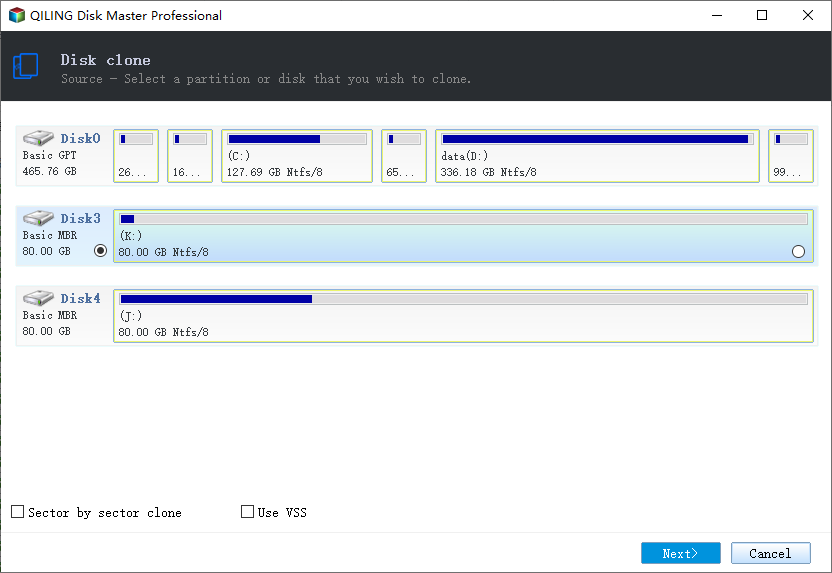
Step 2. Select the disk containing Dell recovery partition as the source and hit Next.
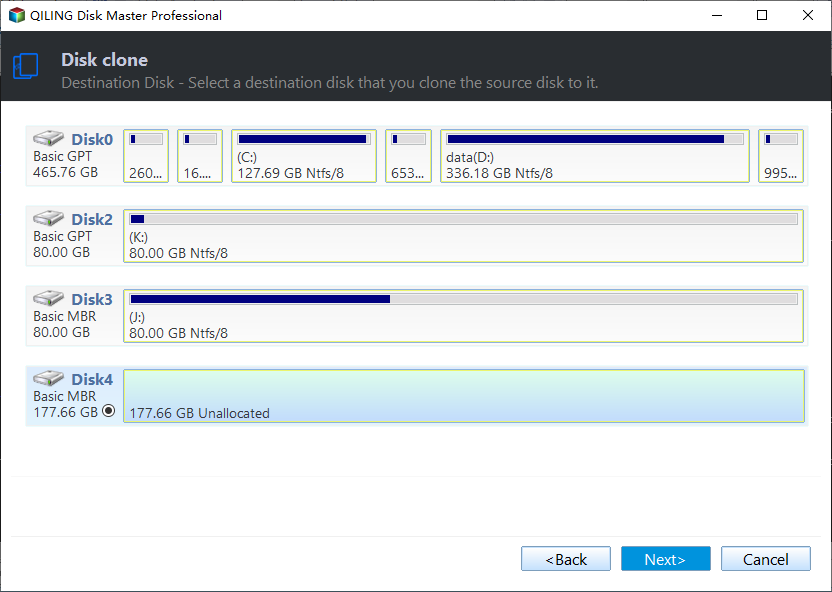
Step 3. Select a destination disk to receive all the data, then click Next to continue.
Step 4. In Operation Summary screen, tick Sector By Sector Clone option to make sure the recovery partition function normally on the target disk. You can also enable SSD Alignment or Edit Partition as you like. Then click Proceed button to begin the process.
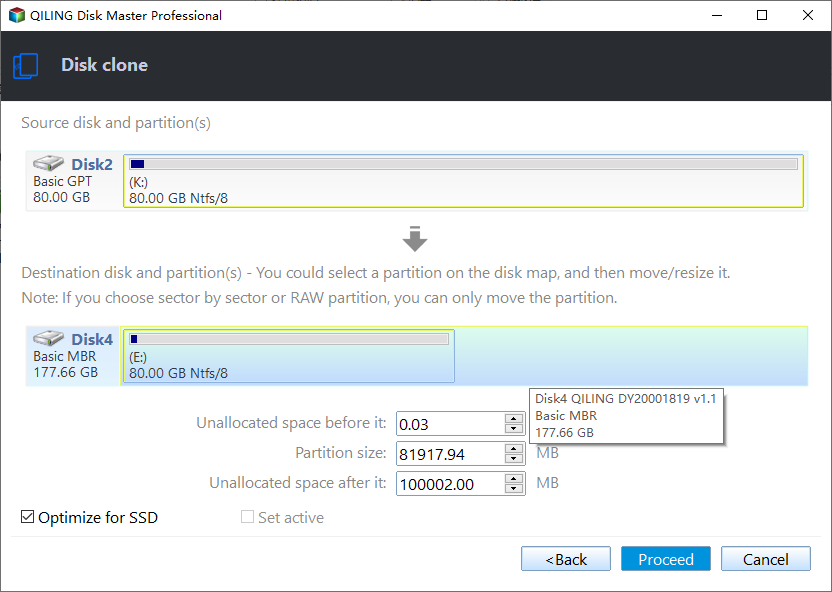
Step 5. When the operation is completed, click Finish.
Notes:
- Edit Partition: specify partition size, drive letter, partition type, etc. to make the full use of the disk capacity.
- SSD Alignment: check this option to improve SSD’s performance if you clone partition to an SSD.
- Sector By Sector Clone: copy all sectors to target disk, including blank or logically bad sectors. If you leave this option unchecked, Qiling will copy only used sectors, which may cause Dell recovery partition not to function.
- Qiling Disk Master supports cloning data disks and system disks of all brands and partition styles, such as cloning MBR to MBR/MBR to GPT or GPT to GPT/GPT to MBR directly. But you still need to ensure the partition style of the target disk is compatible with your boot mode (MBR for legacy BIOS and GPT for UEFI).
Method 3. Create bootable USB drive or CD/DVD for system restore
As an alternative to Windows Create a recovery drive, you can also use Qiling Disk Master to create bootable media. Thus even if your system breaks down suddenly, you can use the media to restore it to an earlier system state.
Note: To use the created media for system restore, you need to backup the system in advance.
Step 1. Click Tools in Home page. Choose Create Bootable Media in the drop-down list.

Step 2. Now, choose a storage device as the bootable media. This media should be correctly connected to your computer otherwise you can’t select it. Then click Next to continue.

Step 3. When the process ends, click Finish to quit the wizard.
Notes:
- To choose Burn to CD/DVD as the storage media, you must have a CD burning program at first, and insert the CD/DVD into the CD-ROM, otherwise this option is unavailable.
- Your USB used as the bootable media will be formatted, so please note to backup its important files at first.
Conclusion
Cloning Dell recovery partition is not the only thing you can do with Qiling Disk Master to prevent system failures. As mentioned earlier, the system backup feature also enables you to one-key back up the system partition along with boot partition, so as to bring the computer back to earlier date without erasing your personal data.
In addition to these, you can also clone disk, partition or volume on a server operating system using Server edition.
Related Articles
- How to Create A Dell Recovery USB in Windows 10 and Restore System from It
- How to Transfer Recovery Partition to New Hard Drive Easily
- Fixed: Unable to Create Recovery Drive in Windows 10 [3 Ways]
- Safely Clone Hidden Recovery Partition to SSD in 5 Steps