Failed to Install Qiling Disk Master
This article applies to: all versions of Qiling Disk Master.
After installation, see email notification setup if backup task reports need to be sent automatically.
Overview
Introduction:
When you install or upgrade Qiling Disk Master after removing an older version, the installation may fail if previous program files, services, or registry entries were not removed completely. You may see one of the following messages:
Message 1:
You repeatedly receive the message: "Qiling Disk Master has been installed in your computer. Do you want to uninstall it?"
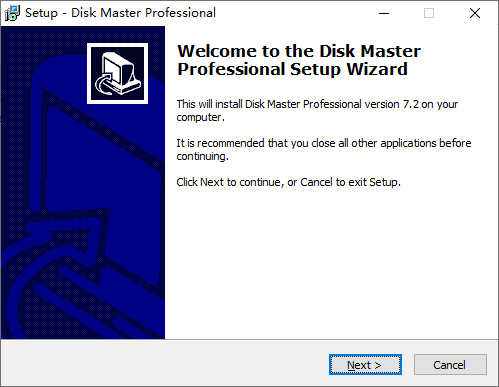
Message 2: When installing the new version, an error appears while renaming a file in the destination directory: "Move File Failed: code 183: Cannot create a file when that file already exists".
Message 3: When installing the new version, an error appears while replacing an existing file: "Delete File Failed".
code 5: Access is denied.
Message 4: When uninstalling the previous version, the file "C:\Program Files\Qiling\Disk Master\unins000.dat" does not exist, and the message "Cannot uninstall" appears.
These messages usually mean that the previous version of Qiling Disk Master was not completely uninstalled before the new installation started.
Solutions
Solutions:
Method 1: Press Win+R to open the Run box, type "CMD" to open Command Prompt, go to the installation directory (cd C:\Program Files\Qiling\Disk Master), and run "DiskMasterUI.exe uninstall". After the uninstall finishes, reinstall Qiling Disk Master.
Method 2: Please check the following items:
1. Manually delete the Qiling Disk Master folder from the installation directory, usually C:\Program Files\Qiling. Before deleting it, close DmAgent.exe in Windows Task Manager. If needed, stop the "Disk Master Agent" service in the Services section of Task Manager. You can open Task Manager by pressing Ctrl+Alt+Delete or by right-clicking the taskbar.
2. To open the Registry Editor, press Win+R, type "regedit" in the Open box, and press Enter.
(1)Locate the following entries and delete them:
Note: Copy and paste each path into Registry Editor to locate it accurately.
HKEY_LOCAL_MACHINE\SOFTWARE\Microsoft\Windows\CurrentVersion\Uninstall\{8213CE5C-49D8-45CC-98C1-7355D18995C5}_is1
HKEY_LOCAL_MACHINE\SYSTEM\CurrentControlSet\services\vDisk
HKEY_LOCAL_MACHINE\SYSTEM\CurrentControlSet\services\diskbckp
To delete the "diskmaster" value, go to "HKEY_LOCAL_MACHINE\SOFTWARE\Microsoft\Windows\CurrentVersion\Explorer\AutoRun\diskmaster" in Registry Editor, and then press Delete to remove the value.
Note: Copy and paste the path to locate the entry accurately.
HKEY_LOCAL_MACHINE\SOFTWARE\Microsoft\Windows\CurrentVersion\RunOnce
If the installation still fails or you have further questions, please contact our Qiling Support Team for assistance.
Related Articles
- Free Clonezilla Alternative for Incremental Backup in Windows 11/10
Clonezilla does not support incremental backup or differential backup for now, so you need to find a Cloezilla alternative for incremental backup. - Fix Clonezilla Fails with MBR and GPT Mismatch with 3 Ways
Learn how to Fix Clonezilla Fails with MBR and GPT Mismatch with 3 Ways with clear steps, key checks, and practical tips. - Solved: Cobian Backup "The Engine Is Not Found" Error
If you're experiencing the 'the engine is not found' error in Cobian Backup, there are solutions available. To resolve this issue, you can try reinstalling Cobian Backup, checking for any conflicts with other backup software. - How to Create HDD Image in Windows 11, 10, 7 for Disk Backup
This article introduces what an HDD image is, what it does, and how to create an HDD image that can be used for backup or migration in Windows 11, 10, 7. - Easiest Way to Recover Data after Initializing Disk
This guide explains Easiest Way to Recover Data after Initializing Disk with clear steps, key checks, and practical tips. - How to Recover Deleted Files from HP Laptop in Simple Ways?
Learn how to Recover Deleted Files from HP Laptop in Simple Ways with clear steps, key checks, and practical tips.
Products
Articles & Tutorials
- Data Recovery
- Data Backup
- File Recovery
- File Backup
- File synchronize
- System Backup and Restore
- Disk and Partition Clone
- Technical articles
- Disk Master Help
- Windows Deleted File and Disk Recovery Tutorials
- Windows File and Data Recovery Tutorials
- More Windows Tutorials for Install, Security, Files, and PC Tips
- Windows Boot, Repair, and Recovery Environment Tutorials
- Windows Backup Tutorials
- Windows Restore Tutorials
- Windows Clone and Migration Tutorials
- Windows Server Backup, Recovery, and Management Tutorials
- Windows Disk, Partition, and Storage Management Tutorials