Migrate User Profile to New Computer with Best Software
What is a user profile?
A user profile contains personal data, system files, and settings that are specific to a user account on a computer, and can only be accessed on that same computer.
In some situations, users may want to migrate their user profile to a new device or location, or to recover a previous version of their profile in case of data loss or corruption. This can be done by backing up the user profile and then restoring it on the new device or location, or by using a third-party tool to migrate the profile.
#1: Configure the same user profile settings in the new computer.
#2: Transfer user profiles to new user accounts.
Migrating user profiles in Windows systems involves transferring a user's settings, files, and other personalized data from one machine to another. This process can be performed manually or using specialized software.
How to migrate user profile to new computer
To migrate user profile to new computer, a user profile backup or migration tool is indispensable. Here I'll introduce you to 3 feasible options and step by step guide to migrate user profile in Windows 10.
Way 1: Copy user profile to new computer with Advanced System Properties
1. Right-click on My Computer and select Properties, then select Advanced system settings.
2. Click the Settings under User Profiles.
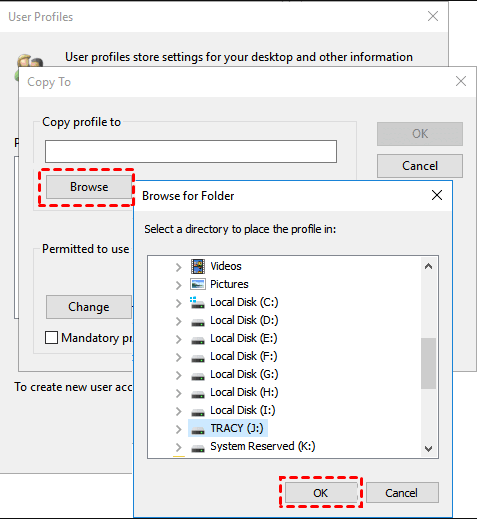
3. In a new prompt window, all user profiles will be listed. You can select the user profile you want to move and then copy to another location by clicking "Copy To".
You may encounter the issue of Windows 7 user profile copy to gray out, which can be tricky to resolve. In this case, creating a new account and changing the default profile may be necessary to resolve the issue.
Way 2: Migrate user profile to another computer with Backup and Restore
You can also choose to back up your system with user profile and then restore it to a new computer, which will result in a computer that is identical to the original but with larger capacity and higher performance.
1. To access the Backup and Restore (Windows 7) feature, go to the Control Panel and select Backup and Restore (Windows 7). From there, you have two options:
#1 Through backup settings: To access older backup settings, type "backup settings" in the search box, select it, and then click on "Looking for an older backup" and choose "Go to Backup and Restore (Windows 7)".
#2: Through control panel: To access the Control Panel, type "control panel" in the search box and select it. Then, scroll down and select "Backup and Restore (Windows 7)" under the "System and Security" section.
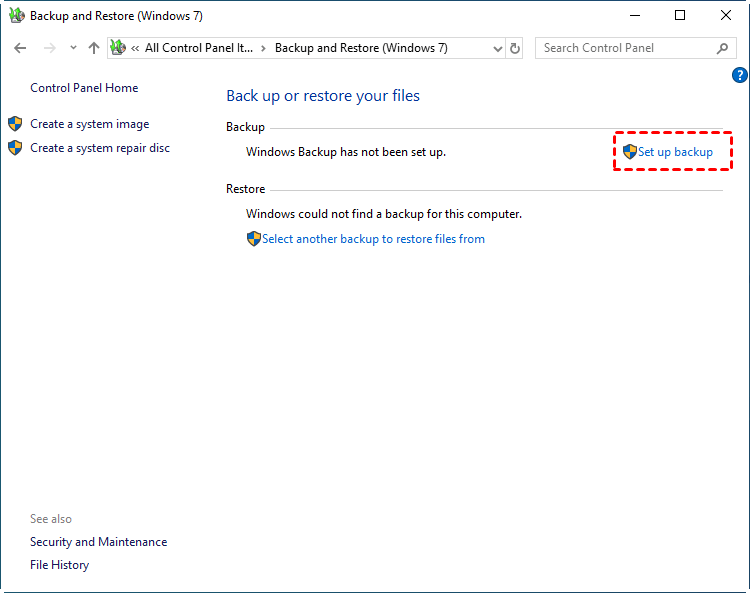
2. In the Backup and Restore window, click "Set up backup" on the right, select a destination location to store the backup image, and choose "Let Windows Choose" to include all user profiles. Confirm the backup settings and click "Save changes and run backup".
3. After creating a system image with all user profiles, you can restore your files to a new computer by opening Backup and Restore and clicking Restore my files, which will migrate only your user profiles.

4. To recover user profiles, click Search, Browse for files or Browse for folders to choose the user profiles for recovery, then click Next.

5. Choose a new location to restore your files and click the "Restore" button.
In the recovery environment, you can choose to restore a system image to a new hard drive, which is an effortless way to migrate the system to a new computer with the same hardware. However, this option is not available if the new drive is smaller than the original one.
Way 3: Migrate profile to new computer with Qiling Disk Master
If you want to migrate user files or system to a new computer with different hardware, the Windows built-in backup software may not work. However, you can consider using professional backup software, such as Qiling Disk Master Professional, which offers two ways to help you achieve this.
- #1: Directly migrate profile to new computer. You can select to back up only user profiles using the file backup feature, which allows you to restore files to a new computer.
- #2: Backup system and user profiles to new computer. Unlike the previous method, this approach creates a complete backup of the operating system, user profiles, system files, and installed programs, allowing you to seamlessly transfer to a new computer and use it just as you would the old one.
To create a backup, first make a copy of your important files and data, then schedule regular backups, and set up incremental or differential backup. You can also automate backup cleanup and create a bootable media or recovery environment in case of computer failure.
Please download it and migrate user profile with one of the above methods. Here I'll take the previous way as an example.
1. Open Qiling Disk Master and create a file backup with it.
To backup user profile in Windows 10, click on the main page under the "Backup" tab, select "File Backup", then choose "Files" or "Folders" to include all related files, select a destination path, confirm the files to backup, and finally click "Proceed".

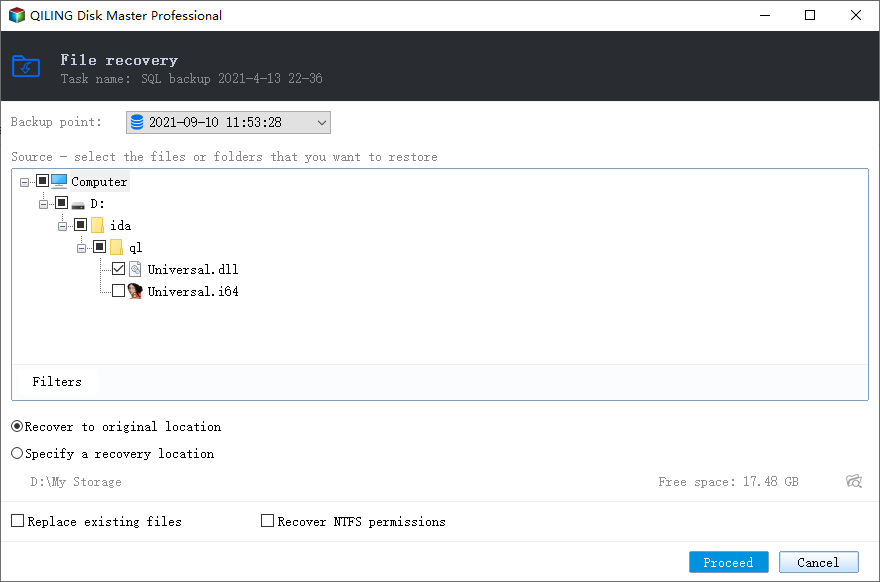
2. Install the software on the new computer, open it, and navigate to the "Backup and recovery" tab. From there, click "Browse for Recovery" to locate and select the backup image.
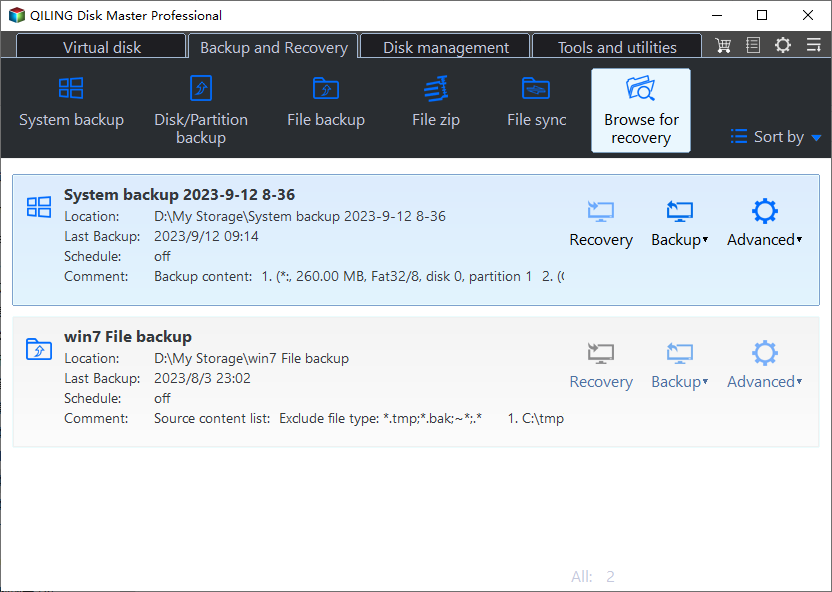
3. Select the backup image you want to restore files from and the files or folders in it, then click Next.
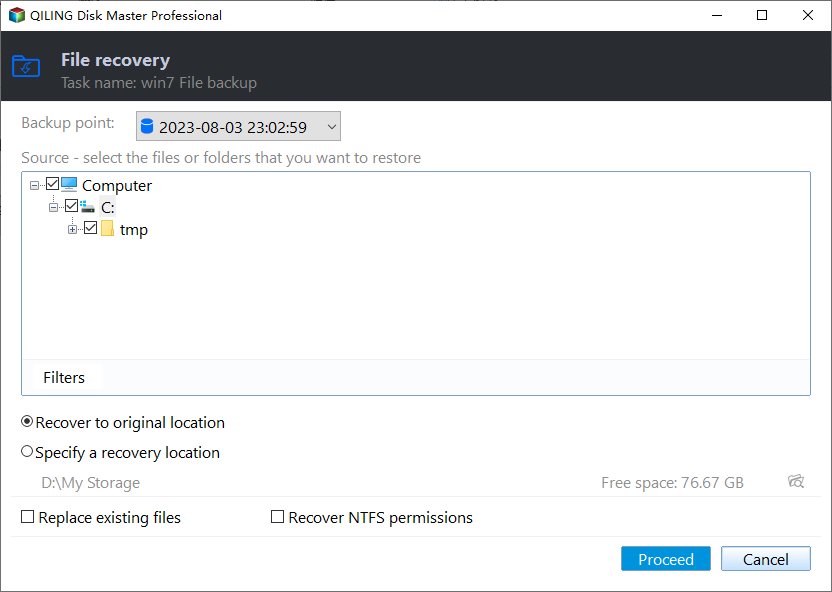
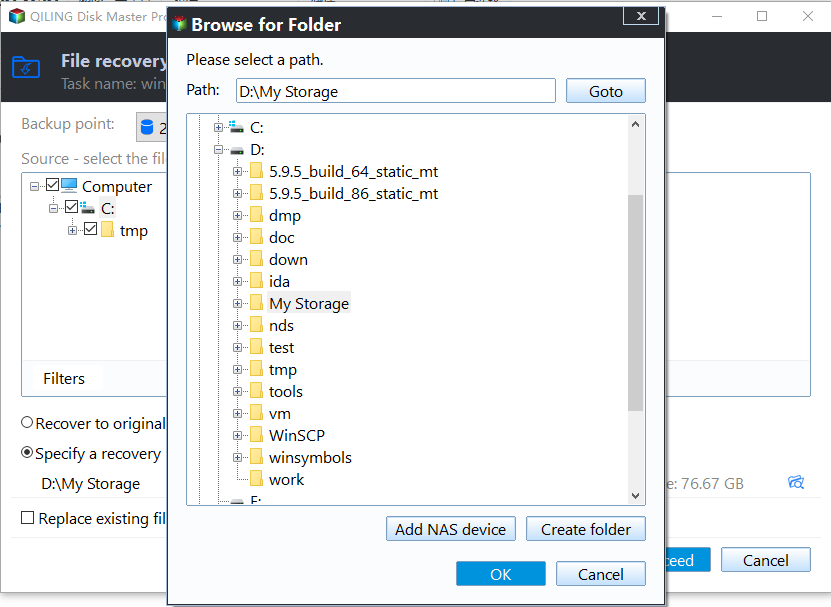
4. To change the location of the user profile, select a new location and click "Proceed" to execute this task.
Tip on selective file restore:
If you need to restore specific files, you can use the "Explore image" feature, which is useful when you don't have a file backup. This feature mounts the backup as a virtual drive, allowing you to copy files from it.
Summary
You can easily migrate a user profile to a new computer using the methods mentioned. Alternatively, if you want to migrate the entire system with user profiles, you can backup the system, restore it on the new computer, and use it as is without needing to configure anything extra.
Installing this software on your computer and setting up continuous backups with its schedule options is recommended. This ensures you always have enough space to store new backups. To prevent potential issues, you can also preset backup and cleanup methods, guaranteeing a smooth backup process.
Related Articles
- Best User Profile Migration Tool for Windows 7/8/10
How to migrate user profile to new computer with Windows user profile migration tool in Windows 10, 8, 7? You will find 2 ways to perform profile migration wizard in this article: User State Migration Tool (USMT) and Qiling Disk Master. - Easily Move User Profile to Another Drive in Windows 10, 11
Wanna move user profile to another drive in Windows 10/11? You can get two efficient solutions from this page. - Best USMT Alternative to Migrate User Profiles Safely
If you are looking for an easy User State Migration Tool (USMT) alternative to migrate user profile, keep reading this article and I'll introduce you to such software. - 2 Tips | How to Backup Firefox History on Windows 11/10/8/7
Do you know how to backup Firefox history? If you do not know, you are on the right page. This article will share 2 ways to help you back up history in Firefox. After reading this article, you can choose any way to back up Firefox history on your Windows computer. - Create Scheduled Backups Using Wbadmin Enable Backup
Learn how to configure scheduled backups with Wbadmin enable backup from command line. Workarounds to run daily, weekly or even less frequent scheduled backup to shared folder over NAS. - Proceed for All Drives with Wbadmin or Effective Tool
To protect data and system on all drives, you can run Wbadmin to proceed with backing up all drives. Alternatively, there's a simpler way to achieve this.