How to Clone Hard Drive Using Command Prompt [Windows OS]
Why do you need to clone hard drive?
Cloning a hard drive involves copying all data from one drive to another, allowing you to use the cloned drive as a replacement for the original. This process provides several benefits, including the ability to use the cloned drive in the same way as the original.
❤ To get a duplicate of important data. A cloned hard drive is a backup of your original data, allowing you to easily and quickly retrieve your information in case your old drive crashes or fails.
❤ To speed up hard drive speed. Upgrading your HDD to an SSD or cloning a smaller hard drive to a larger one can significantly optimize your disk speed, allowing for faster data access and improved overall system performance.
How to clone hard drive using Command Prompt (for files)
When it comes to cloning a hard drive, you might think of using Windows' built-in tools, such as Disk Management or Command Prompt. While Disk Management can mirror the C drive, you might be looking for a way to clone a hard drive using CMD. Fortunately, cloning a hard drive using Command Prompt is a straightforward process that can be broken down into manageable steps.
Attention: You can't copy a drive using Command Prompt, but you can clone the operating system to a new drive using specialized software like Qiling Disk Master. These programs can create a bit-for-bit copy of the entire drive, including the operating system, settings, and all data. This is different from copying individual files, which is what Command Prompt can do.
Part 1. Using the copy command
Here are the steps to copy files on the target hard drive using the copy command from the command line:
Step 1. Type "cmd" on the search bar. Right-click on "cmd" and select "Run as administrator".
Step 2. Input the commands:
copy c:\example.txt
The command `copy C:\example.txt .` will copy the file "example.txt" from the C drive to the current directory.
copy c:\example.txt d:
The command "copy C:\example.txt D:\example.txt" will copy the file "example".
When you give the following command:
copy *.txt c:
The command will copy all text files in the current directory to the C drive.
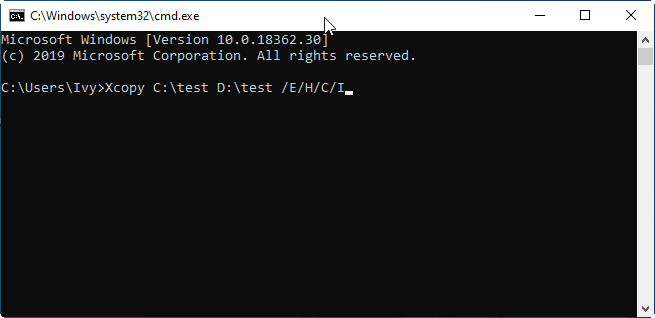
Part 2. Using the Xcopy command
Xcopy is a built-You can use the Xcopy command on the Windows system to clone a hard drive. To do this, open Command Prompt and type the following command: `xcopy /s /c /i /h /k source destination`. Replace "source" with the drive letter of the hard drive you want to clone, and "destination" with the drive letter of the destination hard drive. The `/s` option copies all files and directories, including subdirectories, the `/c` option copies files with the current date, the `/i` option ignores read-only files, the `/h` option copies hidden files, and the `/k` option copies the read-only attribute of the files. For example, if you want to clone the C: drive to the D: drive, you would type `xcopy /s /c /i /h /k c: d:`.
Step 1. Open CMD as in part 1.
Step 2. To copy all files and subdirectories from partition C to partition F, type "xcopy c:\ f:\ /s /e /h /i /c /y" and press Enter. This command includes empty subdirectories, system and hidden files, and overwrites any existing files without prompting. Replace the drive letters (C and F) with your actual partitions.
The meaning of the above parameters:
/s: Xcopy will copy directories and subdirectories except for empty ones, and if "/s" is omitted, it will work within a single directory.
/e: copy all subdirectories, including the empty one.
/h: copy the hidden and system file.
/i: force xcopy to assume that destination is a directory
/c: force xcopy to continue even if it encounters an error.
/y: To stop the xcopy command from prompting you about overwriting files from sources that already exist in the destination location, you can use the `/y` option. This tells xcopy to assume a yes on overwrite prompts, so it will simply overwrite any existing files without asking.
Please pay attention to:
While Command Prompt offers two methods to copy drives using CMD, it's a file/folder level copy, not a partition/drive level copy, and the complex command lines can be intimidating for those who are not tech-savvy.
Using the command line to clone a hard drive can be tricky, as even a small mistake, such as typing the wrong letters, can result in failure or data damage. Furthermore, if the source and destination drives have different file systems, such as FAT32 and NTFS, you will need to convert one to match the other before attempting the copy.
Advanced way: Use GUI hard drive cloning software
If you're not getting the expected result from cloning a hard drive using the Command Prompt, it's time to switch to a GUI hard drive cloning tool like Qiling Disk Master Professional. This reputable and versatile disk manager is designed for Windows 11/10/8/7/XP/Vista and can complete hard drive cloning more effectively, offering a better alternative to the Command Prompt.
◉ Qiling Disk Master can clone a single partition, as well as an entire hard drive, including all its content, to another drive.
◉ It allows you to migrate only the OS to an SSD, which is not available in Disk Management or Command Prompt.
◉ The tool has multiple cloning methods, allowing you to choose the one that best suits your needs.
◉ This software supports all types of file systems and partition styles, making it easy to clone between different types, such as FAT32, NTFS, exFAT, and also between MBR and GPT partition styles.
◉ The cloning process using the "hot clone" feature doesn't require restarting your computer, allowing for a seamless and uninterrupted cloning experience.
With a user-A user-friendly and intuitive main interface makes it easy to complete every step of a hard drive clone. Download the demo version to see how this Xcopy alternative can be used to replace the command line method of cloning a hard drive, making the process simpler and more straightforward.
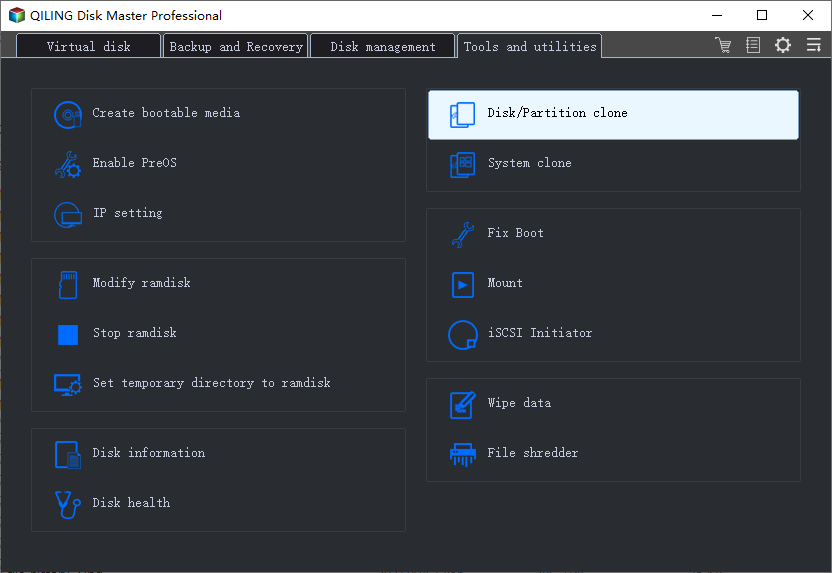
Step 1. Install and launch Qiling Disk Master, click "Tools" tab page, and select "Clone Disk".
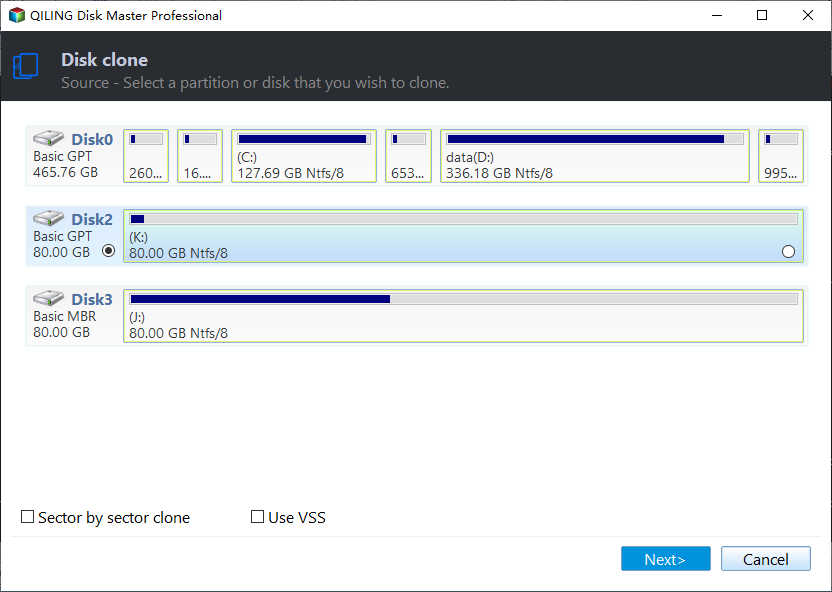
Step 2. Choose the hard disk that you need to clone as the source disk and click "Next".
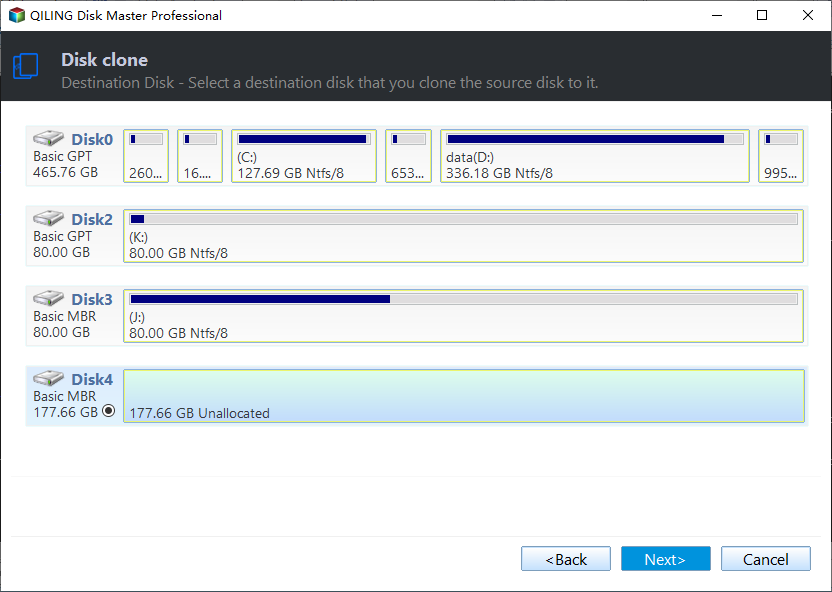
Step 3. Select another drive as the destination disk, and then click "Next".
Step 4. Then, you can check the source and destination disk in the next window or change to "Sector to Sector clone".
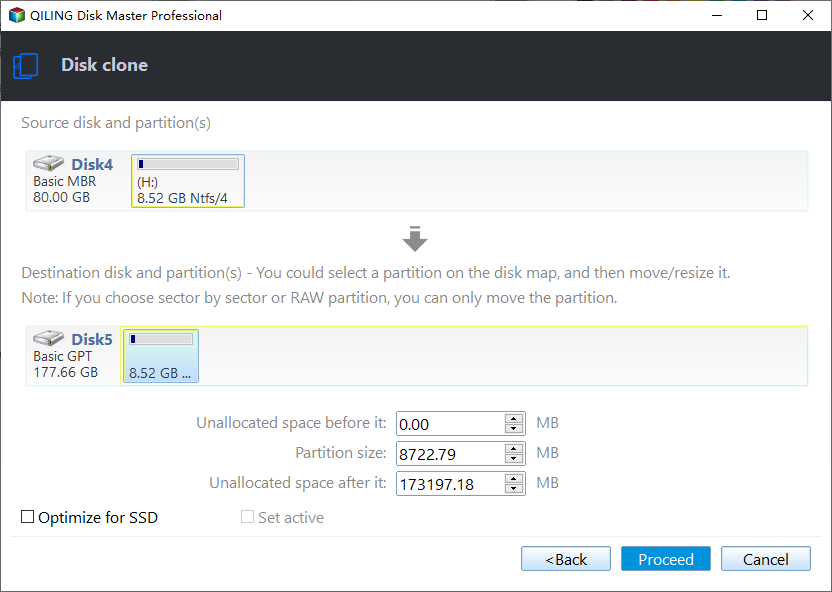
Here, you can also adjust the partition size on the destination disk or tick "4k alignment" to improve the reading and writing speed of the SSD.
✿ Copy without resizing partitions: The source disk configuration will be replicated on the new disk, preserving the exact same partition sizes.
✿ Fit partitions to the entire disk: The partitions on the source disk will be copied to the destination disk, filling all available space on the destination disk.
✿ Edit partitions on this disk: It allows you to manually adjust and change the size of a partition as needed.
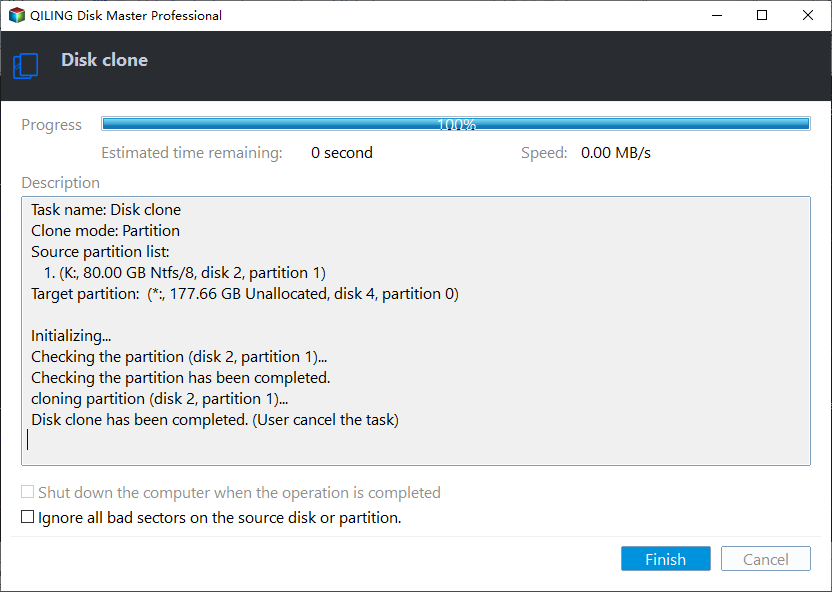
Step 5. After returning to the main interface, check the pending operation and click "Proceed" to commit the operation.
If you've cloned a hard drive that contains an operating system, you'll want to change the boot order to prioritize the cloned drive, otherwise you might encounter issues with it not booting.
Conclusion
When cloning a disk, you have two options: using the Command Prompt or a graphical user interface (GUI) disk cloning tool. While the Command Prompt method is available, a GUI tool like Qiling Disk Master Professional is generally easier to use, especially for those without extensive computer experience, and is a more popular choice for cloning disks in Windows operating systems.
This software has many fantastic features, including recovering deleted or lost partitions, cleaning up junk files from the computer, moving apps or folders from one drive to another, deleting large files to free up space, and more.
Related Articles
- How to Clone Failing Hard Drive in Windows 11, 10, 8, 7?
How to clone a failing hard drive before it's totally corrupted? In this post, the best third-party disk cloner will be introduced to help with hard disk clone. - How to Transfer OS from HDD to SSD without Reinstalling
The easiest way to transfer OS from HDD to SSD is system cloning. It ensures booting from the target SSD, and eliminates the need of reinstalling Windows.