Clone PS3/4 Hard Drive to Larger Drive or SSD Easily
Why clone PS3 hard drive?
The PlayStation 3 (PS3) or its successor PS4 is a video game console and media center developed by Sony Computer Entertainment, released over a decade ago in late 2006.
There are two main reasons to clone a PS3 hard drive: the small storage capacity of the console's hard drive and the growing need for space due to large game installations and HD movie downloads.
Upgrading the PS3's hard drive to a larger, faster one is a viable option, as prices have decreased significantly, making a large drive more affordable. Alternatively, if budget allows, replacing the hard drive with an SSD can provide substantial improvements in loading times and overall system speed. This can enhance the gaming experience on the PS3.
When choosing between a hard disk drive (HDD) and a solid state drive (SSD) for your PS3, it's essential to know that the console supports 2.5-inch SATA drives with a height of 9.5mm.
How to clone PS3 hard drive to larger drive
Using a third-party tool to clone PS3 HDD is far easier than you might imagine. I will guide you through the process step by step.
Before cloning PS3 hard drive
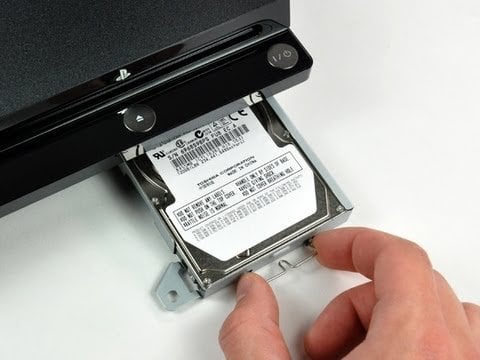
- To repurpose your old PS3 or PS4 hard drive, remove it from the console using a screwdriver to release the frame that holds it in place. Then, connect the hard drive to a spare port on your computer and verify that Windows can recognize it. This will allow you to access and utilize the storage capacity of the old hard drive on your computer.
- Connect your new hard drive or SSD to a spare port in the same computer and ensure it's recognized by Windows. If no spare port is available, place it in an external HDD enclosure.
- When a new hard drive is installed, it typically needs to be initialized, partitioned, and formatted as NTFS, but the PS3 or PS4 can only read FAT32-formatted partitions, not NTFS. Unfortunately, the built-in Disk Management tool cannot format a hard drive larger than 32GB to FAT32, but you can use a free partition manager like Qiling Disk Master to convert NTFS to FAT32 without losing any data.
- Download Qiling Disk Master Professional, a software that specializes in backup, restore, and cloning for Windows PCs, supporting all versions including Windows 11, 10, 8.1/8, 7, Vista, and XP (all editions, 32/64-bit).
Detailed steps of cloning PS3 hard drive to new hard drive or SSD
Once you've prepared everything, you can start cloning your PS3 hard drive to a new hard drive or SSD using the Backup and Restore method. This is the final step in the process, and it's the last thing you need to do before your PS3 is up and running on its new storage device.
Step 1. Backup PS3 hard drive
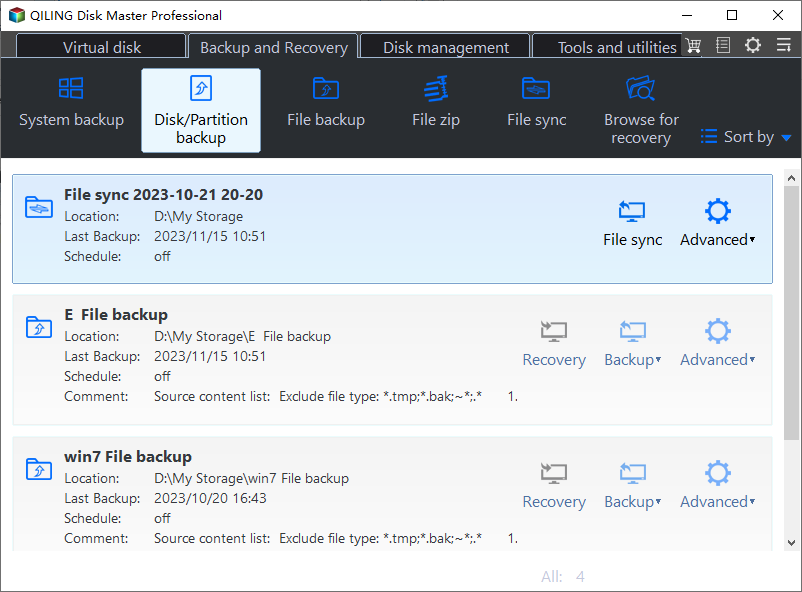
1. Launch Qiling Disk Master on your computer, and then click Backup -> Disk Backup.
2. To backup the PS3 hard drive, first, add the PS3 hard drive as a source disk by clicking on "Disks", then select a destination path to save the backup image, which can be a local disk, USB flash drive, or network share.
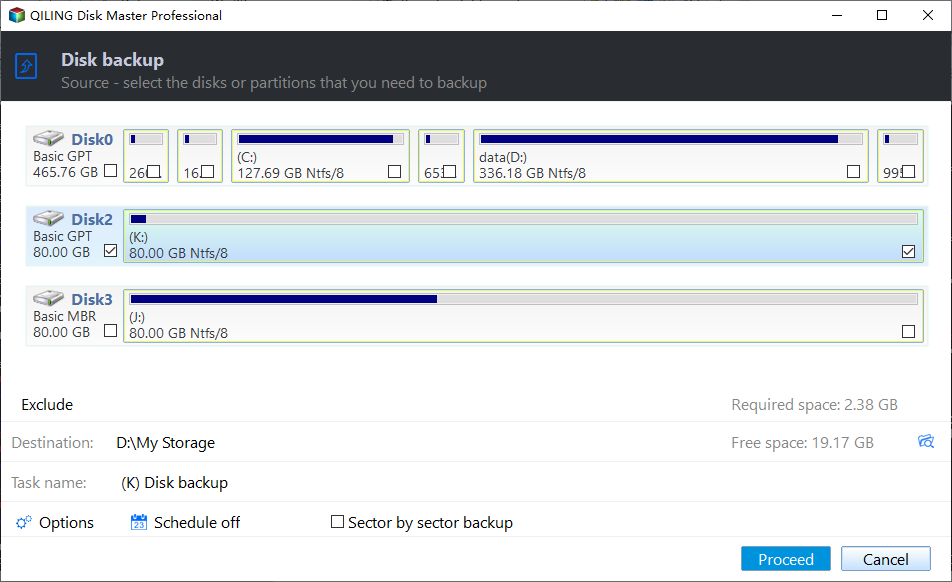
3. After clicking Proceed to execute the task, leave the program to finish the backup and you can continue your work on the computer.
Note: To automatically backup or clone a PS3 hard drive with a Custom Firmware (CFW), you can schedule daily, weekly, or monthly incremental backups by clicking on the "Schedule" option and enabling the default settings. This allows for automatic backup or cloning of the PS3 hard drive with a CFW.
Step 2. Restore PS3 disk image to larger drive or SSD
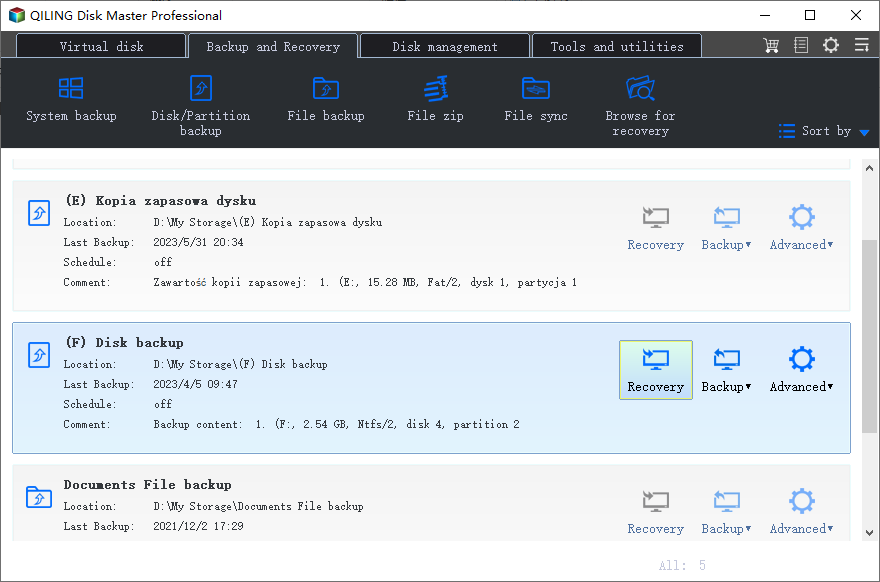
1. To use the software, launch it and then click on either "Select Task" or "Select Image File" to locate and select your desired backup image.
If you click the Select Task option, you will be asked to choose a backup task in the next window, so select the disk backup task you created and click Next.
To select an image file, click the Select Image File option and browse to the location of the disk image file. This will allow you to manually locate the file in a pop-up window.
2. In the Image Information window, select the option to restore the entire disk and click Next.

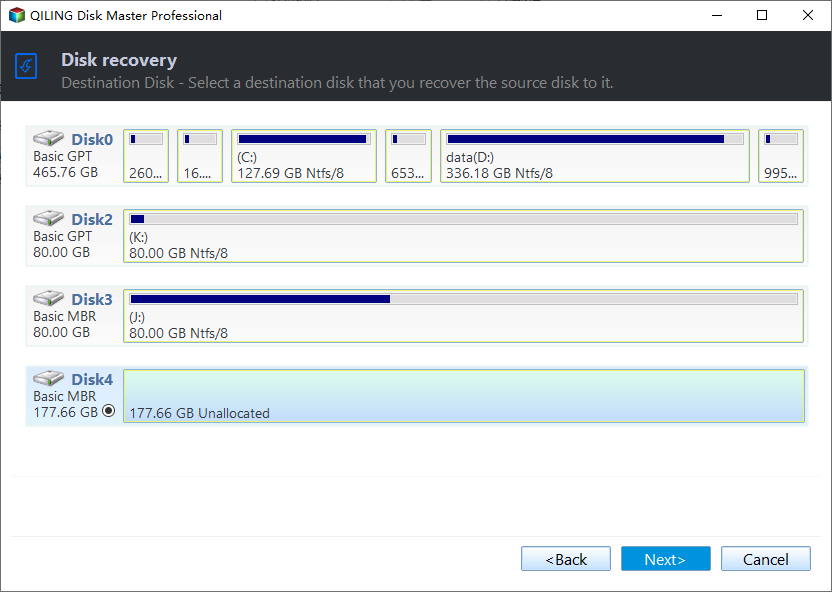
3. The large hard drive or SSD should be selected to receive the restored data, and then click Next.
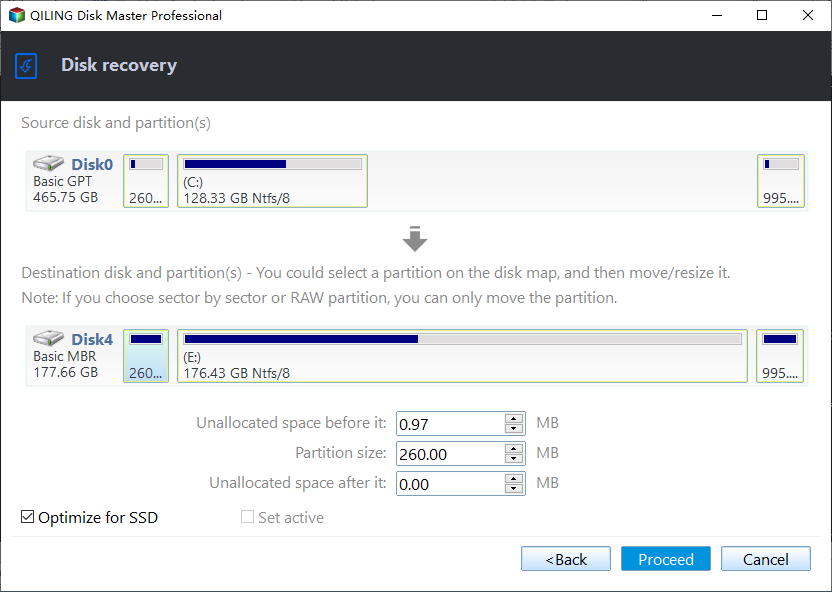
4. To start the process of cloning a PS3 hard drive CFW to a new drive, click Proceed. If the new drive is an SSD, select SSD Alignment to improve the reading and writing speed of the SSD.
Note: To back up your system and restore it to a different computer, enable the "Universal Restore" feature, which will install necessary drivers to allow Windows to boot on the new computer.
The time it takes to clone a PS3 hard drive depends on the amount of data on the old drive, but the process can be reversed to replace the old drive with a new one or SSD.
Cloning doesn't delete the data on your old hard drive, so if your new drive works well, you can manually wipe old hard drive for reuse. You can also clone PS4 hard drive with the same steps.
Clone PS3 hard drive to SSD with built-in utilities
The PS3 has a built-in feature called "Backup" and "Restore" that allows users to create a backup of their data and restore it to the console, effectively achieving the same result as cloning. This feature can be accessed to see details.
Step 1. Backup the saved data on the PS3.
1. Connect a USB drive or other storage device to your PS3 and format it as FAT32.
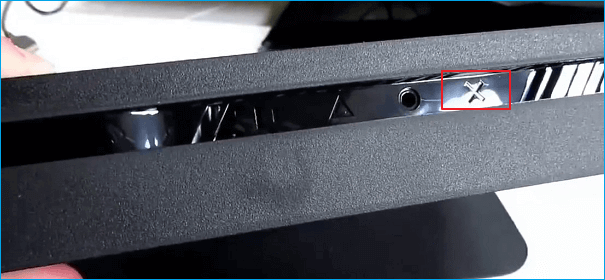
2. Go to Settings > System settings and press the X button to enter the next page.
3. Then, click Backup and press "X" button to enter in.
4. Go to the backup settings page, select the backup option instead of restore or delete backup data, and proceed with the backup process.
5. Follow the instructions to back up the saved data to USB drive or other device.
Step 2. Replace the old hard drive with a new one.
1. Wait for at least 10 minutes in order to let your console cool down, then open the HDD door from its lower case.
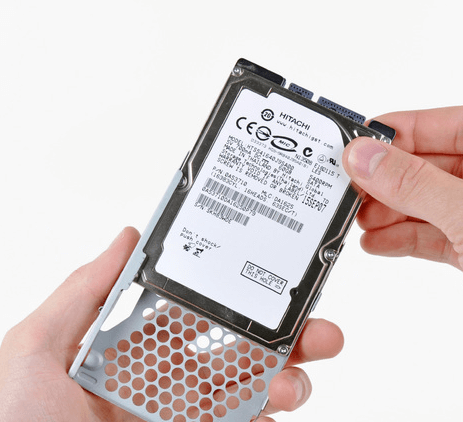
2. Remove the old hard drive from its steel cage, replace it with the new one, and secure the new drive in place using the screw.
Step 3. Restore the saved data to the new drive.
1. Start the PS3 and go to the Restore option with the same procedure as Step 1. Go to Settings > System Settings > Restore PS3.
2. To restore saved data to a new hard drive, follow the on-screen instructions provided by the system. These instructions will guide you through the process of recovering your saved data from the old hard drive to the new one, ensuring that your important files and settings are transferred successfully.
Summary
Cloning a PS3/4 hard drive to a larger drive or SSD is a straightforward process that can be accomplished using the console's built-in backup and restore feature or a third-party tool like Qiling Disk Master. This allows users to easily transfer their data and games to a larger storage device.
Qiling Disk Master has more features, including backing up disks, systems, partitions, and specific files or folders. It also allows scheduling backups in daily, weekly, or monthly modes, and backing up only changes with incremental or differential backup.
The software allows for easy and quick hard drive upgrades, including cloning an NVMe drive to a larger NVMe SSD, making it possible to boot the computer directly without needing to restore an image first.
Qiling Disk Master Standard is a smart choice for users. You can download and try it by yourself to see its features and capabilities.
Related Articles
- Two Ways to Backup PS3/4 Hard Drive Step by Step
Learn the two simple methods to back up PS3 or PS4 hard drive to removable storage device or PC in case of hard drive failure. - Simple Steps to Backup Xbox 360/One HDD for Free
It's important to back up Xbox 360 or Xbox One hard drive (HDD) in case of data loss due to system crashes, hard drive failure or replacement. - Seagate DiscWizard Clone Stuck [Why & How to Fix]✅
Discover why your Seagate DiscWizard clone is stuck and get back to seamless disk cloning with expert troubleshooting. Resolve the issue and enjoy uninterrupted disk cloning. - Free Bootable USB Clone Tool: Copy Bootable USB in Windows 11, 10, 8, 7
If you are looking for a bootable USB clone tool to make an exact copy of your USB drive, the free Qiling Disk Master is a great choice. It allows you to free clone a bootable USB drive in Windows 11, 10, 8, 7 with easy steps. - How to Migrate Windows 7 to SSD with Excellent Software
Qiling Disk Master can help to migrate Windows 7 to SSD through two means: backup the system drive to an image file, and then restore it to the SSD, or directly clone the system drive to the new SSD. - Two Ways to Migrate Windows 7 to SSD Without Reinstall Windows
You will learn how to migrate Windows 7 from HDD to SSD with built-in Backup and Restore or Qiling Disk Master Professional. It will greatly enhance your computer without reinstalling Windows.