Cloned Drive Shows BOOTMGR Missing in Windows 10: Repair or Reclone
A cloned disk can contain your Windows folder and still fail with BOOTMGR is missing. Copying C: alone may omit the partition that actually starts Windows. The computer may also be using the wrong disk or an incompatible firmware mode.
Keep the original disk intact until the clone starts independently. Do not erase it just because the copy operation reported success.
Test the clone without relying on the original disk
- Shut Windows down fully and disconnect power. For a serviceable desktop, disconnect the original disk according to the hardware manual. For a laptop, use the manufacturer's replacement procedure. Do not disconnect internal storage while powered on.
- Install the clone on the internal connection intended for normal use. An ordinary Windows disk clone is not automatically a portable Windows installation that boots over USB.
- Open the one-time boot menu. Choose the cloned disk for legacy boot, or its Windows Boot Manager entry for UEFI boot.
- Keep the original firmware mode unless the migration deliberately converted the disk. Changing MBR to GPT and changing firmware mode are coordinated operations, not interchangeable fixes.
If the clone boots only when the original remains connected, boot files may still be coming from the old disk. That is not a successful independent migration.
Check whether the source and clone have matching boot partitions
When the original Windows installation can still start, open Disk Management and compare the disks. A legacy installation may use a System Reserved partition; a UEFI installation uses an EFI System Partition. A recovery partition has a different purpose and cannot substitute for either.
Record all source partitions, their sizes, and their role before another clone attempt. If only C: was copied, repeating a partition-only copy will usually reproduce the omission. Also check the original disk's health: recurring read errors can prevent a complete clone even if most files are visible.
When the required partitions are present, start Windows installation media and run Repair your computer > Troubleshoot > Advanced options > Startup Repair with the clone as the only attached internal Windows disk. Afterward, remove the USB and test again. Use a layout-specific boot repair if this fails; do not format the EFI partition as a generic remedy.
Reclone the full system disk with Qiling Disk Master
Choose this route when the original is healthy and the previous copy omitted necessary partitions. The destination will be overwritten. Save anything created on the clone since the first copy, and confirm that your Qiling edition supports the required system-disk operation.
Step 1. Boot the original Windows installation. Connect the destination SSD and verify both disks by model and capacity. Close applications that are actively changing files.
Step 2. Open Qiling Disk Master and choose the disk clone function. Select the entire original Windows disk as the source, including its small boot partitions.
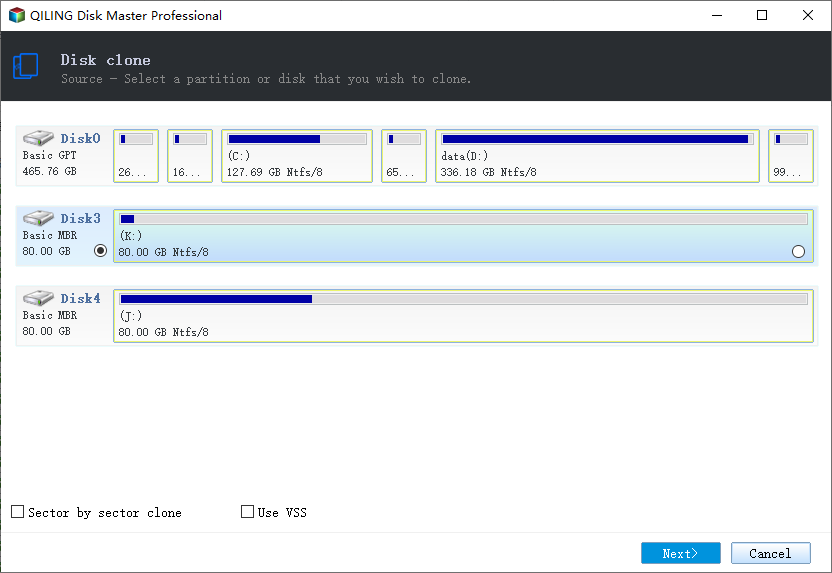
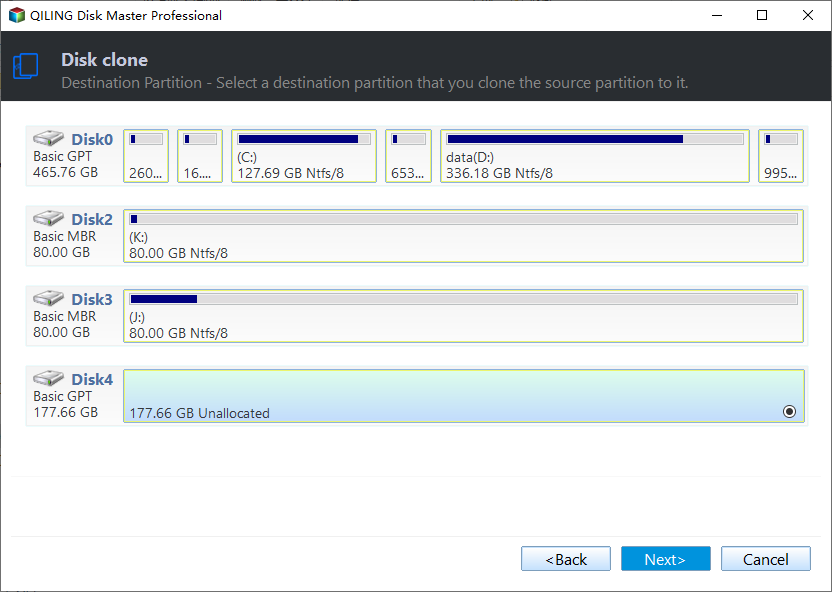
Step 3. Select the replacement SSD as the destination. Read the overwrite warning and confirm that its existing data has been saved elsewhere.
Step 4. Check the destination layout and enable SSD alignment when offered. A smaller target must accommodate the data and the layout supported by the selected clone mode; used-space size alone is not always enough.
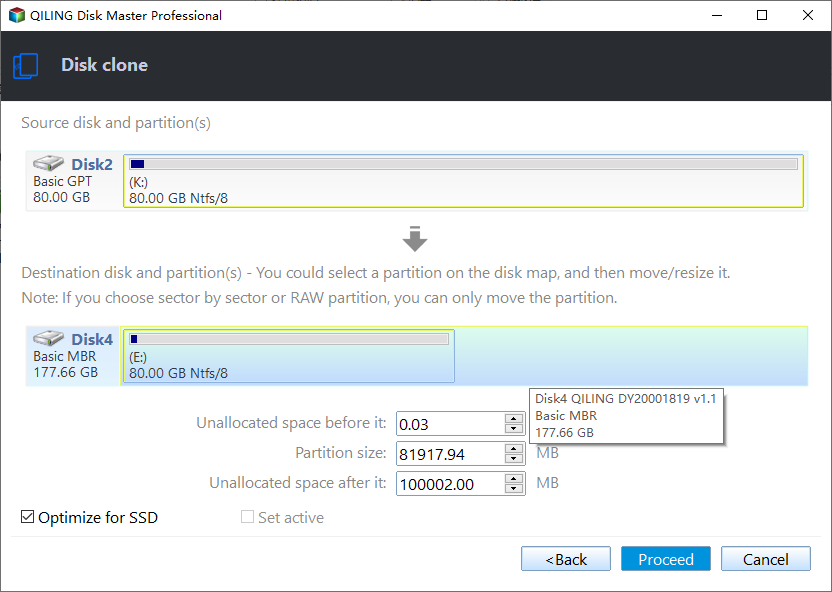
Step 5. Click Proceed. Keep both drives connected until completion. Shut down before installing or reconnecting internal disks.
Confirm the migration is complete
Repeat the independent startup test with the original disconnected. Check the Windows drive capacity, open applications, and verify important files. Restart once more to confirm the first successful boot was repeatable.
Reconnect the old disk only after the clone works on its own, and ensure the new disk remains first in the boot order. Keep the original as a recovery copy until you have a separate verified backup. Repeated clone failures accompanied by source read errors require data-recovery planning rather than endless retries.
Related Articles
- Disk Clone and System Clone
Understand what each clone type includes before migrating Windows. - Black Screen After Cloning
Investigate a different startup symptom once the cloned disk reaches Windows loading.
Products
Articles & Tutorials
- Data Recovery
- Data Backup
- File Recovery
- File Backup
- File synchronize
- System Backup and Restore
- Disk and Partition Clone
- Technical articles
- Disk Master Help
- Windows Deleted File and Disk Recovery Tutorials
- Windows File and Data Recovery Tutorials
- More Windows Tutorials for Install, Security, Files, and PC Tips
- Windows Boot, Repair, and Recovery Environment Tutorials
- Windows Backup Tutorials
- Windows Restore Tutorials
- Windows Clone and Migration Tutorials
- Windows Server Backup, Recovery, and Management Tutorials
- Windows Disk, Partition, and Storage Management Tutorials