How to Clone Disk with Hirens Boot CD [2024 Updated]
What is Hirens Boot CD?
Hirens Boot CD is an all-A bootable rescue CD solution contains many useful Windows 11/10 repair tools, categorized into partition tools, backup, clone, and restore tools. These tools are essential for resolving issues such as hard drive failure, virus infection, partitioning problems, password recovery, and data recovery, making them a valuable resource for troubleshooting and repairing Windows systems.
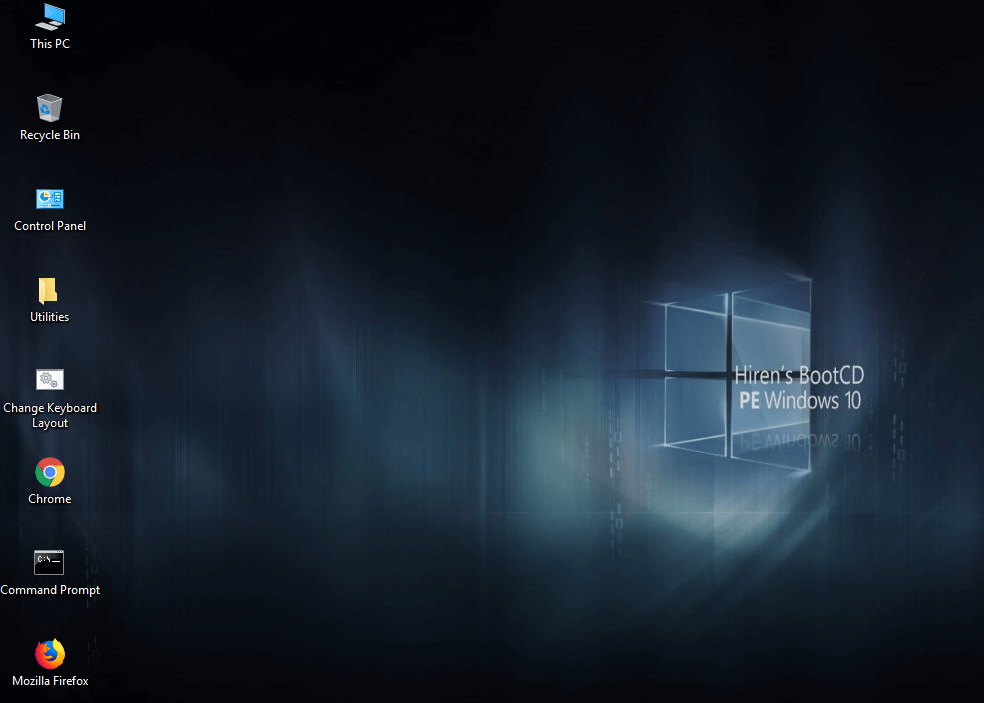
Hirens Boot CD Review [Pros and Cons]
Hirens Boot CD can be a useful tool, but it's essential to weigh its pros and cons before choosing a cloning tool. On the plus side, it's a free and portable utility that can be run from a CD or USB drive, making it a handy option for troubleshooting and recovery.
Pros:
✅Hiren's Boot CD includes a variety of tools such as partitioning tools, backup and cloning tools, and recovery tools.
✅The software does not contain any malware or pirated software, ensuring a secure and trustworthy experience for users.
Cons:
❎The boot USB for Hiren has not been updated since November 2012.
❎Not every tool is guaranteed to work properly, and you may encounter ISO image extraction failure errors when burning ISO files.
The Hirens Boot CD has some limitations, but a professional disk cloning tool like Qiling Disk Master can help you fix your computer better. Qiling Disk Master offers flexible and reliable features, is simpler to use than Hirens Boot CD, and is regularly updated to address any issues users may encounter.
Using the Qiling Disk Master Standard directly is a convenient option as it eliminates the need to copy the ISO file to a bootable USB drive after downloading the Hirens Boot CD. If you still want to explore the process of cloning a disk using the Hirens Boot CD, you can continue reading to learn the steps involved.
How to clone disk with Hirens Boot CD
▏Part 1. Create Hirens bootable USB
To use Hirens Boot CD PE, download the ISO file, burn it to a disk, and boot from it. Once booted, use the built-in utility to clone your disk.
Step 1. The Hirens Boot CD can be downloaded from its official website, and the ISO file can be burned to a CD, DVD, or USB drive using Windows' built-in Windows DiscImage Burner.
Step 2. To burn an ISO to USB, download Rufus, a free tool for creating a bootable USB drive, and run it after inserting the USB device. Note that this process will erase all data on the USB, so be sure to back up any important files beforehand.
Step 3. After running the app, select FAT32 (default) for the file system.
Step 4. To change the option next to "Create a bootable disk using ISO Image", navigate to Format Options, then select the desired option from the dropdown menu.
Step 5. To access the HBCD, select the little CD icon next to this box and browse to the location of the ISO file in the HBCD folder.
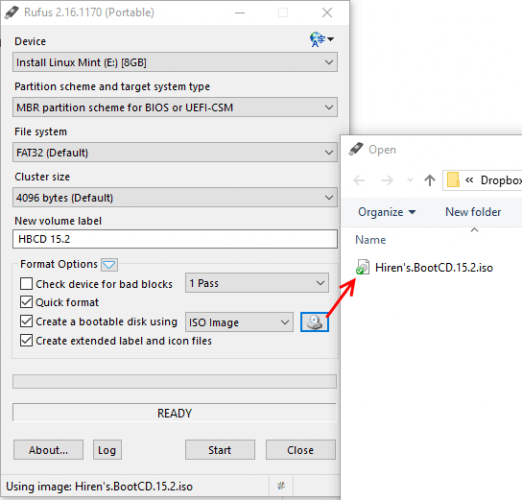
Step 6. Finally, click Start when ready.
Step 7. When the process completes, you've installed HBCD on your USB.
Using Qiling Disk Master will simplify the process of creating a bootable USB, allowing you to do so easily and without any errors.
▏Part 2. Set USB as boot drive
Now that you have installed the HBCD on the USB, you need to configure the computer to boot from the USB. This involves setting the computer to boot from the USB device, which can be done by entering the computer's BIOS settings and selecting the USB drive as the primary boot device. The specific steps may vary depending on the computer's manufacturer and model, but the general process is the same.
Step 1. To access the BIOS settings, press the "Esc" key when the computer shows the boot screen; note that some computers may use Delete, F2, F6, or F12 instead.
Step 2. After entering the BIOS, set the USB drive as the first boot device.
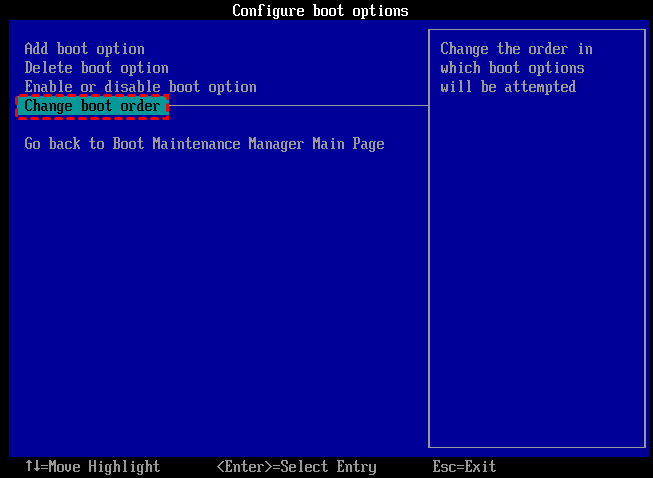
Step 3. After setting, press the "ESC" key to exit and return to the main BIOS interface, then select Save and Exit.
Step 4. Restart the computer, and the computer will automatically enter the main interface of USB boot after restarting.
▏Part 3. Clone disk with Hirens Boot CD
After installing the Hirens Boot CD, you can boot into the main interface of the CD, which allows you to access various tools and utilities for troubleshooting and repairing your computer.
Step 1. To access the Qiling Disk Master 7.0 tool, open the "utilities" in the Hirens Boot CD, navigate to "Partition Tools" within the "Hard disk tools", and then select the Qiling Disk Master 7.0 tool to access its interface.
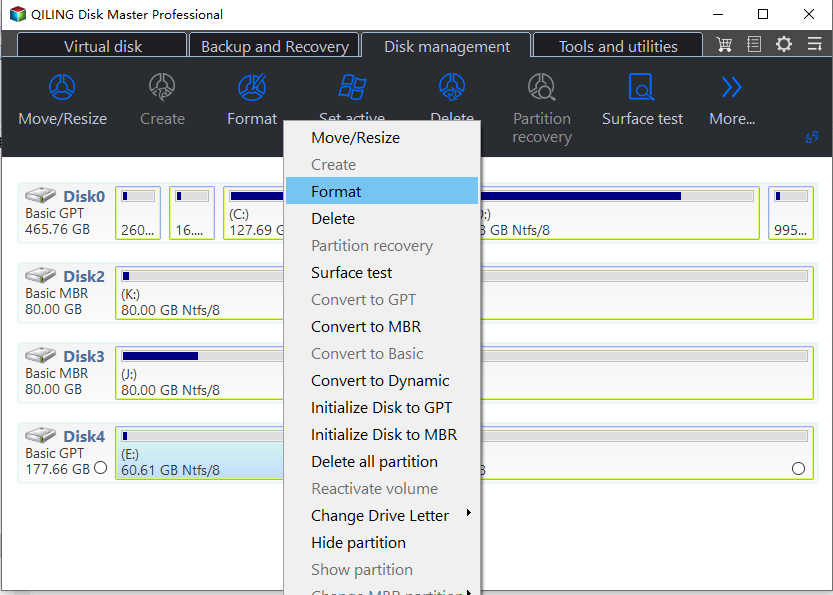
Step 2 To copy a disk, open the main interface and click on "Wizards" in the upper left corner. From the drop-down menu, select "Disk Copy Wizard" and follow the on-screen instructions to complete the process.
Tips:
1. In addition to clone disk, there are many functions available here, such as convert to MBR, low-level format.
2. This version is outdated, and the experience it brings to you may not be so good. Next, I will recommend the latest version to you.
Hirens Boot CD alternative
Qiling Disk Master Standard is a free third-party disk management tool that supports Windows 11, 10, 8.1, 8, 7, Vista, and XP. It offers various functions, including disk cloning, merging partitions, and more. This tool can clone disks with bad sectors and even optimizes and assigns 4K sectors to SSDs for improved performance.
To improve the experience, download and install Qiling Disk Master Standard, a more concise operation that can bring a better experience.
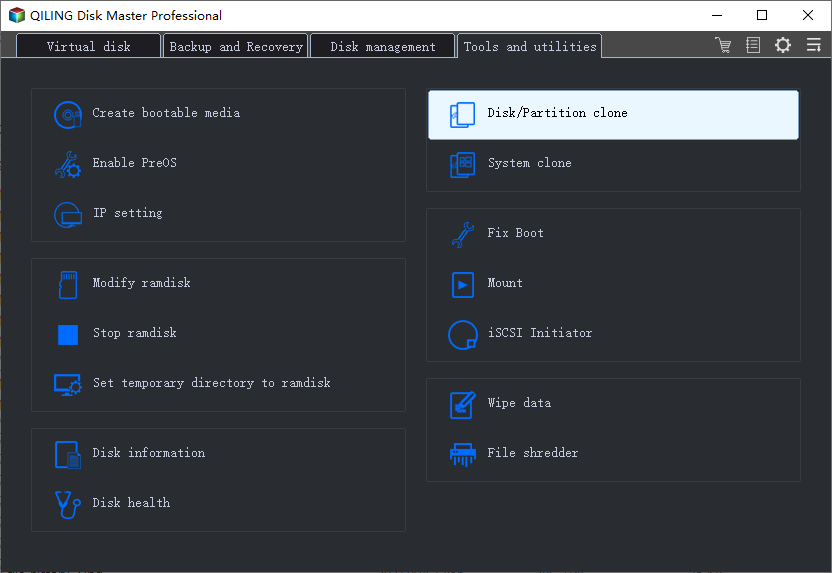
Step 1. Click "Tools" in the main interface, and select "Clone Disk".
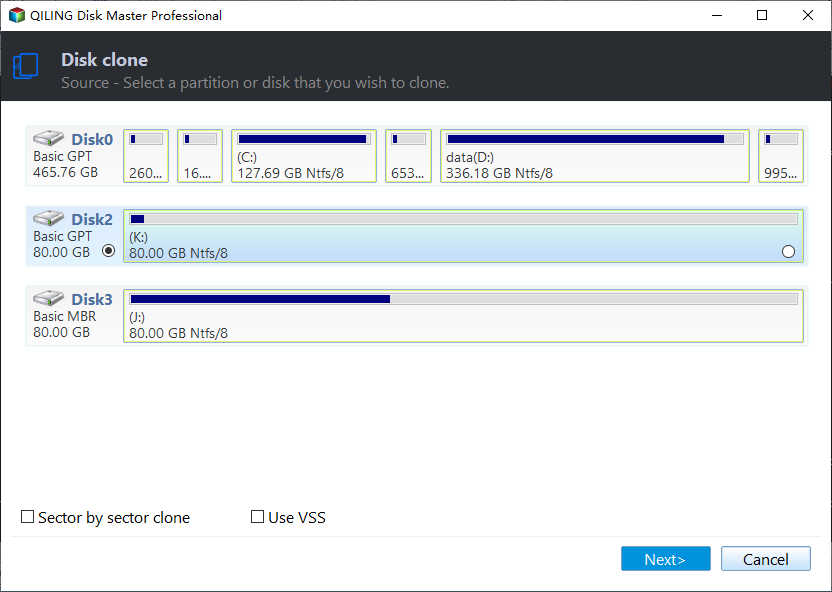
Step 2. Choose the hard disk that you need to clone as the source disk and click "Next".
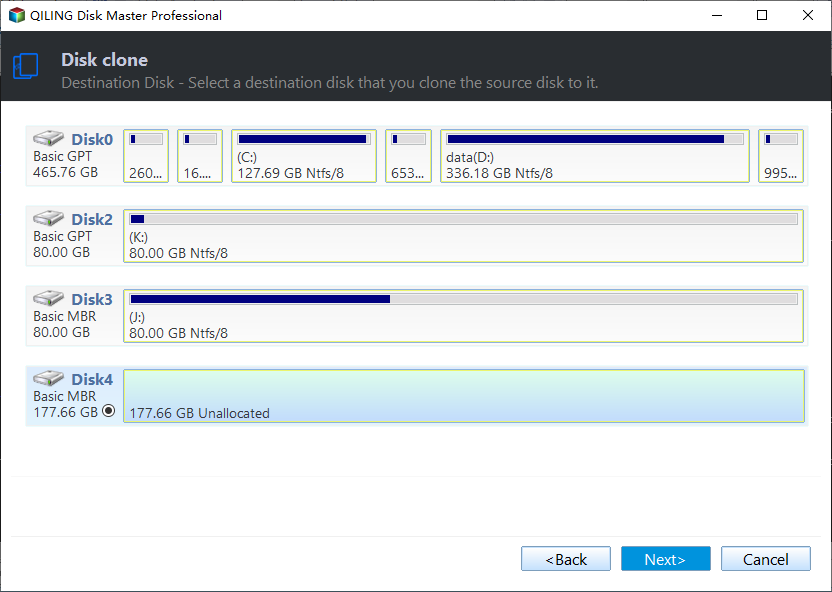
Step 3. Select another drive as the destination disk, and then click "Next".
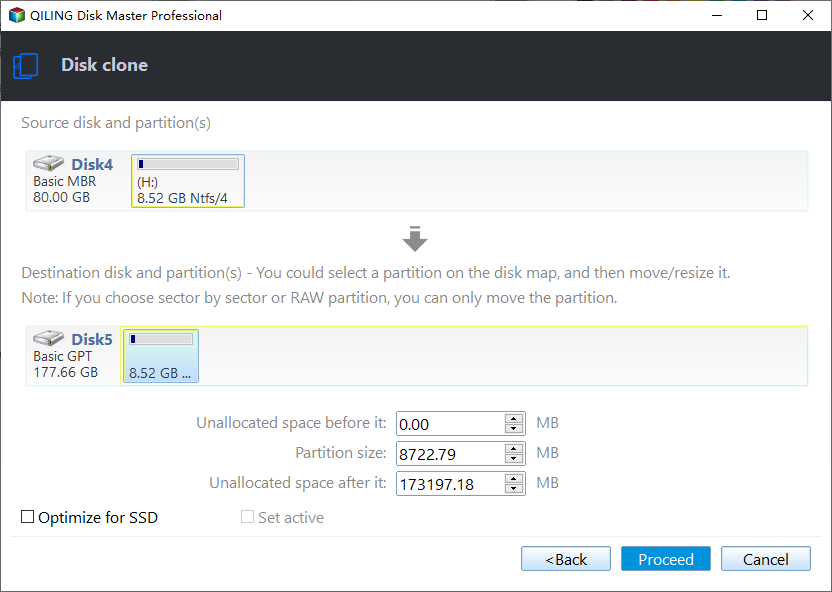
Step 4. Then, you can check the source and destination disk in the next window or change to "Sector to Sector clone".
You can adjust the partition size on the destination disk or enable 4k alignment to improve SSD performance.
Step 5. After returning to the main interface, check the pending operation and click "Apply" and "Proceed" to commit the operation.
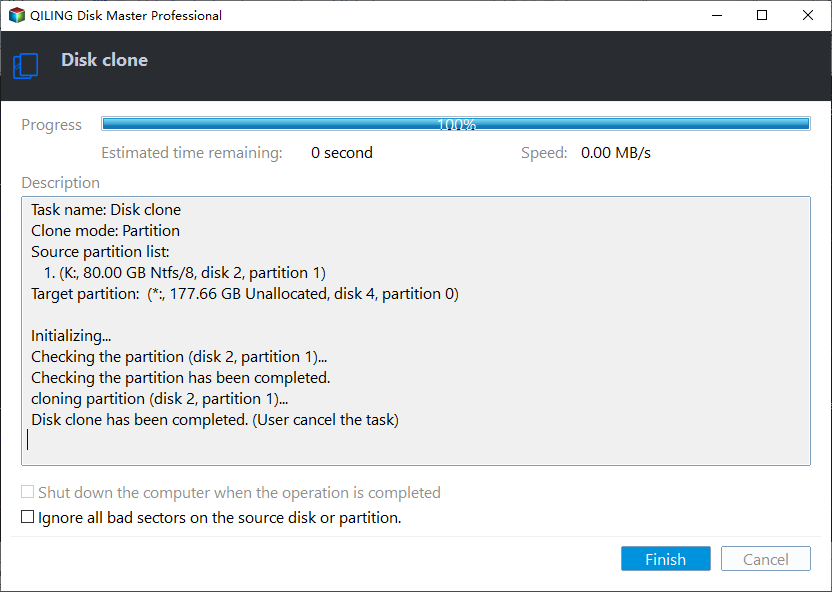
Tip: If you need to clone a system disk, you should upgrade to the Professional Edition.
Conclusion
To clone a disk using Hirens Boot CD, you have two methods to choose from. Both methods can help you achieve your goal, but you can select one based on your preferences. If you're using Windows Server 2022/2019/2016/2012(R2), you may want to consider using Qiling Disk Master Server instead, which is specifically designed for Windows Server users.
Related Articles
- Free Software to Clone a Hard Drive to New Hard Drive Safely
Clone hard drive is necessary if you need to replace the new hard drive. This page will show you how to clone a hard drive on Windows 11, 10, 8 and 7 without losing data. - Clone Smaller SSD Drive to Larger SSD in Windows 10/8/7
If you still have no idea how to clone smaller SSD to larger SSD, luckily, you've come to the right place. Here, you'll learn to use the best disk clone software to get it done without any data loss. - How to Clone SSD to HDD in Windows 10,8,7 with Secure Boot?
Learn how to Clone SSD to HDD in Windows 10,8,7 with Secure Boot with clear steps, key checks, and practical tips. - How to Clone Windows System to SSD in Windows 10/8/7 without Boot Issue?
Cloning Windows system to SSD drive can help speed up Windows computer. This post will show you how to clone Windows system partition or disk to SSD in Windows 11/10/8/7 and how to boot from the destination disk. - Easily Clone Larger Drive to Smaller Drive Right Now
To clone larger drive to smaller drive (HDD to SSD, HDD to HDD, SSD to HDD or SSD to HDD) in Windows 11, 10, 8.1, 8 or 7, Qiling Disk Master can be helpful! - Clone mSATA SSD to mSATA SSD Safely in 5 Steps
In this article, you will learn the best way to clone mSATA SSD to mSATA SSD, and some useful tips to ensure successful cloning.
Products
Articles & Tutorials
- Data Recovery
- Data Backup
- File Recovery
- File Backup
- File synchronize
- System Backup and Restore
- Disk and Partition Clone
- Technical articles
- Disk Master Help
- Windows Deleted File and Disk Recovery Tutorials
- Windows File and Data Recovery Tutorials
- More Windows Tutorials for Install, Security, Files, and PC Tips
- Windows Boot, Repair, and Recovery Environment Tutorials
- Windows Backup Tutorials
- Windows Restore Tutorials
- Windows Clone and Migration Tutorials
- Windows Server Backup, Recovery, and Management Tutorials
- Windows Disk, Partition, and Storage Management Tutorials