[Full Guide] How to Partition SSD for Windows 10 Install
- Help! How do I partition my SSD in Windows 10?
- Things you should know before partition
- 2 reliable ways to partition SSD for Windows 10 install
- ▶ Option 1. Partition SSD for Windows 10 install with Disk Management
- ▶ Option 2. Partition SSD for Windows 10 install with Qiling Disk Master
- Bonus tip: Install Windows 10 on SSD from HDD
★ Content Navigation:
| 📞The basic concepts of partitioning | Figure out what is partition style and file system. |
| 💻Partition SSD with Disk Management | Open Disk Management, right-click the SSD and select "Initialize Disk" to initialize it. Then, right-click the unallocated space to create a new volume. |
| 🚀Partition SSD with Partition Assistant | Right-click the SSD and select "Initialize Disk". Then, click "Quick partition". |
| 💡Bonus tip | Here's a brief summary: To clone Windows 10 from an HDD to an SSD without reinstalling, you can use a cloning software like Qiling Backup. These tools allow you to create an exact copy of your Windows 10 installation, including all files, settings, and applications, onto the SSD. |
Help! How do I partition my SSD in Windows 10?
To divide your 960GB SSD into 2 separate partitions for Windows and your documents, you can follow these steps: During the Windows installation process, when you reach the "Where do you want to install Windows?" screen, select the "Custom: Install Windows only (advanced)" option. Then, create a new partition for Windows by selecting the "New" option and allocating a suitable size (e.g., 400GB) for it. Leave the remaining space for your documents partition. Alternatively, you can use the built-in Disk Management tool in Windows to create partitions after installation. To do this, go to Settings > System > Storage > Manage, and then select "Disk Management" from the context menu.
Things you should know before partition
Understanding the following two points will help you to operate more clearly when partitioning the new SSD for Windows 10 install.
▶ Partition scheme: MBR VS GPT
On Windows, there are two types of partition schemes: Master Boot Record (MBR) and GUID Partition Table (GPT), which determine the disk format after partitioning. MBR and GPT disks have different schemes to manage partitions.
MBR disks have limitations, allowing only 4 primary partitions or 3 primary + 1 extended partition, and are restricted to a maximum of 2TB capacity. In contrast, GPT has no such limitations, supporting an unlimited number of partitions and larger hard disk capacities, with Windows even capable of handling up to 128 partitions.
▶ File system: NTFS VS FAT32
When installing Windows 10, we need to partition the drive, which involves choosing a file system. The primary function of a file system is to manage user data, and different file systems have distinct management methods. Therefore, when partitioning, it's essential to consider which file system format to select, taking into account the specific needs of the user.
NTFS and FAT32 are two distinct file system formats with notable differences. NTFS, developed by Microsoft, is a more modern and robust file system, offering features such as file compression, encryption, and access control. In contrast, FAT32, also developed by Microsoft, is an older file system that is simpler and less secure.
1. FAT32 has a 32GB limit on hard disk size, while NTFS can support up to 2TB.
2. FAT32 has a 4GB file size limit, while NTFS has no such restrictions.
3. FAT32 has limitations in terms of security, as it cannot set permissions, resulting in relatively poor security performance. In contrast, NTFS allows for security settings to be applied to files.
2 reliable ways to partition SSD for Windows 10 install
To partition an SSD using Windows built-in tools and third-party tools, I will demonstrate two methods. Firstly, I will show you how to use Windows built-in tool to partition the SSD.
Before partitioning, you'll need to physically install the new SSD into your PC. For detailed steps, refer to the guide on installing a SSD in a desktop PC.
When a new SSD appears in the disk, there are often two situations:
● To initialize the SSD, you need to open the Disk Management console in Windows, right-click on the SSD drive, and select "Initialize". This will make the SSD detectable and usable in Windows. If the SSD is not initialized, it will not be recognized and used by Windows.
● The SSD is initialized but the disk space is unallocated, allowing for the creation of a new partition from this space.
When all the preparations are ready, we can start partitioning.
▶ Option 1. Partition SSD for Windows 10 install with Disk Management
Step 1. To view all disks in your computer, press the Windows key + R, type "diskmgmt.msc" and press enter. This will open the Disk Management window, displaying all the disks connected to your computer.
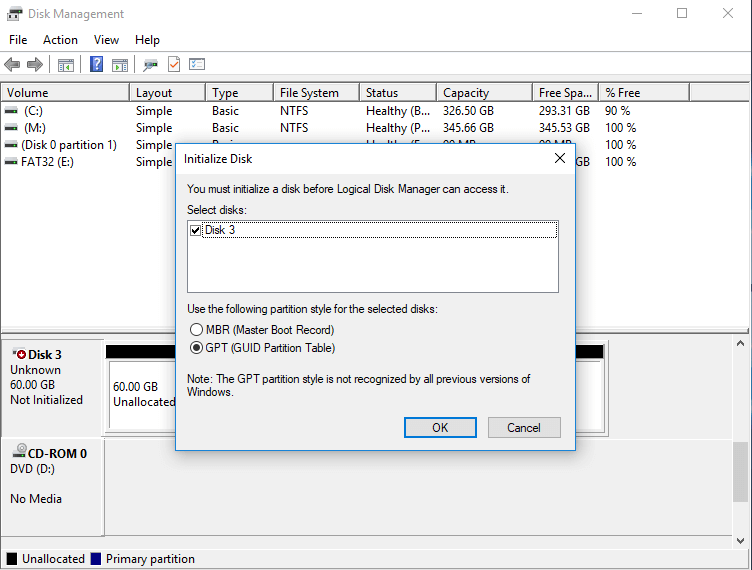
Step 2. If your new disk is unknown, you need to right-click and select "Initialize Disk". For Windows 10 installation, choose GPT, but only if your motherboard supports UEFI boot mode. Otherwise, choose MBR.
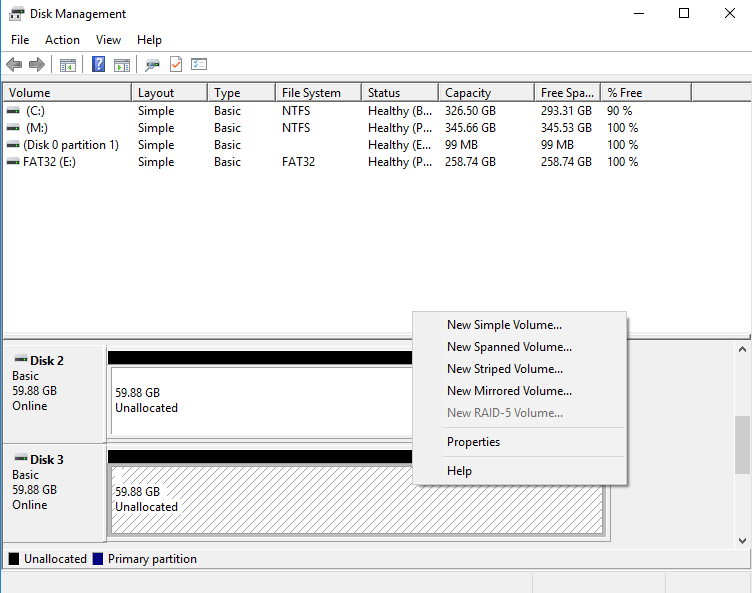
Step 3. After initialization, right-click "Unallocated" and select "New Simple Volume" to create a partition.
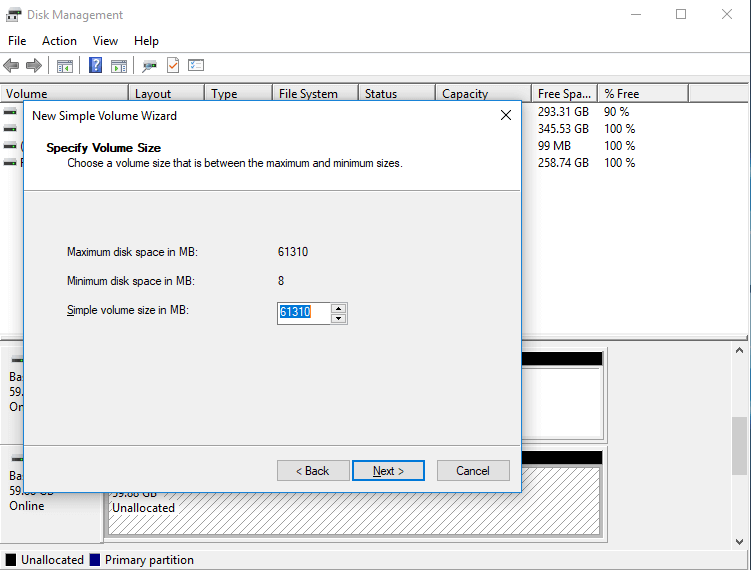
Step 4.In this step, you can select the size of the partition, adjusting it reasonably if you want to create multiple partitions.
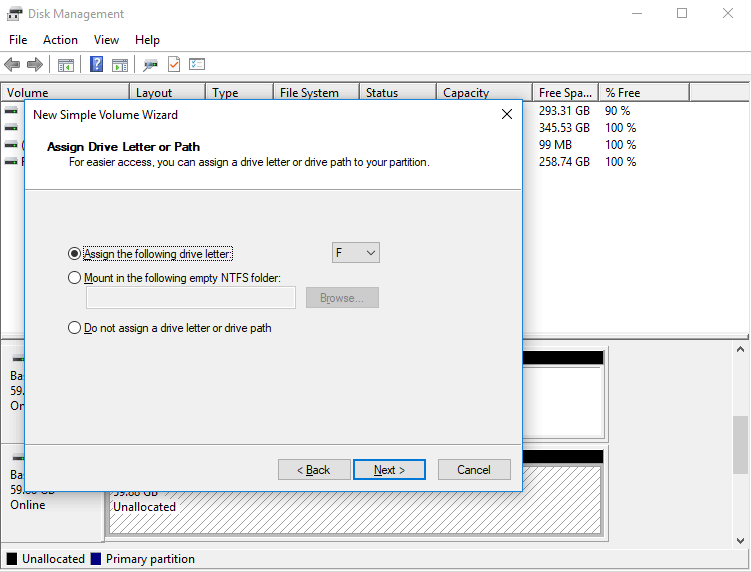
Step 5. Select drive letter.
Step 6. Select File system.
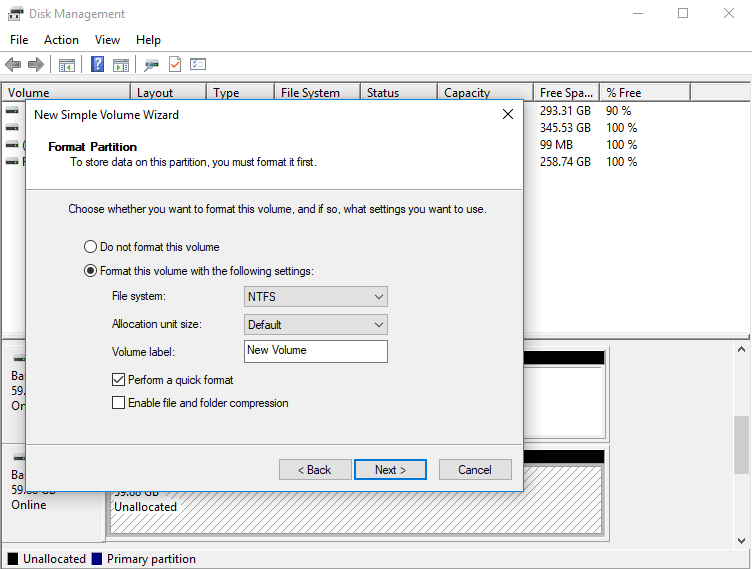
Step 7. Click "Finish".

You have successfully partitioned the SSD using Disk Management by creating a new partition, formatting it, and assigning a drive letter, and then deleting the existing partition to free up space for the new one, ultimately achieving your goal.
▶ Option 2. Partition SSD for Windows 10 install with Qiling Disk Master
Do you think it is too troublesome to use Disk Management to create partitions?
Now I will introduce you a convenient and easy-to-use third-party tool to partition.
Qiling Disk Master Pro is a partition disk management software that offers a convenient quick partition function.
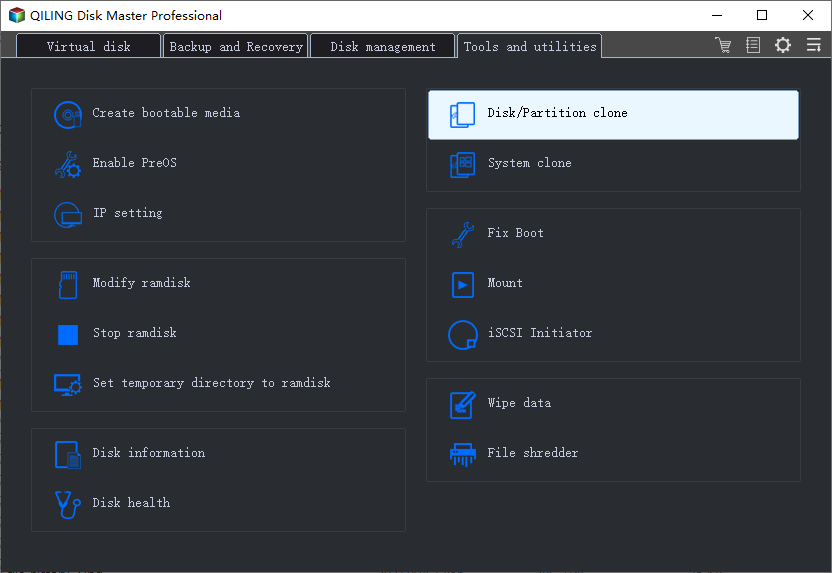
Step 1. Download and install Qiling Disk Master Pro.
Step 2. Right-click on the new SSD, select "Initialize Disk", and choose GPT if installing Windows 10.
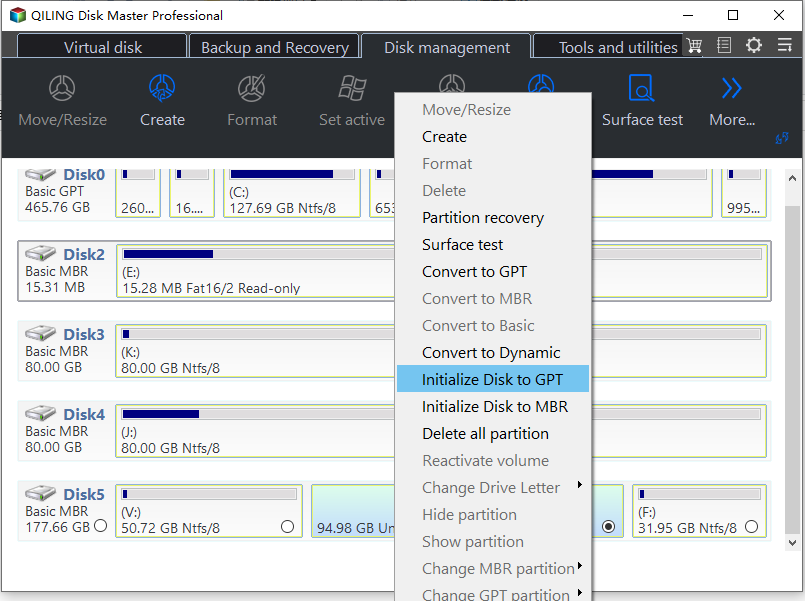
Step 3. After initialization is complete, return to the main interface and click "Disk management" to perform multiple operations at once and preview partition results.
Tip: It's recommended to have two partitions, one for the system and one for personal downloads.
Bonus tip: Install Windows 10 on SSD from HDD
If you're upgrading your current system's hard drive to an SSD, you can install Windows 10 on the new SSD by cloning from the HDD.
To install Ubuntu, you can simply download the ISO file, burn it to a USB drive, and boot from it. This eliminates the need to partition the SSD, create an installation drive, and perform installation operations, saving time and energy.
Related Articles
- Clone HDD to SSD with Qiling Disk Master
When you plan to replace the current disk with an SSD, you'd better clone HDD to SSD. This article will explain why and show you how to do it. - How to: Extend SSD Partition Windows 10 without DATA Loss
This article will teach you how to use professional and free third-party software to extend SSD partition in Windows 10. - Quick Partition Software – Qiling Disk Master
- How to Solve Windows Migration Assistant Not Working
Discover effective solutions to fix Windows Migration Assistant not working issues. Learn step-by-step troubleshooting tips to ensure a smooth transition to a new Windows system. - 2 Effective Ways to Backup Outlook PST Files Automatically
To partition an SSD for Windows 10 install, you can use Qiling Disk Master to create or resize partitions on the SSD. It supports GPT and MBR partition styles, and can help you create bootable SSDs for Windows 10 installation. - How to Backup Windows 10 Mail to External Hard Drive (3 Ways)
To backup Windows 10 Mail, you can follow three methods to save your emails to an external hard drive, and choose the one that suits your needs best.