2 Effective Ways to Backup Outlook PST Files Automatically
Need to Backup Outlook PST Files Automatically
Automatically backing up Outlook PST files is crucial to prevent data loss or corruption. PST files can become damaged due to various reasons such as hardware failure, software conflicts, power outages, or virus attacks, and having a recent copy can save you from losing important data, including emails, contacts, appointments, and other important information.
Regularly backing up your Outlook PST files can help prevent data loss due to accidental deletions, overwriting, or system crashes. This can be achieved by automating the backup process using various tools and methods, ensuring your data is always safe and available.
How to Backup Outlook PST Files Automatically
This article demonstrates how to automatically back up Outlook 2016, using it as an example. We will show you step-by-step how to achieve this task.
#1. Backup Outlook PST File Automatically with Add-in Feature
To automatically back up Outlook 2016 PST files, you can use the Microsoft Outlook Backup add-in tool. It helps create PST backups at the interval you set.
- Download the Outlook 2016 Backup Add-In v1.7, unzip the downloaded zip file, double-click the OutlookBackupAddIn.msi file to install the add-in, and then launch Outlook.
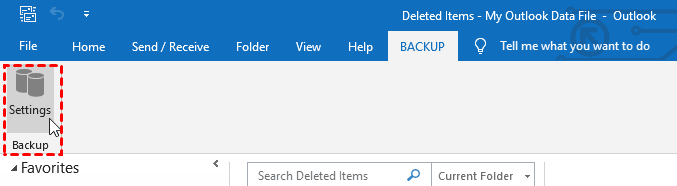
- From the menu bar, click BACKUP > Settings.
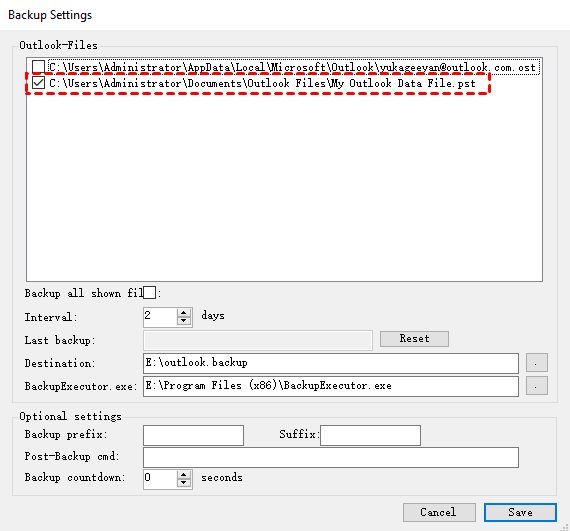
- Select the PST data files To set up a backup, select the "Interval" option and choose the time frame for the backup, such as 2 days. Next, specify the destination for the backup. Finally, click Save to confirm the settings.
- When you exit Outlook 2016 for the first time, an initial automatic backup will be taken.
#2. Backup Outlook PST File Automatically via Third-party Software
In addition to the methods mentioned, you can use powerful third-party software to automatically back up PST files in Outlook. Qiling Disk Master Professional, an all-round computer backup and restore software, offers advantages over Outlook Add-in programs, providing a more comprehensive solution for backing up PST files.
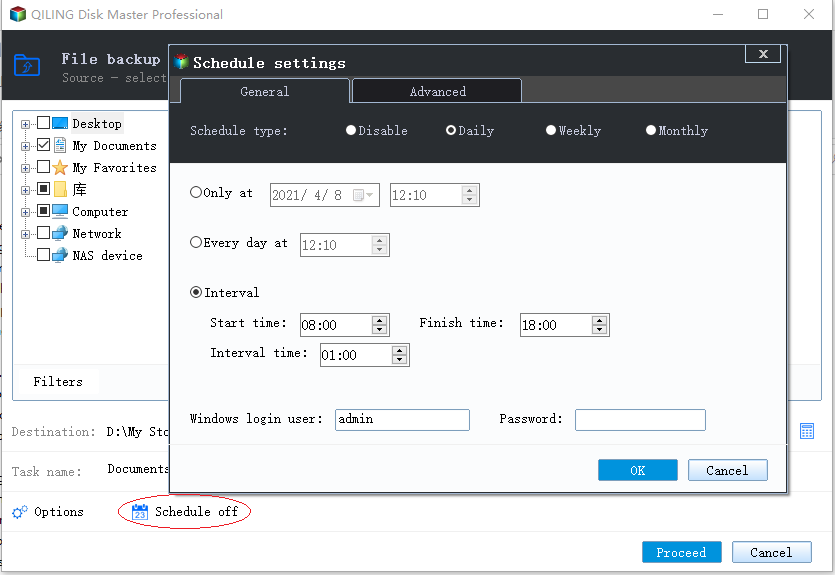
- This program allows for scheduled backups of Outlook PST files using daily, weekly, monthly, or event triggers, and also enables the option to wake up the computer to run scheduled tasks during off-peak hours.
- It saves time and space by only backing up changed files.
- The software has the ability to automatically delete old backup images, freeing up space and preventing full backup disks, making it a convenient and space-efficient solution.
Download this backup software and follow the steps below to create an automatic Outlook PST backup.
The Professional edition supports Windows 11, 10, 8, 7, XP, and Vista. For server users, try Qiling Disk Master Server.
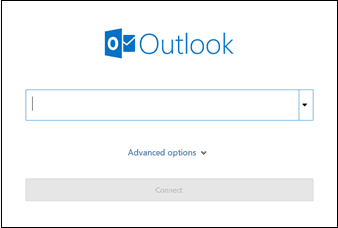
- Open Outlook 2016, type "email" and click "Connect", then follow the on-screen instructions to add the Outlook account containing PST files.
- Launch Qiling Disk Master Professional, click Backup, then File Backup.

- Click "Add Outlook data" and select the Outlook account or folders that contain the PST data you want to back up.
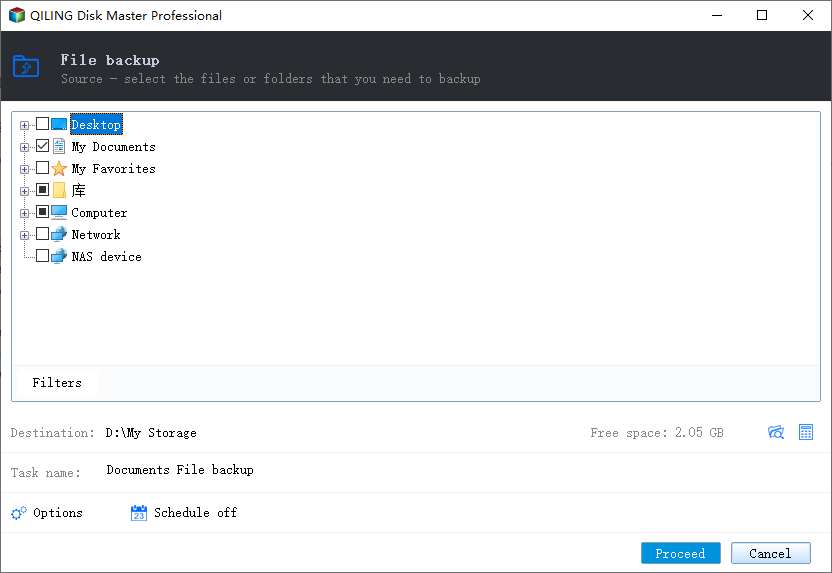
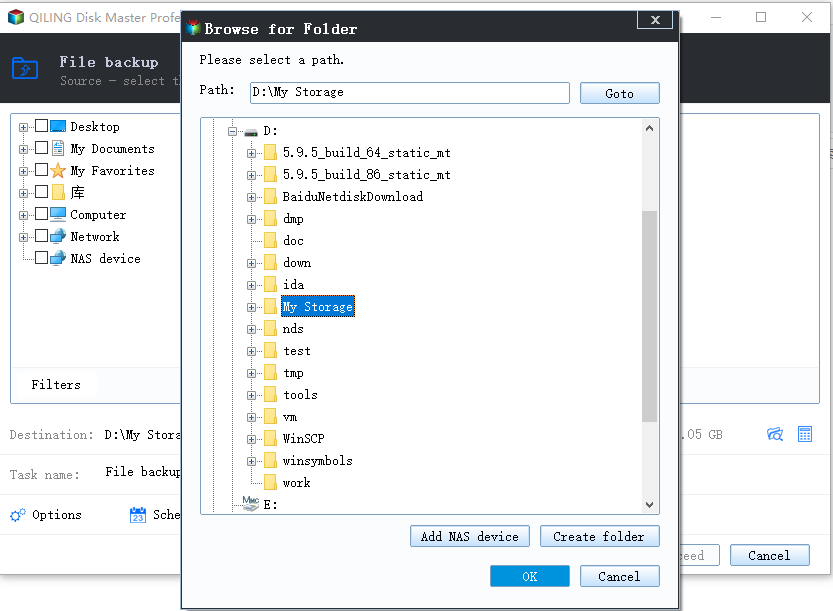
- Click the destination box and select where to save the PST backup image.
- To schedule a backup, enable daily, weekly, or monthly backups. Select "Wake the computer to run scheduled task" if the computer may be asleep at the backup time.
- After confirming the backup settings, click "Proceed" to run the Outlook PST backup task.
🌟 Notes:
- The Event triggers option supports PST backup at system startup and user logon, but it does not set a specific clock time for the task.
- To prevent the backup disk from becoming full, enable Backup Scheme to delete old backup images automatically.
Summary
Backing up your Outlook PST file automatically helps protect emails, contacts, tasks, and other Outlook data from corruption, accidental deletion, system crashes, and hardware failure. You can use the Outlook backup add-in for basic automatic backup or Qiling Disk Master for a more flexible scheduled backup plan.
Related Articles
- Backup Outlook PST Files to OneDrive with 2 Tested Ways
Learn both manual and automatic methods to back up Outlook PST files to OneDrive while avoiding common file locking issues. - D Drive Suddenly Missing in Windows 10 | How to Recover?
D drive missing and cannot see the D drive in Windows 10/11? Here you can learn why D drive disappeared in Windows 10 and how to restore D drive or other lost partition in Windows computer. - Fixed: Encrypt Contents to Secure Data Greyed Out Windows 10
If you find "Encrypt contents to secure data" option greyed out and therefore can't secure folders via EFS technology in Windows 10/8/7, try following solutions to fix it. - Solved: exFAT Drive Not Recognized in Windows 11
What's the best solution to exFAT drive not recognized in Windows 10/11? Read on since the answers are given in the following post.