Copy a Laptop OS to a USB Drive: Choose the Right Bootable Method
“Copy the OS to a pen drive” can mean several different things. A Windows installation USB installs or repairs Windows; a rescue USB starts recovery tools; a system image holds a restorable copy of the laptop; and a portable Windows installation attempts to boot and run directly from USB. Dragging C: files to a flash drive does none of these.
Decide what you need and prepare the drives
For disaster recovery, use a bootable rescue USB and a system or disk image stored on an external drive. The small rescue USB alone does not contain your laptop installation. For a new internal SSD, use a disk clone. For an installer, use Microsoft's official Media Creation Tool. Windows To Go was removed from Windows 10 version 2004 and later; ordinary disk cloning to a pen drive is not a supported promise of portable boot across PCs.
Have a reliable external drive with enough space for the image and a separate USB stick for recovery media. Creating bootable media erases the selected stick, so copy its files elsewhere first.
Create a bootable recovery USB
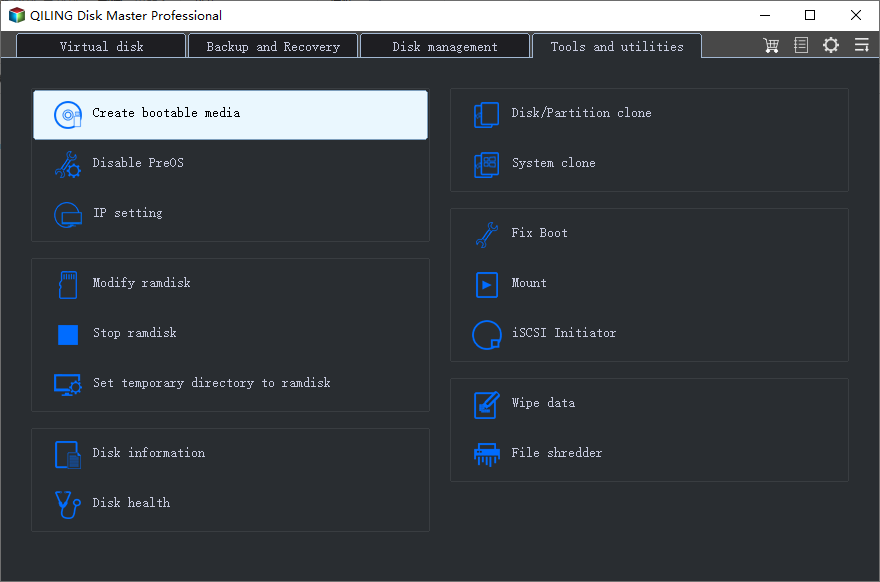
Step 1. Connect the USB stick and launch Qiling Disk Master on the working laptop. On Tools and utilities, choose Create bootable media.
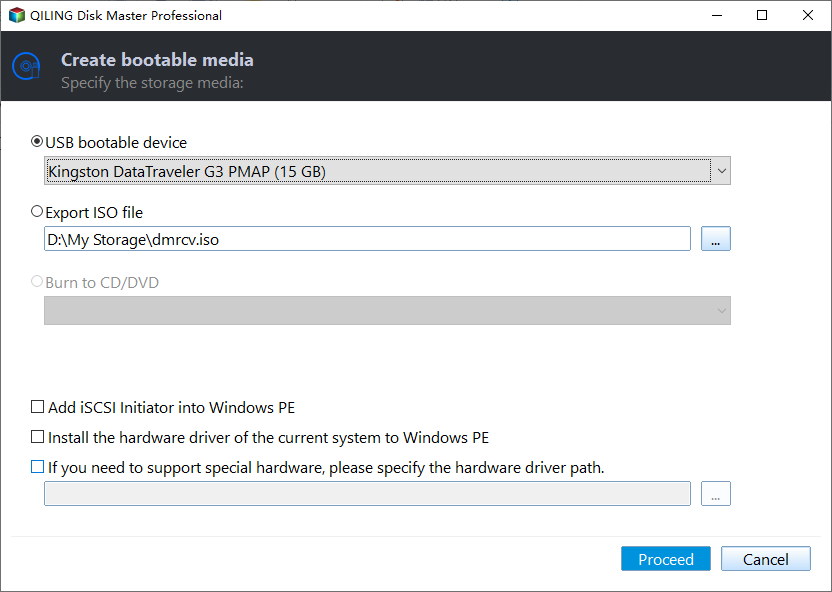
Step 2. Select USB bootable device and choose the stick by its model and capacity. Make sure it is not the external drive holding your backup image, then click Proceed. Confirm the erase warning only after copying any files you need from that USB stick.
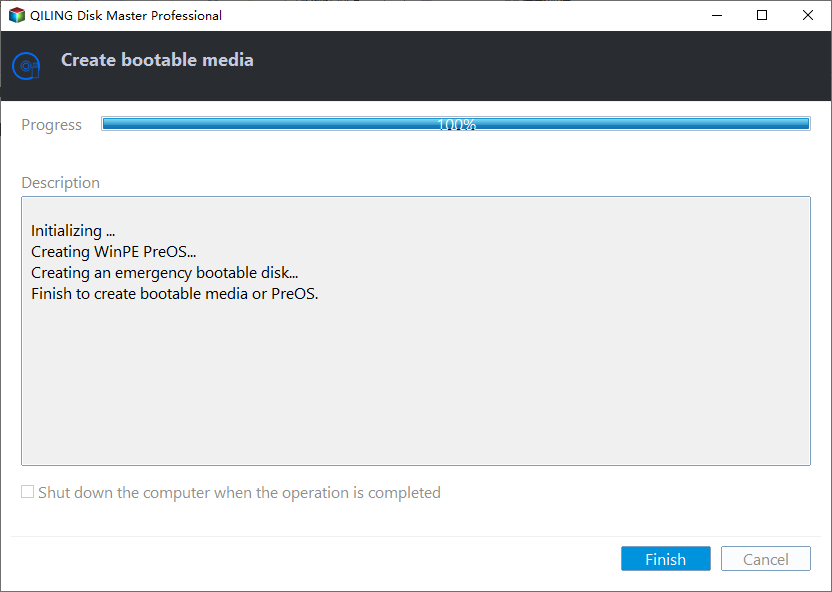
Step 3. Wait for the creation process to reach completion, click Finish, and leave the rescue USB available for a boot test.
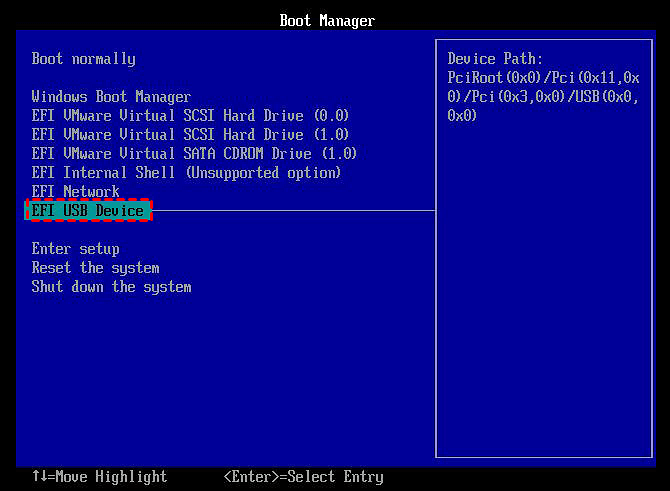
Step 4. Restart the laptop, open its one-time boot menu, and select the USB device. Confirm that Qiling's recovery environment opens, then exit without starting a restore. The menu in the example is only illustrative; its appearance and boot key vary by laptop. If USB is absent, review firmware boot mode and Secure Boot compatibility for that recovery medium.
Save the OS as a separate image
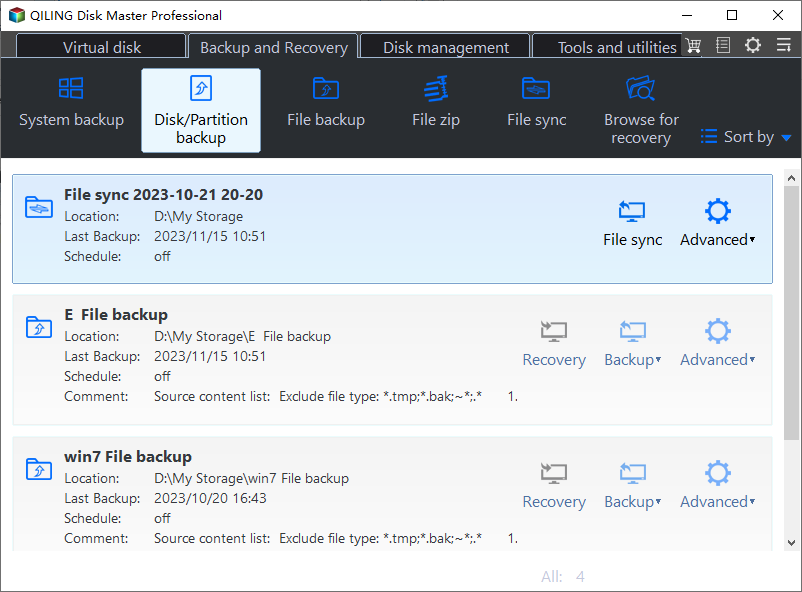
Step 1. Connect a separate external drive with enough free space for the image. In Qiling Disk Master, open Backup and Recovery > Disk/Partition backup.
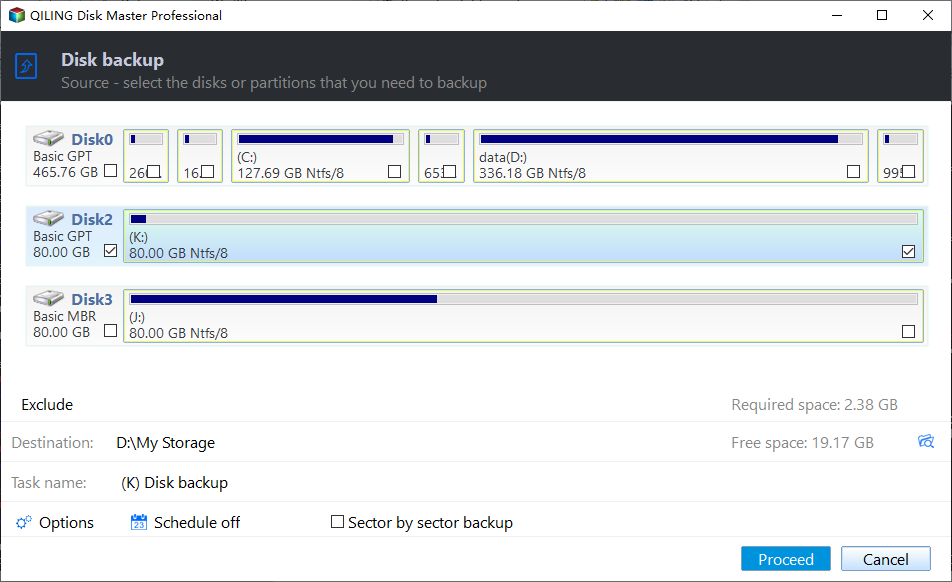
Step 2. Find the laptop's internal disk by the partition labeled C:. Check the box beside its disk number to include the entire system disk, with EFI/System Reserved and recovery partitions, rather than C: alone. Clear any unrelated disk selection. The screenshot checks another disk as an interface example; select the disk containing C: on your laptop.
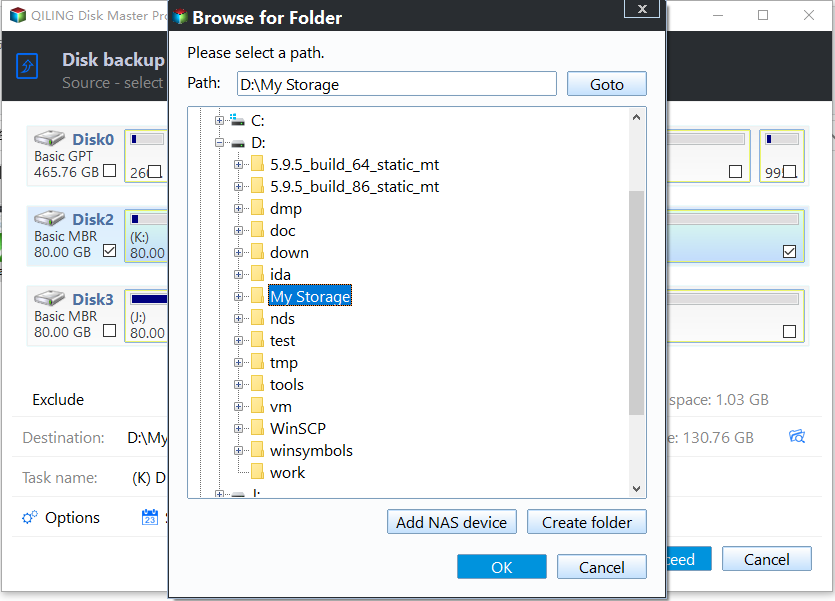
Step 3. Click the folder icon beside Destination, choose a folder on the external image drive, and click OK. Check the displayed destination path and free space; the image must not be saved to the disk being backed up.
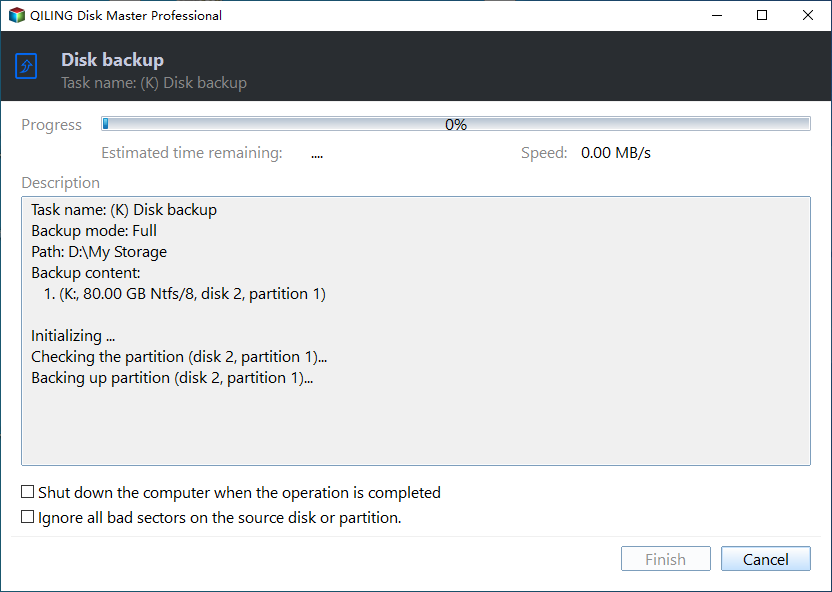
Step 4. Review the selected source disk and destination, then click Proceed. Wait for completion without disconnecting either drive. On Backup and Recovery, open the finished task's Advanced > Check Image option and wait for a successful check. Keep both the rescue USB and external image drive.
Step 5. Test the recovery pair: boot from the rescue USB with the image drive attached and check that Qiling can find the dated image file and the laptop's internal disk. Stop before the final restore confirmation; testing does not require overwriting a working laptop.
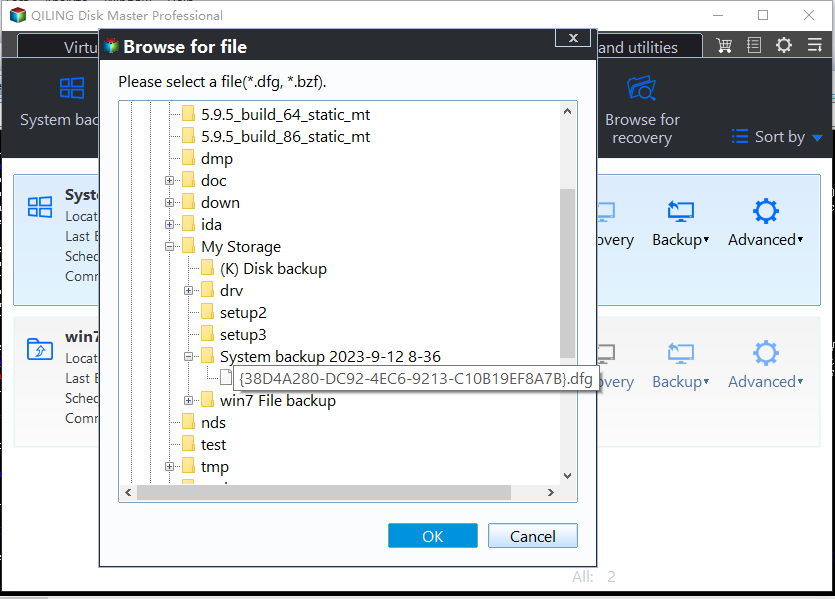
Step 6. For a real recovery, select the image and intended internal destination by model and capacity, review what will be overwritten, and click Proceed. Wait for completion before booting from the restored disk.
When a direct clone is appropriate
If replacing the laptop drive, connect the new SSD with a suitable adapter and use a disk-clone feature available in your edition. Select the old internal disk as source and the new SSD as destination, review all partitions and SSD alignment, then click Proceed. The destination is erased. Shut down and swap drives before testing boot; an ordinary USB clone is not the same as a licensed portable Windows installation.
Related Articles
- What Is Windows To Go?
Understand the limits of portable Windows before choosing a USB workflow. - Create a Bootable Windows USB
Compare Windows installation and portable-workspace options.
Products
Articles & Tutorials
- Data Recovery
- Data Backup
- File Recovery
- File Backup
- File synchronize
- System Backup and Restore
- Disk and Partition Clone
- Technical articles
- Disk Master Help
- Windows Deleted File and Disk Recovery Tutorials
- Windows File and Data Recovery Tutorials
- More Windows Tutorials for Install, Security, Files, and PC Tips
- Windows Boot, Repair, and Recovery Environment Tutorials
- Windows Backup Tutorials
- Windows Restore Tutorials
- Windows Clone and Migration Tutorials
- Windows Server Backup, Recovery, and Management Tutorials
- Windows Disk, Partition, and Storage Management Tutorials