How to Mirror a C Drive in Windows 10: Mirror, Clone, or Backup?
“Mirror C:” is ambiguous. A dynamic-disk mirror keeps a second volume synchronized for disk redundancy; a clone copies a drive to a replacement; an image backup preserves a point-in-time version for recovery. A mirror repeats accidental deletion and malware changes, so it is not a backup.
Choose the right result
For replacing a failing or small drive, clone the whole system disk, including EFI/System Reserved and recovery partitions. For rollback after a bad update, create a full-disk image on separate storage. Windows dynamic-disk mirroring is a specialized redundancy configuration with edition, firmware, and boot-partition considerations; Microsoft notes that dynamic disks are deprecated for uses other than mirrored boot volumes. Do not convert a working boot disk to dynamic merely to make a copy.
Before any method, save current files, record BitLocker recovery keys if relevant, and verify the target disk has enough capacity. Keep the source disk intact until the new setup boots successfully.
Method 1. Clone the system disk to a replacement
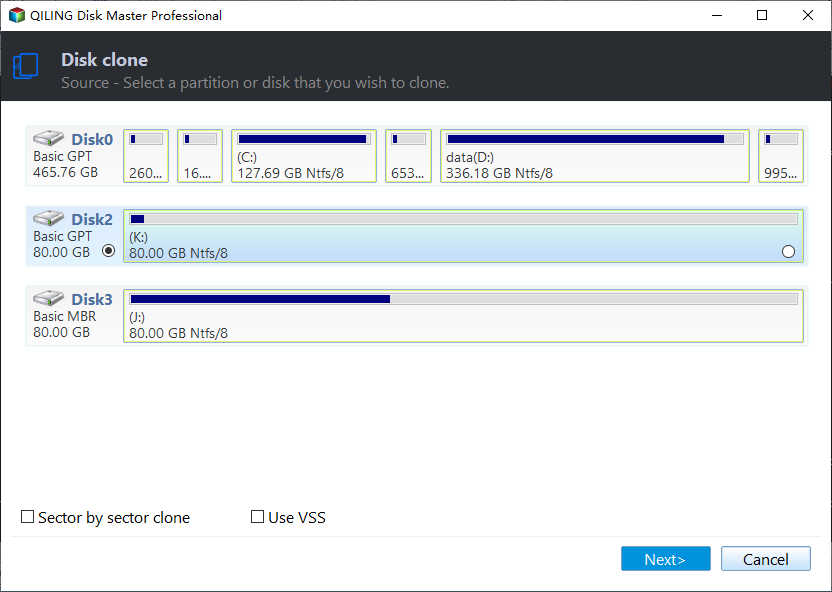
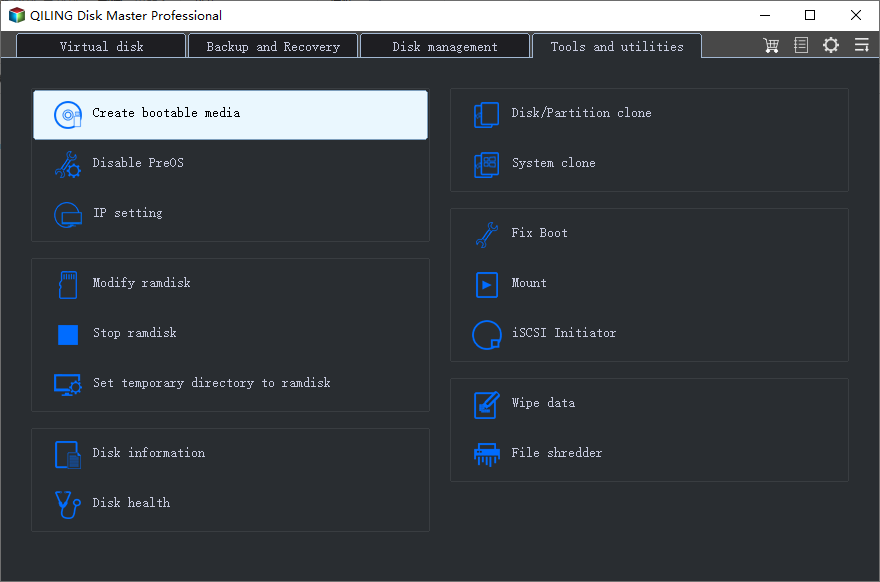
Step 1. Install or connect the replacement SSD/HDD and save any files already on it elsewhere. In an edition of Qiling Disk Master that supports system-disk cloning, open Tools and utilities > Disk/Partition clone. Select the current Windows disk as the whole-disk source by its model, capacity, and C: partition, not C: alone, then click Next. The example image has a different disk selected; choose the disk containing C: on your PC.
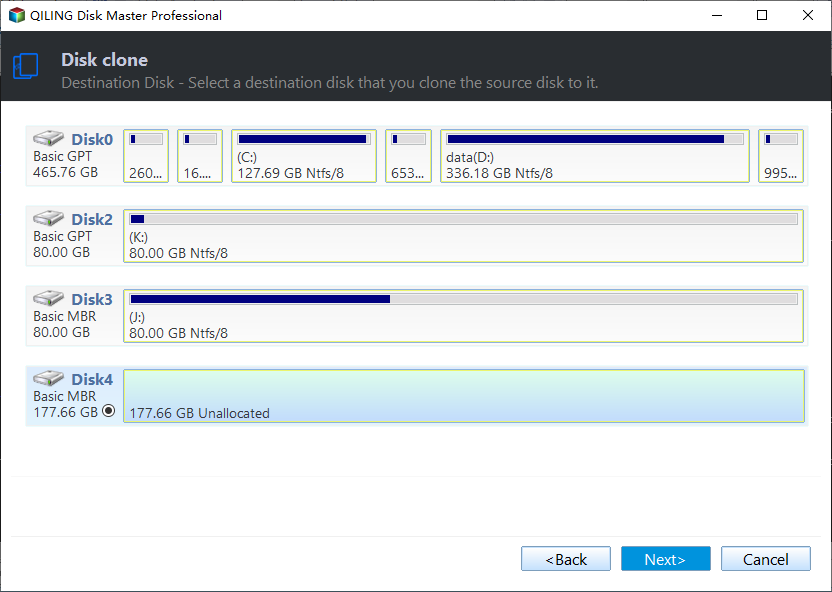
Step 2. Select the replacement as the whole-disk destination by its model and capacity, then click Next. Every destination partition and file will be overwritten, so check that source and destination disk numbers have not been reversed.
Step 3. In the preview, confirm that the boot, Windows, and recovery partitions are included. If the target is an SSD, enable Optimize for SSD when available; if it is larger, adjust the Windows partition size only if the preview offers that option. Recheck the clone direction, click Proceed, allow any requested reboot for locked system data, and wait for completion.
Step 4. Shut down, make the cloned disk the primary boot drive, and test Windows and recovery before erasing or repurposing the source disk.
Method 2. Keep a recoverable disk image
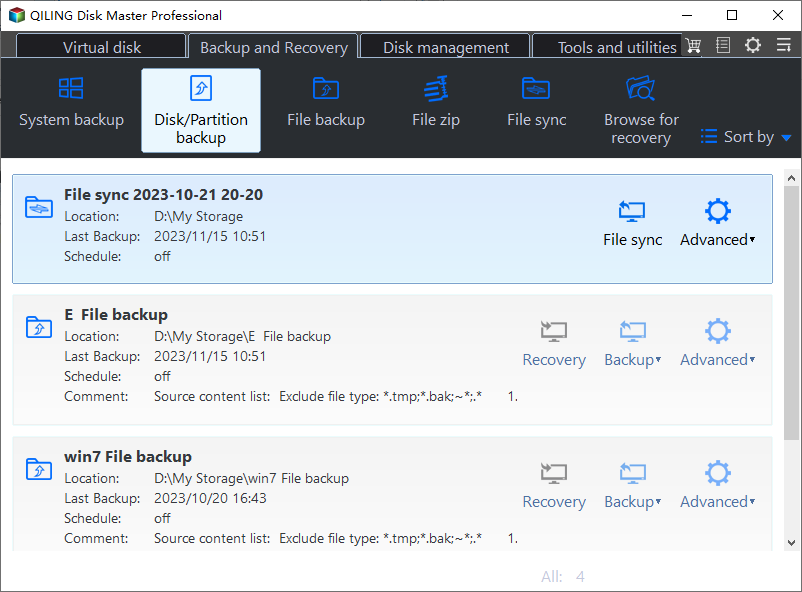
Step 1. Connect a separate backup drive with enough free space. In Qiling Disk Master, open Backup and Recovery > Disk/Partition backup.
Step 2. Find the physical disk containing C: and check the box beside its disk number to include the complete Windows disk, with EFI/System Reserved and recovery partitions. Clear any unrelated disk selection. The screenshot checks another disk to illustrate the control; select your own Windows disk.
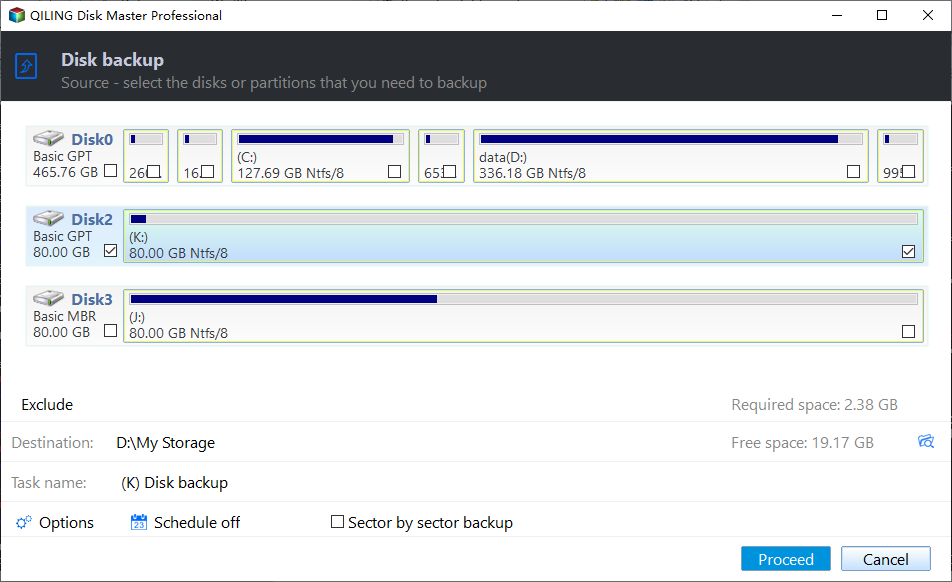
Step 3. Click the folder icon beside Destination, choose a folder on the separate backup drive, and click OK. Confirm that the destination is not on the source disk and has enough free space.
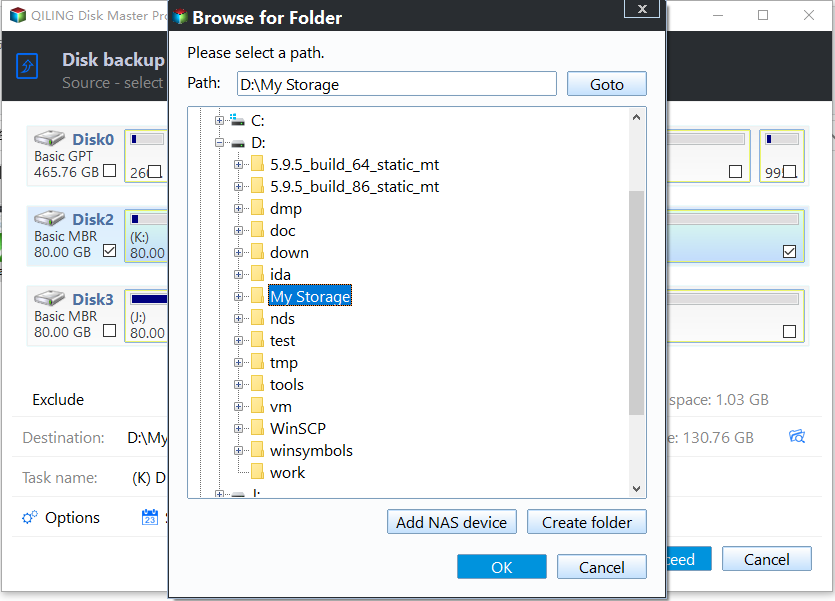
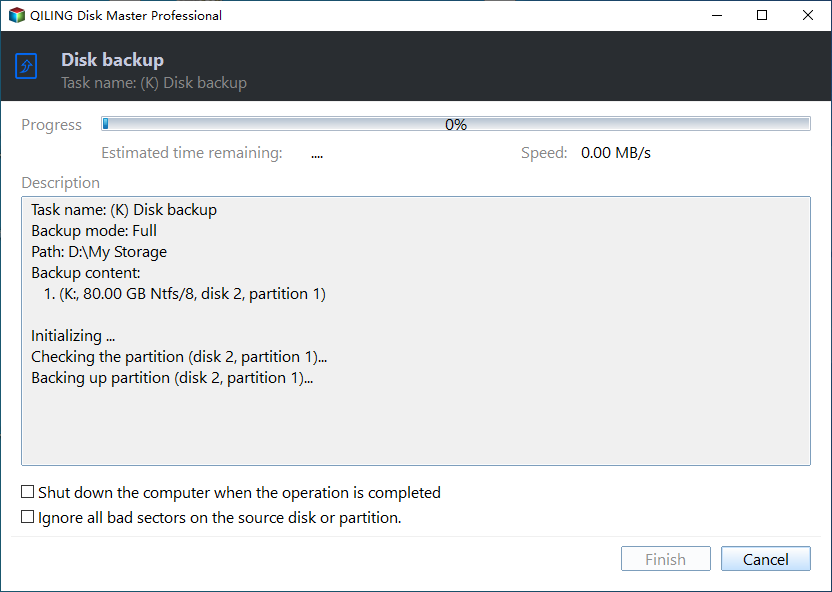
Step 4. Review the source and destination, click Proceed, and wait for the disk backup to finish without disconnecting either drive.
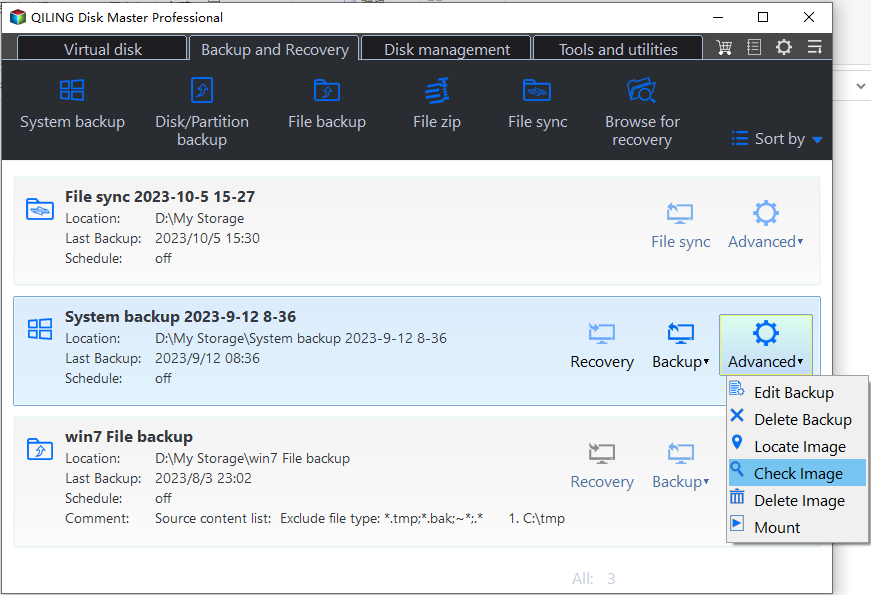
Step 5. Find the completed task on Backup and Recovery, confirm its date and location, and choose Advanced > Check Image. Wait for a successful check before relying on the image.
Step 6. Create compatible rescue media on a separate USB stick, then boot it once with the external image drive attached. Check that the image and internal disk appear, then stop before the final restore confirmation; this test does not require overwriting the working system.
Step 7. For an actual restore, first preserve newer files, then select the image and the replacement disk by model and capacity. Review the overwrite scope before clicking Proceed. An older image can restore a state from before corruption; a continuously synchronized mirror cannot.
About Windows dynamic-disk mirroring
Disk Management may offer Add Mirror on supported configurations with sufficient unallocated space on a second physical disk. This can convert disks to dynamic and may need extra boot configuration, especially with UEFI/GPT. Review edition and firmware support and Microsoft's boot-mirroring procedure before using it; the secondary copy is not automatically an independently bootable rescue disk. Maintain an offline backup regardless.
Related Articles
- Clone a Windows 10 HDD to SSD
Follow a system-drive migration workflow. - Back Up the EFI System Partition
Protect startup files when imaging a UEFI PC.
Products
Articles & Tutorials
- Data Recovery
- Data Backup
- File Recovery
- File Backup
- File synchronize
- System Backup and Restore
- Disk and Partition Clone
- Technical articles
- Disk Master Help
- Windows Deleted File and Disk Recovery Tutorials
- Windows File and Data Recovery Tutorials
- More Windows Tutorials for Install, Security, Files, and PC Tips
- Windows Boot, Repair, and Recovery Environment Tutorials
- Windows Backup Tutorials
- Windows Restore Tutorials
- Windows Clone and Migration Tutorials
- Windows Server Backup, Recovery, and Management Tutorials
- Windows Disk, Partition, and Storage Management Tutorials