Recover an Accidentally Replaced File in Windows
Replacing a file with another file of the same name can hide the original version immediately. Recovery depends on whether Windows, an app, or a cloud service kept an earlier copy.
Understand the problem
An overwritten file is harder to recover than a normally deleted file because new content may occupy the old file record. Act quickly and check all version sources before saving more data to the same folder.
- Confirm the target disk, partition, drive letter, file system, and capacity before changing anything.
- Back up or recover important files before formatting, deleting, resizing, converting, or reinstalling Windows.
- For boot-related repairs, check BIOS or UEFI mode, boot order, and disk style before editing system partitions.
Use Windows built-in tools
Start with version-based recovery options before running a scan.
- Right-click the file or folder and check Restore previous versions.
- Check File History, OneDrive version history, Dropbox, Google Drive, or other sync tools.
- Look for temporary copies created by Office, editors, or design software.
- If the original file was deleted before replacement, scan the original folder or drive.
Use Qiling tools for guided steps
 Deep Data Recovery
Scan the original drive for recoverable versions after a file is replaced or deleted.
Function. Recover files with Fast Scan
Step 1. Stop writing new data to the drive that stored the original file. Install Deep Data Recovery on another drive if possible.
Step 2. Launch Deep Data Recovery and choose Fast Scan first. Fast Scan is suitable when the replacement happened recently or the original file was deleted first.
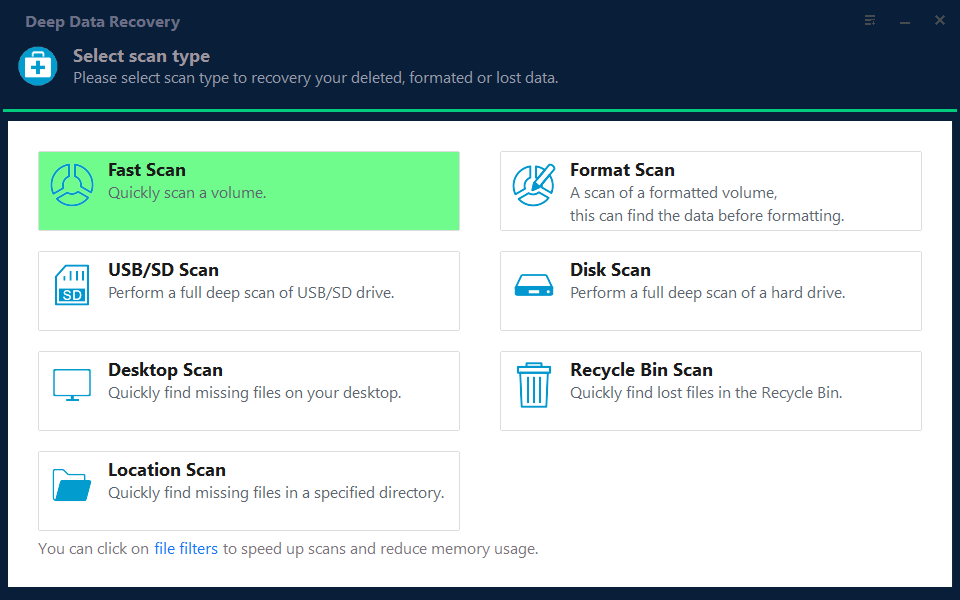
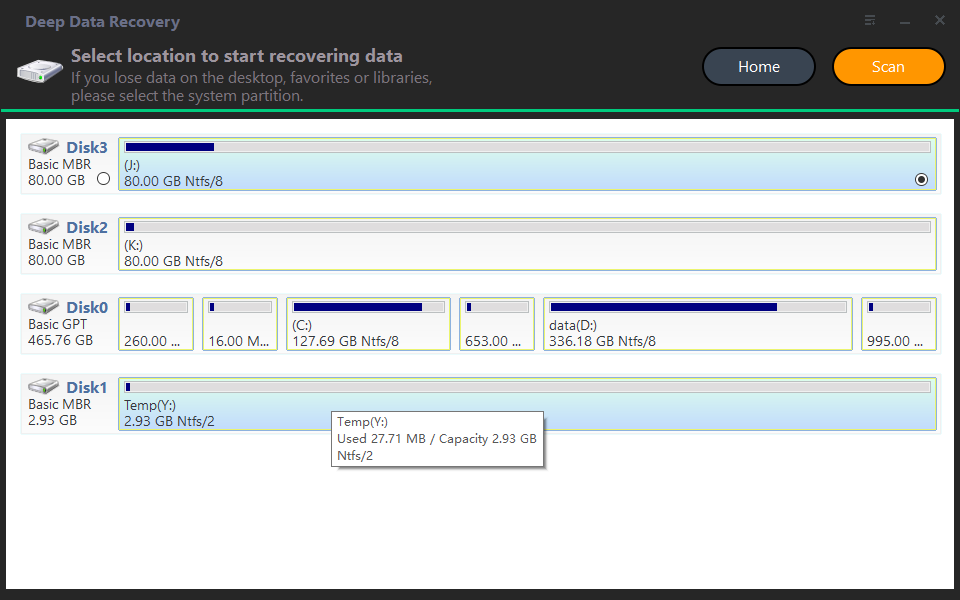
Step 3. Select the drive that stored the original file as the scan location. If the original folder is missing, scan the whole partition where it was stored.
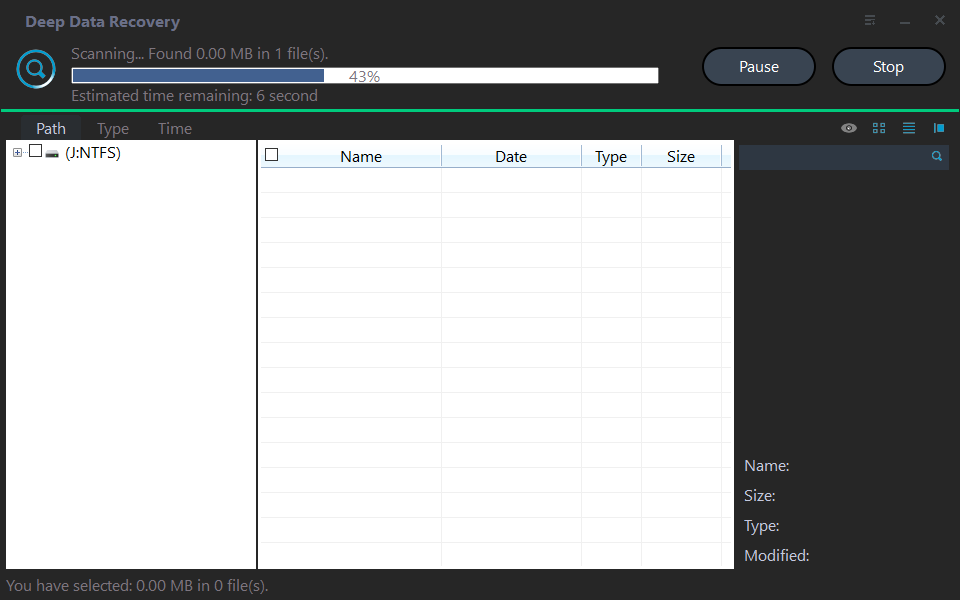
Step 4. Wait for the scan to complete. Use file type, name, date, and path filters to narrow the results.
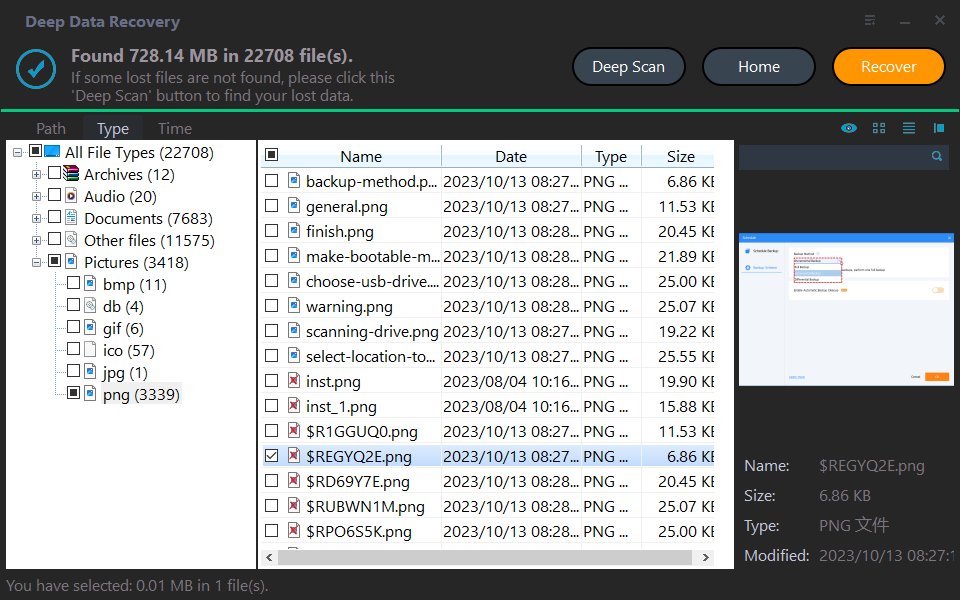
Step 5. Preview the files, select the items you need, and recover them to another disk or external drive.
Check the result
Open the recovered file and compare its content, date, and size. Save the recovered copy to another drive so it does not overwrite other recoverable data.
Related Articles
-
Recover Deleted Files
Recover deleted files from a Windows drive before new data overwrites them. -
Accidentally Emptied Recycle Bin
Restore files after the Recycle Bin has been emptied.
Products
Articles & Tutorials
- Data Recovery
- Data Backup
- File Recovery
- File Backup
- File synchronize
- System Backup and Restore
- Disk and Partition Clone
- Technical articles
- Disk Master Help
- Windows Deleted File and Disk Recovery Tutorials
- Windows File and Data Recovery Tutorials
- More Windows Tutorials for Install, Security, Files, and PC Tips
- Windows Boot, Repair, and Recovery Environment Tutorials
- Windows Backup Tutorials
- Windows Restore Tutorials
- Windows Clone and Migration Tutorials
- Windows Server Backup, Recovery, and Management Tutorials
- Windows Disk, Partition, and Storage Management Tutorials