Convert FAT32 to NTFS with Disk Management or Command Prompt
FAT32 works on many older devices but cannot store a single file of 4 GB or larger. NTFS adds Windows permissions and other features useful for a Windows-only data drive. The right method depends on whether you can erase the volume and whether other devices still need FAT32.
Disk Management does not perform an in-place file-system conversion: its Format action recreates the file system and removes the volume's existing data. Windows' convert command can change a healthy FAT32 volume to NTFS without formatting, but a verified backup is still important.
Check the volume and prepare a backup
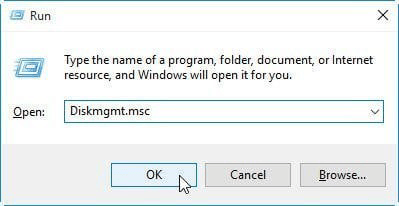
Step 1. Press Win + R, type diskmgmt.msc, and click OK. In Disk Management, locate the FAT32 volume and write down its drive letter, size, and physical disk number. Check its contents in File Explorer as well; do not identify the target by drive letter alone.
Step 2. Decide where the drive will be used. A camera, game console, or firmware updater may require FAT32 even when Windows can use NTFS. For sharing large files across different systems, check whether each device supports exFAT before choosing NTFS.
Step 3. Connect a separate physical drive with enough space. In Qiling Disk Master, open Backup and Recovery and choose File Backup.

Step 4. In the source tree, expand the FAT32 drive and check the files and folders you need to keep. Make sure you are selecting content from the volume identified in Step 1, not from the backup drive.

Step 5. Open the destination selector and choose a folder on the separate physical drive. Confirm the folder choice, then check that the source and destination are on different disks.
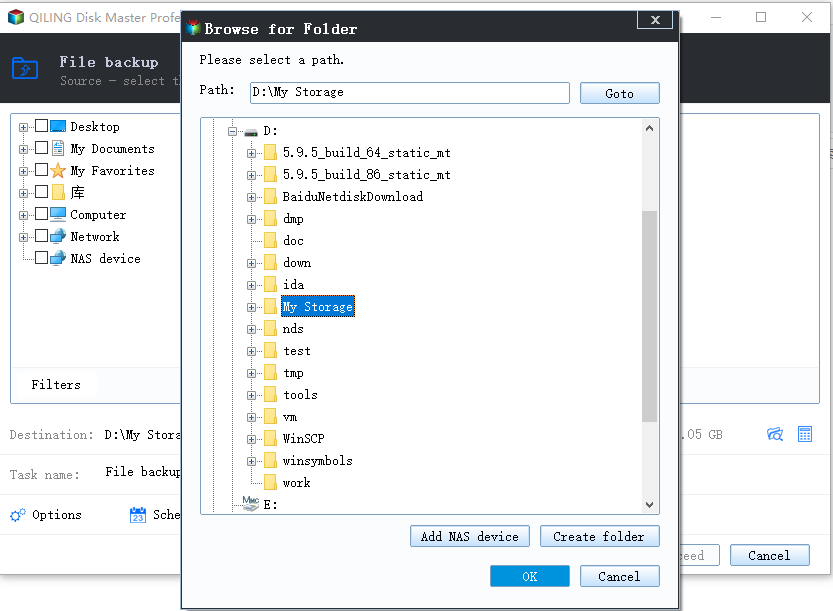
Step 6. Click Proceed and wait for the backup to finish. Restore a sample file to a different folder and open it to check the backup. Keep the backup drive disconnected while formatting the FAT32 volume.
Method 1. Format as NTFS in Disk Management
Use this method only when the backup is verified and erasing the FAT32 volume is acceptable. Formatting is not an in-place conversion.
Step 1. Reopen Disk Management and match the FAT32 volume to the recorded disk number, drive letter, and capacity. Right-click that volume, not the disk label or another partition, and choose Format. If the option is unavailable because the volume is in use, stop and check which volume you selected.
Step 2. In the Format dialog, enter a volume label if desired, set File system to NTFS, and leave Allocation unit size at Default unless a specific application requires another value. Perform a quick format is generally appropriate for a healthy volume, but it does not securely erase data.
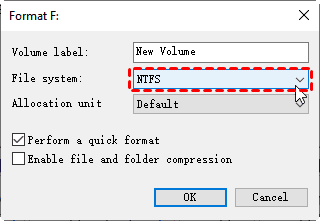
Step 3. Check the volume letter in the dialog once more, click OK, then confirm the warning that formatting removes existing data. Wait until Disk Management shows the volume as NTFS and Healthy.
Step 4. Reconnect the backup drive and restore the saved files to the newly formatted volume. Open several files to make sure the restore succeeded.
Method 2. Convert a healthy FAT32 volume without formatting
Step 1. Confirm the volume still shows FAT32 and that the backup is usable. Close files and programs using the drive. In File Explorer, right-click the drive, open Properties, and note its current volume label and drive letter.
Step 2. Search for Command Prompt, choose Run as administrator, and approve the prompt. Run dir X:\, replacing X with the recorded FAT32 drive letter, to check that it lists the expected files. If it lists another drive, stop.
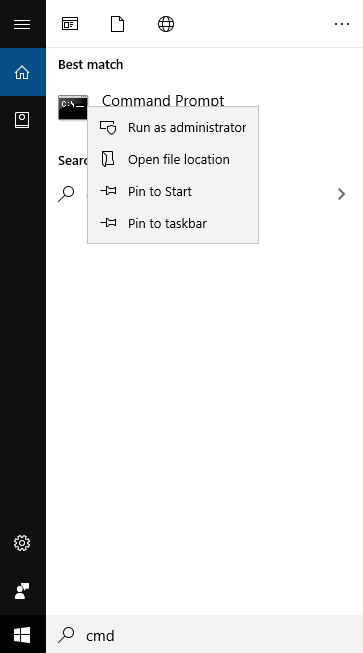
Step 3. With the correct letter confirmed, enter the following command, replacing X: with that drive letter:
convert X: /fs:ntfsStep 4. If asked for the current volume label, type the label noted in Step 1 and press Enter. Wait for Conversion complete; do not unplug the drive or interrupt the operation. The screenshot shows an example using drive F:, not the letter to type on your PC.
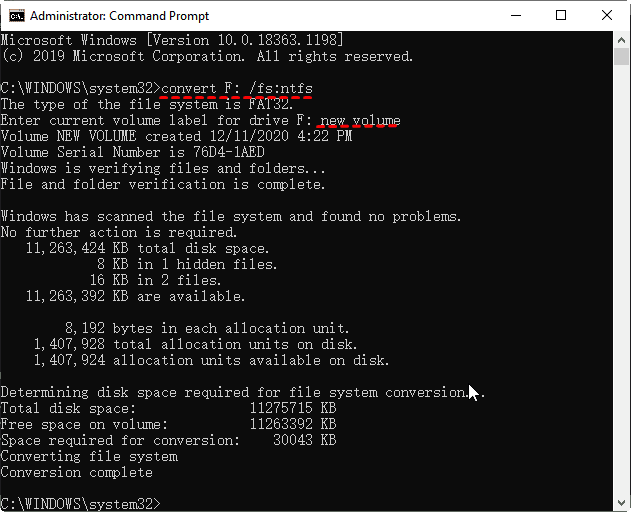
Step 5. If Windows says the volume cannot be locked and offers to convert it at the next restart, follow that prompt only after confirming the letter again. Leave the drive connected, restart normally, and let Windows finish before using it. Do not assume conversion succeeded until the file system shows NTFS.
Step 6. Open the drive's Properties and confirm File system: NTFS. Open several original files and compare them with the backup. If the command reports an error or the volume still shows FAT32, stop and investigate before trying another write operation. convert does not convert exFAT to NTFS, and returning to FAT32 generally requires formatting.
Verify the change and restore compatibility if needed
Reopen Disk Management or the drive's Properties dialog. Confirm NTFS, the expected capacity, and that representative files open. If the drive is for a device that does not recognize NTFS, restore data from the backup after formatting it to that device's supported file system.
Keep the backup until the drive has been tested on every device that needs it. Formatting or conversion will not repair a failing USB controller or physically damaged storage.
Related Articles
- Convert FAT32 to NTFS in Windows 10
Compare the built-in conversion route with formatting and data backup. - FAT32 to NTFS Conversion Is Unavailable
Diagnose why Windows refuses an in-place conversion before retrying.
Products
Articles & Tutorials
- Data Recovery
- Data Backup
- File Recovery
- File Backup
- File synchronize
- System Backup and Restore
- Disk and Partition Clone
- Technical articles
- Disk Master Help
- Windows Deleted File and Disk Recovery Tutorials
- Windows File and Data Recovery Tutorials
- More Windows Tutorials for Install, Security, Files, and PC Tips
- Windows Boot, Repair, and Recovery Environment Tutorials
- Windows Backup Tutorials
- Windows Restore Tutorials
- Windows Clone and Migration Tutorials
- Windows Server Backup, Recovery, and Management Tutorials
- Windows Disk, Partition, and Storage Management Tutorials