Delete Dell OEM Partition Safely
Dell OEM partitions may store diagnostics, recovery tools, or factory restore files. Deleting them can free space, but it may remove recovery options.
Understand the problem
Before deleting an OEM partition, decide whether you still need Dell factory recovery. Create recovery media or a full backup first.
- Confirm the exact disk, partition, file system, Windows version, boot mode, or sync setting before making changes.
- Back up or recover important files before wiping, formatting, converting, cloning, reinstalling, or repairing Windows.
- For boot and update tasks, prepare recovery media and check BIOS or UEFI settings before deeper repair.
Use Windows built-in tools
Check before removal.
- Open Disk Management and identify the Dell OEM partition by size and location.
- Create recovery media if you still need factory restore capability.
- Back up important files.
- Use DiskPart delete partition override only when the target is confirmed.
- Use the freed space only after deletion is complete.
Use Qiling tools for guided steps
 Qiling Disk Master
Back up files and review the disk map before deleting a Dell OEM partition.
Function. Back up important files first
Step 1. Connect an external drive or choose a safe network location with enough free space for files on the Dell computer.
Step 2. Open Qiling Disk Master and choose File Backup. This protects files before cleanup, partition changes, repair, or system updates.

Step 3. In the tree control, select the files and folders that must be protected. Protect user files before removing recovery or OEM partitions

Step 4. Choose a destination that is not affected by the operation, such as another disk, external drive, NAS, or shared folder.
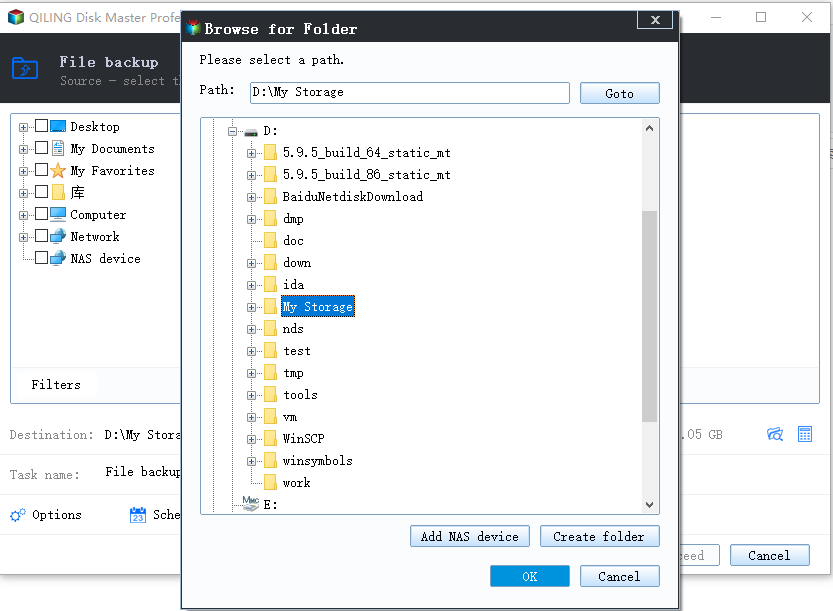
Step 5. Review the source and destination, then click Proceed. Wait for the backup to finish before continuing.
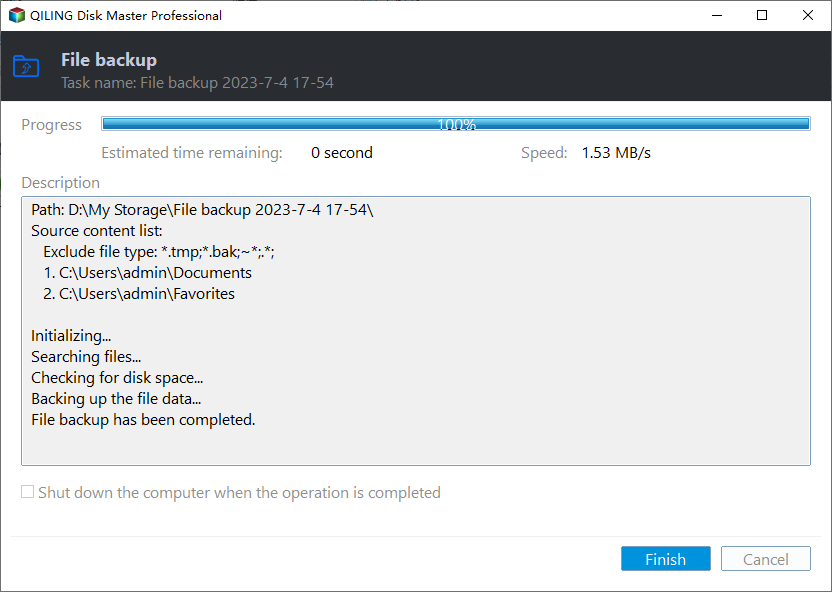
Function. Resize or move the partition with preview
Step 1. Open Qiling Disk Master and identify the neighboring partition by drive letter, capacity, file system, and position.
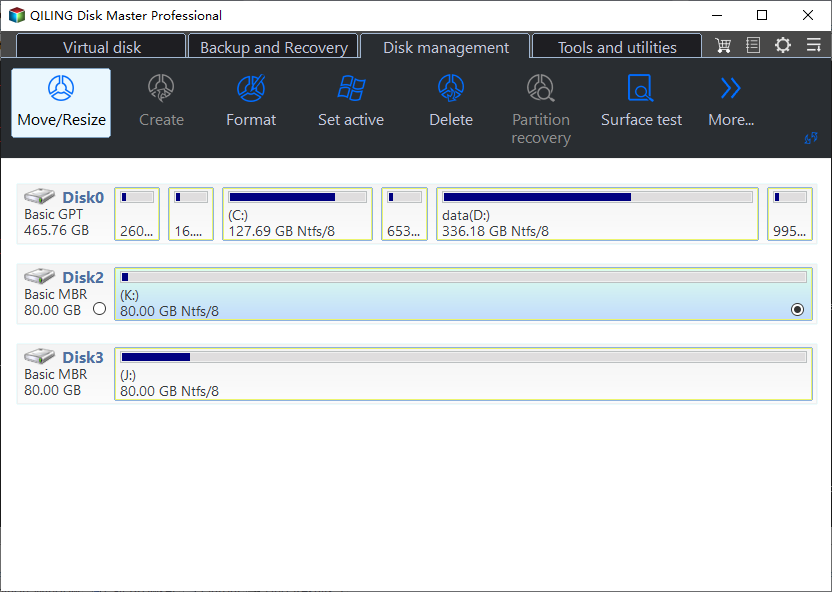
Step 2. Select the partition and click Resize/Move. Check where unallocated space is located before changing the size.
Step 3. Drag the border or enter the size to use free space released by the OEM partition. Leave enough space for Windows, updates, and applications.
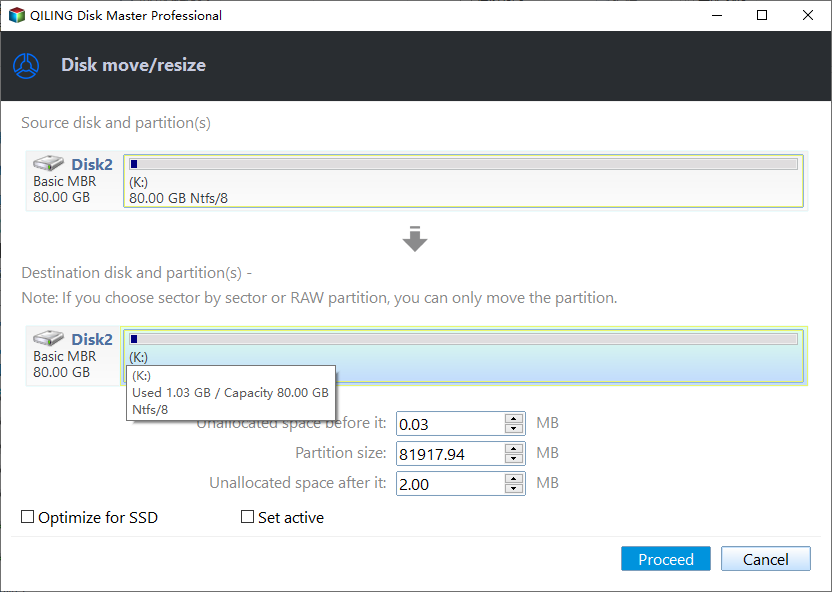
Step 4. Review the pending operations and click Proceed only after confirming the correct disk and partition.
Check the result
After deletion, restart and confirm Windows still boots. Keep recovery media in case you need diagnostics later.
Related Articles
-
Delete Partition
Delete a selected partition after checking data and disk layout. -
Delete Partition Override Not Working
Fix cases where protected partitions cannot be deleted normally.
Products
Articles & Tutorials
- Data Recovery
- Data Backup
- File Recovery
- File Backup
- File synchronize
- System Backup and Restore
- Disk and Partition Clone
- Technical articles
- Disk Master Help
- Windows Deleted File and Disk Recovery Tutorials
- Windows File and Data Recovery Tutorials
- More Windows Tutorials for Install, Security, Files, and PC Tips
- Windows Boot, Repair, and Recovery Environment Tutorials
- Windows Backup Tutorials
- Windows Restore Tutorials
- Windows Clone and Migration Tutorials
- Windows Server Backup, Recovery, and Management Tutorials
- Windows Disk, Partition, and Storage Management Tutorials