How to Partition a Dell Hard Drive Safely
Why partition a Dell hard drive?
Creating separate partitions can keep Windows, personal files, backups, and project data organized. On a Dell computer, however, the disk can also contain EFI, Recovery, and OEM partitions. These small partitions are needed for startup or recovery and should not be deleted, moved, or formatted unless you understand their purpose.
Before changing Dell partitions
- Back up important files to a separate drive.
- Check Disk Management to identify the Windows, Recovery, EFI, and OEM partitions.
- Keep enough free space on the C: drive for Windows updates and applications.
- Do not shrink, delete, or format partitions marked EFI System, Recovery, or OEM.
Method 1. Partition with Disk Management
Step 1. Press Win + R, type diskmgmt.msc, and press Enter.
Step 2. Right-click a large data or C: partition with enough unused space, then choose Shrink Volume. Enter the amount of space to release and select Shrink.
Step 3. Right-click the new unallocated space and choose New Simple Volume.
Step 4. Use the wizard to set the volume size, assign a drive letter, choose NTFS, and give the new partition a clear label.
Step 5. Open File Explorer to confirm the new drive appears. If Shrink Volume is unavailable or returns less space than expected, use the next method after confirming your backup.
Method 2. Partition with Qiling Disk Master
 Qiling Disk Master
Use Qiling Disk Master to adjust an existing partition first when you need free space, then create a new partition from unallocated space in a separate operation.
Step 1. Open Qiling Disk Master and identify the Dell system disk by capacity, disk number, and existing drive letters. Leave EFI, Recovery, and OEM partitions unchanged.
Part A. Create unallocated space if the Dell disk has none
If the disk already has enough unallocated space, skip Part A and go directly to Part B.
Step 2. Right-click a large data partition, such as D: or another non-system data volume, and choose Resize/Move Partition. Do not select EFI, Recovery, or OEM partitions.
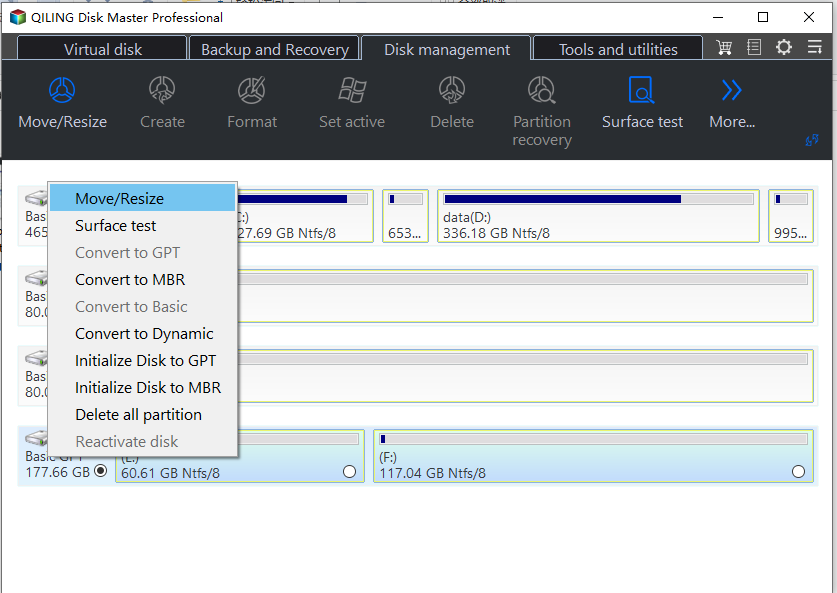
Step 3. Drag the partition border or enter a smaller partition size to release the amount of space you want for the new partition. Keep enough free space on the original partition for existing files and future updates.
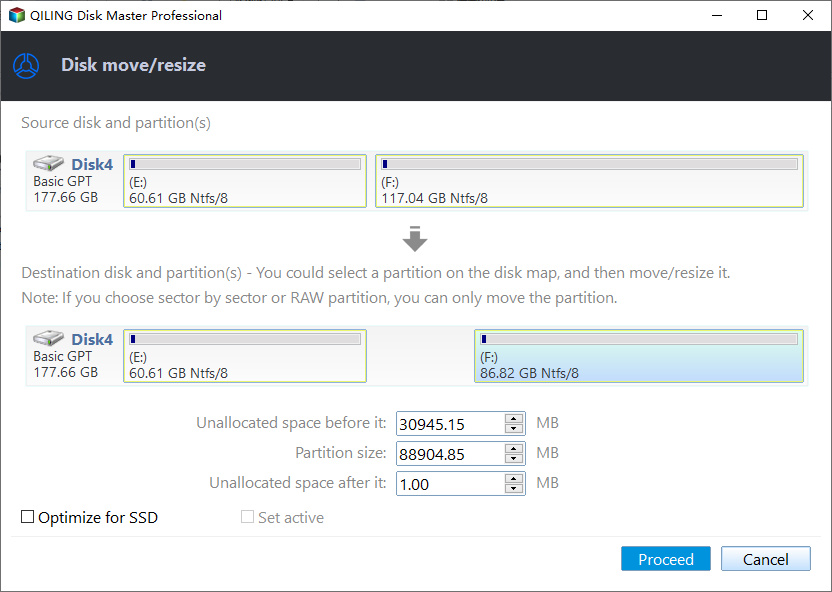
Step 4. Review the resize preview, then click Proceed to apply the operation. After it finishes, return to the disk map and confirm that the new unallocated space is available for creating a partition.
Part B. Create a new partition from unallocated space
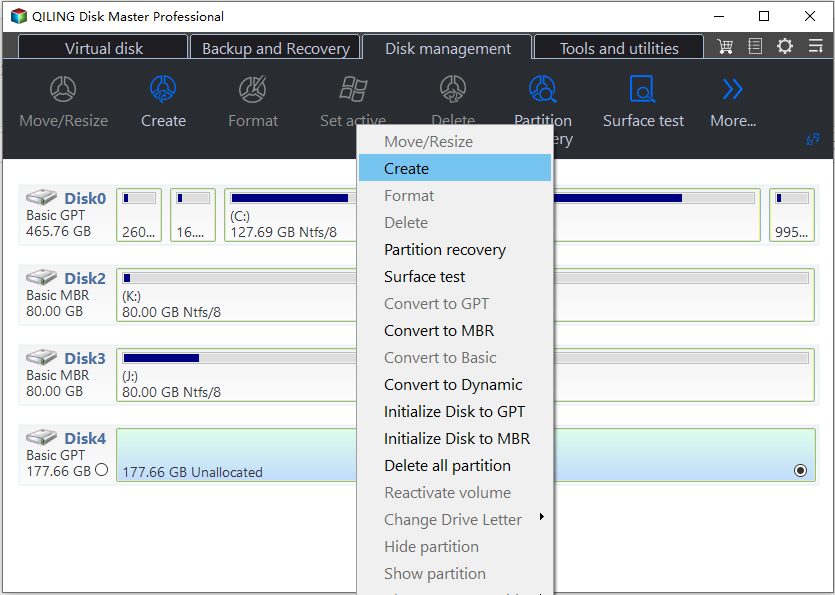
Step 5. Right-click the unallocated space and choose Create Partition. This is a separate function from Resize/Move Partition.
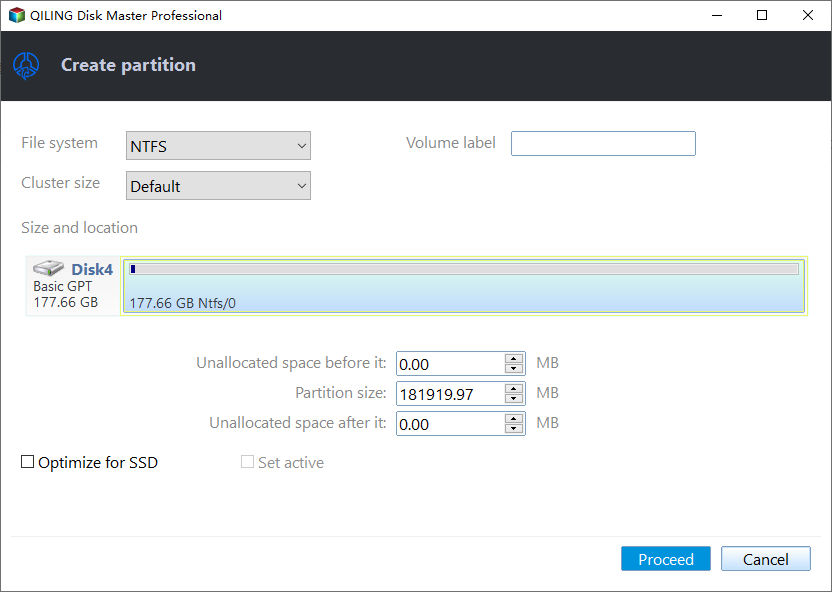
Step 6. Set the partition size, drive letter, file system, and volume label. Use NTFS for a normal Windows data partition unless you have a specific reason to choose another file system.
Step 7. Review the disk map and the pending operation list. Confirm that it only includes the intended resize operation, if needed, and the new partition creation.
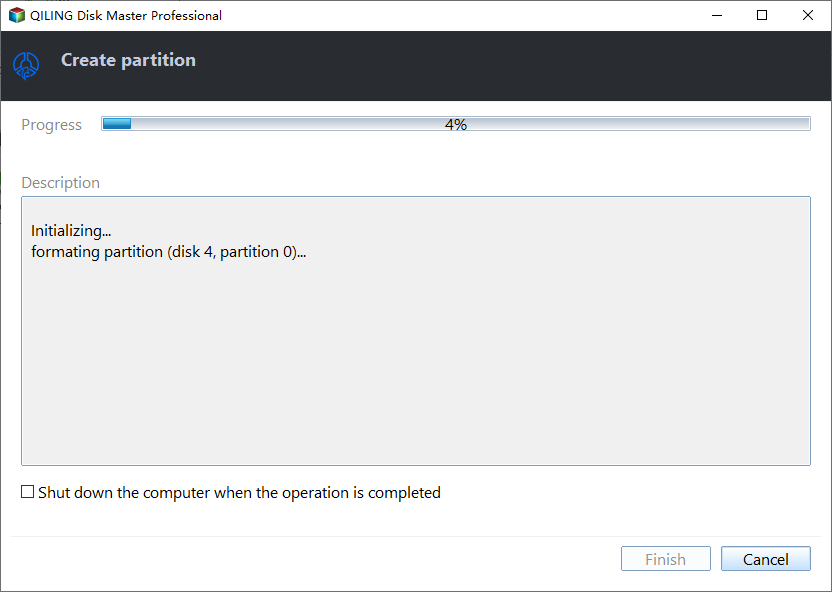
Step 8. Click Proceed to apply the pending operations. Keep the Dell computer connected to power until the task finishes.
Conclusion
Disk Management is suitable for basic partition creation. A partition manager is useful when you need a clearer preview or more control over resizing. In either case, protect data first and leave Dell's startup and recovery partitions intact.
Related Articles
-
Create More Than 4 Partitions
Learn how partition style affects the number of partitions a Windows disk can contain. -
Partition a 3TB Hard Drive
Use GPT and create partitions safely on a large-capacity hard drive.
Products
Articles & Tutorials
- Data Recovery
- Data Backup
- File Recovery
- File Backup
- File synchronize
- System Backup and Restore
- Disk and Partition Clone
- Technical articles
- Disk Master Help
- Windows Deleted File and Disk Recovery Tutorials
- Windows File and Data Recovery Tutorials
- More Windows Tutorials for Install, Security, Files, and PC Tips
- Windows Boot, Repair, and Recovery Environment Tutorials
- Windows Backup Tutorials
- Windows Restore Tutorials
- Windows Clone and Migration Tutorials
- Windows Server Backup, Recovery, and Management Tutorials
- Windows Disk, Partition, and Storage Management Tutorials