Fix No Boot Device Available in Windows 7
The message No Boot Device Available means the computer cannot find a disk that contains bootable Windows files. It may appear after a BIOS reset, disk replacement, cable issue, failed clone, or damaged boot record.
Understand the problem
Before rebuilding boot files, confirm that the disk is physically detected. If the disk is failing, recover or back up important files first.
- Confirm the exact disk, partition, drive letter, file system, and capacity before changing anything.
- Back up or recover important files before formatting, deleting, converting, resizing, or recreating partitions.
- For boot-related changes, check BIOS or UEFI mode, boot order, and system partition status before editing disk layout.
Use Windows built-in tools
Start with hardware and firmware checks, then use Windows recovery commands only after the system disk is detected.
- Restart the PC and enter BIOS or UEFI setup. Confirm the system disk appears in the storage list.
- Set the Windows disk as the first boot device and save the change.
- Reseat SATA and power cables, or try another port if the disk is not detected.
- Boot from Windows 7 installation media and run Startup Repair.
- Open Command Prompt and run bootrec /fixmbr, bootrec /fixboot, and bootrec /rebuildbcd if Startup Repair cannot fix the issue.
Use Qiling tools for guided steps
 Qiling Disk Master
Create bootable media and protect data before repairing a disk that cannot boot.
Function. Prepare bootable media before boot repair
Step 1. On a working computer, connect an empty USB drive. Back up any files on it because creating bootable media will overwrite the USB drive.
Step 2. Open Qiling Disk Master, go to Tools and utilities, and choose Create bootable media.
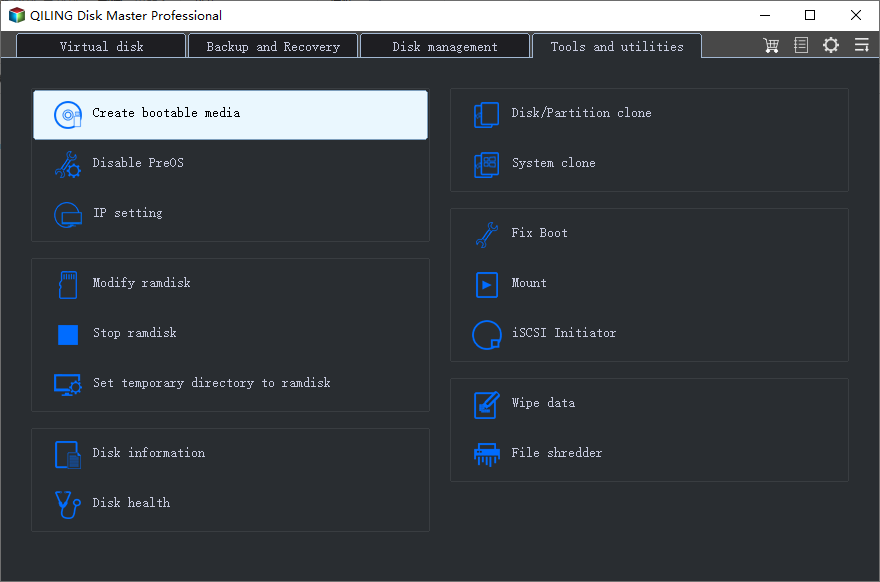
Step 3. Select the USB boot device option and choose the correct USB drive.
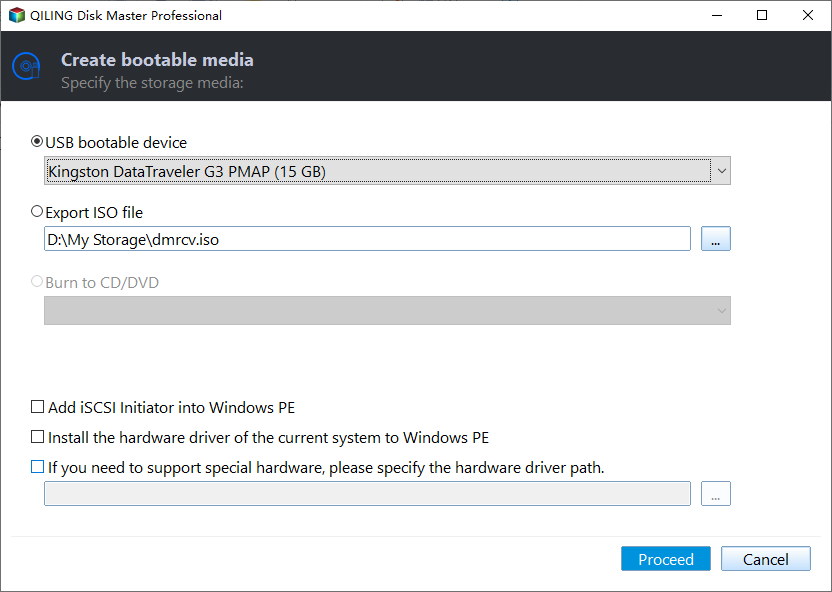
Step 4. Create the bootable USB and wait until the process is complete.
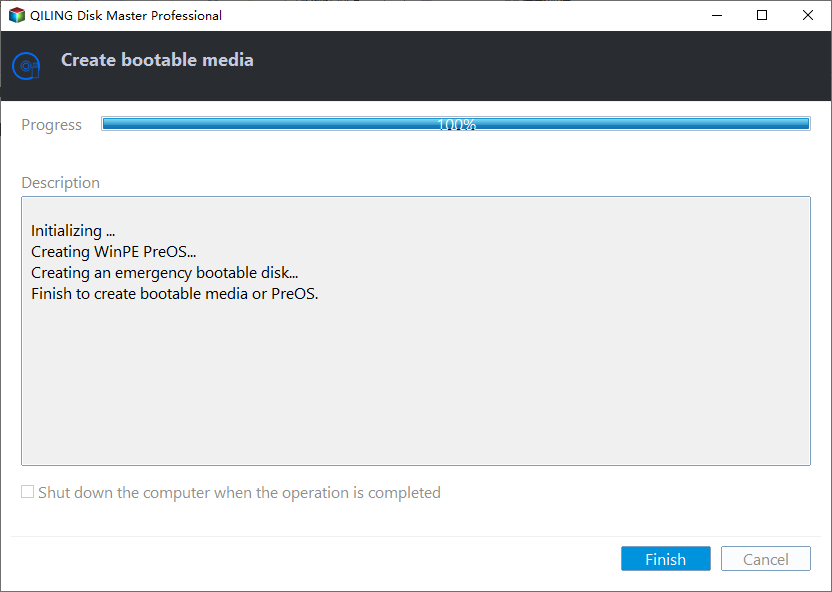
Step 5. Boot the affected computer from this USB drive. Use it to protect data, check disk layout, or prepare boot repair before making boot changes.
Function. Clone with a visible disk layout
Step 1. Connect a healthy replacement disk to the computer. Open Qiling Disk Master, choose Clone, and select Disk/Partition clone.
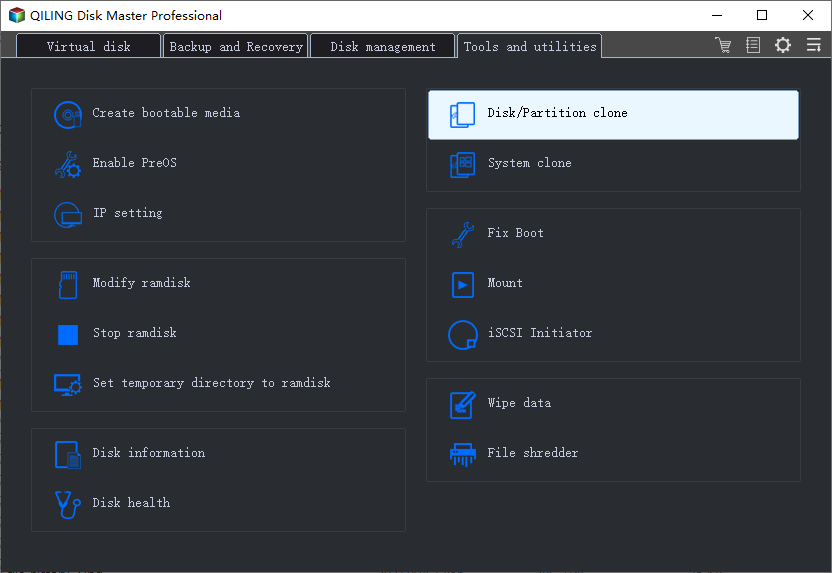
Step 2. Select the Windows 7 system disk as the source. Check the disk number, partition size, file system, and label so you do not clone the wrong volume.
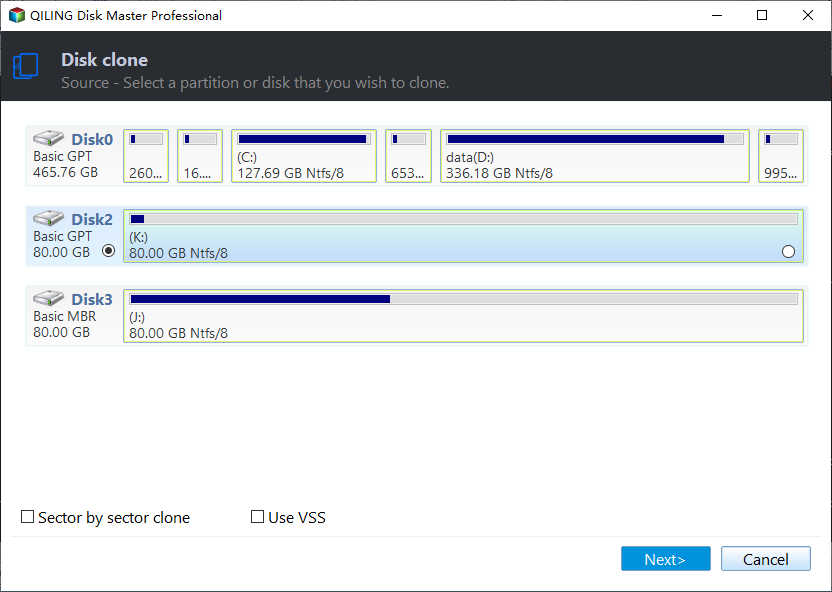
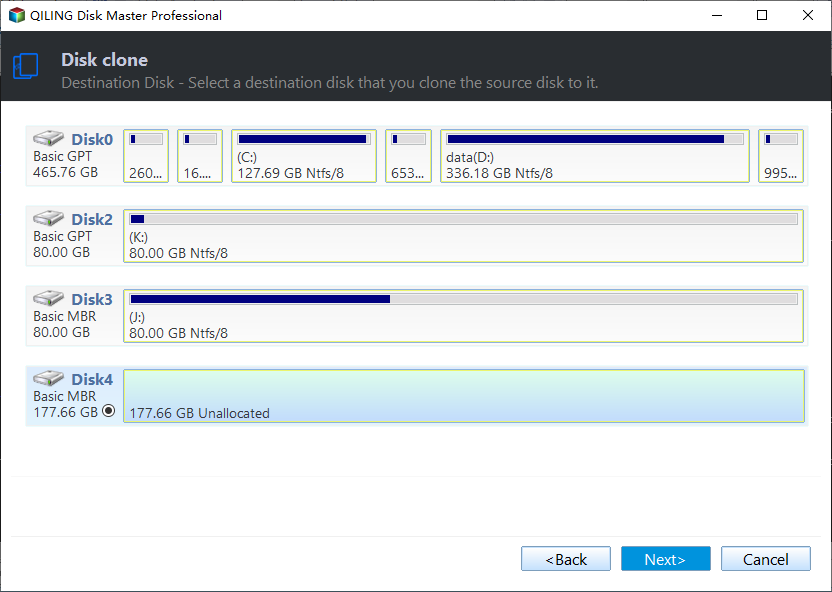
Step 3. Select a healthy replacement disk as the destination. The destination may be overwritten, so confirm that important files on it have already been backed up.
Step 4. Preview the target layout. Keep required recovery, EFI, or system partitions when system startup depends on boot or factory recovery.
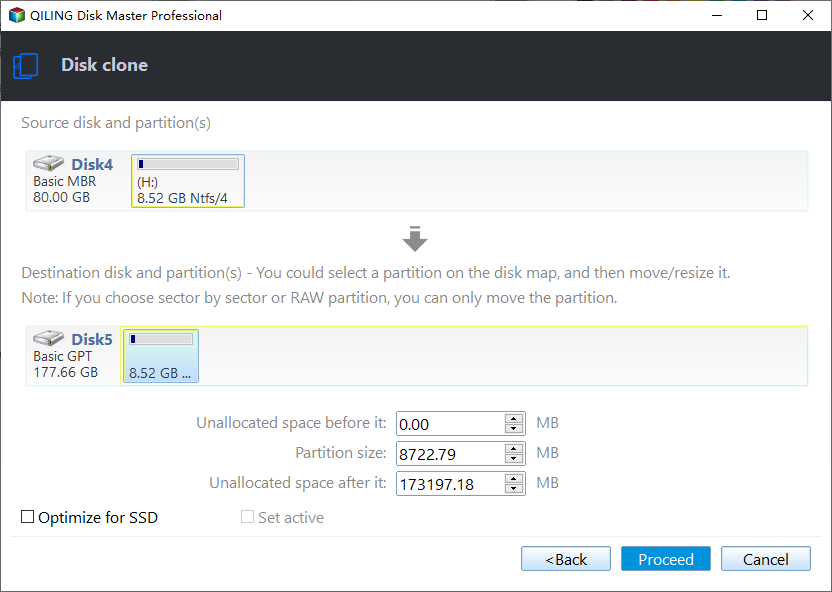
Step 5. Click Proceed to start cloning. Keep the computer powered on until the clone finishes.
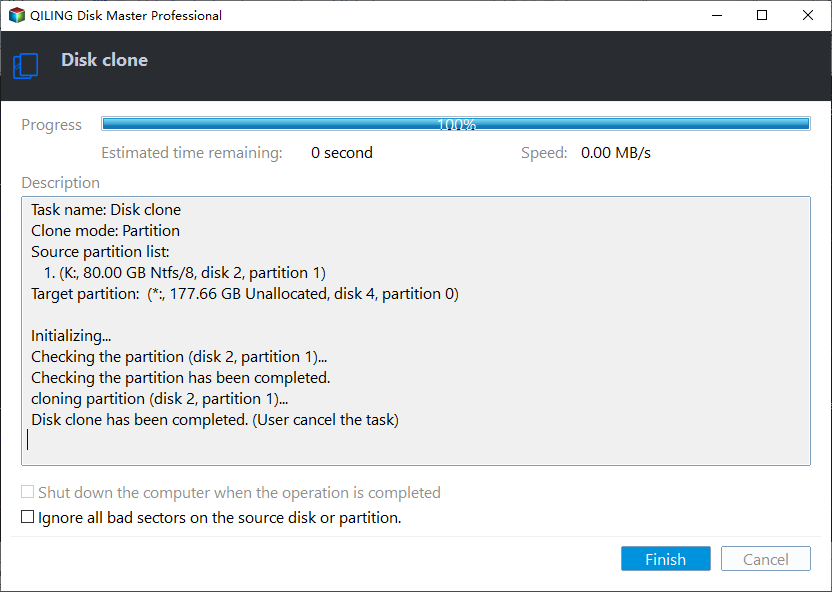
Step 6. After completion, open the destination disk and verify the copied partitions or files. For a boot disk, set the cloned disk first in BIOS or UEFI and test startup.
Check the result
Remove repair media, restart the PC, and confirm that Windows 7 loads from the internal disk. If the disk disappears again, check hardware health.
Related Articles
-
Fix MBR in Windows 7
Repair damaged boot records in Windows 7 with built-in tools or bootable media. -
BOOTMGR Is Missing
Fix BOOTMGR errors when Windows cannot find required startup files.
Products
Articles & Tutorials
- Data Recovery
- Data Backup
- File Recovery
- File Backup
- File synchronize
- System Backup and Restore
- Disk and Partition Clone
- Technical articles
- Disk Master Help
- Windows Deleted File and Disk Recovery Tutorials
- Windows File and Data Recovery Tutorials
- More Windows Tutorials for Install, Security, Files, and PC Tips
- Windows Boot, Repair, and Recovery Environment Tutorials
- Windows Backup Tutorials
- Windows Restore Tutorials
- Windows Clone and Migration Tutorials
- Windows Server Backup, Recovery, and Management Tutorials
- Windows Disk, Partition, and Storage Management Tutorials