Fix Windows 11 GPT Disk Not Recognized
Windows 11 normally works best with GPT disks and UEFI boot. If a GPT disk is not recognized, the cause may be BIOS mode, driver problems, disk damage, missing drive letters, or partition table errors.
Understand the problem
Do not initialize or convert the disk before checking whether it contains important files. Initializing the wrong disk can make recovery harder.
- Confirm the target disk, partition, drive letter, file system, and capacity before changing anything.
- Back up or recover important files before formatting, deleting, resizing, converting, or reinstalling Windows.
- For boot-related repairs, check BIOS or UEFI mode, boot order, and disk style before editing system partitions.
Use Windows built-in tools
Check recognition problems from low risk to high risk.
- Restart and check whether the disk appears in BIOS or UEFI.
- Confirm that the computer boots in UEFI mode for a Windows 11 system disk.
- Open Disk Management and check whether the disk is Offline, Unknown, or missing a drive letter.
- Update storage controller and chipset drivers.
- If the partition table appears damaged, recover files before rebuilding the disk.
Use Qiling tools for guided steps
 Qiling Disk Master
Create bootable media and protect files before repairing a GPT disk that Windows 11 cannot recognize.
Function. Create bootable media before system repair
Step 1. Prepare an empty USB drive and connect it to a working computer. Back up the USB first because it may be formatted.
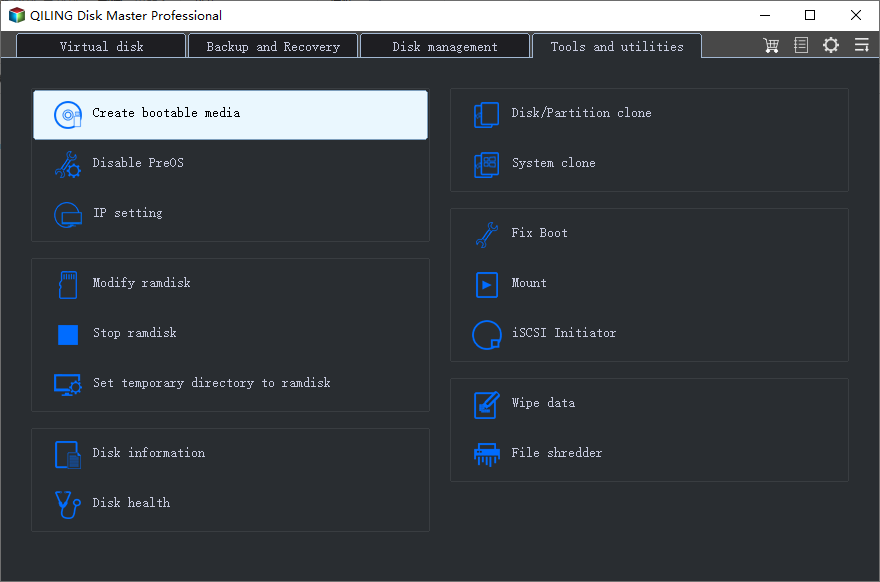
Step 2. Open Qiling Disk Master and choose Create Bootable Media. This helps you start a computer when Windows cannot boot normally.
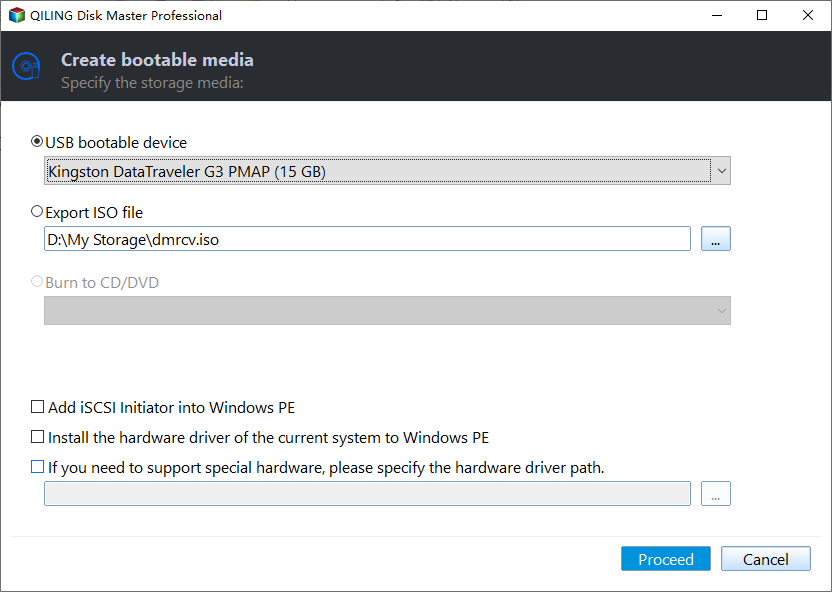
Step 3. Select the USB boot device option and choose the correct USB drive. Confirm the drive letter and capacity before continuing.
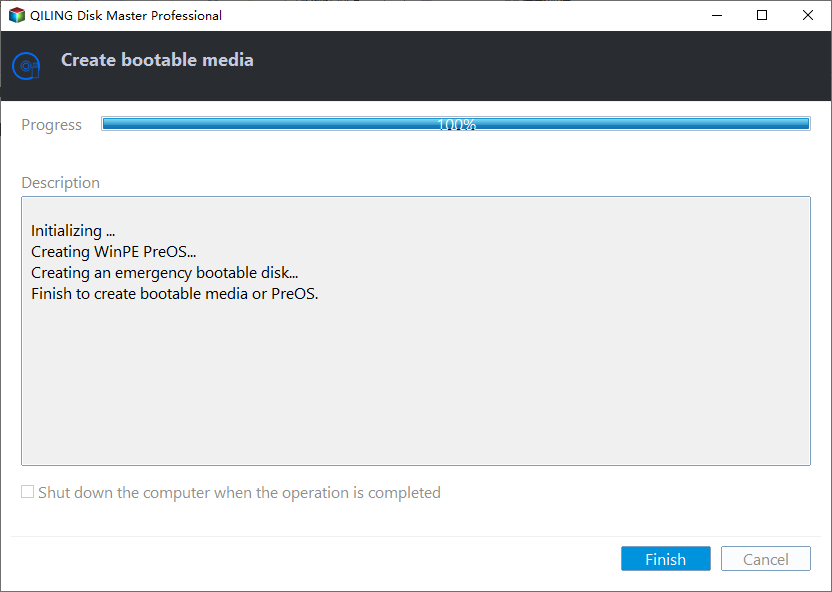
Step 4. Click Proceed and wait for the bootable media to be created. Use it for checking the GPT disk from a bootable environment.
Function. Recover files with Fast Scan
Step 1. Stop writing new data to the GPT disk or affected partition. Install Deep Data Recovery on another drive if possible.
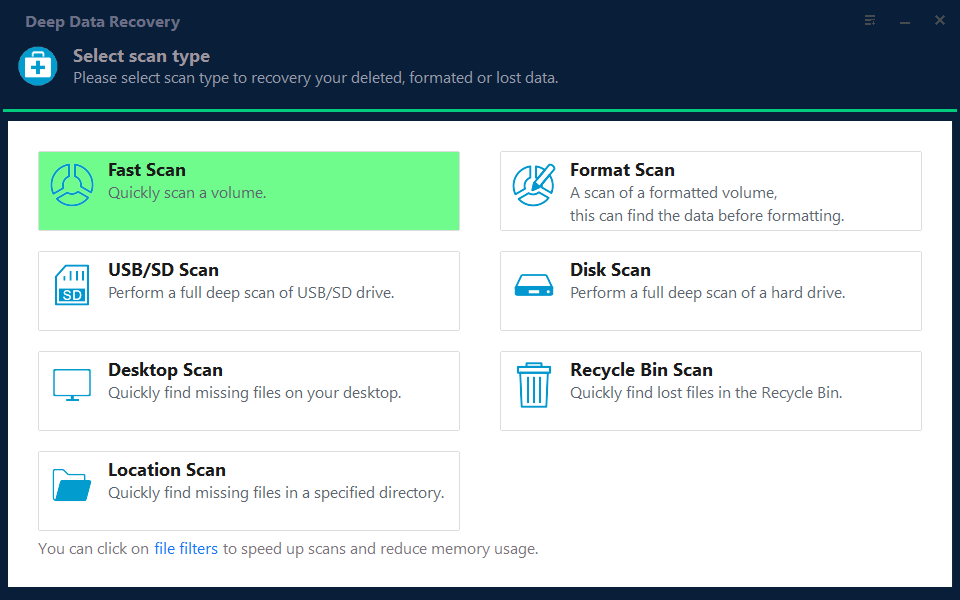
Step 2. Launch Deep Data Recovery and choose Fast Scan first. Use Fast Scan if files disappeared after a drive letter, partition table, or recognition problem.
Step 3. Select the GPT disk or affected partition as the scan location. If the original folder is missing, scan the whole partition where it was stored.
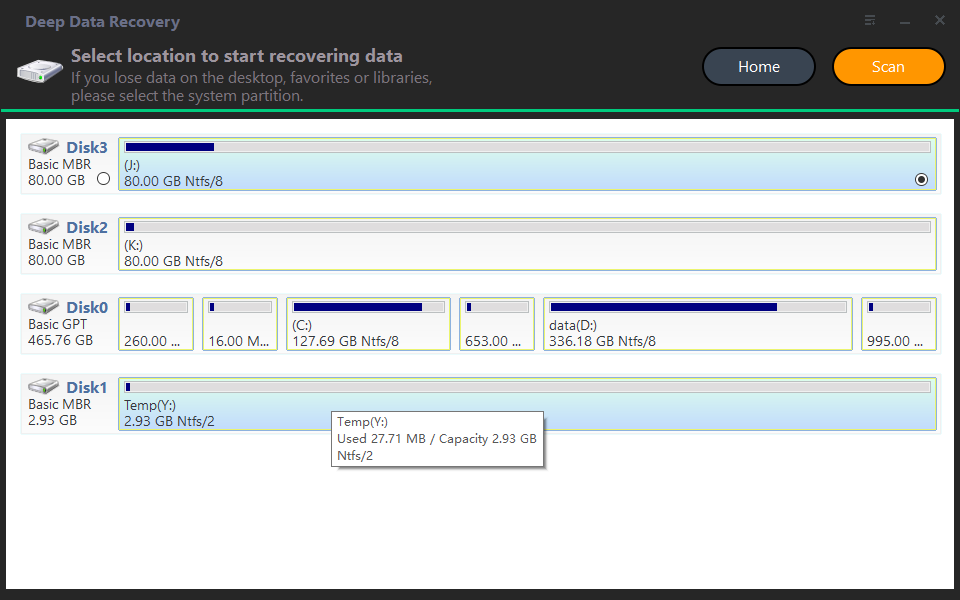
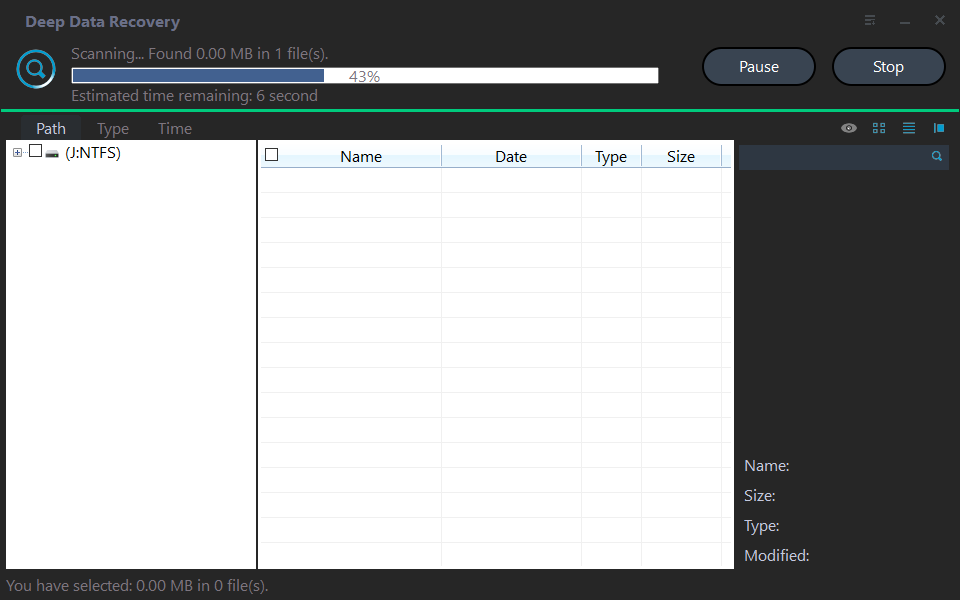
Step 4. Wait for the scan to complete. Use file type, name, date, and path filters to narrow the results.
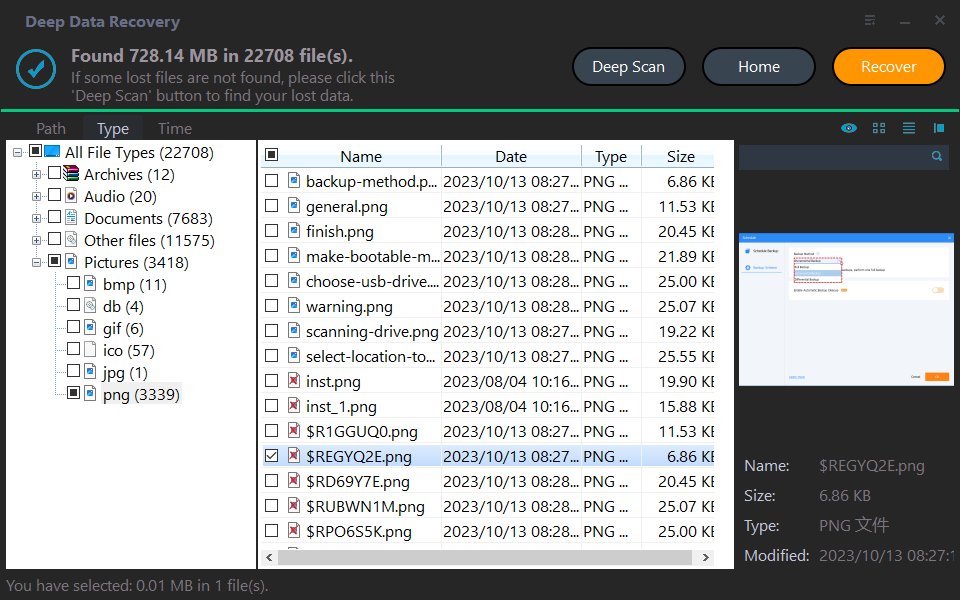
Step 5. Preview the files, select the items you need, and recover them to another disk or external drive.
Check the result
After repair, verify the disk in Disk Management. Confirm partition style, drive letters, and file access before making further conversions.
Related Articles
-
Check MBR or GPT
Confirm disk partition style before converting, repairing, or installing Windows. -
Install Windows on GPT Disk
Understand GPT, UEFI, and installation compatibility before changing disk style.
Products
Articles & Tutorials
- Data Recovery
- Data Backup
- File Recovery
- File Backup
- File synchronize
- System Backup and Restore
- Disk and Partition Clone
- Technical articles
- Disk Master Help
- Windows Deleted File and Disk Recovery Tutorials
- Windows File and Data Recovery Tutorials
- More Windows Tutorials for Install, Security, Files, and PC Tips
- Windows Boot, Repair, and Recovery Environment Tutorials
- Windows Backup Tutorials
- Windows Restore Tutorials
- Windows Clone and Migration Tutorials
- Windows Server Backup, Recovery, and Management Tutorials
- Windows Disk, Partition, and Storage Management Tutorials