How to Wipe a Disk in Windows 7 Before Reuse or Disposal
Deleting files or formatting a partition can make a disk look empty while leaving recoverable data behind. If a Windows 7 computer is being retired or its drive is being passed to someone else, choose an erasure method that matches the storage technology and the sensitivity of the information.
Windows 7 is no longer a suitable default operating system for an internet-connected computer. Use a supported maintenance environment where possible, and verify that the chosen tool supports the old machine's storage hardware.
Choose between logical cleanup and sanitization
For ordinary reuse under your own control, deleting unneeded files or creating a new file system may be sufficient. That is not the same as preventing data recovery by another person.
For a healthy conventional HDD, an overwrite can erase accessible sectors. It cannot guarantee access to sectors the drive has remapped or cannot read reliably. For an SSD, use the manufacturer's supported sanitize or secure-erase procedure when available; overwriting through normal file access may miss controller-managed areas and adds unnecessary writes.
For regulated or highly sensitive data, follow the organization's approved sanitization and verification process. A general-purpose software completion message is not, by itself, evidence of compliance. A failed or inaccessible drive may require approved physical destruction.
Prepare before any irreversible action
Step 1. Back up everything you need to a separate physical device, including licenses, encryption recovery information, and exported application data. Open representative files or perform a test restore.
Step 2. Record the target disk's model, serial number where available, and capacity. A drive letter is not a reliable physical-disk identifier after booting recovery media.
Step 3. Disconnect the backup disk and other unnecessary storage before wiping. Ensure stable power and decide whether you are erasing the whole disk or only a selected partition.
Step 4. If erasing the active Windows system disk, start from a compatible maintenance environment or attach the disk to another authorized computer. Do not expect the running Windows installation to erase itself and continue functioning.
Overwrite a conventional HDD with Qiling Disk Master
The following describes a zero-fill operation on a selected HDD, not an SSD-specific sanitize command. Confirm that the installed Qiling edition and recovery environment support the task before proceeding.
Step 1. Open the disk-management view and identify the intended physical HDD by model and capacity. Check that no needed partition on that disk remains unbacked up.
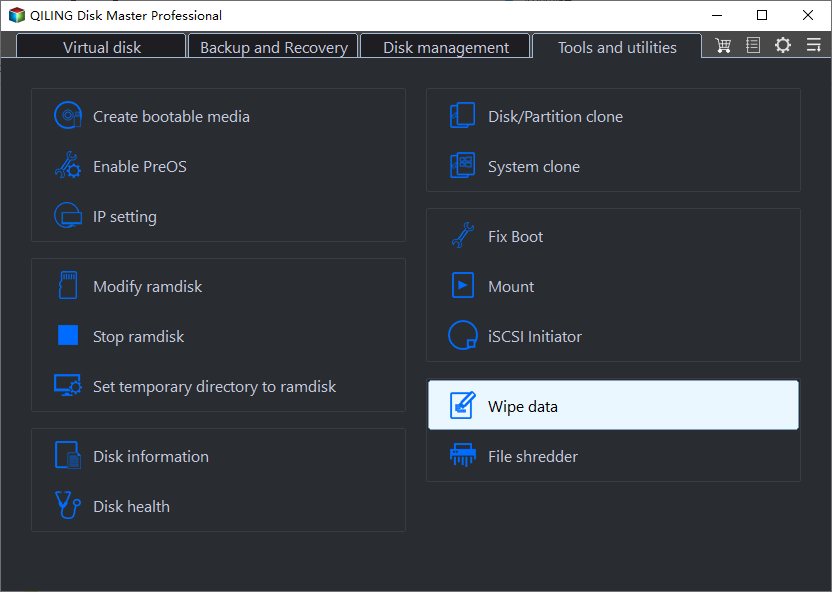
Step 2. Select the target disk and open Wipe Hard Drive. Make sure this is the disk-level operation if the goal is to erase all its partitions.
Step 3. Choose the erase count for the operation. For Fill sectors with zero, use 1 erase pass. Additional passes are not a substitute for a method appropriate to the device.
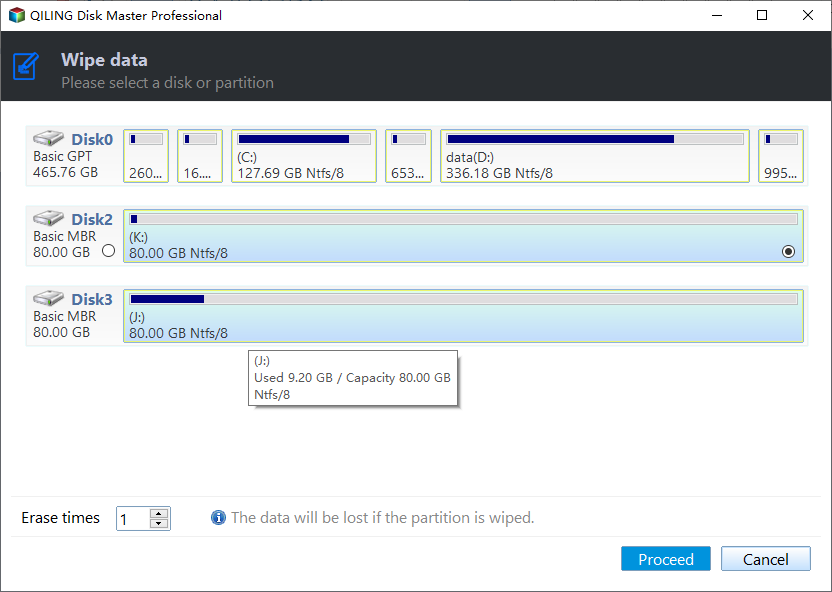
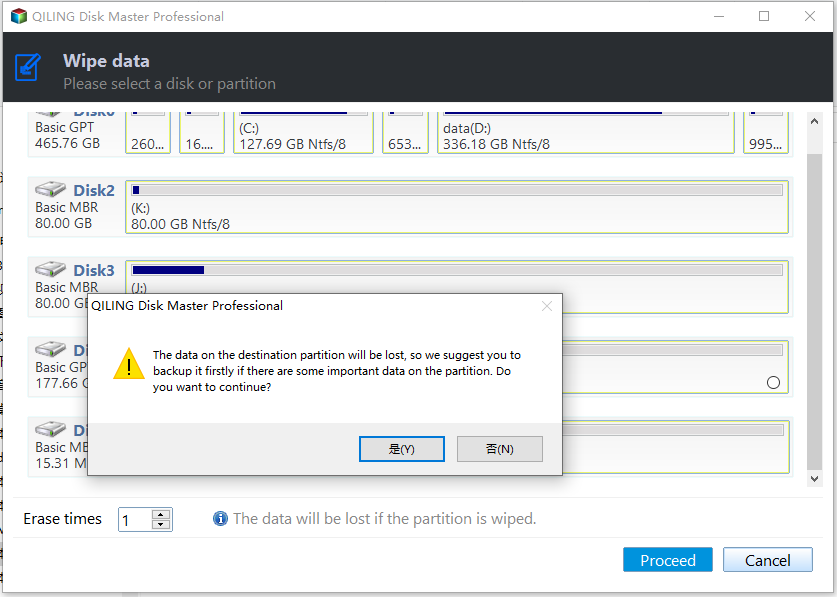
Step 4. Review the target again and click Proceed. Read the warning and confirm only when you are certain that the correct disk is selected.
Step 5. Keep power connected until the task completes. Check the reported result. If there are errors, do not represent the drive as fully sanitized. This operation removes data; it does not repair physical bad sectors.
SSD and encrypted-drive considerations
For an SSD, find the exact model's manufacturer utility and read its sanitize requirements. Some commands require a direct SATA or NVMe connection and cannot pass through a USB enclosure. Do not improvise hot-unplug procedures to clear a security state.
Cryptographic erasure is only appropriate when the encryption implementation, key handling, and organization policy support it. Deleting a Windows password is not cryptographic erasure. Keep recovery keys only as required by the approved process, and do not claim that a quick format securely destroys encrypted data in every configuration.
Prepare the disk for its next use
After successful erasure, a disk may appear unallocated. Create a suitable partition table and volume if you are retaining it, or let the new operating-system installer create its layout. Do not restore private data onto a disk intended for transfer.
If erasure failed because of hardware errors, choose an approved disposal route. Formatting afterward can make the disk look usable without resolving either the confidentiality risk or its reliability problem.
Related Articles
- Hiren's BootCD and Low-Level Formatting
Understand what an overwrite tool actually does and when a bootable maintenance environment helps. - Check Disk Errors and Bad Sectors
Distinguish logical repairs from physical drive damage before trusting a disk again.
Products
Articles & Tutorials
- Data Recovery
- Data Backup
- File Recovery
- File Backup
- File synchronize
- System Backup and Restore
- Disk and Partition Clone
- Technical articles
- Disk Master Help
- Windows Deleted File and Disk Recovery Tutorials
- Windows File and Data Recovery Tutorials
- More Windows Tutorials for Install, Security, Files, and PC Tips
- Windows Boot, Repair, and Recovery Environment Tutorials
- Windows Backup Tutorials
- Windows Restore Tutorials
- Windows Clone and Migration Tutorials
- Windows Server Backup, Recovery, and Management Tutorials
- Windows Disk, Partition, and Storage Management Tutorials