Hiren's BootCD Low-Level Format: Prepare, Erase, and Reuse an HDD
In modern PC utilities, low-level format usually means overwriting user-addressable storage, not recreating a drive's factory tracks and sectors. Hiren's BootCD PE can provide an offline environment for disk tools, but an erase operation destroys data rather than recovering it.
Use this workflow only for a drive whose files have already been saved or are deliberately being discarded. A failing drive with valuable data needs recovery before any overwrite.
Choose the right operation for the device
An HDD overwrite and an SSD sanitize operation are not equivalent. SSD wear leveling and reserved areas mean that an ordinary host overwrite may not cover every physical location. For an SSD, use its manufacturer's supported erase or sanitize procedure, with attention to the exact model and connection.
A quick format or partition deletion is also different from a whole-disk overwrite. For regulated disposal, follow the organization's approved sanitization and verification process; this article does not certify compliance.
- Record the target drive's model, serial number, and capacity.
- Copy required files to separate storage and open representative copies.
- Disconnect unrelated data disks when practical, including the backup disk.
- Allow enough time and stable power for the whole operation. Large HDDs can take hours.
Create and start Hiren's BootCD PE media
- Download the ISO from the official Hiren's BootCD PE download page. Check the published verification information for the downloaded image.
- Use the USB-creation method documented by Hiren's for that release. Select the intended USB by capacity and recognize that writing the image erases the USB.
- After writing finishes, shut down the target PC and insert the recovery USB.
- Choose that USB from the one-time boot menu using a firmware mode supported by the image and PC.
- Once PE starts, inspect disk identities again. Drive letters may differ from normal Windows.
Do not assume that a current PE release has the menus of the older DOS-based Hiren's CD. Check the included-tools list before looking for a utility by name.
Use an included HDD erase utility carefully
If your downloaded release includes HDD Low Level Format Tool, open it from the available disk utilities. Confirm the physical HDD by model and serial number, select its erase function, and read the final warning before starting. Interface labels depend on the tool version.
Choose a full overwrite when that is your intended operation; a quick partition-metadata reset is not the same thing. Do not use an erase tool to fix an inaccessible drive before recovery, and do not mistake the USB containing Hiren's for the target.
If errors or disconnections interrupt the operation, do not report the disk as successfully erased. Record the failure and decide whether replacement or an approved disposal process is necessary.
Alternative: overwrite an HDD with Qiling Disk Master
On a working compatible Windows computer, connect the expendable HDD as a secondary disk. For a system disk, use compatible offline media instead of trying to erase the running installation.
Step 1. Open Qiling Disk Master, right-click the confirmed physical HDD, and choose Wipe Hard Drive.
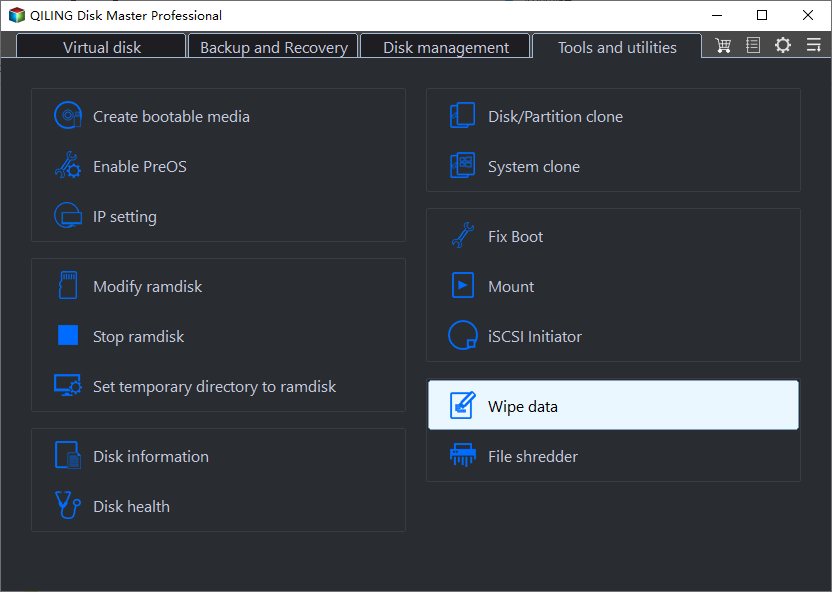
Step 2. Select Fill sectors with zero and set Erase times to 1 for a one-pass zero overwrite.
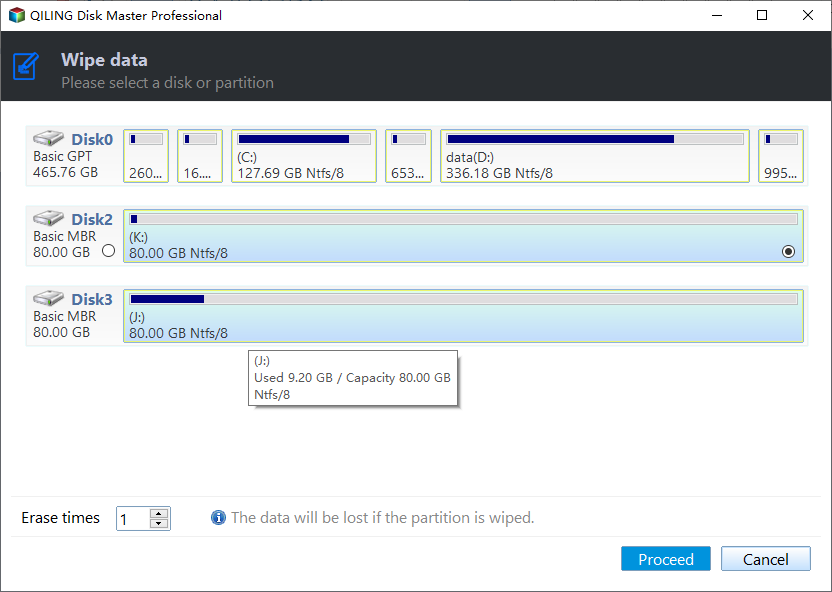
Step 3. Review the target and click Proceed. Read the confirmation warning and continue only when the disk can be erased.
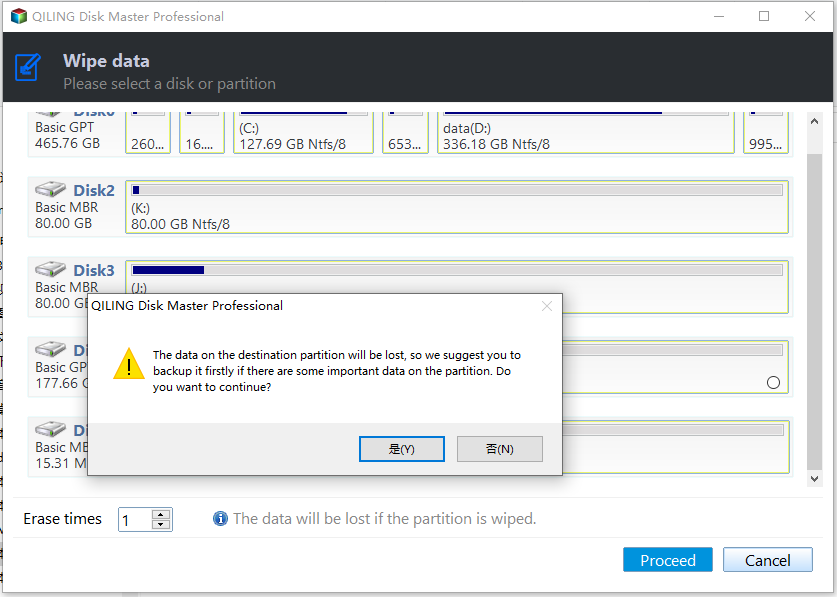
Step 4. Wait for completion and review the result. An interrupted task must not be treated as a completed wipe.
Prepare the erased disk for reuse
If the disk is healthy and you intend to reuse it, initialize the blank disk as appropriate, create a new data volume, and format it. Those are separate actions after erasure. Check disk health and sample reads and writes before relying on it.
Overwriting does not physically repair bad sectors or restore a worn-out disk to factory condition. Replace a drive whose errors return.
Related Articles
- Writing Zeros and Bad Sectors
Understand why an overwrite cannot reverse physical disk damage. - Prepare an SSD for Reuse
Use an erase method suited to SSD storage rather than an HDD routine. - Cannot Format a Drive in Disk Management?
Diagnose a failed Windows format and protect data before considering an offline or destructive disk tool.
Products
Articles & Tutorials
- Data Recovery
- Data Backup
- File Recovery
- File Backup
- File synchronize
- System Backup and Restore
- Disk and Partition Clone
- Technical articles
- Disk Master Help
- Windows Deleted File and Disk Recovery Tutorials
- Windows File and Data Recovery Tutorials
- More Windows Tutorials for Install, Security, Files, and PC Tips
- Windows Boot, Repair, and Recovery Environment Tutorials
- Windows Backup Tutorials
- Windows Restore Tutorials
- Windows Clone and Migration Tutorials
- Windows Server Backup, Recovery, and Management Tutorials
- Windows Disk, Partition, and Storage Management Tutorials