Cannot Format a Drive in Disk Management? Diagnose and Fix It
Disk Management may disable Format or report an error because the volume is in use, write-protected, corrupted, or physically failing. A system, EFI, or recovery partition is not an ordinary data volume. Identify the drive and save needed data before running any formatting command.
Check the reason and protect data
Step 1. Open Disk Management and record the physical disk number, capacity, drive letter, and status. Confirm that the intended volume is not marked System, Boot, EFI, or Recovery. If it is, do not format it as a troubleshooting step.
Step 2. Copy readable files to another physical disk. If the volume is inaccessible, stop repeated writes and consider file recovery before formatting. Check the USB lock switch, cable, port, and whether the device appears with its expected capacity.
Step 3. Close File Explorer windows and applications using the volume. Restart once and retry. If the drive reports I/O or hardware errors, inspect its health; formatting cannot repair a failed controller or worn-out flash memory.
Method 1. Try the Windows format dialog
Step 1. Compare the data volume's letter and capacity in File Explorer and Disk Management. Right-click that volume in Disk Management and choose Format.
Step 2. Select NTFS for a Windows-only drive, exFAT for compatible modern devices, or FAT32 only if the target device requires it. Enter a label and leave allocation size at Default.
Step 3. Recheck the volume, read the data-loss warning, and confirm only after verifying the backup. Wait for completion, then reopen Disk Management to confirm Healthy and the chosen file system. If the volume stays RAW or disappears, stop and check hardware instead of repeating formats.
Method 2. Format the selected volume with DiskPart
Use this only after the backup is verified. Open Command Prompt as administrator and run:
diskpart
list volume
select volume N
detail volume
format fs=ntfs quick
exit
Replace N with the number of the intended data volume. Read detail volume and stop if its disk, letter, capacity, or role is unexpected. The format command deletes files on that volume. Do not add clean or delete partition; those are separate, more destructive operations.
Method 3. Use Qiling's format tool
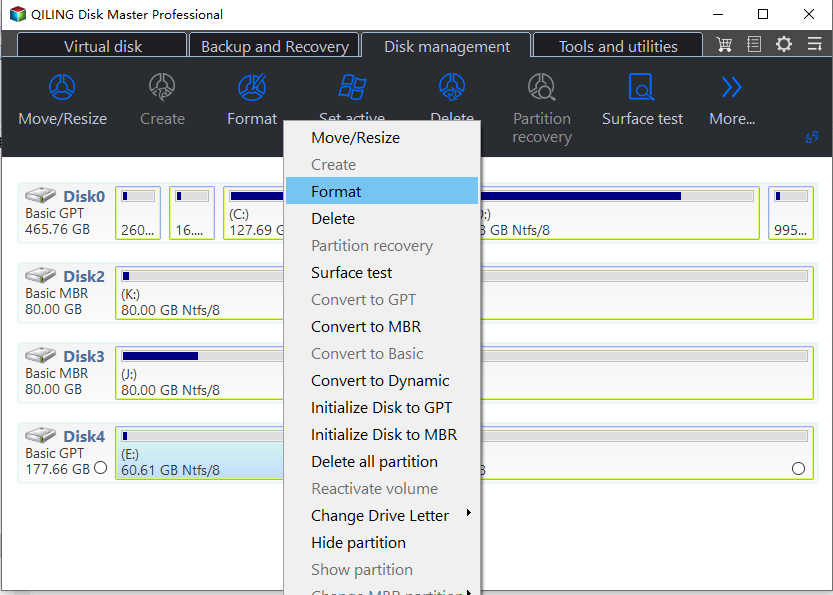
Step 1. Launch Qiling Disk Master, locate the data partition by disk and capacity, and choose Format Partition.
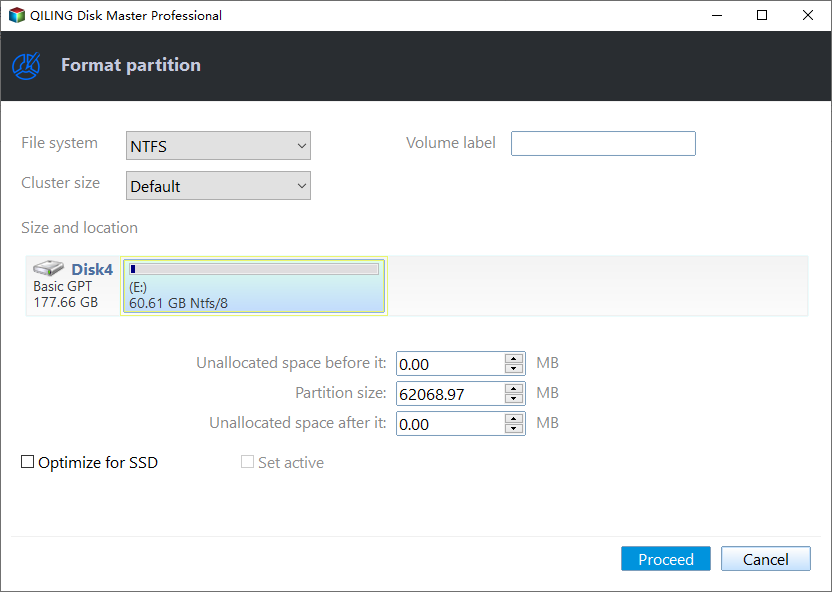
Step 2. Set the label and supported file system, then review the target partition and pending operation. Cancel if the selected partition is not the one you backed up.
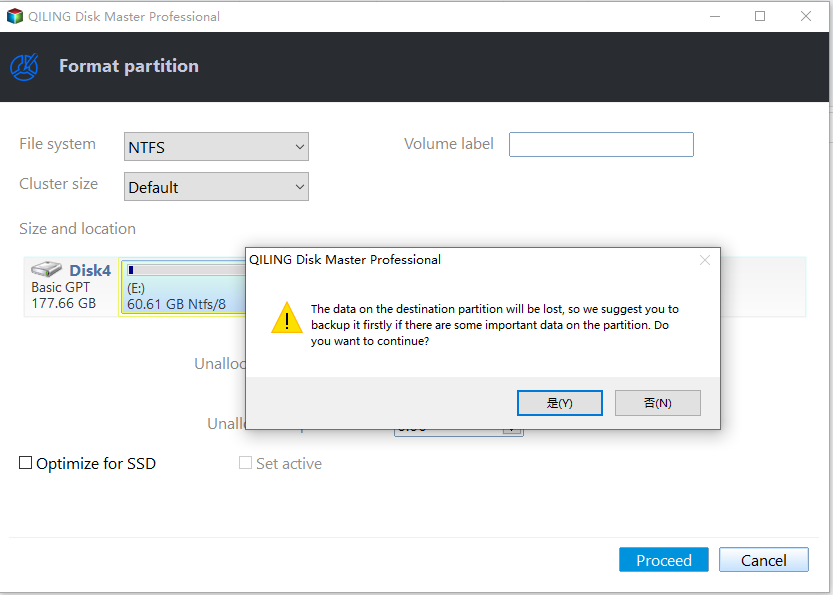
Step 3. Click Proceed to execute, wait for completion, and confirm the file system in Disk Management. Restore the backup only after the drive behaves normally.
If all methods fail
Try another cable or computer to isolate the fault. A device showing 0 bytes, disappearing during use, or repeatedly failing write tests may need replacement. Do not keep formatting a drive that holds the only copy of needed files.
Related Articles
- Format a Windows System Drive
See why formatting C: needs a different recovery or installation workflow. - Repair an NTFS File System
Diagnose file-system damage before deciding to format.
Products
Articles & Tutorials
- Data Recovery
- Data Backup
- File Recovery
- File Backup
- File synchronize
- System Backup and Restore
- Disk and Partition Clone
- Technical articles
- Disk Master Help
- Windows Deleted File and Disk Recovery Tutorials
- Windows File and Data Recovery Tutorials
- More Windows Tutorials for Install, Security, Files, and PC Tips
- Windows Boot, Repair, and Recovery Environment Tutorials
- Windows Backup Tutorials
- Windows Restore Tutorials
- Windows Clone and Migration Tutorials
- Windows Server Backup, Recovery, and Management Tutorials
- Windows Disk, Partition, and Storage Management Tutorials