Offline Files Sync Pending in Windows 10? Try 5 Solutions Now!
- Offline files sync pending error
- Offline files sync pending in Windows 10 – how to fix it
- Method 1: Disconnect and reconnect your network drive
- Method 2: Make fully use user profiles
- Method 3: Remove partnership and then add it back
- Method 4: Force offline files sync command line
- Method 5: Force offline files sync folder properties
- Easier way to sync network files to local drive in Windows 10
- Written in the end
Offline files sync pending error
Many Windows users experience a pending status when syncing offline files, which can be frustrating and time-consuming. This issue is not unique to a specific Windows version, as it affects Vista, XP, 7, 8, 10, and 11 users.
If your file is in a "sync pending" state, it means the synchronization process is still ongoing and the status will change once completed. To confirm all files are synced successfully, you should verify the status. However, if your files consistently remain in a "sync pending" state, you'll need to manually resolve the issue.
Offline files sync pending in Windows 10 – how to fix it
To fix the offline files sync pending error, try the following solutions: [insert solutions here].
- Method 1: Disconnect and reconnect your network drive
- Method 2: Make fully use of user profiles
- Method 3: Remove partnership and then add it back
- Method 4: Force offline files sync command line
- Method 5: Force offline files sync folder properties
Method 1: Disconnect and reconnect your network drive
When experiencing a syncing pending error, try disconnecting and reconnecting your network drive, and then set all files to always be available offline.
Method 2: Make fully use user profiles
You can choose to logoff and logon user profile 3 times, or directly recreate user profiles, which can resolve sync pending error after resetting the offline files cache using registry.
Method 3: Remove partnership and then add it back
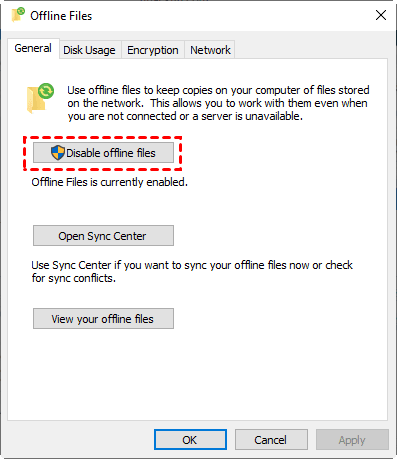
To disable offline files, go to Sync Center, click Manage offline files, then click Disable offline files, and finally click OK. When prompted, click Yes to restart your computer.
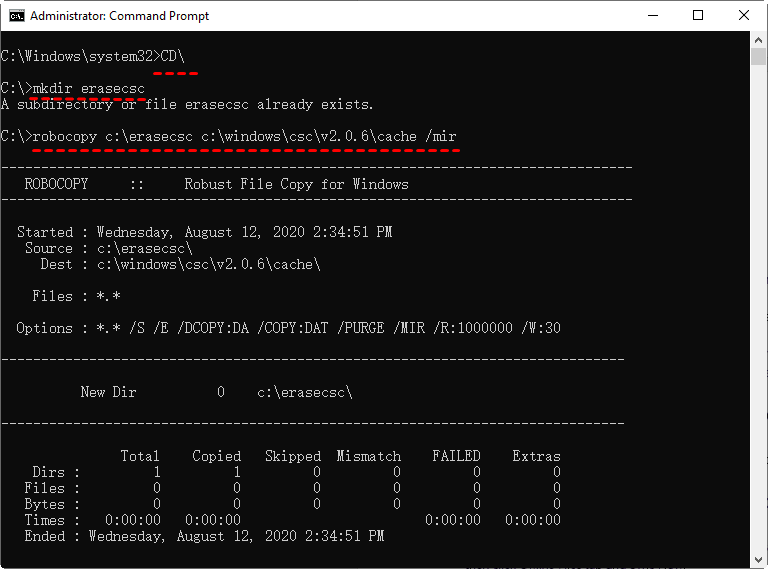
Then, clear CSC cache with the following command.
- CD\
- mkdir erasecsc
- robocopy c:\erasecsc c:\windows\csc\v2.0.6\cache /mir
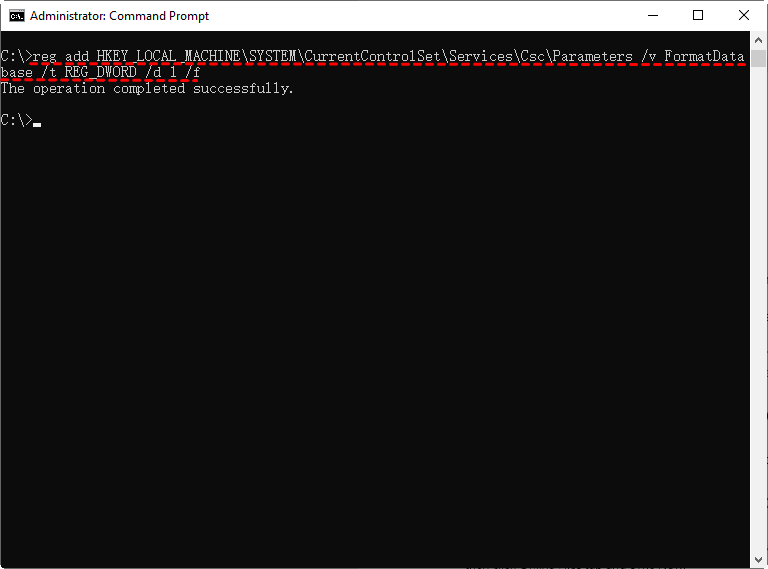
Next, add registry entry with powershell.
reg add HKEY_LOCAL_MACHINE\SYSTEM\CurrentControlSet\Services\Csc\Parameters /v FormatDatabase /t REG_DWORD /d 1 /f
After disabling offline files, restart your computer to apply the changes and then re-enable offline files. This will delete all previous sync partnerships.
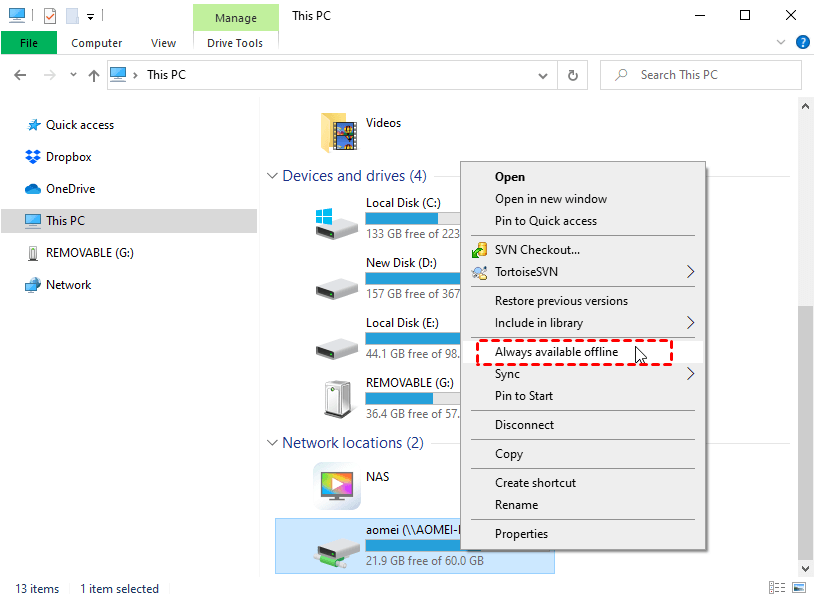
At last, add the partnership to Sync Center. Map the network drive with all files that need syncing to the local computer, make all files available offline, and it will proceed automatically.
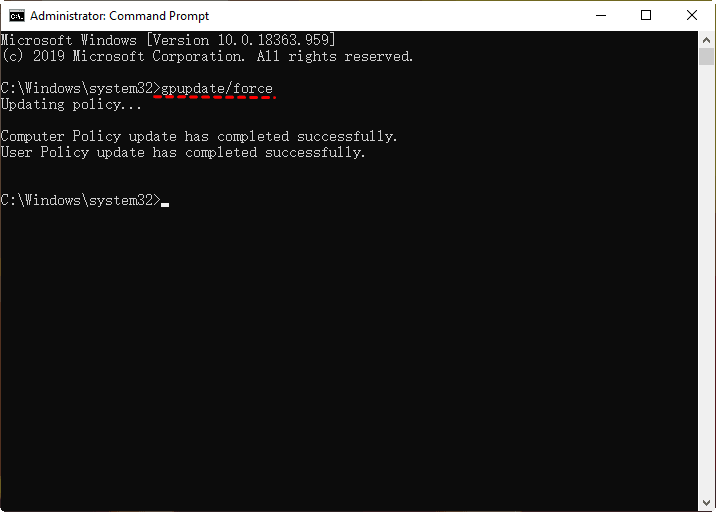
Method 4: Force offline files sync command line
To reinstall the group policy, you can run the command "gpupdate /force" in the Command Prompt as an administrator. This will update the group policy settings on your system. You can do this by following these steps:
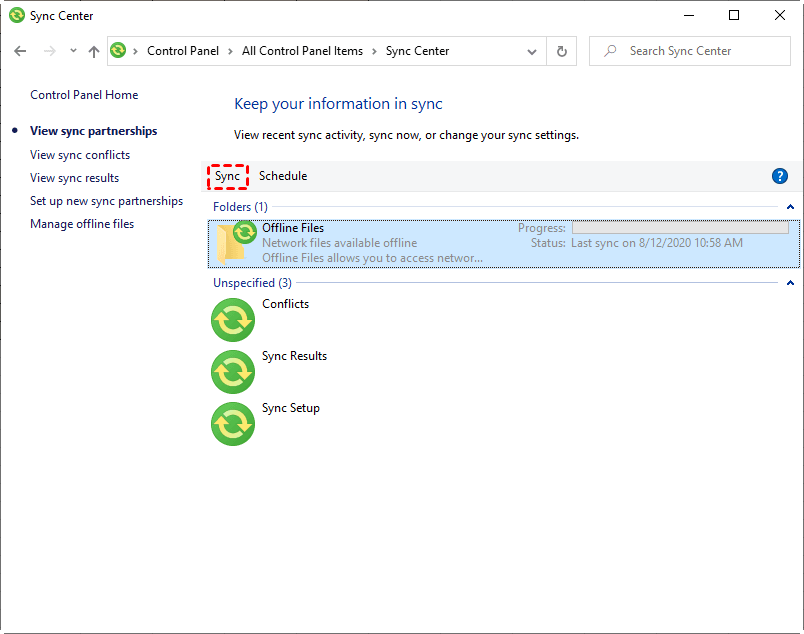
Go to Sync Center, select the offline files folder, and click Sync at the top.
Method 5: Force offline files sync folder properties
To synchronize the mapped network drive, go to the mapped drive, select the folder always available offline, and click Properties, then the Offline Files tab, and finally Sync Now.

Easier way to sync network files to local drive in Windows 10
If you're experiencing the offline files sync pending error, the solutions above can help. However, if you're looking for a simpler way to sync network files locally, you can consider using a free file sync software like Qiling Disk Master Standard.
To use this software, simply connect your network drive, select the files you want to transfer, and choose a local path as the destination. During the process, you'll have access to various useful features.
- Work well in automatic sync at a fixed interval, such as daily, weekly, or monthly.
- Support syncing network files to multiple devices, including external drives, cloud storage services like OneDrive, NAS, and more, not just local drives.
- Compatible with all Windows operating systems, including Windows 7/8/10/11/XP/Vista, etc.
- The website has a clean interface and user-friendly design, making it accessible to all users, including those who are new to the platform.
Then, let's have a closer look at how it works.
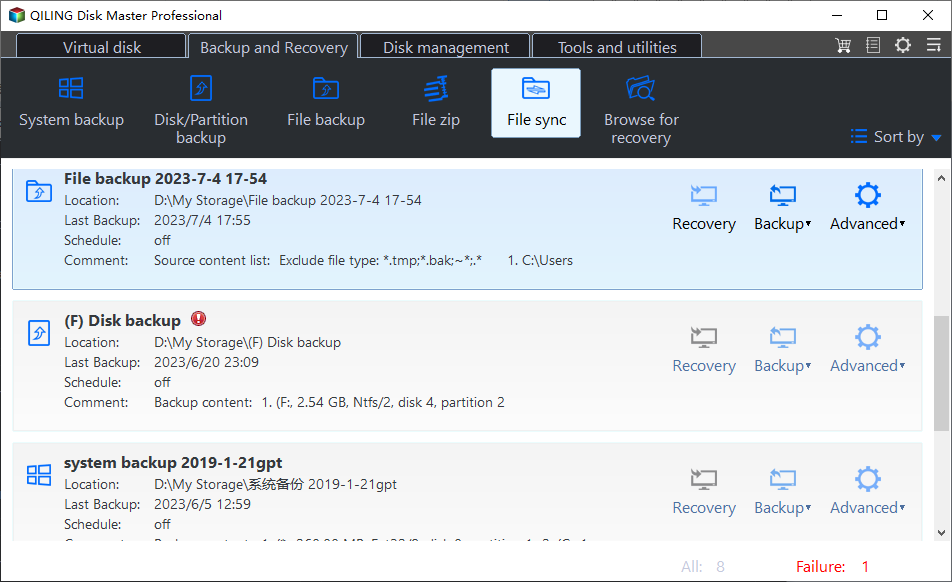
Step 1. Download Qiling Disk Master Standard, install and launch it. Then, click Backup and File Sync.
Step 2. To add files or folders from a network drive, click on the "Folder" or "Share/NAS" option, select the desired files or folders, and then click the folder-shaped button to choose a local drive as the destination.

💡 To sync network files for the first time, you need to add a network location by clicking Add Share or NAS Devices, then entering the IP address, username, and password, and saving the information.
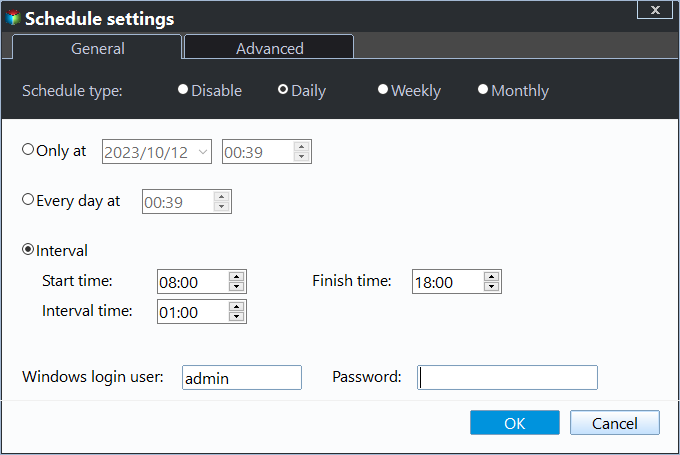
Step 3. To automatically sync your files, click Schedule Sync and select your preferred settings, such as daily, weekly, or monthly intervals, and then click Proceed.
💡 Notes:
⊙ The program will no longer sync files if the source folder name is modified.
⊙ Qiling Disk Master Standard only supports one-way file sync, where changes made in the source directory can be reflected in the destination, but not the other way around. If you need to perform a two-way file sync, consider upgrading to a higher edition.
⊙ If you work in a team, consider using the "File Sync" feature in Qiling Disk Master Professional, which automatically monitors and syncs any file changes instantly.
Written in the end
To solve the issue of offline files sync pending in Windows, try using File Sync feature in Qiling Disk Master Standard, which can sync network files locally and run automatically using its Schedule Sync feature, making the process easier and more convenient.
This software allows you to sync files with cloud storage, such as OneDrive, and also enables creating bootable media to ensure data safety in case of system failure.
Related Articles
- Windows 10 Home Sync Center | Alternative & Guide
Windows 10 home Sync Center is not working, but you still can sync files between two computers with the help of free file sync software – SyncToy or Qiling Disk Master Standard. Click on to get the guide below. - User Guide to Enable Offline Files in Windows 10 and Sync it
You will learn the one-step-shop to use offline files properly, including enabling or disabling offline files in Windows 10 and syncing network files locally. - How to Sync Folder to Network Drive in Windows 7/8/10
Syncing local folder to network drive automatically is one of the best ways to protect data in the long-term. For easy access, you can choose to make network files available offline. - How to Sync a Laptop and a Desktop in Windows 10 (2 Cases)
Wanna sync settings or files between a laptop and a desktop in Windows 10/11? Find a complete guide from this article. - What Is the Best Free WD Sync Alternative
This article will show you how to fix WD Sync not working and two WD sync alternatives to sync files from or to WD My Cloud. - How to Free Backup Windows PC to OneDrive/Google Drive/DropBox?
Is OneDrive good for computer backup? How can you back up PC to OneDrive efficiently? In this post, you'll find 3 approaches to back up computer files to OneDrive or other cloud drives. All of them are free and convenient.