How to: Extend System Partition on Windows 10 [Safely and Quickly]
Why extend system partition on Windows 10/11?
Windows 10/11 System partition (C drive) is a crucial partition that can cause issues like app slow response and Windows update failure if it runs out of space, prompting a Low Disk Space warning. To avoid these problems, it's advisable to extend the system partition before it's almost full.

Two ways to extend system partition on Windows 10
There are two easy and reliable ways about how to increase system partition C capacity presented. Pick up one according to your own need.
Way 1. Allocate free space from one partition to system partition on Windows 10/11
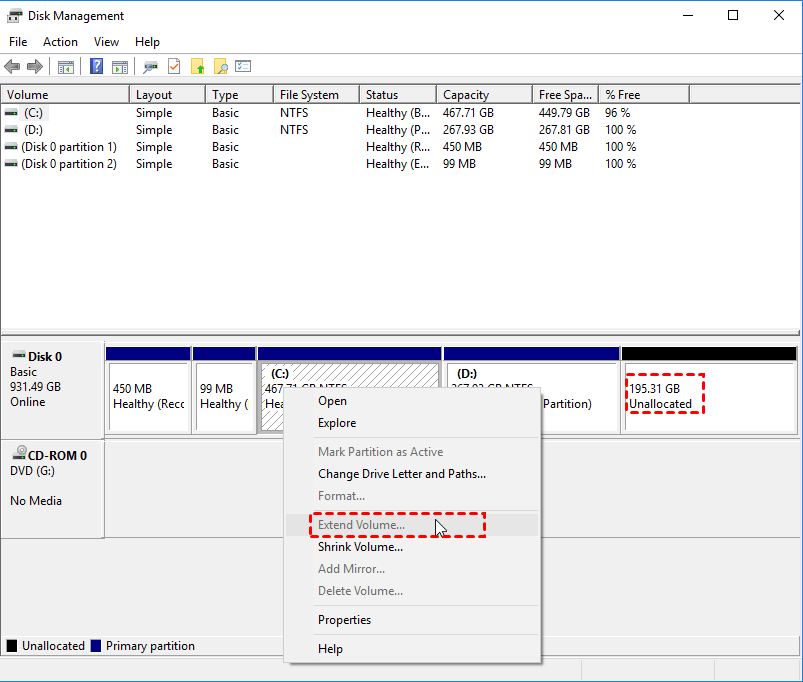
In such cases, where the system partition has no unallocated space available for extension, even after shrinking a partition behind it, the "Extend Volume" option in Windows 10 Disk Management remains greyed out. This is because the system partition cannot be extended into the space of another partition, and the Extend Volume option is disabled due to this limitation.
Note: To extend a partition successfully, you need to make the unallocated space contiguous to the partition you want to extend. This can be done by deleting the adjacent partition, which will merge the unallocated space with the existing partition, making it contiguous. Alternatively, you can use a third-party partition manager tool to move the unallocated space to the beginning of the disk, making it contiguous to the partition you want to extend.
Thus, a feature-Qiling Disk Master Professional is a powerful partition software that can directly reallocate unused space from one partition to another in Windows 11, 10, 8, 7. It can be used to extend the system volume by reallocating unused space from another partition.
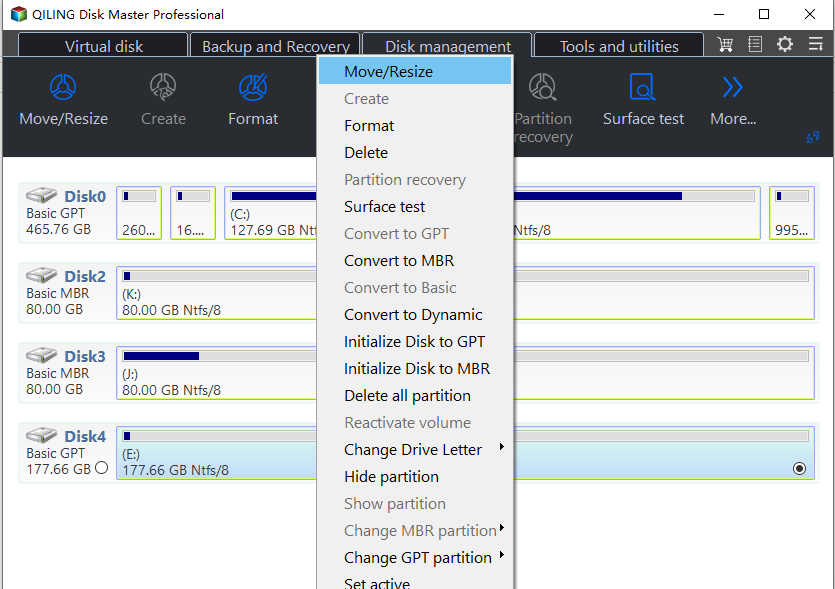
Step 1. Install and run the software. On the home interface, right-click the partition that has enough space and choose "Move/Resize".
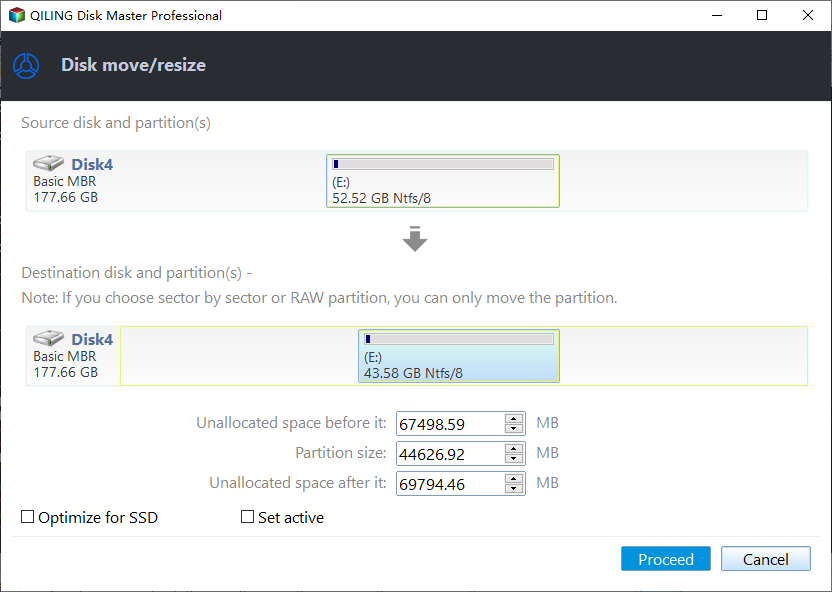
Step 2. In the pop-up window, select the size of free space from partition D to reallocate to the target partition, which in this case is C:.
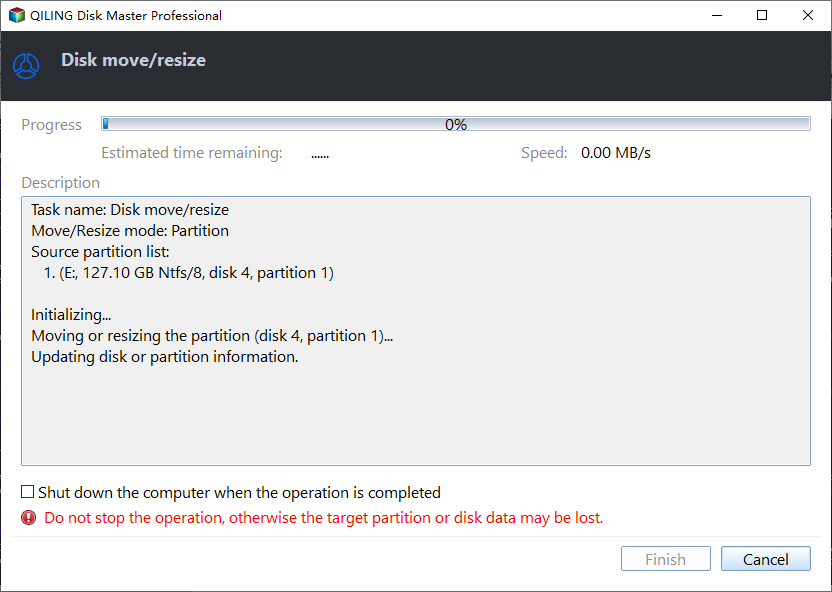
Step 3. To confirm the disk space changes, go back to the main interface and preview the operation result. In the preview, you can see that the C drive will be extended and the D drive will be shrunk. After confirming the changes, click "Apply" and then "Proceed" to commit the operation.
Notes:
- To perform the operation, you need to boot your computer in PreOS mode. This is because the operation involves the system partition, which requires a specific environment to be accessed safely.
- You can add non-contiguous unallocated space into system partition via Qiling Disk Master.
- To manage hard drives partition under Windows Server 2019/2016/2012 (R2)/2008 (R2), Qiling Disk Master Server is helpful!
Way 2. Windows 10 merge partition into system C drive
If you want to extend the system partition and don't mind losing data on partition D, which is behind partition C, you can use Windows 10 Disk Management to merge partition D into C. To do this, follow the step-by-step guide provided.
The operation will delete partition D, causing it to disappear and all data on it to be lost. To avoid losing data, back it up beforehand.
The first stage: Delete partition D (the partition adjacently behind C drive)
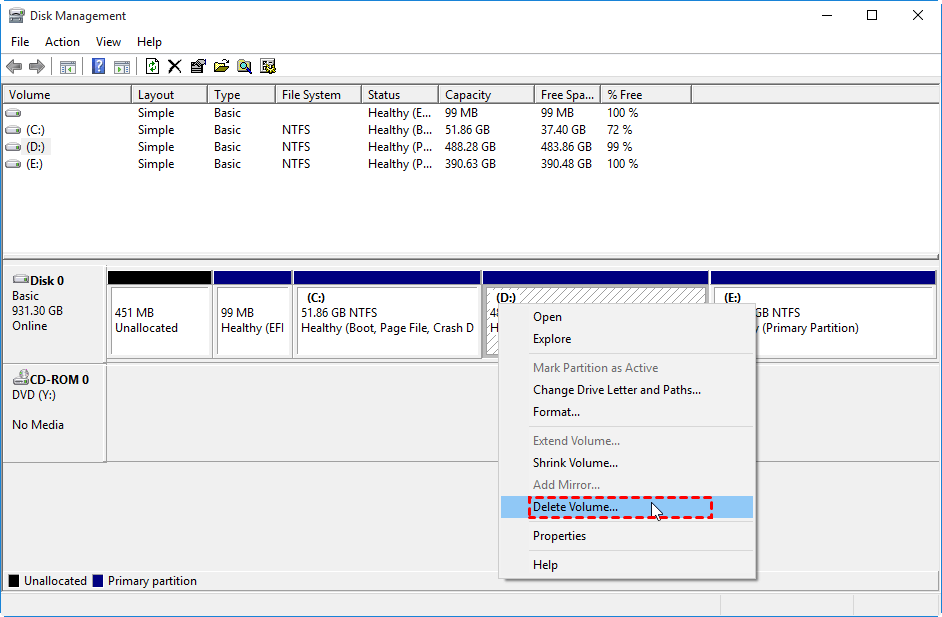
Step 1. In Windows 10, press Windows + X and choose Disk Management.
Step 2. In Disk Management, right-click partition D and choose "Delete Volume".
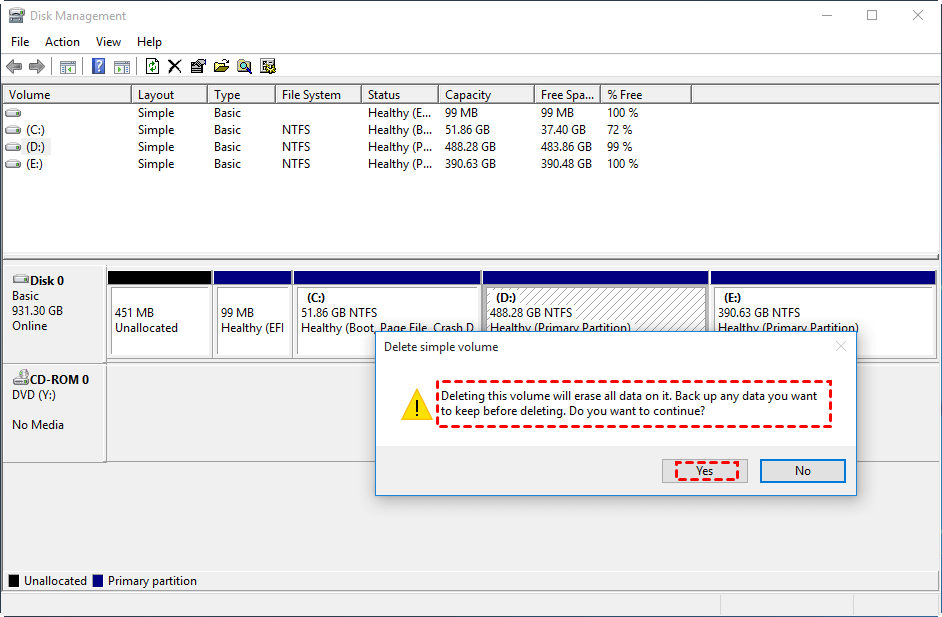
Step 3. You'll be prompted that the operation will erase all data. Click "Yes" to confirm it.
The second stage: Extend partition C with the unallocated space after deleting partition D
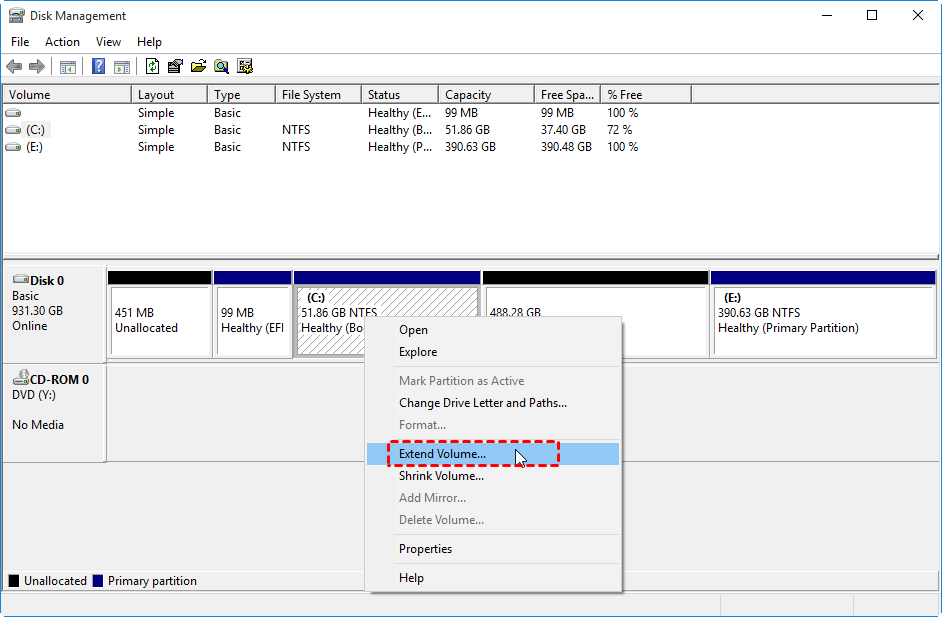
Step 4. After resizing the system partition, you'll get unallocated space that is contiguous with the system partition C. To utilize this space, right-click on C and select "Extend Volume", which should now be enabled. This will allow you to make use of the newly created unallocated space.
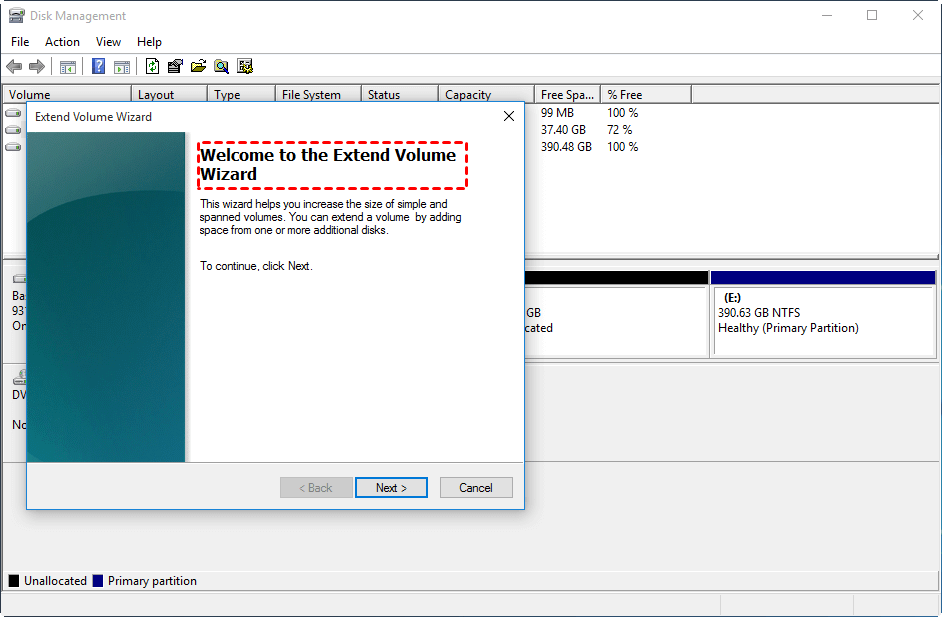
Step 5. Extend Volume Wizard is running, click "Next" to continue.
Step 6. You can specify how much free space to add to or leave alone the unallocated space, which will be merged into the target drive by default.
Related Articles
- Solved: Unable to Format External Hard Drive in RAW
Do you feel frustrated because you are unable to format external hard drive in RAW? Read this article patiently and find effective solutions here. - Free WD Quick Formatter Download for Windows 7,8,10
This article tells how to download and use WD Quick Formatter Tool format WD My Passport or Seagate external drive to NTFS or FAT32 step by step. - Solutions to Windows Can't Be Installed to Disk 0 Partition 1
Windows can't be installed to disk 0 partition 1 is an error message you may meet when installing Windows. Here, I'll tell why & how to fix it in several ways. - How to Remove Drive from RAID?
Removing drive from Software RAID 0, 5 array shrinks volume to free up unallocated space and reconfigure dynamic disk structure to optimize PC performance. - Top 9 Best Hard Drive Format Software Free Download 🏆
What is the best hard drive format software that works to format all types of storage devices with desired file system formats? We selected 9 best hard drive format software for you to free download and set the best format to your disk on Windows and Mac. - Blue Screen While Playing Games? 2024 Fixes Here
If your computer crashes with a blue screen while playing games, there are several solutions you can try. One approach is to use automatic repair tools, such as Windows' built-in diagnostic and repair tools, to identify and fix the problem.