Reset/Refresh Windows 10 without Losing Programs (3 Ways)
Windows 10 refresh and reset
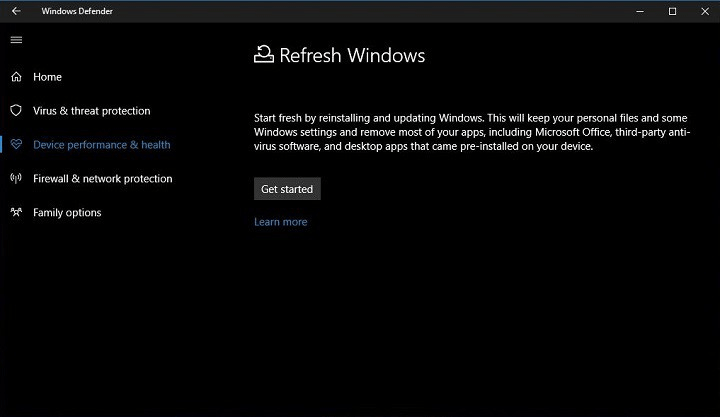
Refresh and Reset in Windows 10 are two different options to troubleshoot PC problems. Refresh reinstalls Windows 10 while preserving installed apps, settings, and files, whereas Reset reinstalls Windows 10, removes installed apps and settings, and may also remove some files.
Refresh, In previous Windows 10 builds (15002) and older OS like Windows 8, the process was known as "Refresh your PC". This allowed users to reinstall and update Windows while keeping personal files and settings, but most of the programs would be removed.
In the latest Windows 10 version, the Refresh feature is now part of the "Reset this PC" option, with the "Keep my files" choice allowing for a Refresh-like reset while keeping personal files intact. This is in contrast to the "Remove everything" option, which is similar to the "Reset your PC" feature in older versions and will erase all data during the reset process.
Both Windows 10's built-in reset options can fix system errors, allowing you to choose between keeping files or removing everything, including installed apps and personal files. If you want to keep everything, you can try alternative methods to refresh Windows 10 without losing programs.
How to reset windows 10 without losing data and apps
In Windows 10, the "Reset this PC" feature allows you to choose whether to keep personal files or not, but you will lose all installed programs either way.
You can reset Windows 10 without losing data and apps by choosing the "Keep my files" option during the reset process. This will allow you to reinstall Windows 10 while keeping your personal files, apps, and settings intact. This way, you can have a fresh start with Windows 10 without losing any of your important data or apps.
Yes, there are two workaround methods to keep apps when resetting a PC. You can use one of these methods to preserve your apps after a reset. Choose the one that suits your needs.
Method 1. Reset Windows 10 without losing programs by repair upgrade
To refresh Windows 10 without losing programs and data, you can perform a repair upgrade by running the Windows Setup.exe within Windows 10. This process allows you to reinstall Windows 10 while keeping your installed programs and data intact. To get started, you can follow these steps:
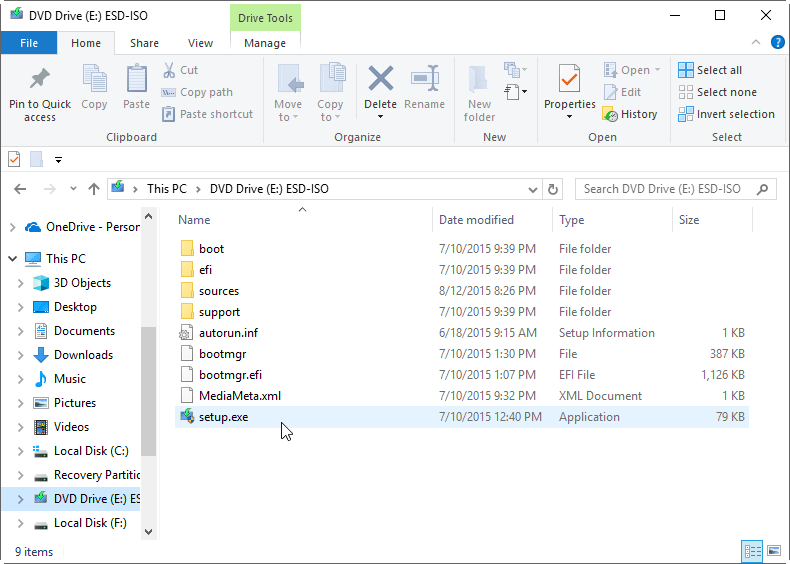
1. If you have a Windows 10 installation disc, simply insert it into your computer. If not, you can download the MediaCreationTool from Microsoft, which will allow you to create an installation media or ISO file.
✾ Tip: You can refer to the tutorial about Windows 10 recovery tool for details.
2. To install the software, open the installation disc or ISO file and navigate to the root directory. From there, locate and run the Setup.exe file, which can also be found in the Sources folder.
3. Please click "Accept" if you agree with the license terms, allowing you to proceed with the installation.
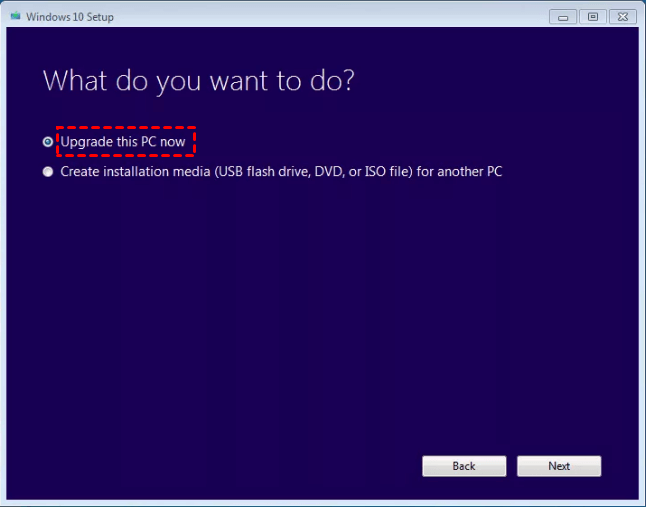
4. Wait a moment, and then you will see the Windows 10 Setup window. From there, you can choose Upgrade this PC now.
5. Click the Accept button again.
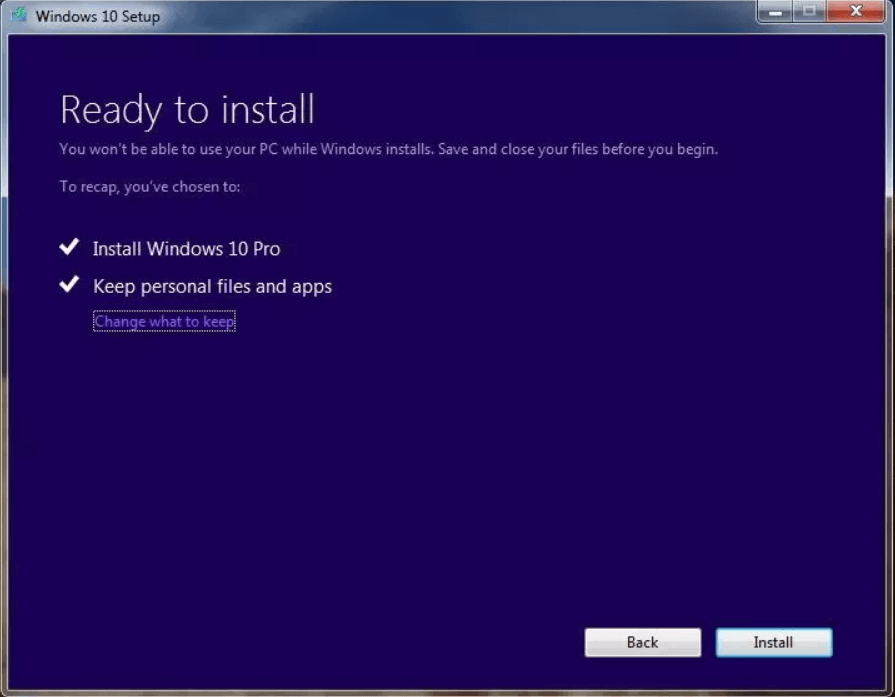
6. When you arrive at the Ready to install page, the default option is to keep personal files and apps. To reset Windows 10 without losing files and apps, click the Install button.
Your computer will restart several times during the process, and since it will reset Windows 10 to keep files and programs, it may take longer than a usual reset.
When you refresh Windows, it reinstalls Windows from the original installation media, but it doesn't delete any installed programs, so they will remain the same. This means if a program was causing system issues, the refresh won't fix the problem since it doesn't touch the installed programs.
Method 2. Create a custom refresh image with all programs for resetting
To reset Windows 10 without losing files and apps, you can create a custom refresh image with all data and programs included, and then use it for resetting Windows 10. This can be done using the DISM command from the Windows recovery environment (WinRE).
1. To access the WinRE system, click the Power button while holding down the Shift key, or boot from recovery media or an installation disk.
2. When your computer reboots after Shift + Restart or from recovery media, select Troubleshoot > Advanced options > Command Prompt. You may need to enter your account password to use command prompt.
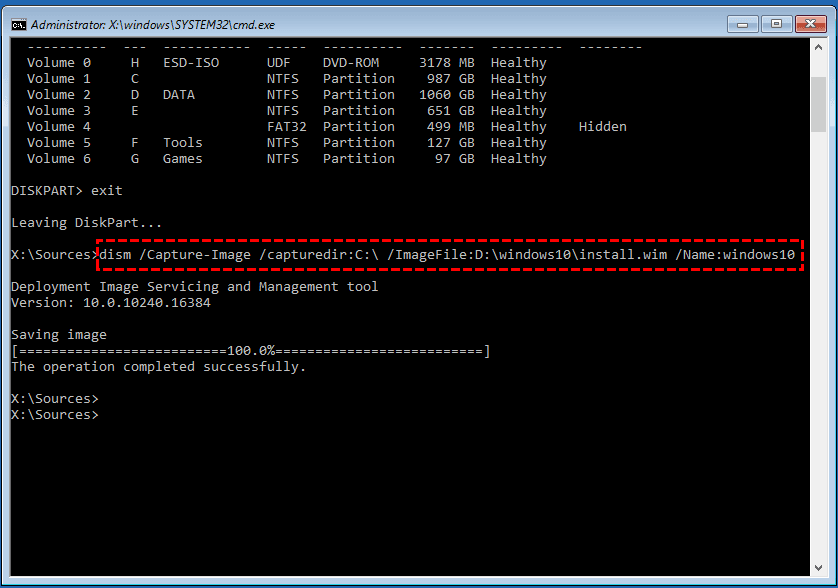
3. To backup the current system to D:\windows10 folder and create an image file "install.wim", type the following command in the Command Prompt window and press Enter: ```backup-win10 -v -all -f D:\windows10\install.wim``` Note: You need to change the location path to match your needs. ```
▶ dism /Capture-Image /CaptureDir:C:\ /ImageFile:D:\windows10\install.wim /Name:windows10
Tips:
● /Capture-Image- Capture a drive image to a new .wim file.
● /CaptureDir- Specify the source directory, the location to be captured.
● /ImageFile- Specify target location to store the image file.
● /Name- Specify a name.
4. As you install more programs and save more personal files on your computer, you can add an additional image based on the first recovery image you created using the /Append-Image option, which works similarly to an incremental image backup.
▶ Dism /Append-Image /ImageFile:D:\windows10\install.wim /CaptureDir:C:\ /Name:windows10
5. When the recovery image is created, run the command "Reset this PC" without losing programs to restore your PC to its original state.
▶ reagentc /setosimage /path D:\windows10 /index 1 `wmic computersystem where name="your_computer_name" call win32_product where name="your_windows_product_name" get description, installdate, name, version`
Refresh Windows 10 and keep programs - easier way🔥
Qiling Disk Master Standard is a free backup software for Windows 11/10/8/7 that creates recovery image backups, allowing users to easily restore Windows 10/11 and keep files and programs when needed.
- It provides system backup, file backup, disk backup, partition backup, and cloud backup features, along with faster recovery capabilities.
- The backup file can be highly compressed and incremental backups can be used to save space.
- It allows you to set multiple scheduled backup tasks, whereas the Windows built-in tool only supports one task.
- Upgrading to the Professional edition allows for system restoration to dissimilar hardware while maintaining secure boot functionality.
Qiling Disk Master offers a concise interface that simplifies the process of creating a system image. With just 3 steps, users can easily follow the instructions and minimize the risk of human error. By following the steps, users can try out the software and experience its ease of use.
Create an image backup with Qiling Disk Master
1. At the main page of this software, click the Backup tab and choose System Backup.

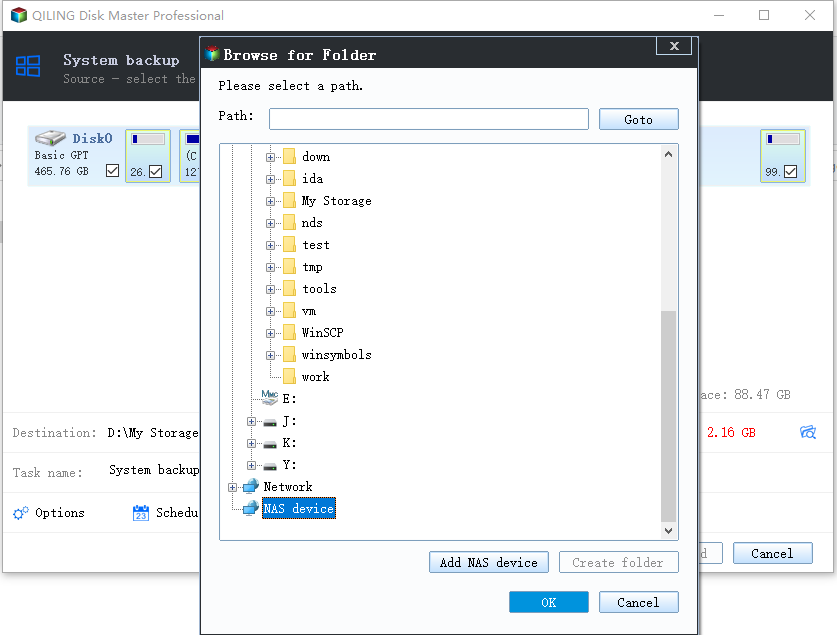
2. Choose a destination where you want to save the backup image, such as an external hard drive, NAS, network drive, or local disk.
3. Configure a daily, weekly or monthly scheduled backup to ensure all personal data and installed programs are included, then click Proceed to start the backup.
Qiling Disk Master, utilizing VSS technology, will also include files currently in use, eliminating the need to worry about backup integration. A backup will be created quickly.
System refresh Windows 10 with the backup image
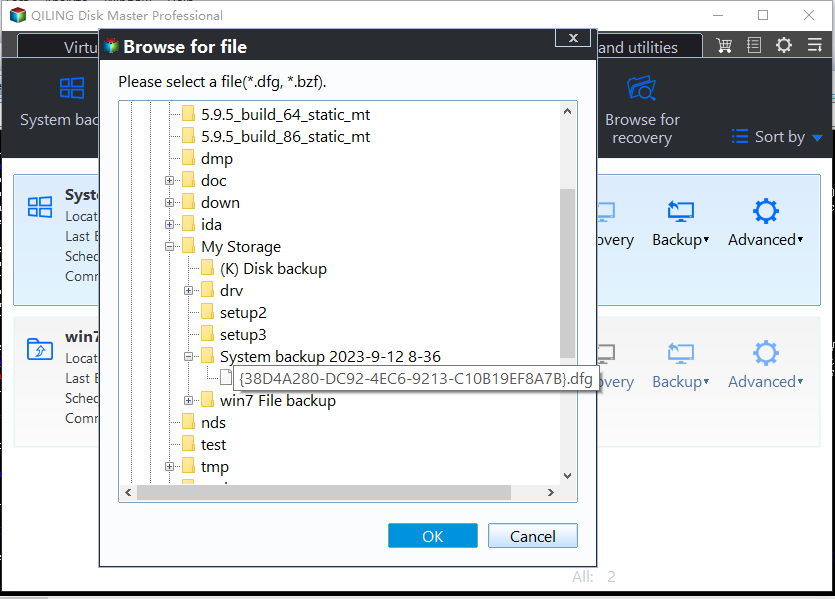
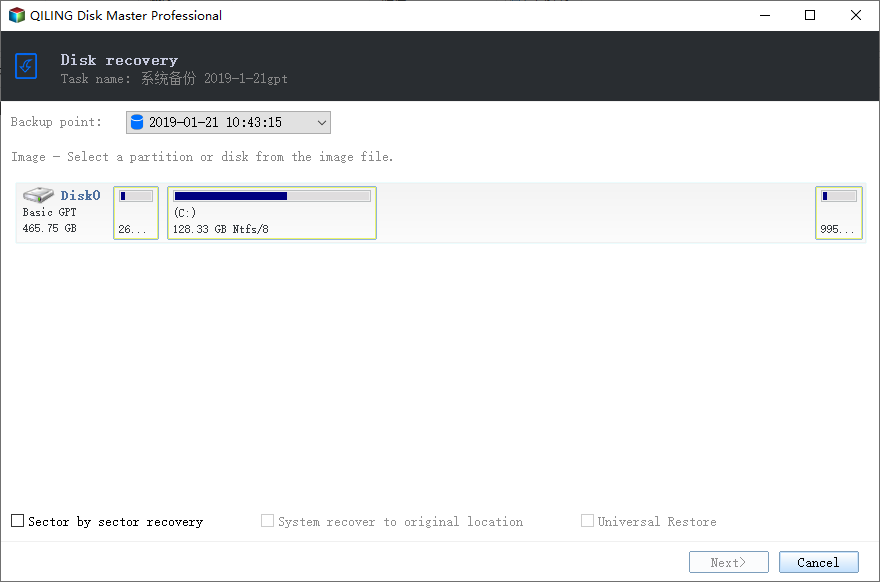
1. Run Qiling Disk Master. Click Restore and Select Task.
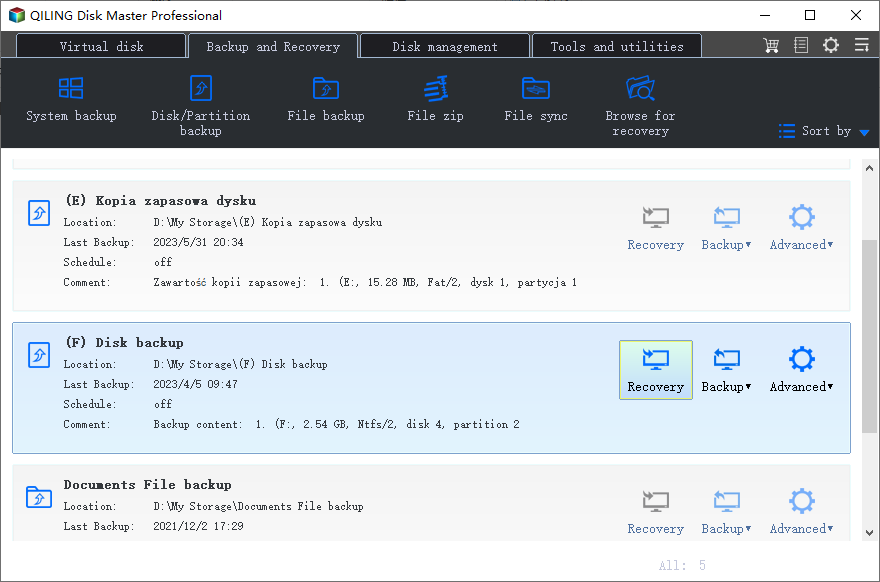
2. Choose the system backup task you created before.
3. Tick Restore this system backup and click Next.
4. The program will automatically select the original system drive(s) as the destination place. After confirming, click Proceed.
Related tips:
- To make the restore process more convenient, you can create a recovery environment with Qiling Disk Master, allowing you to run the program from WinRE to restore your PC.

- If the WinRE fails to load, you can create a bootable media on another PC to restore your PC to a working state.
- You can create a portable version of Qiling Disk Master on a removable device, allowing you to use it on multiple computers without installation, which is a feature available in the Tech and Tech Plus editions.
FAQs about resetting Windows without losing apps
1. What happens if I refresh Windows 10?
2. What will I lose if I reset Windows 10?
3. Does resetting Windows 10 remove viruses?
4. Does resetting Windows 10 make it faster?
Conclusion
To refresh Windows 10 without losing programs and data, you have two options: a repair upgrade or a reset with a custom recovery image. Depending on your situation, you can choose the one that best suits your needs.
It is recommended to create a system image with Qiling Disk Master, which allows for quick restoration to an earlier date, including all system partition data and apps, and also provides a technician edition for protecting unlimited company computers.
Related Articles
- How to Refresh or Reset Windows 10 from Command Prompt?
- How to Reset Windows 10 PC and Keep My Files? (2 Methods)
- Fixed: Windows 10 Reset Stuck at 1% , 34%, 64%, 99%
- How to Reinstall Windows 10 without Losing Data (3 Ways)?
- QILING Safe Disk Server
QILING Safe Disk keeps your confidential data in a strongly encrypted form on your disk and provides you with transparent access to it from any application. - Welcome to QILING Support Center
QILING tech support center, QILING Disk Master support