How to Use Windows Server Backup for Active Directory Backup
Quick Navigation:
- The necessity of backing up Active Directory
- Backup Active Directory with Windows Server Backup
- Easier way to backup and restore Active Directory
- Conclusion
The necessity of backing up Active Directory
Active Directory (AD) is a directory service that Microsoft developed for the Windows domain networks. It is included in most Windows Server operating systems as a set of processes and services. Users manage permissions and access to networked resources through AD.
It is necessary to backup Active Directory 2008/2012/2016 because:
- You may accidentally delete a user account or an Organizational Unit (OU) in Active Directory. A backup of AD will help you recover those objects easily.
- The Active Directory database may be corrupted from server updates. With a backup at hand, you can restore it to the normal state as you wish.
Then, what Active Directory backup tools should you choose? Please read on.
Backup Active Directory with Windows Server Backup
Windows Server Backup (WSB) is a backup and recovery tool first introduced in Windows Server 2008. To back up AD, you typically back up the full server. As WSB is not installed by default, you need to install it by yourself and then perform a full server backup with it. Let’s take Windows Server 2012 R2 as an example:
▶ Install Windows Server Backup
1. Open Server Manager and click Add roles and features.
2. On the Add Roles and Features Wizard, click Next.
3. On the Installation Type screen, leave the default Role-based or feature-based installation and click Next.
4. Click Next respectively on the Server Selection screen and the Server Roles screen.
5. On the Features screen, select Windows Server Backup and click Next.

6. Click Install. Wait for the installation process to be completed. Click Close to exit the Add Roles and Features Wizard.
▶ Backup Active Directory with Windows Server Backup
1. Open Server Manager, click Tools in the upper-right column and select Windows Server Backup.
2. Click Local Backup. On the Action menu, click Backup once.

3. In the Backup Once Wizard, on the Backup options page, click Different options, and then click Next.
4. On the Select backup configuration page, click Full server (recommended), and then click Next.
5. On the Specify destination type page, click Local drives or Remote shared folder, and then click Next.
6. On the Select Backup Destination page, choose the backup location. If you selected local drive, choose a local drive; if you selected remote share, choose a network share.
Notes:
▪ If you get an error stating that no backup storage location is available, you will need to either exclude one of the volumes that has been selected or add a new volume or remote share.
▪ If you get a warning stating that the selected volume is also included in the list of items to backup, determine whether to remove it by clicking OK or not.
7. On the confirmation screen, click Backup. Once this has completed, click Close to exit the Backup Once Wizard.

8. Close Windows Server Backup.
After you backup Active Directory 2008/2012/2016 with Windows Server Backup, you may choose different recovery methods when you encounter Active Directory issues. A non-authoritative restoration is needed when it has something to do with the system. In this situation, you perform a normal system-state restoration and then boot the server.
If you have accidentally deleted an object in AD, an authoritative restore is suitable. In this case, the steps are same as a non-authoritative restoration except that you should run Ntdsutil command with the appropriate options before reboot.
The whole process of backup & recovery with WSB seems complicated and error-prone. Is there an easier way to backup and restore Active Directory? Certainly there is!
Easier way to backup and restore Active Directory
Qiling Disk Master Server, specialized backup software for server, can help you perform Active Directory backup’s best practices.
- It supports both Windows PC operating systems (Windows 11/10/8.1/8/7/Vista/XP) and Windows Server operating systems (Windows Server 2022/2019/2016/2012/2008/2003, etc).
- It offers you four types of backup: System/Disk/Partition/File Backup. You can run system backup to backup the full server, and then restore Active Directory by system restore.
- To recover selective files in AD, you can use the Explore Image feature to mount the system image to a virtual partition, and then retrieve the needed files from the virtual partition.
Now follow the instructions below to backup Active Directory via Qiling Disk Master Server:
Step 1. Download the free trial of Qiling Disk Master Server and follow the wizard to finish installation. It will be installed in a short time.
Step 2. Launch Qiling Disk Master Server. Click on “Backup” and select “System Backup”.

Step 3. The required system partition(s) is (are) selected by default. Choose the destination path to store the backup files.

Step 4. Confirm the operation and click “Proceed”.

💛 Helpful tips:
There are more backup settings you can use to make your backup hassle-free.
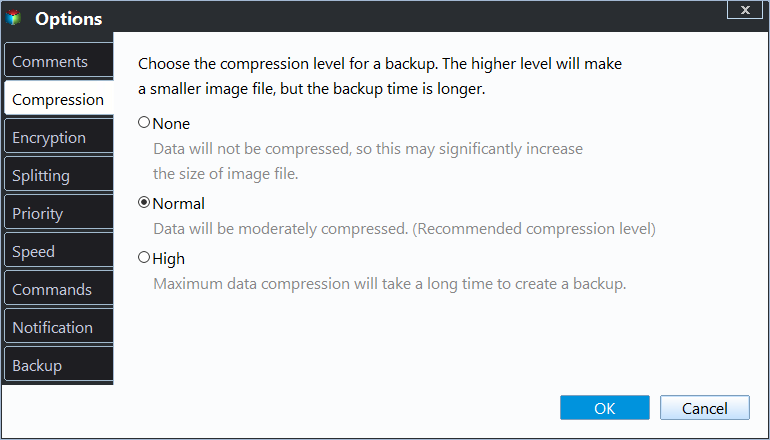
>> Options: you can encrypt, compress and split your backups, etc based on your needs.
>> Schedule Backup: you can set the backup task to run automatically at fixed intervals, such as daily, weekly, or monthly.

>> Backup Scheme: you can choose the backup method - full/incremental/differential backup. Also, you can delete old image files automatically to free up disk space for new backups.

Conclusion
Now you know how to use Windows Server Backup for Active Directory backup. Nevertheless, Qiling Disk Master Server provides an easier way to backup and restore Active Directory with its user-friendly interface and simple steps. It can also help you solve the problem of Windows Server Backup not deleting old backups and run Windows Server 2016 repair. Go for the free trial of Qiling Disk Master Server at once!
Related Articles
- Create System State Backup for Windows Server 2012
- Use Wbadmin Start Systemstatebackup to Backup Your Computer
- Alternative Way to Create Restore Point in Windows Server 2008 (R2)
- How to Create System Repair Disk on USB for Windows 7/8/10?
Want to create system repair disc on USB but do not know how? Read this guide to learn the easiest method.