Back Up Windows 11 to an External SSD
An external SSD is a good backup target for a Windows 11 PC: it is fast enough to finish a full image in a reasonable time, small enough to store off-site, and readable from another computer. The failure modes are also well known, and almost all of them come from three decisions made before the first byte is copied: the drive you bought, the file system you formatted it with, and the type of backup you chose. This guide covers those decisions and the verification step that most people skip.
Choose the external SSD
Capacity matters more than raw speed for a backup drive. A system image needs roughly as much space as the used portion of your Windows volume, and you want room for at least one older copy. For a 512 GB system disk that is often 1 TB of backup space once history is included.
- Interface. USB 3.2 Gen 1 or Gen 2 is enough. A Thunderbolt or USB4 enclosure is faster, but backup time is usually limited by small-file overhead rather than the link speed.
- Build. Prefer DRAM-less-free designs and a model with a stated sustained write speed. Cheap QLC drives can drop to hard-disk speeds once the cache is exhausted, which matters for a 200 GB image.
- Portability. A bare M.2 drive in an enclosure is fast and compact but more fragile than a sealed portable SSD. If the drive will travel, choose the sealed unit.
- Power. Avoid bus-powered enclosures that behave erratically on a laptop running from battery. A backup that dies at 90 percent is worse than no backup.
Format the target correctly
Format the drive with Windows Disk Management
Step 1. Connect the SSD and open Disk Management. Confirm the drive letter and capacity before doing anything, because the next step erases the disk.
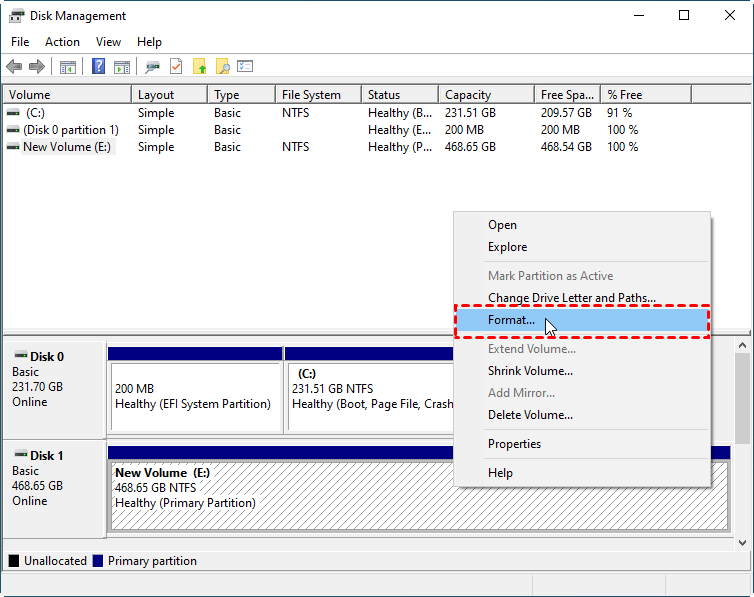
Step 2. Format the partition as NTFS for a backup used only on Windows. NTFS supports files larger than 4 GB, which a system image always exceeds, and it supports compression if you need to save space.

Step 3. Choose exFAT only if the same drive must also be read on a Mac or on a device without NTFS support. exFAT has no journaling, so an unplug during a write is more likely to cost you the whole file system.
Step 4. Do not use FAT32. It cannot store a single file larger than 4 GB, so an image backup will fail partway through no matter how much free space remains.
Format the drive with Qiling Disk Master
The same program that runs the backup can also format the target drive, so you do not have to switch between tools.
Step 1. Open Qiling Disk Master Professional, select the external SSD in the disk list, and choose Format.
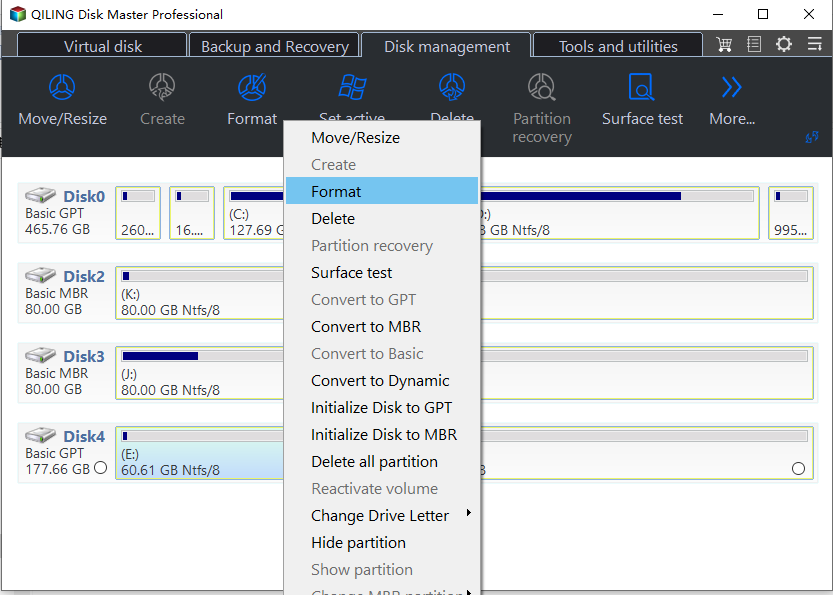
Step 2. Set the file system to NTFS or exFAT, enter a volume label such as Win11Backup, and confirm the drive letter.
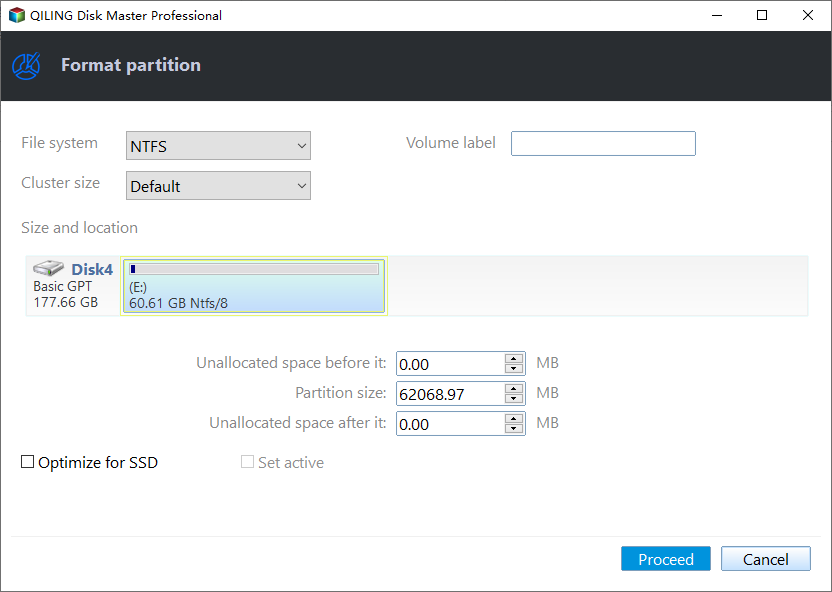
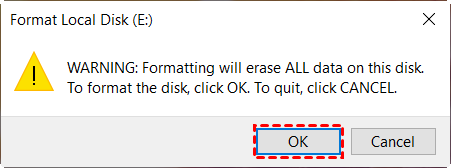
Step 3. Read the warning that all data on the partition will be erased, click Proceed, and wait for the task to finish.
File backup or system image
These solve different problems, and a practical setup usually includes both.
File backup copies the folders you select: documents, photos, project files. It is fast after the first run, easy to browse, and easy to restore single files from. It cannot bring back a broken Windows installation or your installed applications.
System image copies the whole system volume, including Windows, drivers, and applications. Restoring it returns the PC to the exact state of the backup. It is larger, slower to create, and not meant for pulling out one document.
A workable pattern is a weekly system image plus a daily incremental file backup of the folders that change most.
Run and verify the backup
Step 1. Open Qiling Disk Master Professional and choose Backup. Select System Backup for an image, or File Backup to protect specific folders.
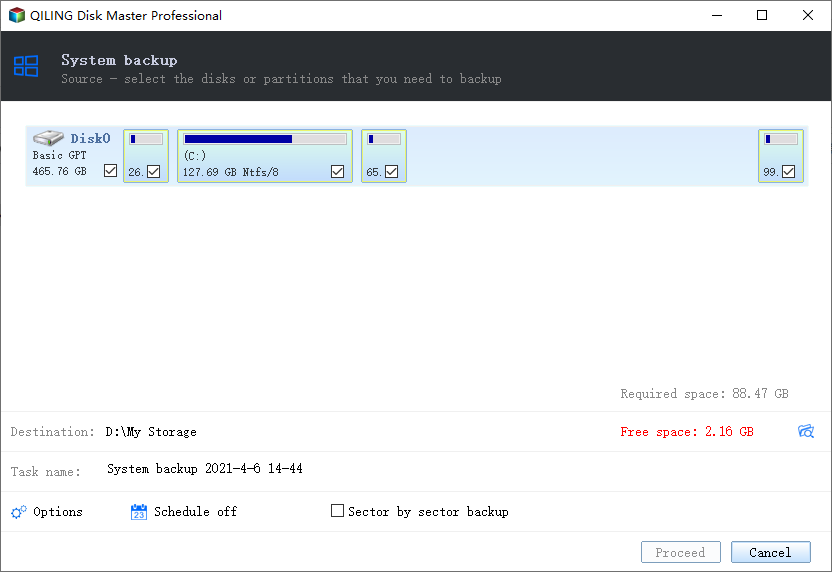
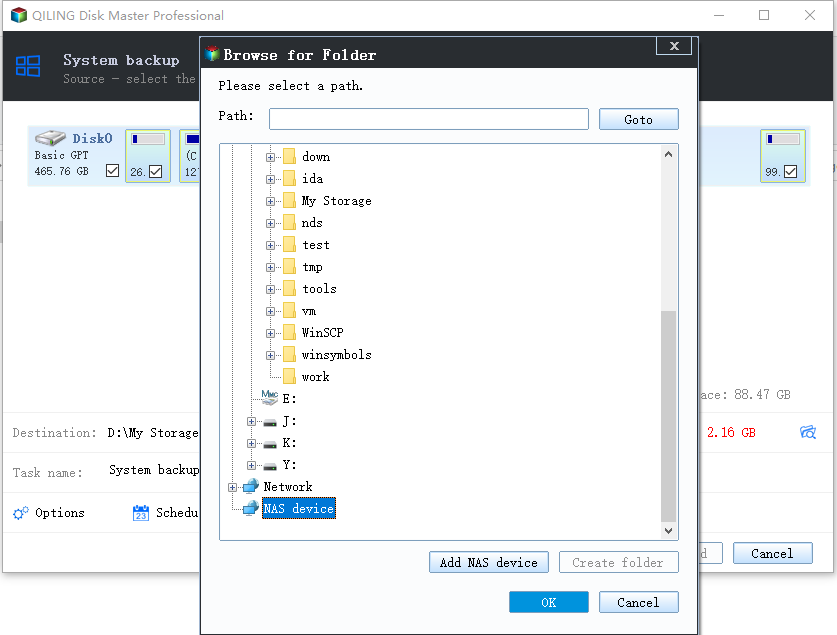
Step 2. Select the external SSD as the destination. Keep the backup on the drive root in a named folder rather than scattering files across the volume.
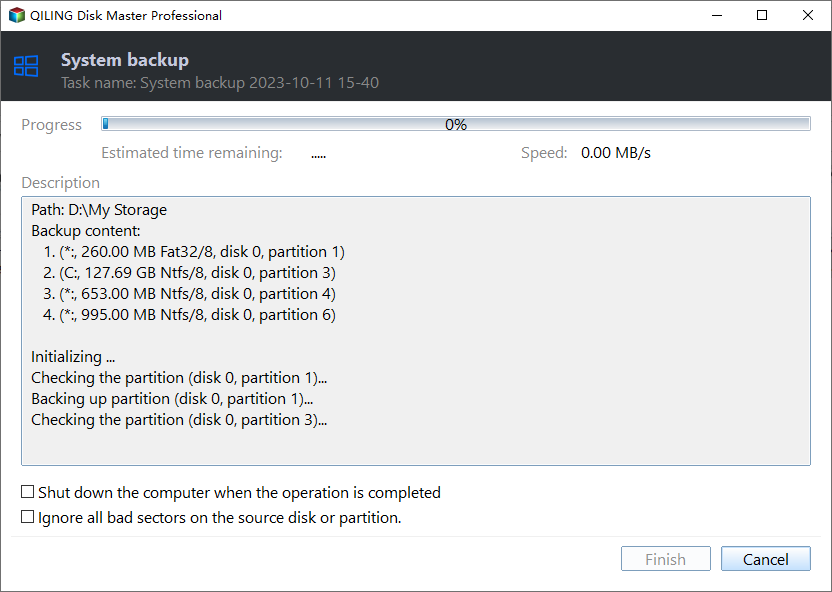
Step 3. Enable email notification or task logging if available, then start the task. Wait for the completion message rather than closing the window when the progress bar looks finished.
Step 4. Verify the backup instead of assuming it works. For partition, disk, and system image backups, use the Mount option to attach the image as a logical drive, then browse it in File Explorer and open a few files. For file backups, run a restore to an alternate location and check the restored files. Alternatively, use Check Image to verify the image integrity without mounting it.
Build a routine that survives
- Follow the 3-2-1 idea. Three copies, on two kinds of media, with one copy off-site. An external SSD that never leaves the desk is one copy, not three.
- Encrypt the backup drive. A portable SSD is easy to lose. BitLocker To Go on the backup volume protects it if it disappears; store the recovery key somewhere else.
- Safely eject. Unplugging during an incremental write is the most common way people lose a backup set.
- Test a restore each quarter. Restore a single folder to an alternate location. This proves the image and the software still work without touching the live system.
- Recreate the image before big changes. Run a fresh system image before a feature update, a driver overhaul, or a disk replacement.
Related Articles
- Create a Windows 11 Recovery USB from a System Image
Pair the backup with bootable media so the image can be restored when Windows will not start. - Clone Windows 11 to a Larger NVMe SSD
Move the whole installation to new hardware instead of restoring it from an image. - Backup and Restore Guides
More tutorials on scheduling, incremental backups, and restore procedures for Windows.
Products
Articles & Tutorials
- Data Recovery
- Data Backup
- File Recovery
- File Backup
- File synchronize
- System Backup and Restore
- Disk and Partition Clone
- Technical articles
- Disk Master Help
- Windows Deleted File and Disk Recovery Tutorials
- Windows File and Data Recovery Tutorials
- More Windows Tutorials for Install, Security, Files, and PC Tips
- Windows Boot, Repair, and Recovery Environment Tutorials
- Windows Backup Tutorials
- Windows Restore Tutorials
- Windows Clone and Migration Tutorials
- Windows Server Backup, Recovery, and Management Tutorials
- Windows Disk, Partition, and Storage Management Tutorials