Create a Windows 11 Recovery USB from a System Image
Many users create a USB recovery drive, then discover that it cannot restore anything: the drive only contains the Windows Recovery Environment, not a copy of their system. A usable recovery USB needs two things that are made separately. First, a system image backup of the PC. Second, a bootable USB that can start the backup software and read that image. This guide builds both and shows how to prove the result works before you need it.
Recovery drive, system image, recovery USB
The three terms are often used interchangeably, which is why so many recovery attempts fail.
- Recovery drive. Created by the built-in tool in Control Panel. It holds a copy of the Windows Recovery Environment, which provides Startup Repair, System Restore, and Command Prompt. It does not contain your installed programs, settings, or personal files.
- System image. A sector-level or file-level copy of the entire system volume, including Windows, applications, drivers, and user data. This is what actually puts a broken PC back the way it was.
- Recovery USB. A bootable USB that holds a recovery environment which can read your backup format. The system image itself may sit on the same USB or on a separate external drive.
If your only goal is to reach Startup Repair, the built-in Recovery Drive is enough. If the goal is to restore a dead Windows 11 installation onto a new disk, you need an image plus a bootable environment. For a restore-focused walkthrough, see Restore a Windows 11 system image to a new NVMe SSD.
Create the system image first
Step 1. Connect an external drive with enough free space. A system image is roughly the size of the used space on the system volume, so leave generous headroom.
Step 2. Open Qiling Disk Master Professional, choose Backup, then System Backup. Select the destination and start the task.
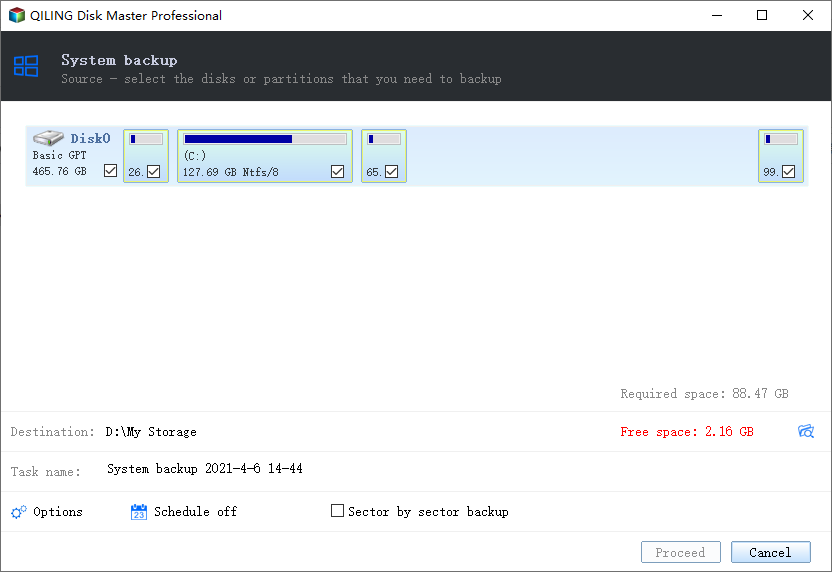
Step 3. Confirm the task completed without errors and note the exact folder that holds the image files. You will need that path later, and it is easy to forget inside a dated subfolder.
Make the bootable USB
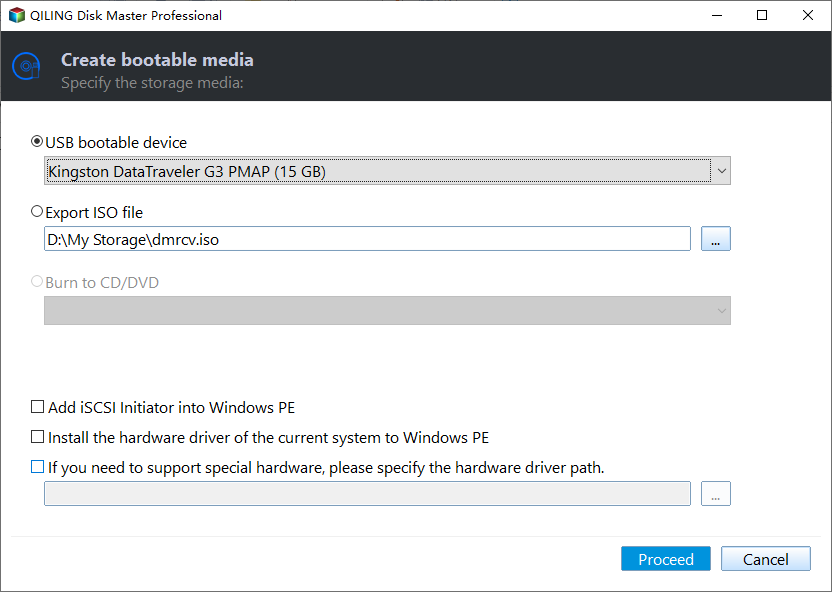
Step 1. Insert a USB flash drive of at least 8 GB. It will be erased completely.
Step 2. In the same program, open Tools and choose Create Bootable Media. Select the USB drive as the target and let the tool write its Windows PE environment to it.
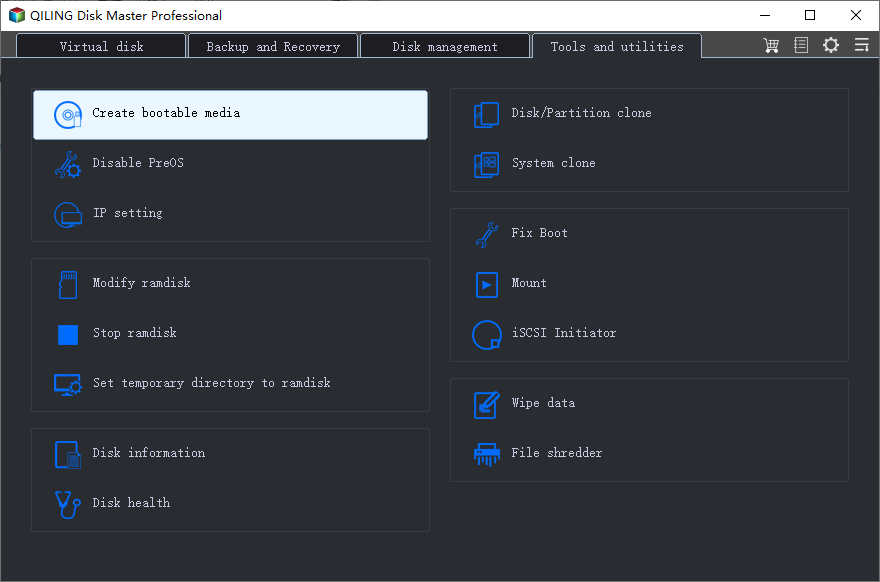
Step 3. Label the stick with a physical sticker stating the build date and the Windows version. Two unlabeled sticks on a shelf are indistinguishable when a PC is down.
Put the image where the USB can reach it
You have two workable layouts, and the choice depends on image size and the capacity of the stick.
- Image on the same USB. Convenient for one self-contained rescue kit, but only practical when the image fits alongside the WinPE files.
- Image on an external drive. The usual choice, because system images are large and external SSDs are cheaper per gigabyte than flash drives.
Either way, the bootable USB must be able to see the drive that holds the image. A USB enclosure works for most systems, but a drive connected through a RAID controller, a network share, or a proprietary docking station may not appear inside Windows PE. Check this before an emergency, not during one.
Test and restore
Step 1. Reboot the PC and open the firmware boot menu, usually F12, F11, or Esc depending on the manufacturer. Confirm the USB appears as a UEFI boot entry and that it reaches the recovery desktop. You do not need to restore anything yet, so stop here on a working machine.
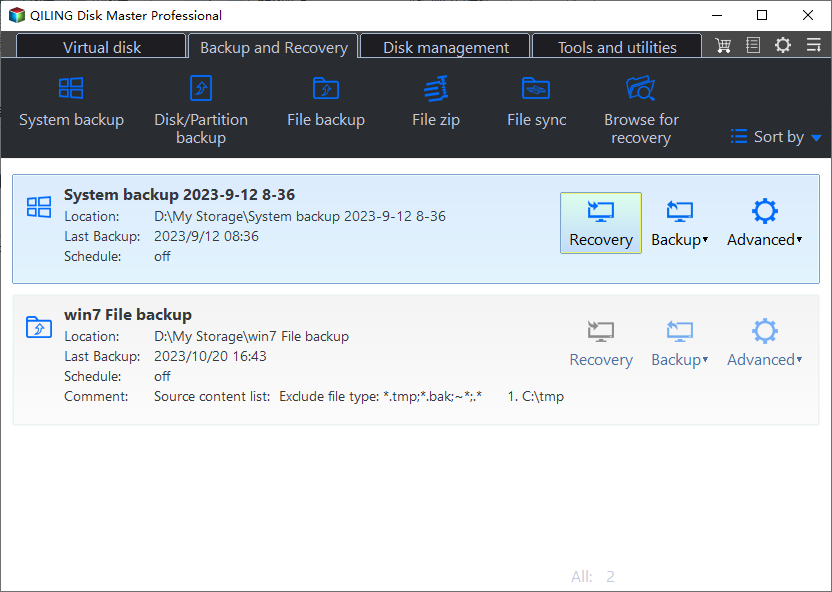
Step 2. When a restore is actually needed, boot the USB, choose Restore, point the wizard at the image folder, and select the target disk. Confirm the destination disk by capacity and model before proceeding, since the restore overwrites it completely.
Step 3. After the restore finishes, disconnect the USB, boot from the internal disk, and check that Windows starts and that your important files are present.
Keep it current
A recovery USB is only as good as the image on it. Rebuild the image on a schedule you can keep, for example monthly, and again before any major change such as a Windows feature update, a driver overhaul, or a disk replacement. Re-create the bootable media when you move to a new version of the backup software.
Related Articles
- Restore a Windows 11 System Image to a New NVMe SSD
Restore a full system image onto replacement hardware and fix the boot entries afterward. - Back Up Windows 11 to an External SSD
Choose a backup target that is large enough, fast enough, and readable from a recovery environment. - Backup and Restore Guides
More tutorials on system images, file backups, and recovery media for Windows PCs.
Products
Articles & Tutorials
- Data Recovery
- Data Backup
- File Recovery
- File Backup
- File synchronize
- System Backup and Restore
- Disk and Partition Clone
- Technical articles
- Disk Master Help
- Windows Deleted File and Disk Recovery Tutorials
- Windows File and Data Recovery Tutorials
- More Windows Tutorials for Install, Security, Files, and PC Tips
- Windows Boot, Repair, and Recovery Environment Tutorials
- Windows Backup Tutorials
- Windows Restore Tutorials
- Windows Clone and Migration Tutorials
- Windows Server Backup, Recovery, and Management Tutorials
- Windows Disk, Partition, and Storage Management Tutorials