Clone Windows 11 to a Larger NVMe SSD
Replacing a small NVMe drive with a larger one is the cheapest way to add fast storage without reinstalling Windows. The clone itself is the easy part. What catches people out is that a clone reproduces the old partition layout exactly, so the new drive still shows the old capacity. The extra space sits unallocated at the end of the disk until you extend the system partition. This guide covers the hardware checks, the clone, and that final step.
Check that the new NVMe drive fits
Slot length. Most laptops and desktops use an M.2 2280 slot, but compact machines sometimes take 2230 or 2242 drives. Measure the old drive or read the model number before ordering.
Key and protocol. An M.2 slot may be keyed for NVMe (M key) or SATA (B+M key). A SATA M.2 drive will not work in an NVMe-only slot, and the reverse is also true. Check the motherboard manual rather than assuming.
PCIe generation. A Gen 4 drive in a Gen 3 slot works, but it runs at Gen 3 speed. This is fine for a replacement drive; do not pay extra for bandwidth the slot cannot deliver.
Physical fit. Some thin laptops accept only single-sided drives. A double-sided drive with chips on both faces may not seat or may press against the chassis.
Thermal headroom. High-end Gen 4 and Gen 5 drives throttle without a heatsink. If the laptop has no room for one, choose a lower-power model rather than the fastest one available.
What a clone does and does not do
A disk clone copies every partition in order: the EFI system partition, the Microsoft reserved partition, the Windows partition, and the recovery partition. The partition table is copied as well, including the size values. The result is a disk that is byte-for-byte equivalent at the partition level, with unused space beyond the last partition.
This is why the new drive shows the old capacity after cloning. Windows cannot automatically grow a partition that is already defined, and Disk Management can only extend a volume into unallocated space directly behind it. When the recovery partition sits between C and the unallocated space, the built-in tool refuses to extend at all. That specific situation is covered in Move unallocated space to C drive.
Clone the system disk
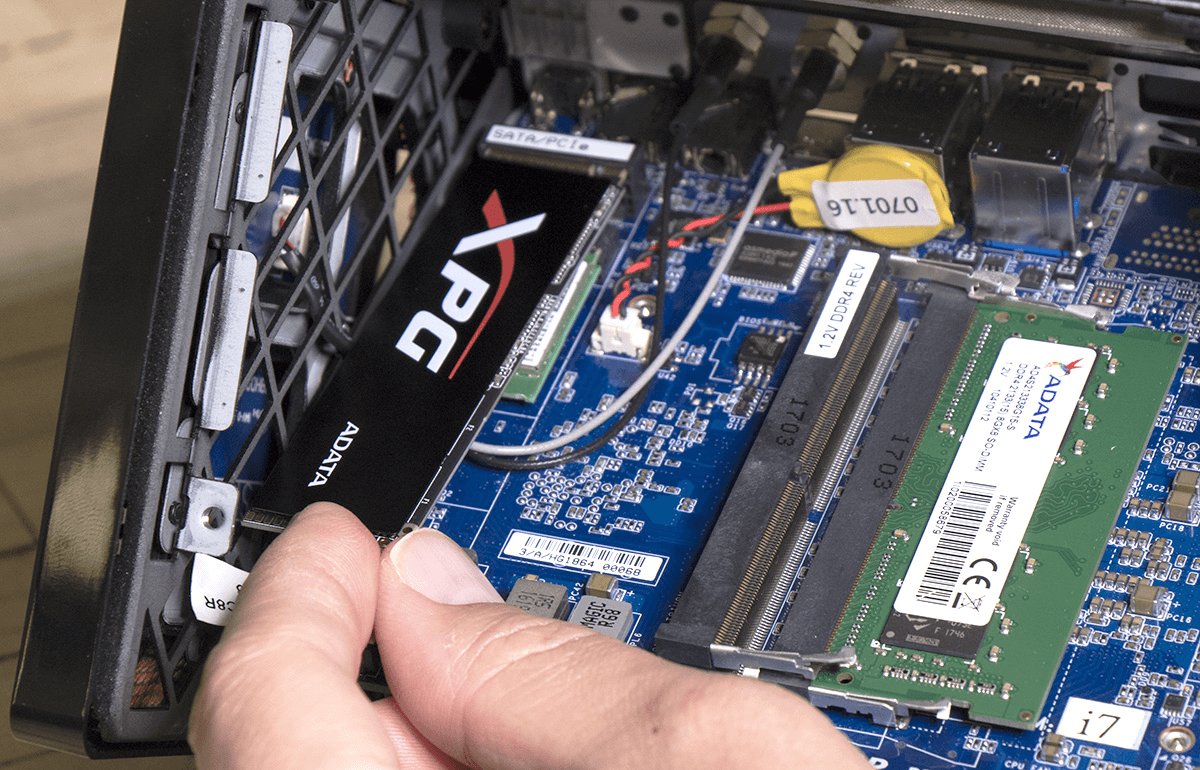
Step 1. Install the new NVMe drive. On a desktop, use a second M.2 slot if one exists. On a laptop with a single slot, use a USB NVMe enclosure for the clone, then swap the drives afterward.
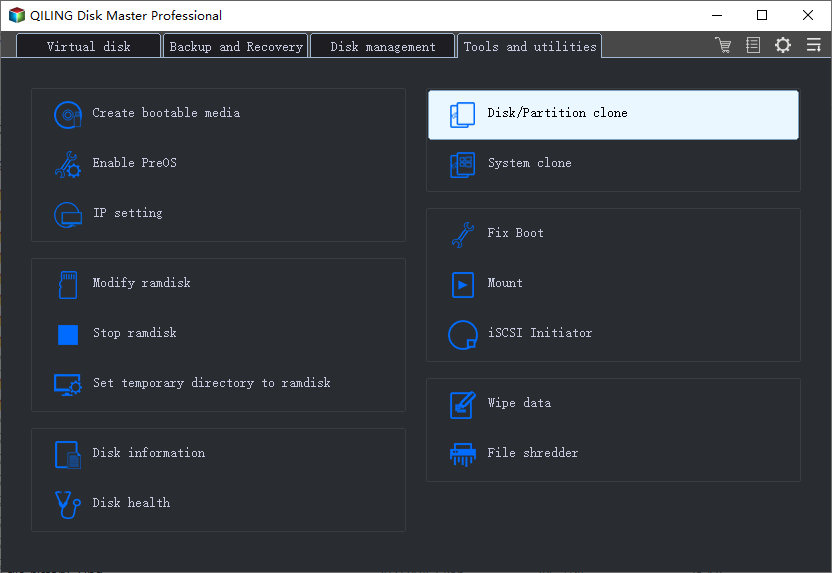
Step 2. Open Qiling Disk Master Professional, choose Clone, then Disk Clone.
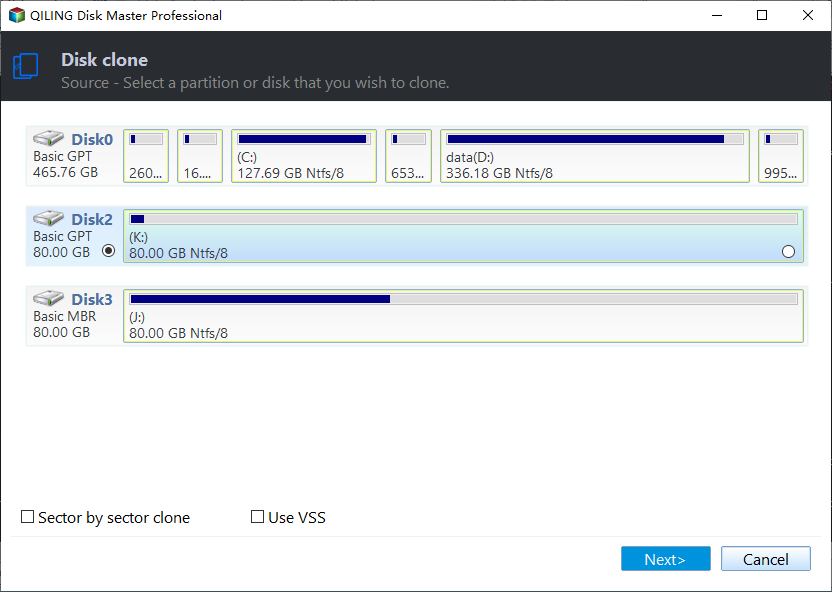
Step 3. Select the current NVMe system disk as the source.
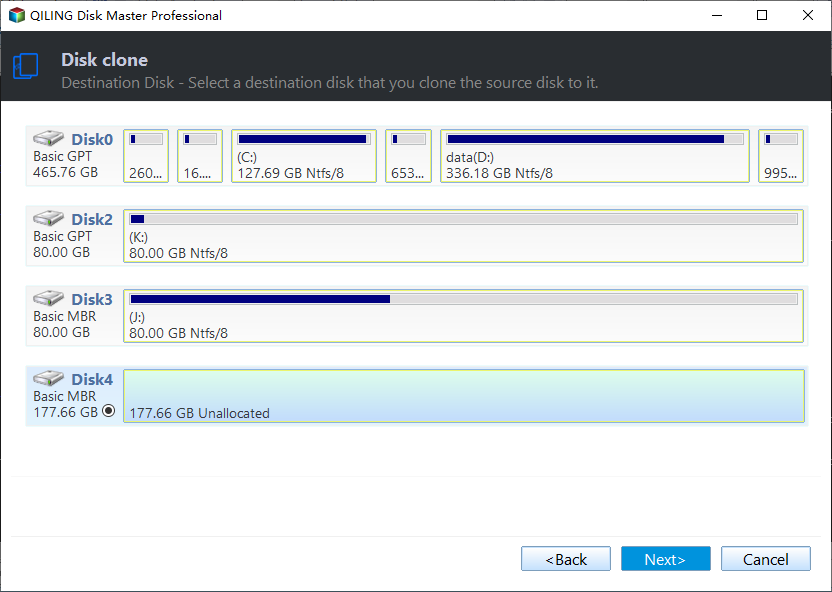
Step 4. Select the larger NVMe drive as the destination. Confirm both disks by model name and capacity, since the destination is erased completely.
Step 5. Keep SSD Alignment enabled and, if the option is offered, choose to let the destination partitions use the full disk. Some tools can expand the last partition during the clone, which saves the manual step later.
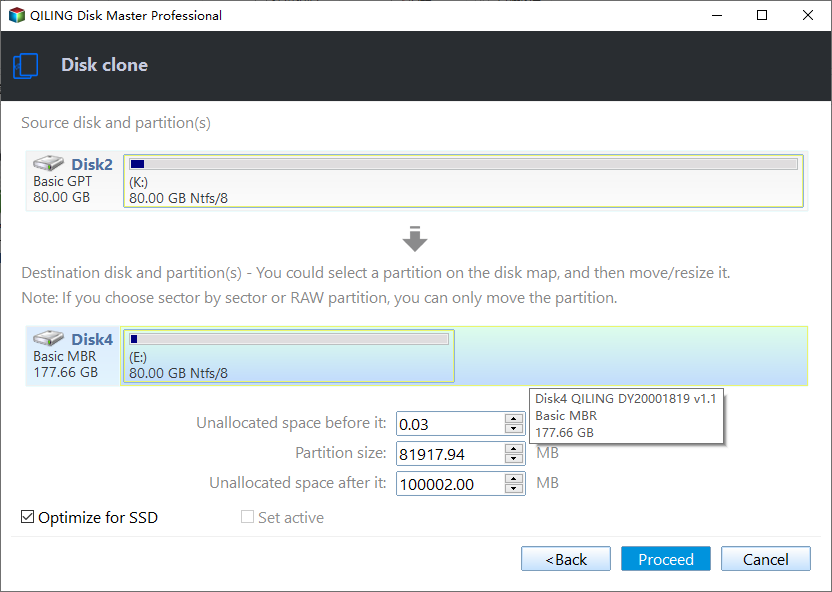
Step 6. Review the summary and click Proceed. A 500 GB system disk usually clones in well under an hour over NVMe.
Extend C to use the extra space
Extend C with Windows Disk Management
Step 1. Boot from the new drive first, then open Disk Management. You should see the Windows volume at its original size with unallocated space after it.
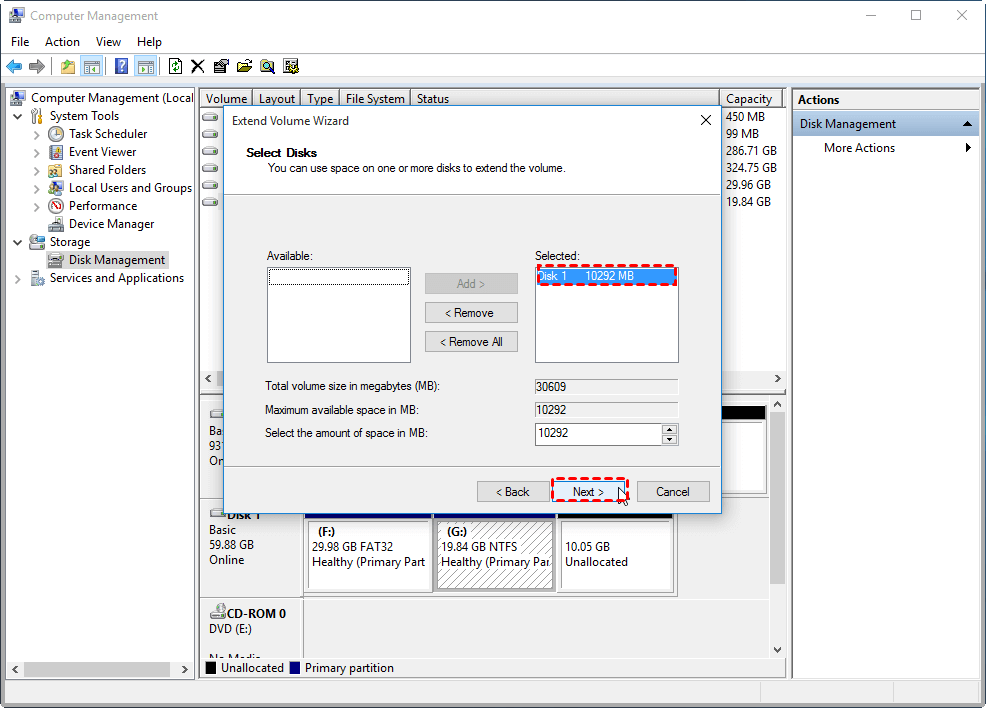
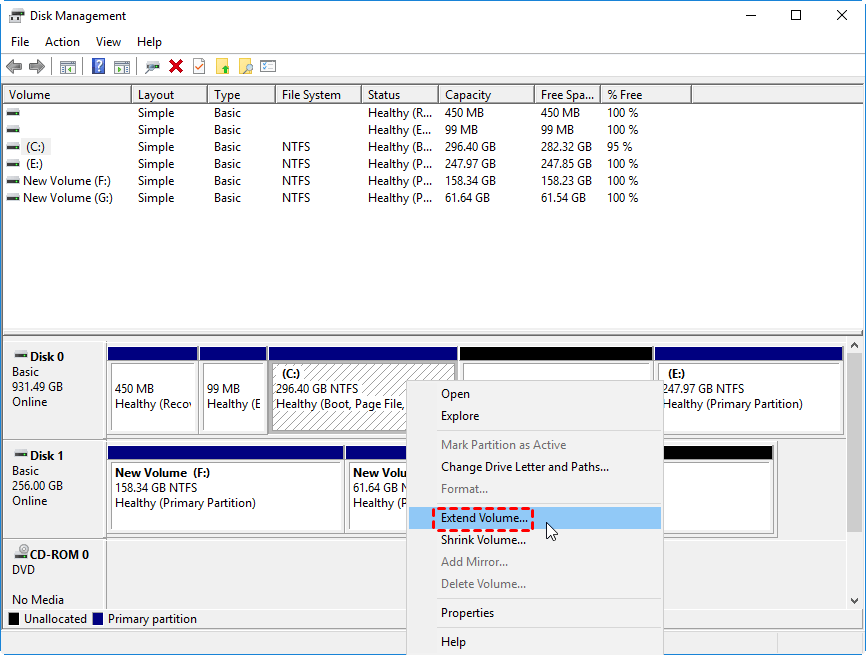
Step 2. If the unallocated space sits directly behind C, right-click C, choose Extend Volume, and accept the maximum available size.
Extend C with Qiling Disk Master
Disk Management refuses to extend C in two common cases: the unallocated space is not directly behind the system partition, or a recovery partition sits between them. The Extend Partition feature can take free space from any position on the disk, so neither case blocks it.
Step 1. Open Qiling Disk Master Professional, select the system partition, and choose Extend Partition.
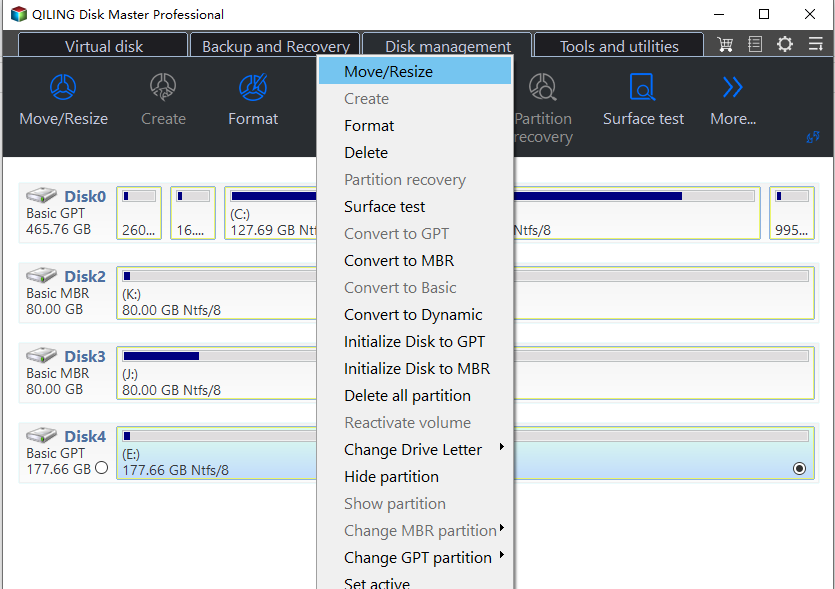
Step 2. Choose where the free space should come from, then drag the slider or type the new size for C and check the result in the preview.
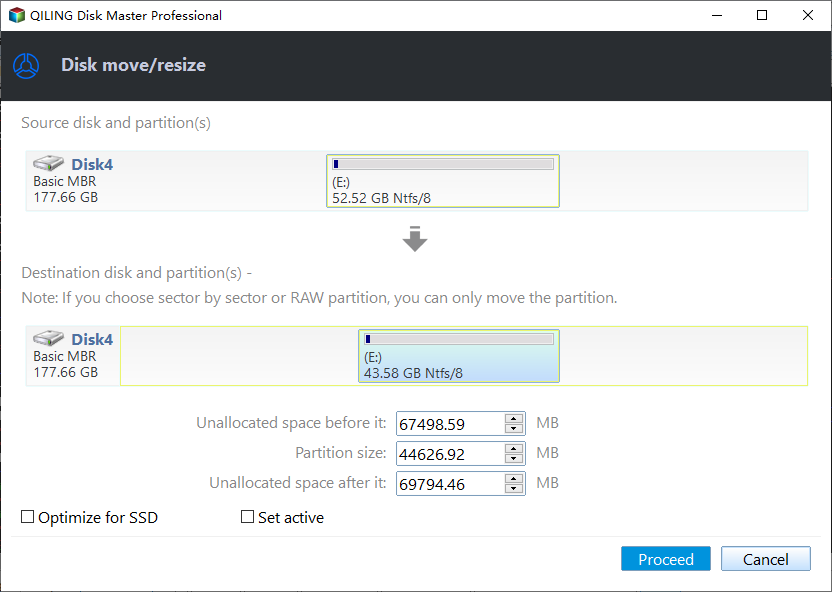
Step 3. Click Proceed and wait for the task to finish. The extra capacity shows up in File Explorer without a reboot.
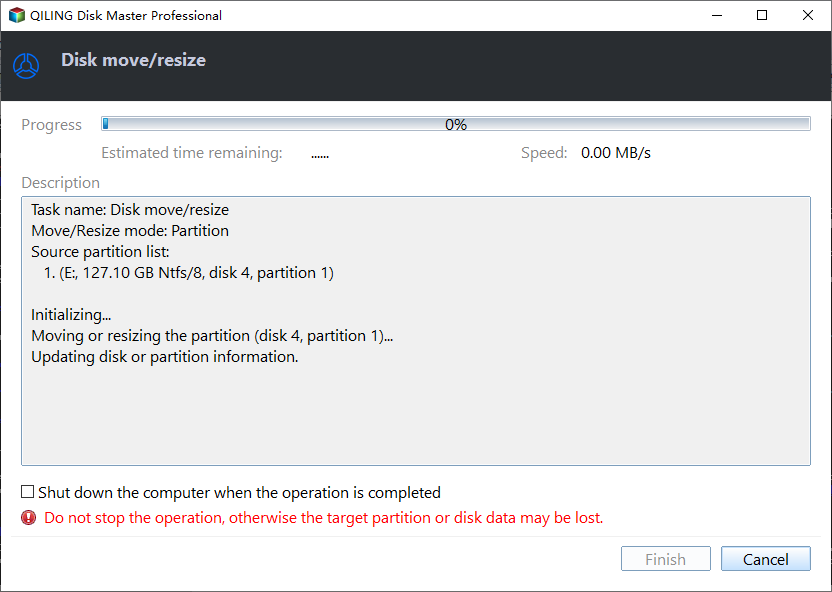
Leave a small amount of unallocated space only if you plan to add a second partition later. Otherwise, absorb all of it into C.
Boot order and verification
- Remove or disable the old drive. Two disks with identical boot entries confuse the firmware and can start Windows from the wrong one.
- Check the Windows edition and activation. A hardware change can trigger a reactivation prompt. Signing in with a Microsoft account linked to the digital license usually resolves it.
- Verify SSD alignment. If you disabled alignment during the clone, check the partition offset afterward. Misaligned partitions cost performance on NVMe drives.
- Keep the old drive untouched for a week. Do not format it until the new install has run through a full update cycle and you have opened your main applications.
Summary
The whole job comes down to four checks: the new drive has to fit the slot and match the key type, the clone has to copy the disk at sector level rather than copying files, the system partition has to be extended into the space the clone leaves behind, and the boot order has to point at the new disk before you retire the old one. Windows does not need to be reinstalled at any point, and the original drive remains bootable until you decide to erase it.
Qiling Disk Master Professional covers the clone and the partition extension in one place, with SSD alignment enabled by default so the new NVMe drive performs as expected.
Related Articles
- Suspend BitLocker Before an SSD Upgrade
Required preparation when the system disk being cloned is protected by BitLocker. - Clone a BitLocker-Encrypted Drive in Windows 11
How TPM binding affects a cloned encrypted disk and when a recovery key is required. - Move Unallocated Space to C Drive
Solutions for both adjacent and non-adjacent unallocated space on a Windows disk.
Products
Articles & Tutorials
- Data Recovery
- Data Backup
- File Recovery
- File Backup
- File synchronize
- System Backup and Restore
- Disk and Partition Clone
- Technical articles
- Disk Master Help
- Windows Deleted File and Disk Recovery Tutorials
- Windows File and Data Recovery Tutorials
- More Windows Tutorials for Install, Security, Files, and PC Tips
- Windows Boot, Repair, and Recovery Environment Tutorials
- Windows Backup Tutorials
- Windows Restore Tutorials
- Windows Clone and Migration Tutorials
- Windows Server Backup, Recovery, and Management Tutorials
- Windows Disk, Partition, and Storage Management Tutorials