How Do I Know If My PC Can Upgrade to Windows 11?
Windows 11 eligibility is not decided by free disk space alone. Microsoft requires a supported 64-bit processor, TPM 2.0, UEFI with Secure Boot capability, at least 4 GB RAM, and at least 64 GB storage, plus graphics and display requirements. Windows Update eligibility may also depend on the installed release and drivers.
Use Microsoft's compatibility checker
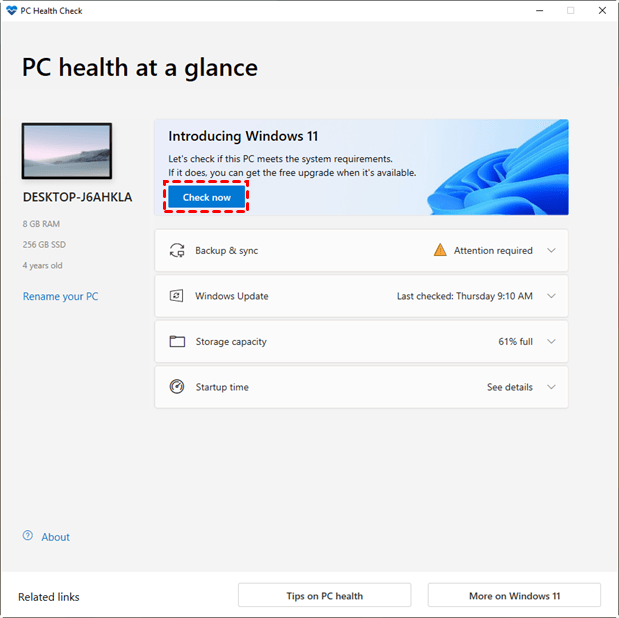
Step 1. Install PC Health Check from Microsoft's Windows 11 page. Open the app and click Check now under Introducing Windows 11. Do not decide from the first pass/fail message alone; open the detailed results in Step 4.
Step 2. Open Settings > System > About and note the processor and installed RAM. In File Explorer, open This PC to check the Windows drive's free space. The storage requirement concerns device capacity, but an in-place upgrade also needs working free space.
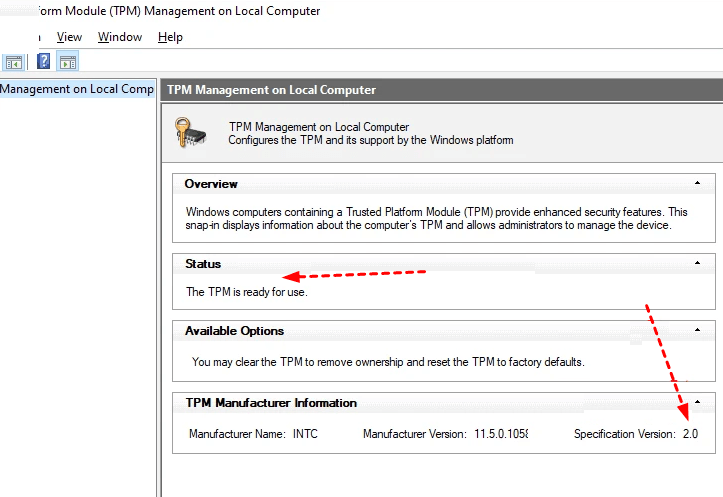
Step 3. Press Win + R, enter tpm.msc, and read Status and Specification Version. Then run msinfo32 and note BIOS Mode and Secure Boot State. Do not clear the TPM or change firmware settings merely to remove a warning.
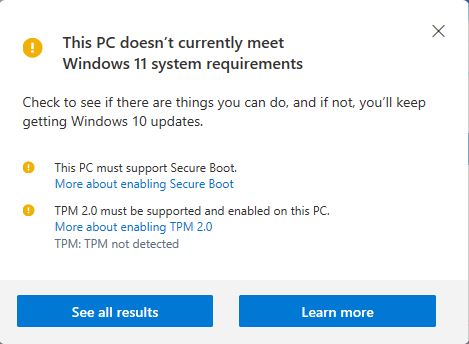
Step 4. Return to PC Health Check and click See all results. Record each failed item separately: TPM support or version, Secure Boot capability, processor support, RAM, and storage. Compare the warnings with the values you recorded above. Ask the PC maker about firmware options before changing them; repartitioning cannot fix an unsupported CPU.
Inspect the boot disk before firmware changes
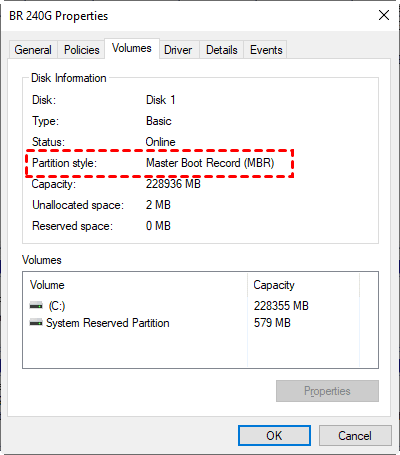
Step 1. Press Win + X and open Disk Management. Find the physical disk that contains C:; note its disk number. Right-click the label on the left that says Disk 0 or another disk number, not the C: volume, and choose Properties > Volumes.
Step 2. Read Partition style and compare it with the BIOS Mode recorded in System Information. GPT is normally used for UEFI startup. If the PC currently boots in Legacy mode from an MBR disk, plan the conversion and firmware change together; do not simply toggle Legacy to UEFI or format the disk.
Step 3. Before any disk conversion or firmware change, save a BitLocker recovery key if encryption is enabled, make the backup below, and consult the PC maker's instructions for that model.
Back up and choose an upgrade path
Step 1. Connect an external drive with enough free space for an image of the Windows disk. Close open work, keep the PC powered, and leave the external drive connected until the backup and verification finish.
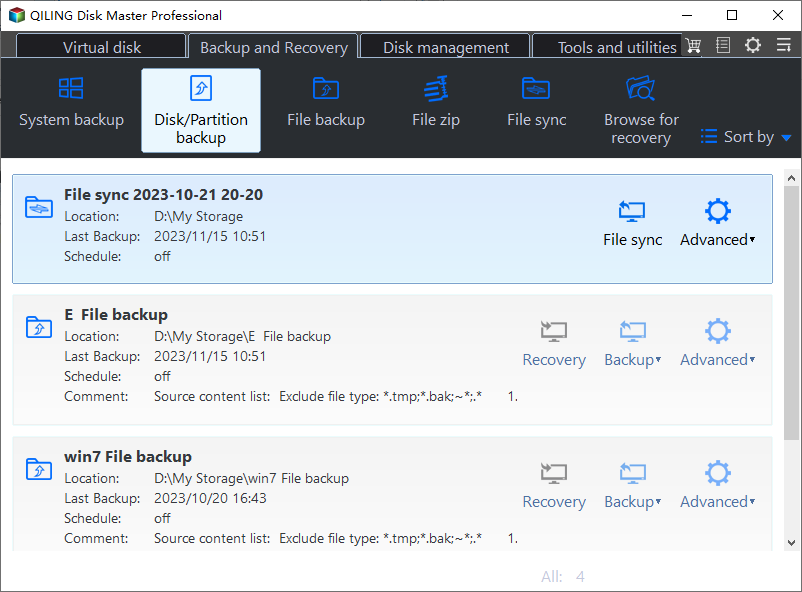
Step 2. In Qiling Disk Master, open Backup and Recovery and click Disk/Partition backup.
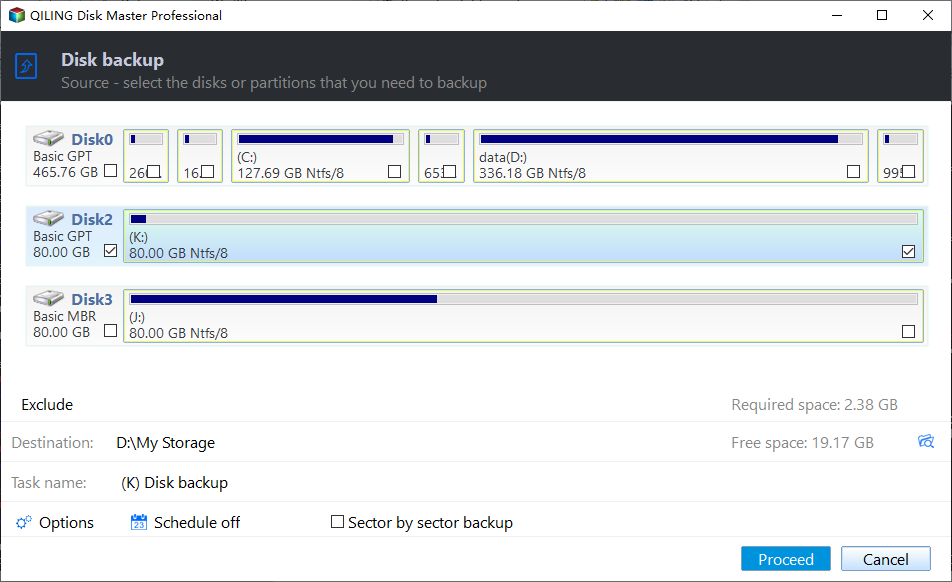
Step 3. Locate the disk containing C:. Check the box beside its disk number to include the whole disk, including boot and recovery partitions, rather than checking C: alone. Clear any unrelated disk selection. The screenshot shows a different disk selected as an interface example; select the disk containing C: on your PC.
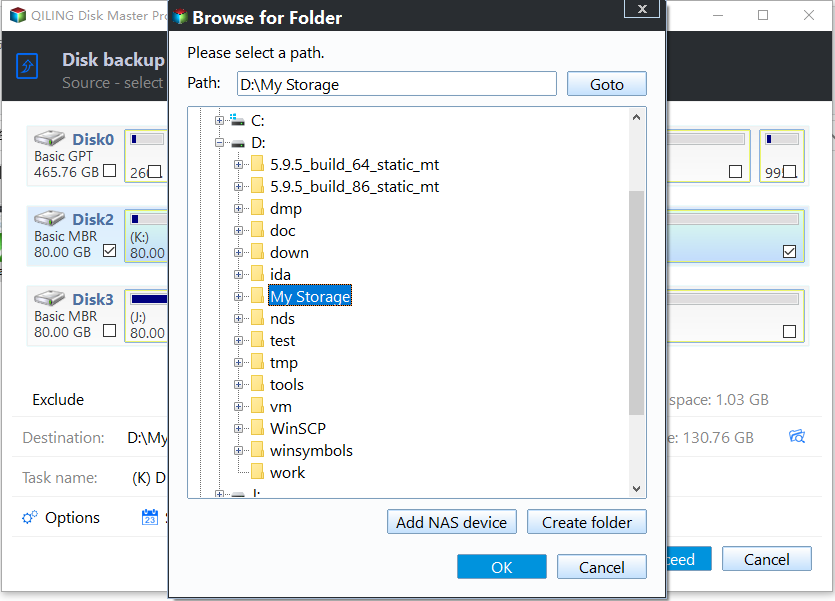
Step 4. Click the folder icon beside Destination. In the folder browser, choose a folder on the external drive and click OK. Back in the backup window, confirm the destination path and available space; do not store the image on the disk being backed up.
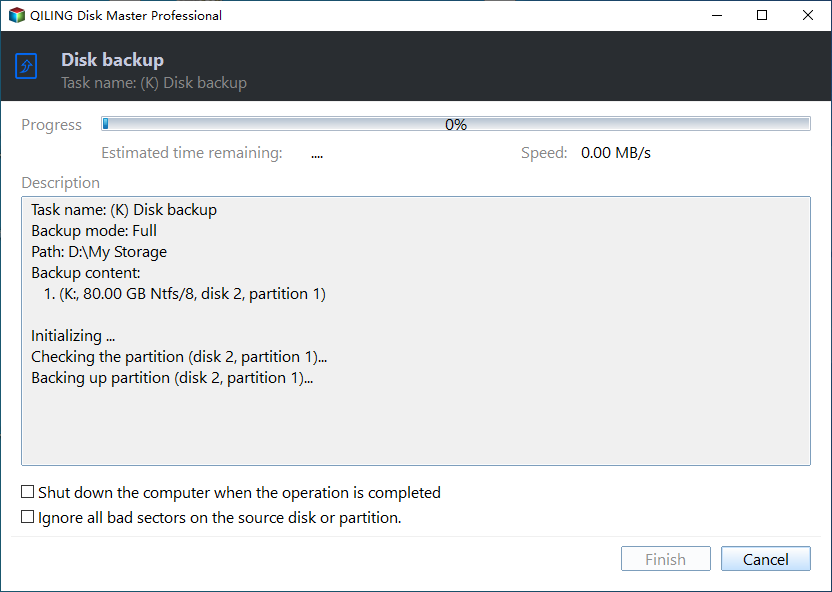
Step 5. Review the selected source disk and destination, then click Proceed. Wait for the backup operation to finish before disconnecting the drive.
Step 6. On the Backup and Recovery tab, find the completed task and choose Advanced > Check Image. Wait for a successful check before any MBR-to-GPT conversion, firmware update, or operating-system upgrade. Keep the backup until Windows 11 and your essential apps work correctly.
If hardware qualifies, use Windows Update or Microsoft's official Installation Assistant. If PC Health Check reports an unsupported CPU or another fixed hardware limit, do not assume changing a registry value makes the PC supported. Keep a recovery path and test essential apps after installation.
Related Articles
- Check TPM for a Windows 11 Update
Review TPM status and firmware options. - ASUS Secure Boot for Windows 11
Understand Secure Boot prerequisites on a supported PC.
Products
Articles & Tutorials
- Data Recovery
- Data Backup
- File Recovery
- File Backup
- File synchronize
- System Backup and Restore
- Disk and Partition Clone
- Technical articles
- Disk Master Help
- Windows Deleted File and Disk Recovery Tutorials
- Windows File and Data Recovery Tutorials
- More Windows Tutorials for Install, Security, Files, and PC Tips
- Windows Boot, Repair, and Recovery Environment Tutorials
- Windows Backup Tutorials
- Windows Restore Tutorials
- Windows Clone and Migration Tutorials
- Windows Server Backup, Recovery, and Management Tutorials
- Windows Disk, Partition, and Storage Management Tutorials