Recover Data from a Formatted USB Drive on Windows 11
A quick format does not erase your files. It clears the file table that tells Windows where each file begins and ends, then marks the space as available. The actual contents stay on the flash memory until something new is written over them. That is why recovery often works, and also why every minute spent using the drive reduces your chances. Copy the drive image or stop using it first, then scan.
What a format actually deletes
Windows offers two formats, and the difference decides whether recovery is realistic.
- Quick format. Rebuilds the file system structures: boot sector, FAT or MFT. File data is left in place. Recovery tools can rebuild entries by scanning for known file signatures.
- Full format. Writes zeros across the whole volume. On a mechanical drive this leaves nothing to recover. On flash media the result depends on whether the controller has already erased the affected blocks.
There is a second factor specific to USB flash drives and SSD-based sticks: TRIM and background garbage collection. When the drive is idle, the controller may erase blocks that the file system no longer references. On such drives, recovery works best when you act immediately and keep the drive powered off between attempts.
Stop writing to the drive
Step 1. Do not save the recovered files back to the same USB drive. Every new file can overwrite the data you are trying to save.
Step 2. Do not run chkdsk on the formatted volume, and do not let Windows repair it. Repair operations can rewrite file system structures and destroy the remnants that a scan would find.
Step 3. If the drive contains critical data, create a sector-level image of it and scan the image instead. This gives you unlimited attempts without touching the original.
Rule out other causes first
Not every "formatted" drive was actually formatted. Before scanning, confirm which situation you have.
- "You need to format the disk before you can use it." The partition table or file system is damaged, not erased. This is a RAW volume, and recovery rates are typically higher than after a real format.
- Drive appears empty but holds no format prompt. The files may be in a hidden folder, in a different partition, or hidden by a drive-letter conflict. Check Disk Management and show hidden items before doing anything else.
- Drive not detected at all. A hardware or controller failure needs a different approach than a formatting mistake.
Scan and recover
Step 1. Connect the USB drive and an external disk with enough free space for the recovered files.
Step 2. Open Qiling Disk Master Professional and use its Data Recovery module. Select the USB drive as the scan target.
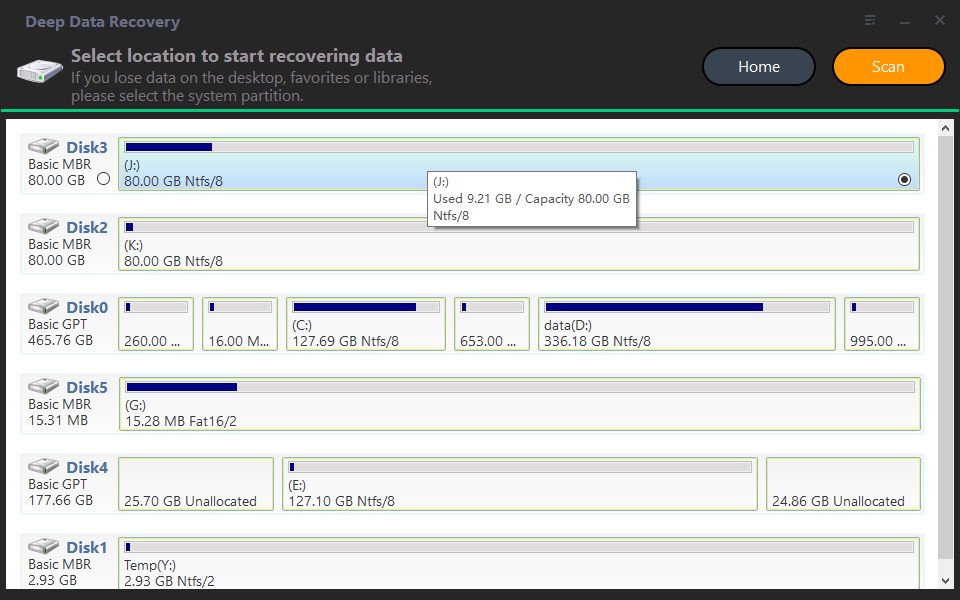
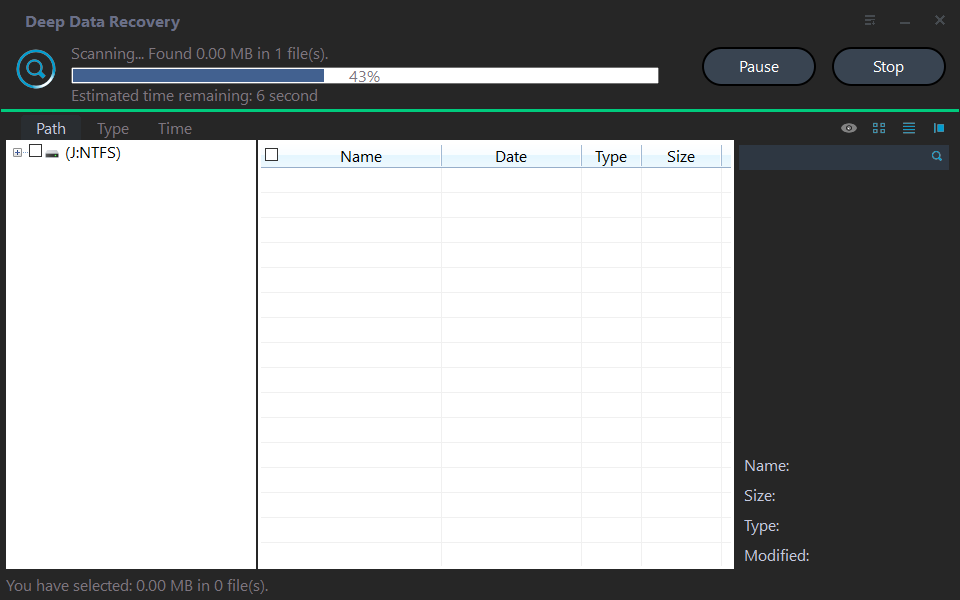
Step 3. Start with a quick scan, which reads file system remnants. If the results are thin, run the deep or signature-based scan. It searches the raw sectors for file headers and is slower but finds files whose entries are gone.
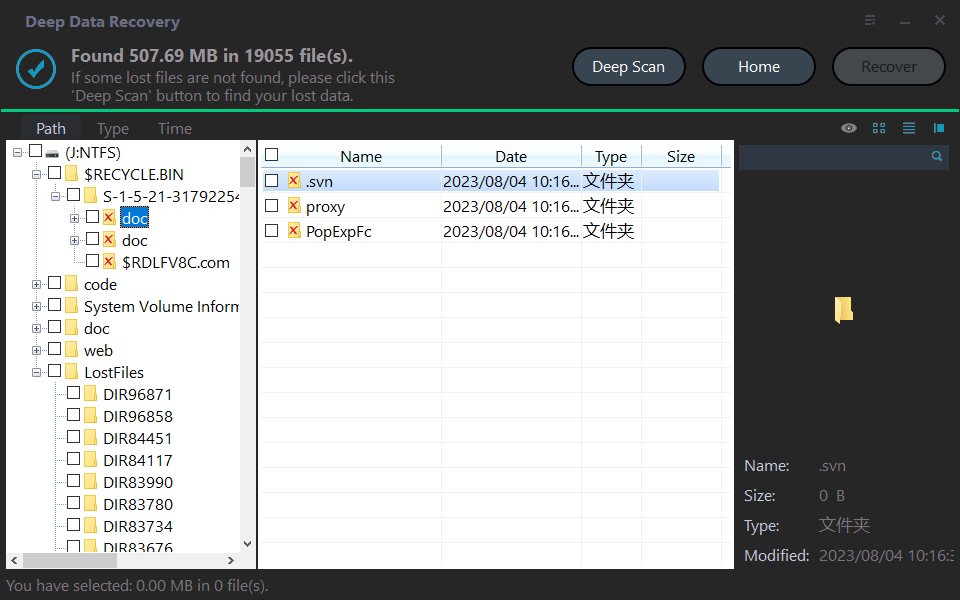
Step 4. Preview the results before recovering. Photos, documents, and many video formats can be previewed, which tells you whether the data survived intact.
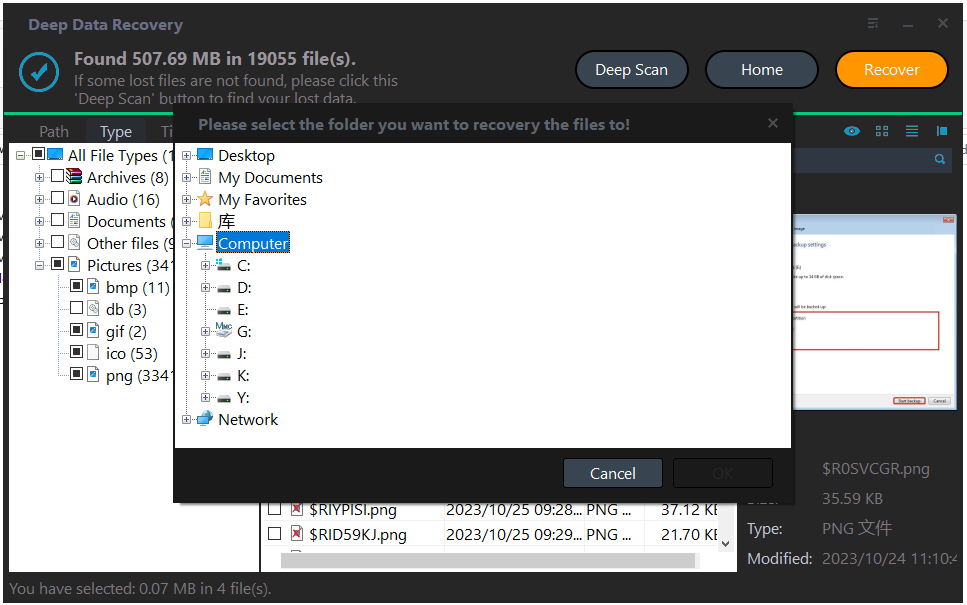
Step 5. Recover to the external disk, never to the USB drive. After recovery, open a sample of the restored files to confirm they are readable.
Improve your odds next time
- Eject properly. Removing a drive during a write is the most common cause of RAW volumes and lost file tables.
- Avoid formatting as a first response. When a drive misbehaves, copy the data off before formatting it.
- Keep a second copy. A USB stick is a transport medium, not a storage location.
- Use NTFS or exFAT for large files. Reformatting to FAT32 later is itself a common trigger for data loss on drives holding large media.
Related Articles
- Recover Files After a Windows 11 Reset
What a reset removes, and how to get personal files back from the old installation. - Recover Deleted OneDrive Files on Windows 11
Restore cloud files from the recycle bin, version history, or a local sync folder. - Back Up Windows 11 to an External SSD
Set up a second copy so a formatted or failed drive is no longer a data emergency.
Products
Articles & Tutorials
- Data Recovery
- Data Backup
- File Recovery
- File Backup
- File synchronize
- System Backup and Restore
- Disk and Partition Clone
- Technical articles
- Disk Master Help
- Windows Deleted File and Disk Recovery Tutorials
- Windows File and Data Recovery Tutorials
- More Windows Tutorials for Install, Security, Files, and PC Tips
- Windows Boot, Repair, and Recovery Environment Tutorials
- Windows Backup Tutorials
- Windows Restore Tutorials
- Windows Clone and Migration Tutorials
- Windows Server Backup, Recovery, and Management Tutorials
- Windows Disk, Partition, and Storage Management Tutorials