How to Check Disk Speed in Windows 11 and Read the Results
A slow PC does not always mean a slow disk. Task Manager shows whether storage is busy, while a benchmark estimates throughput under a defined workload. Sequential and random reads answer different questions, and results vary with cache, free space, power mode, encryption, and other activity.
Check real workload first
Step 1. Start the task that feels slow, then press Ctrl + Shift + Esc to open Task Manager. Select Performance and the disk holding C: or the files in question. Note its model and SSD/HDD type, then watch Active time, Average response time, and read/write rates for about a minute. The layout may differ from the example screenshot, but the same disk readings matter. A disk can show 100% active time with low MB/s when it handles many small requests; that alone is not a measured maximum speed.
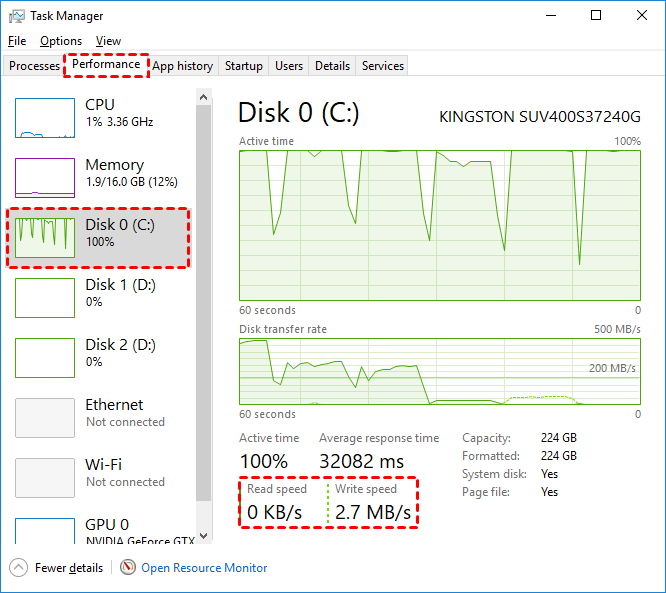
Step 2. Switch to Processes and click the Disk column to sort by current disk use. Identify whether an update, backup, antivirus scan, or your own task is responsible. For more detail, press Win + R, run resmon, and open its Disk tab. These readings describe the current workload, not a controlled peak-speed test.
Run a repeatable built-in read test
Step 1. Check in Task Manager that the disk is mostly idle. Pause downloads, backups, and games. Search for Command Prompt in Start, choose Run as administrator, and approve the prompt. Note whether the target is an HDD, SATA SSD, or NVMe SSD so you compare it with an appropriate device later.
Step 2. To test the disk containing C:, enter winsat disk -seq -read -drive c and press Enter. Replace c with the correct drive letter for another disk, without a colon after -drive. Wait for the command to finish and record the sequential-read result in MB/s.
Step 3. Enter winsat disk -ran -read -drive c for random reads of the same drive. Wait for completion and record that MB/s result in a separate line. Microsoft's WinSAT disk reference documents these options.
Step 4. If the drive appears healthy, repeat each test under the same idle conditions and compare sequential with sequential and random with random. A large variation calls for checking background activity, free space, or temperature before blaming the drive. Stop benchmarking a drive that disconnects, makes unusual noises, or reports errors; protect its data first. Do not compare random-read speed directly with a manufacturer's sequential-read rating.
Investigate a poor result
Step 1. Recheck Task Manager and Resource Monitor for competing disk work. In File Explorer, check available space on the tested volume. If the drive reports errors or intermittently disappears, back up important data before another test.
Step 2. Identify the drive's model and connection: HDD, SATA SSD, and NVMe SSD have different performance limits. Check the cable or port on a replaceable SATA drive, and consider heat or power mode when a result falls after sustained use. On an SSD, use Windows' normal drive optimization and check firmware and driver health instead of repeatedly running write-heavy tests.
Upgrade a genuinely limiting hard drive
If the system uses an HDD and the checks above point to storage as the bottleneck, a compatible SSD may help. Clone only after you have backed up important data.
Step 1. Check that the SSD fits the PC's connector and drive bay and has enough capacity for the Windows disk's data. Connect it through a suitable slot or adapter. Back up the old disk and copy any files already on the SSD elsewhere: cloning overwrites the destination.
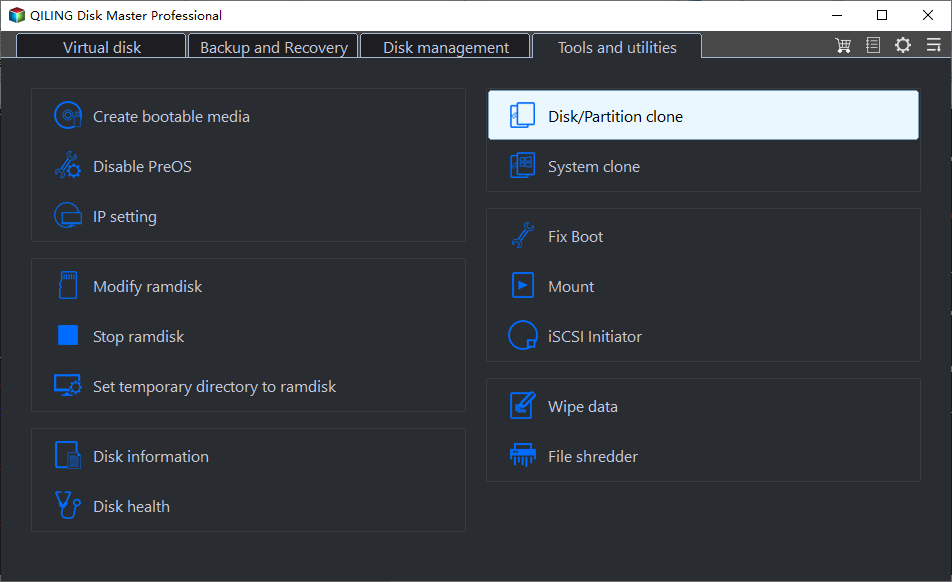
Step 2. In an edition of Qiling Disk Master that supports system-disk cloning, open Tools and utilities > Disk/Partition clone.
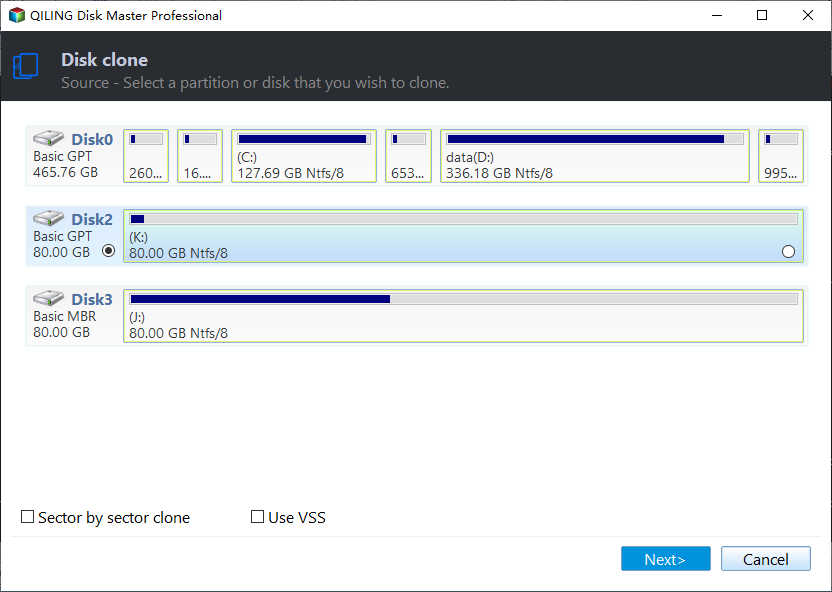
Step 3. On the source screen, find the old Windows disk by the C: partition and its capacity. Select the whole disk using the circle beside its disk number, not an individual partition, so boot and recovery partitions are included. Click Next. Leave Sector by sector clone unchecked if you need to enlarge a partition on the SSD. The screenshot's selected K: disk is only an example of the control; choose the disk containing C: on your PC.
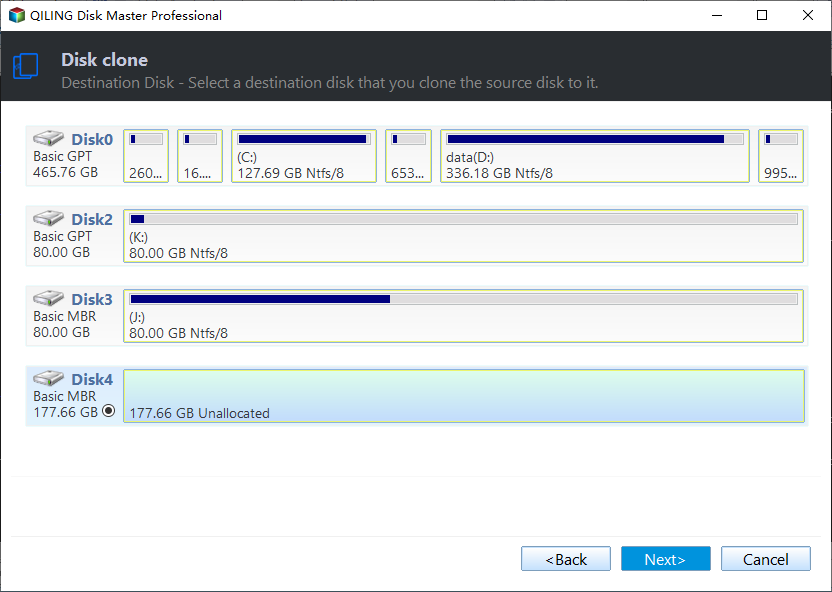
Step 4. On the destination screen, select the new SSD by its capacity and disk number, using the disk-level circle. Confirm that the old disk is the source and the SSD is the destination; reversing them could overwrite Windows. Click Next only after saving any existing SSD data elsewhere.
Step 5. In the preview, check that the Windows, boot, and recovery partitions are included. If the tool allows it, increase the destination Windows partition to use additional SSD space. Select Optimize for SSD if available. The disk letters in the image are examples; use your own source and destination labels.
Step 6. Recheck the cloning direction, click Proceed, and confirm any destination-erasure warning only after verifying the SSD again. Wait for the clone to finish without disconnecting either drive.
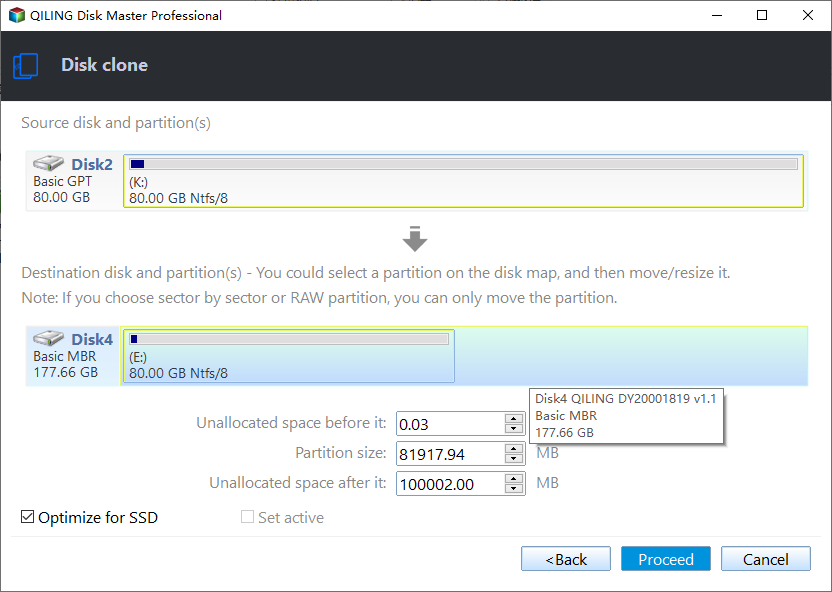
Step 7. Shut down, install the SSD as the boot drive, and disconnect the old disk for the first test where practical. Start Windows, verify your files and C: capacity, then repeat the same disk-speed test. If the PC still stalls, investigate memory, software, or CPU activity instead of cloning again. Keep the old disk unchanged until the SSD has been tested.
Related Articles
- Windows 11 SSD Is Slow
Diagnose SSD-specific causes of poor performance. - Make Windows 11 Faster
Check other bottlenecks before buying storage.
Products
Articles & Tutorials
- Data Recovery
- Data Backup
- File Recovery
- File Backup
- File synchronize
- System Backup and Restore
- Disk and Partition Clone
- Technical articles
- Disk Master Help
- Windows Deleted File and Disk Recovery Tutorials
- Windows File and Data Recovery Tutorials
- More Windows Tutorials for Install, Security, Files, and PC Tips
- Windows Boot, Repair, and Recovery Environment Tutorials
- Windows Backup Tutorials
- Windows Restore Tutorials
- Windows Clone and Migration Tutorials
- Windows Server Backup, Recovery, and Management Tutorials
- Windows Disk, Partition, and Storage Management Tutorials