Windows 11 vs. Windows 10 for Gaming: What Actually Changes?
Windows 11 can be a sensible gaming upgrade on supported hardware, but the operating system alone does not guarantee higher frame rates. GPU and CPU drivers, game version, settings, storage speed, and background workloads often have a larger effect. Standard Windows 10 support ended in October 2025, so security support also matters when choosing what to run.
Compare relevant gaming features
Both systems run a broad Windows game library and support Game Pass for PC where available. Windows 11 offers Auto HDR for supported displays and games and supports DirectStorage when the game, storage, and other hardware meet its requirements. Do not assume either feature applies to every title or that it improves average FPS. Check game anti-cheat, controller, and peripheral support before upgrading.
Check hardware and establish a baseline
Step 1. Run Microsoft's PC Health Check to confirm Windows 11 compatibility. Update the GPU driver and game, then record the resolution, graphics preset, display mode, power mode, Game Mode setting, and whether the game is stored on HDD or SSD.
Step 2. Use the game's built-in benchmark if available, or a repeatable scene and the same capture tool. Run it several times on Windows 10 with unchanged background apps. Record average FPS, frame-time consistency, and loading time separately.
Step 3. After the upgrade, repeat the same test with matching settings and current drivers. Compare multiple runs rather than one unusually fast result; a small difference within normal variation does not show that one OS is faster.
Back up before a major upgrade
Step 1. Save any game files and settings that are not cloud-synced, and close your games and launchers. Connect an external drive with enough free space for the image. Keep it connected and make sure the PC has stable power throughout the backup.
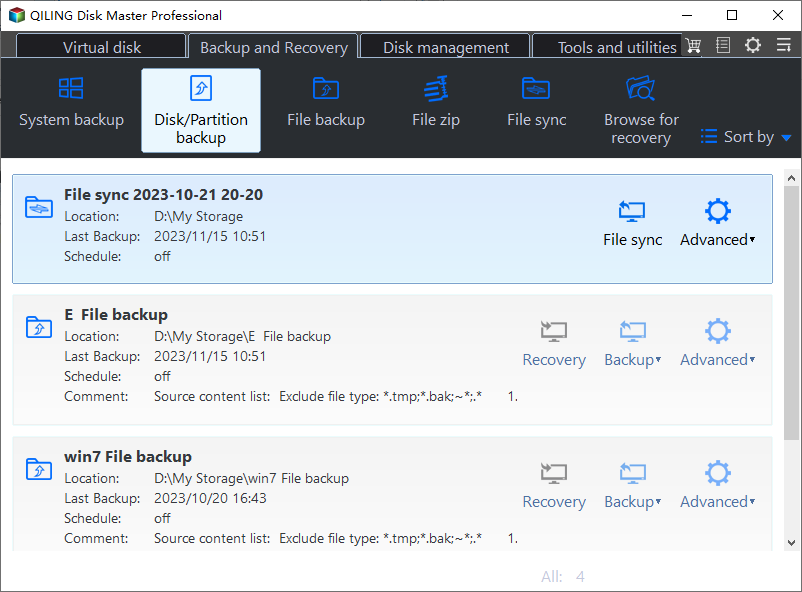
Step 2. Open Qiling Disk Master. On the Backup and Recovery tab, click Disk/Partition backup to open the disk backup window.
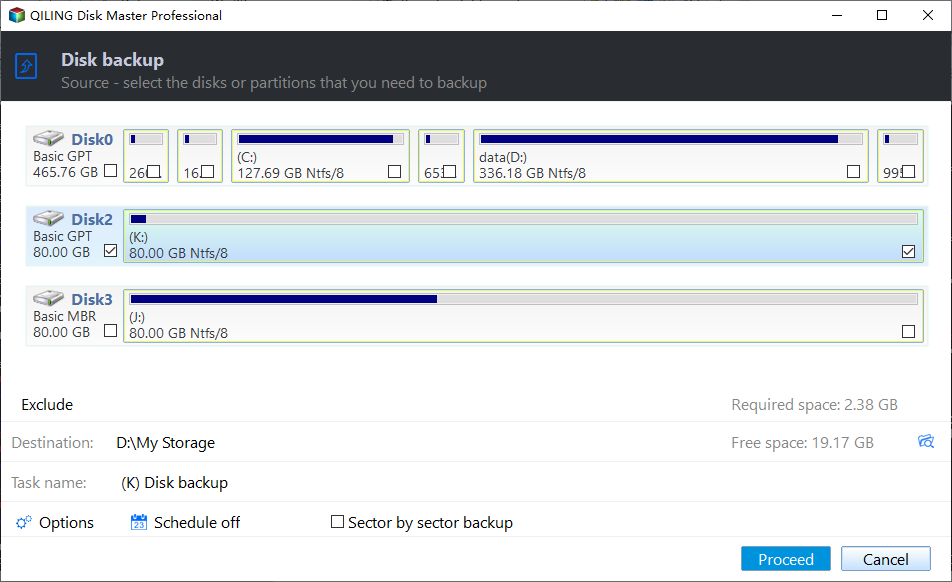
Step 3. Find the disk that contains your Windows C: partition. Check the box beside that disk's number on the left to include the entire physical disk, not just C:. This also includes its boot and recovery partitions. Clear any unrelated disk selection. The example screenshot has a different disk selected, so use the partition labels on your PC to identify the correct Windows disk.
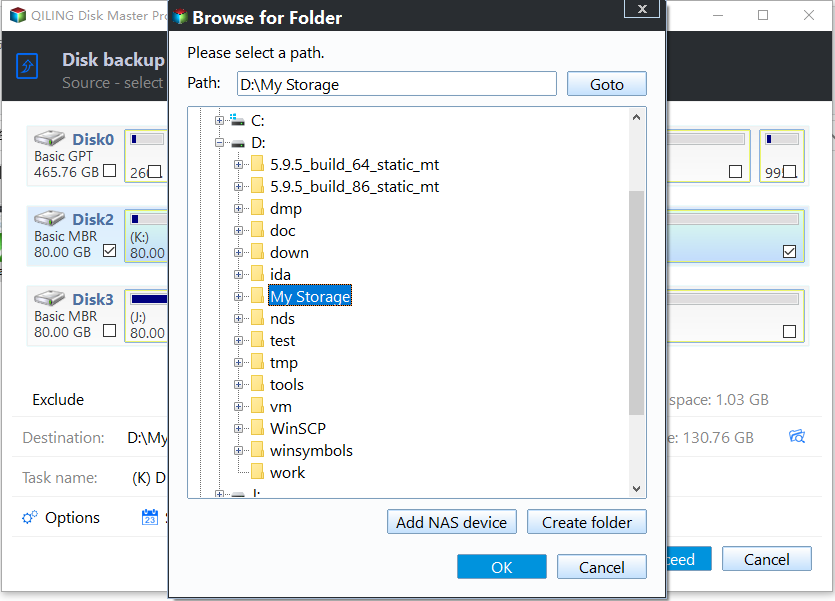
Step 4. Click the folder icon beside Destination. In Browse for Folder, choose a folder on the external drive and click OK. Confirm the destination path and free-space figure in the backup window; do not save the image to the same physical disk you are backing up.
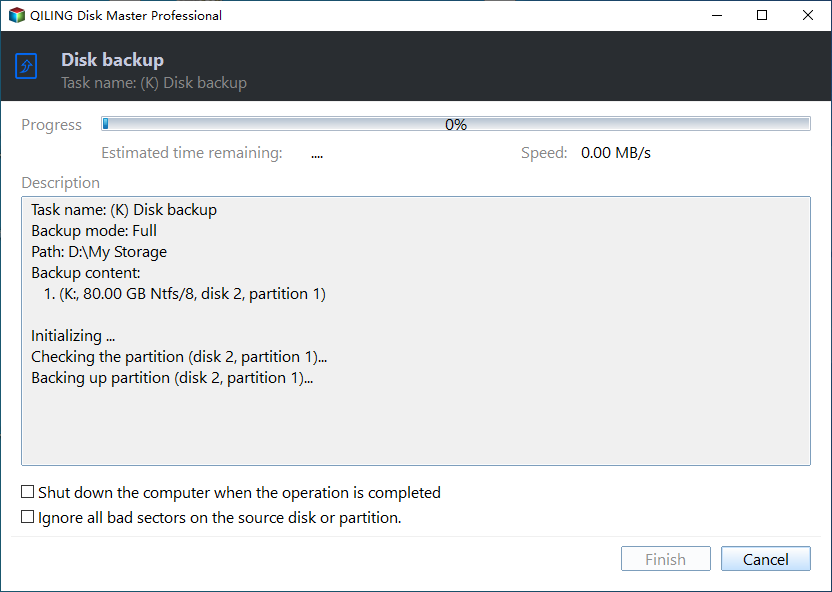
Step 5. Review the selected source disk and destination. Give the task a recognizable name if needed, then click Proceed. The progress window should appear. Wait until the operation finishes; do not disconnect the external drive while the image is being written.
Step 6. After completion, find the disk backup task on the Backup and Recovery tab. Open its Advanced menu, choose Check Image, and wait for the check to finish successfully. Create bootable recovery media before upgrading so you can start the PC and restore the image if Windows 11 does not boot. Keep the external backup until you have tested your important games, launchers, controller software, and anti-cheat systems in Windows 11. For unsupported hardware, do not bypass compatibility checks solely for a claimed gaming speed gain.
Bottom line
Choose Windows 11 when your PC is supported and your games and devices work there. Upgrade storage or graphics hardware for a clearer performance gain when benchmarks show those parts are the bottleneck; do not treat OS migration as a substitute for measuring the actual problem.
Related Articles
- Can This PC Upgrade to Windows 11?
Check compatibility before changing the gaming setup. - Make Windows 11 Faster
Review practical performance checks beyond gaming claims.
Products
Articles & Tutorials
- Data Recovery
- Data Backup
- File Recovery
- File Backup
- File synchronize
- System Backup and Restore
- Disk and Partition Clone
- Technical articles
- Disk Master Help
- Windows Deleted File and Disk Recovery Tutorials
- Windows File and Data Recovery Tutorials
- More Windows Tutorials for Install, Security, Files, and PC Tips
- Windows Boot, Repair, and Recovery Environment Tutorials
- Windows Backup Tutorials
- Windows Restore Tutorials
- Windows Clone and Migration Tutorials
- Windows Server Backup, Recovery, and Management Tutorials
- Windows Disk, Partition, and Storage Management Tutorials