Guide: How to Set NVMe as Boot Drive
How much do you know about NVMe drive?
NVMe (Non-Volatile Memory Express) is a type of solid-state drive (SSD) that uses a dedicated interface to connect to a computer's motherboard, offering faster speeds and lower latency compared to traditional SSDs. Unlike other SSDs, NVMe drives have a dedicated controller and use a different communication protocol, which allows for higher speeds and more efficient data transfer. To boot from an NVMe drive, you'll typically need to change the boot order in your computer's BIOS settings to prioritize the NVMe drive over other storage devices. As for whether an NVMe drive can save a slow computer, the answer is yes - by providing a fast and efficient storage solution, an NVMe drive can help improve overall system performance, especially when paired with a fast CPU and sufficient RAM. However, it's essential to address any underlying hardware or software issues that may be causing the slow performance.
| 📌 NVMe | NVMe, short for "Volatile Memory Host Controller Interface Specification" is a PCIe interface protocol that saves time by utilizing simplified commands for efficient data analysis and modification, resulting in exceptional speed performance with solid-state storage and modern CPUs. |
| 📌 M.2 SSD | The M.2 interface, introduced by Intel to replace mSATA, has two types: one that supports the SATA channel and another that supports the NVME channel. |
| 📌 M.2 SATA | M.2 SATA's read and write speeds are comparable to a 2.5-inch SSD, with the main difference being the interface. Data is first read from the hard drive to memory, then processed by the CPU, and finally written back to the hard drive. |
| 📌 M.2 NVMe | Choosing an M.2 NVMe drive can significantly improve system performance. Unlike traditional hard disk drives, M.2 NVMe drives connect directly to the CPU via a bus, eliminating the need for the memory to access the hard disk, resulting in a smoother and faster overall experience. |
| ⚔ M.2 SATA VS M.2 NVMe | The theoretical bandwidth limitation of the SATA channel is 600MB/s, which is the maximum transfer speed it can reach. M.2 NVMe: The PCI-An M.2 NVMe SSD has a different interface compared to an M.2 SATA SSD, allowing it to reach a bandwidth of up to 10GB/s. |
Can you set NVMe SSD as a boot drive?
Just like other SSDs, NVMe SSDs can be set as a boot drive for your Windows PC, and they are the most efficient and effective method to optimize boot times. NVMe drives offer a cost-effective solution for seamlessly integrating into your system using an M.2 interface, making them a great option for upgrading your computer's boot performance.
Ensure your hardware meets the prerequisites for NVMe booting, and back up your system data before attempting to boot from NVMe, to avoid operation failure.
1. NVMe is most effective with a Skylake chipset or newer, but can still be used with older systems for optimal performance.
2. If your motherboard doesn't have an M.2 PCI-E x4 slot, you may need to use a PCIe x4 adapter to use a drive that requires it.
3. Systems must have UEFI compatibility to support booting from an NVMe SSD.
4. To ensure proper booting, it is recommended to switch from Legacy boot mode to UEFI mode in the BIOS after transferring Windows 10/11 to the NVMe drive.
How to set NVMe as boot drive for your Windows computer?
NVMe design leverages low-latency PCIe SSDs and parallelism to significantly enhance the user experience of SSDs. By setting a NVMe boot drive as the boot drive, a PC can achieve its best performance.
To boot from a PCIe NVMe drive, follow these steps. First, ensure that your motherboard supports PCIe NVMe drives. Next, connect the drive to a PCIe slot on your motherboard, making sure to secure it properly.
▌Section 1. Insert NVMe SSD into your comptuer
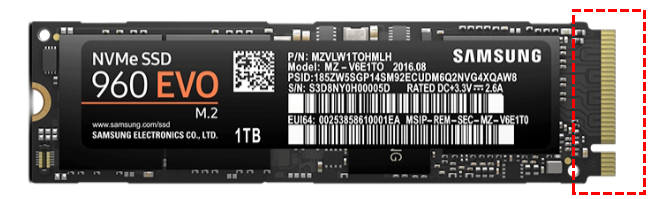
Before installing an NVMe drive, ensure your motherboard supports it and use the correct M.2 key for your drive type. If you're a laptop user, avoid inserting the M.2 drive into the mSATA port.
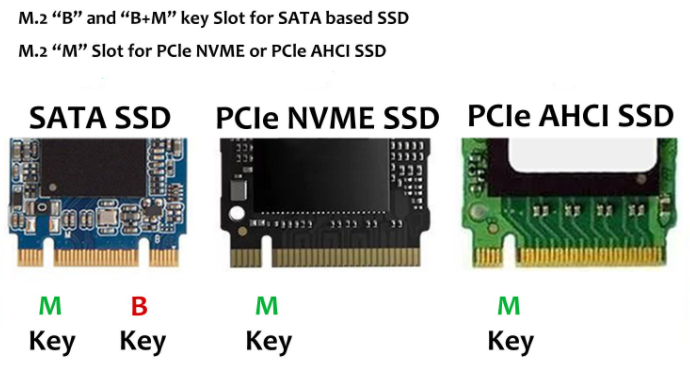
• M+B Key: For SATA M.2 drives and some NVMe drives
• M Key: For NVMe drives using the PCIe x4 bus.
As the following picture shows, Samsung NVMe SSD 960 EVO has an "M-Key".
To ensure compatibility with your system, make sure it's running Windows 8 or higher. Also, ensure your system supports UEFI. If you're using Windows 7, check your motherboard settings to see if it can boot from a UEFI device, and adjust the settings to Legacy boot and then choose UEFI.
After the check, we can move on to the next section.
▌Section 2. Install OS on NVMe drive
Way 1. Do a fresh OS installation
To install Windows on an NVMe M.2 drive, you can use an installation media, disc, or a bootable USB drive.
Step 1. Start your computer, and press the required key as the screen shows. Generally is "DEL" or "F2" to enter BIOS.
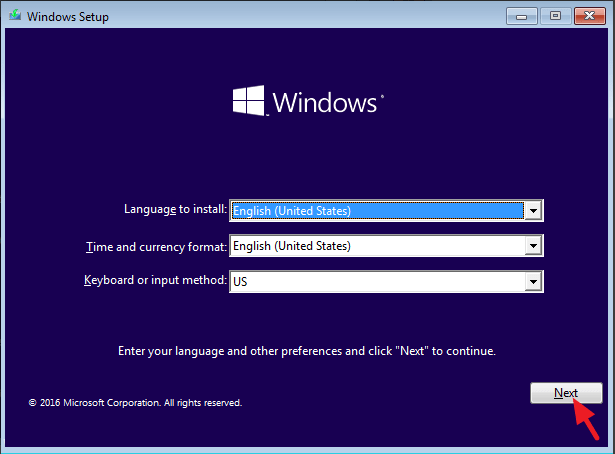
Step 2. Complete the settings in the Setup window by selecting the "Language to install", "Time and currency format", and "Keyboard or input method". Then click "Next".
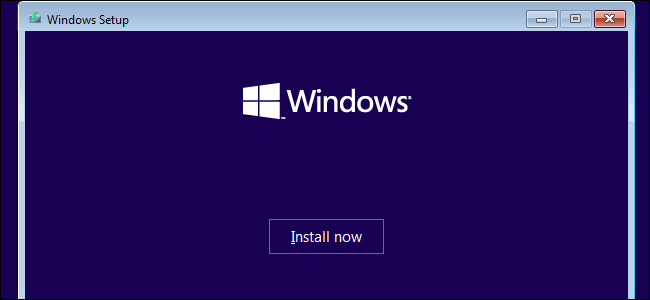
Step 3. Click "Install now".
Then, you can follow the requirements to activate your Windows.
Way 2: Migrate OS to SSD
If you want to move your current operating system or migrate one from another hard drive, we recommend using software like Qiling Disk Master Professional. This powerful disk expert can solve various disk and partition issues, and its "Migrate OS to SSD" function allows you to move your OS to a destination hard drive, including all relative system files.
This tool uses hot clone technology, allowing you to migrate your OS to a new NVMe drive without needing to reinstall the system or reboot the PC multiple times. After the migration, you can successfully boot your OS from the NVMe drive when you use your PC next time.
To boot from a PCIe NVMe drive, you'll need to use a pragmatic software that can handle the complexities of this high-speed storage technology. This software will allow you to configure your system to boot from the NVMe drive, taking advantage of its lightning-fast speeds and low latency.
Step 1. Install and run Qiling Disk Master. Click on "Migrate OS" under the "Clone" menu, then follow the wizard's instructions by reading the introduction and clicking "Next".
Step 2. Select the unallocated space on SSD as the destination location and then click "Next".
Step 3. Resize the system partition and change the drive on this page. Then a note on how to boot Windows 10 on SSD will pop up.
Step 5. Click "Proceed"to execute all operations.
Turn off your computer, unplug the original hard drive, leave the NVMe SSD in place, enter BIOS, change boot settings to boot from the SSD, and restart the computer.
Way 3. Clone the entire disk.
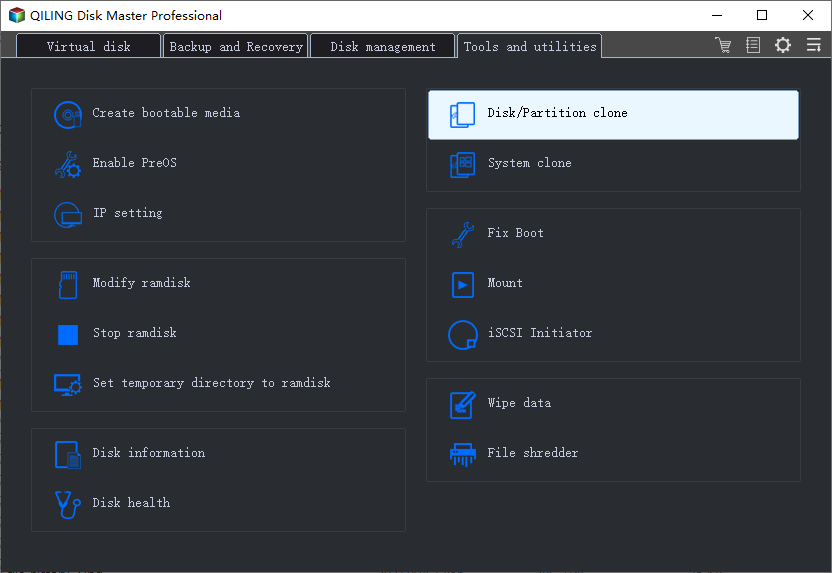
Qiling Disk Master Professional allows you to clone the source disk to the NVMe drive using its "Disk Clone Wizard" feature, creating a bootable copy of the original disk without requiring reinstallation of the OS and programs.
Step 1. Install and launch Qiling Disk Master, and then click "Tools" and "Clone Disk".
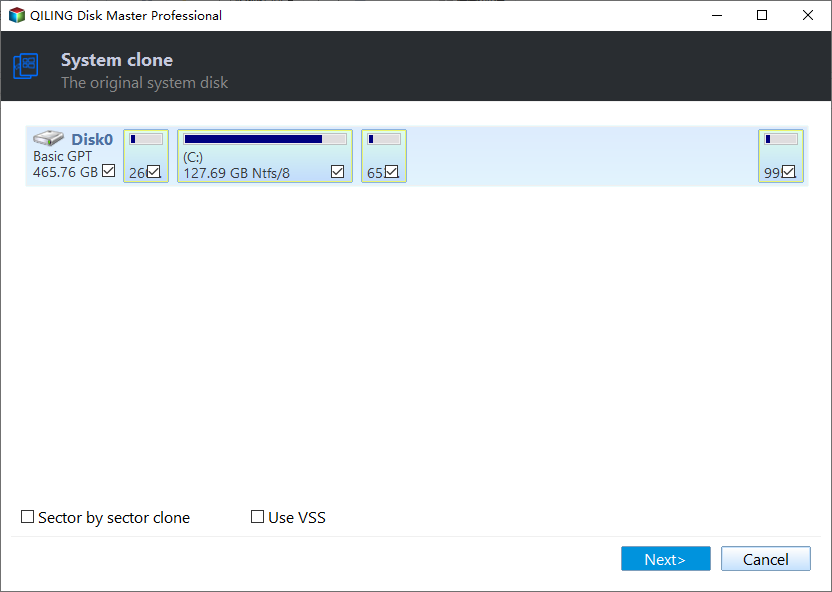
Step 2. Locate the system disk and choose it as the source disk.
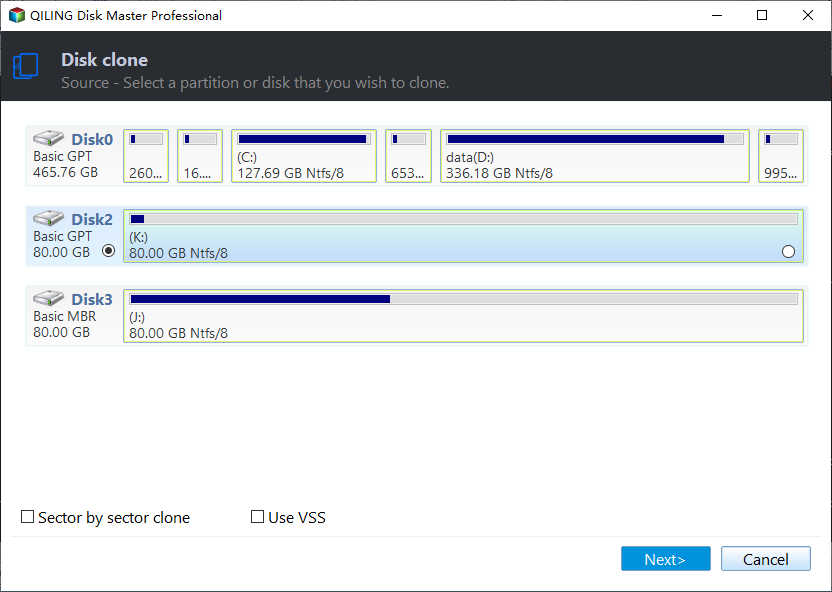
Step 3. If you need to clone a hard drive with bad sectors and the target SSD's capacity is not smaller than the source disk, choose "Sector-by-Sector Clone".
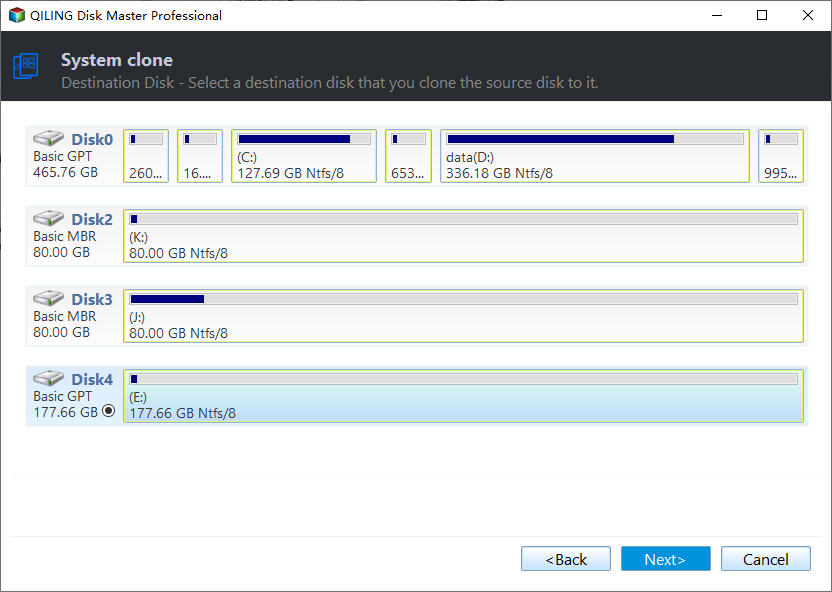
Step 4. Choose the SSD as the destination disk, and select the option to optimize its performance by aligning the partition.
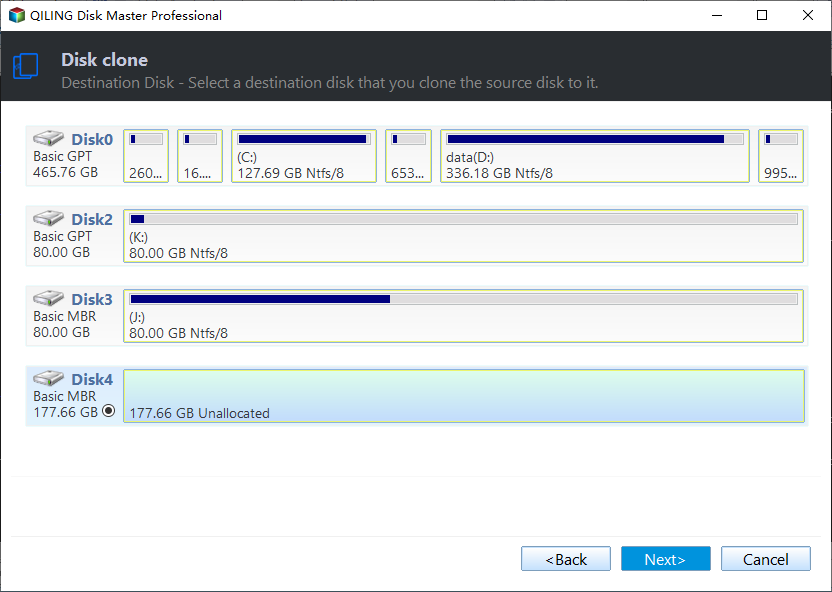
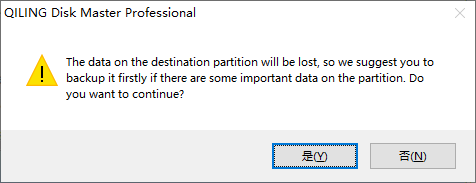
▶ Note: If data is saved on an SSD, you'll be asked to delete all partitions and wipe all data on the SSD.
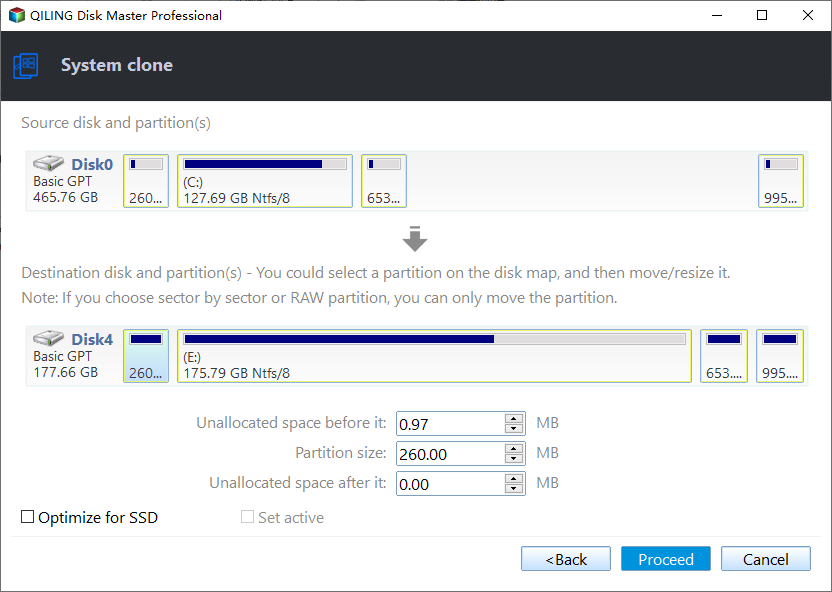
Step 5. In this window, adjust the partition size on the destination SSD.
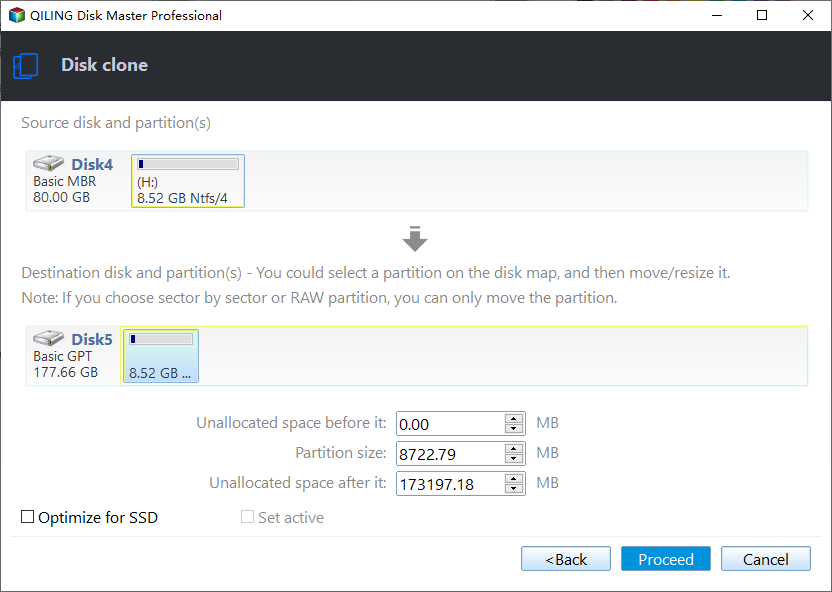
▶ Note: When cloning a larger HDD to a smaller SSD, the option to clone without resizing partitions is unavailable.
Step 6. Click "Proceed" to perform the cloning operation.
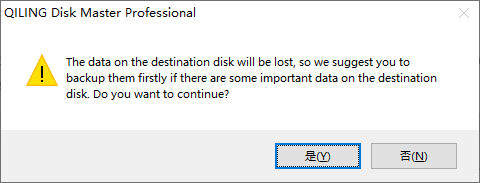
A note will appear in the pop window, read and click "Yes".
▌Section 3. Boot settings
To set NVMe drive as a boot drive in MSI BIOS, follow these steps: Enter the BIOS by pressing the key that corresponds to the BIOS (usually F2, F12, or Del key), go to the "Boot" menu, select the NVMe drive as the first boot device, save the changes and exit the BIOS. The NVMe drive should now be recognized as a boot drive.
Step 1. Power on the device and tap the [Delete] key to enter the BIOS settings menu:
[SETTINGS] → [Boot] → Set boot priority for your device.
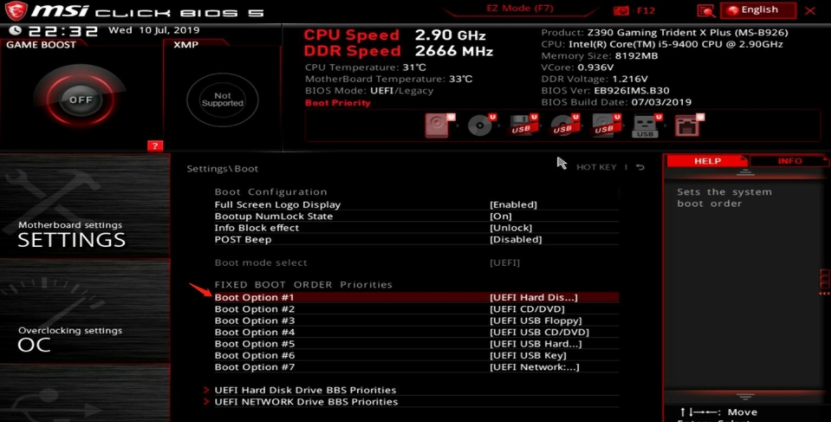
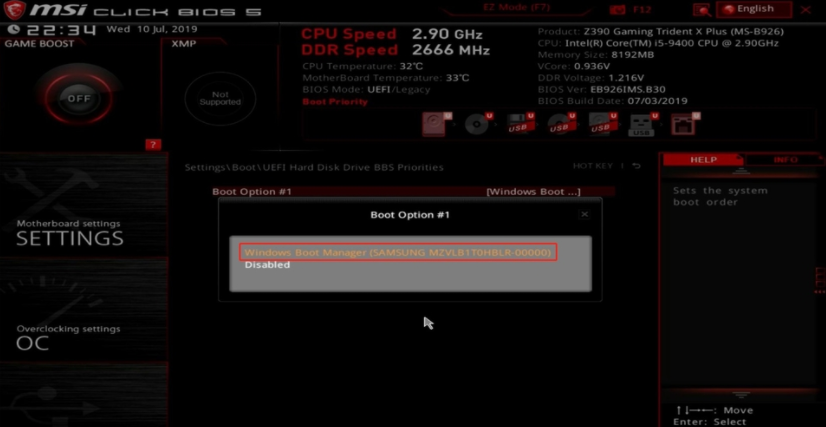
Step 3. Set [Boot Option #1] as the system disk.
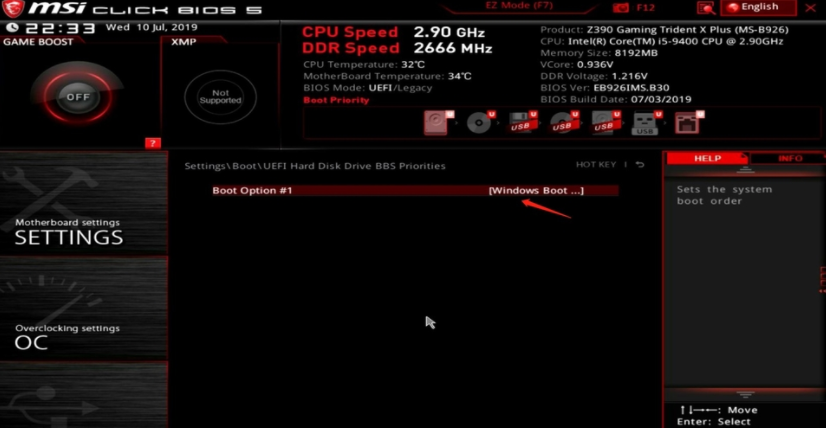
The system disk is the Acer SSD, and you need to choose the Windows Boot Manager option that corresponds to the Acer GT500M 256G.
Conclusion
To set your M.2 NVMe as a boot drive, follow the detailed guide we provided, which includes using Qiling Disk Master, a multifunctional disk manager, to improve the performance of your SSD. This tool can also help you manage your server device or enterprise needs, with options available for the Server Edition and Unlimited Edition.
FAQs about how to set NVMe as boot drive
Q1: Why do I need to set NVMe as the boot drive?
Setting NVMe as the boot drive offers several advantages, including faster read and write speeds, resulting in quicker system startup, faster application loading, and improved responsiveness.
Q2: Can any computer support NVMe as the boot drive?
To use NVMe as a boot drive, your computer must have an NVMe-compatible motherboard or expansion card, and the system's BIOS or UEFI firmware must also support NVMe booting. It's best to check your computer's specifications or consult the manufacturer to confirm compatibility.
Q3: Can I migrate my existing operating system to an NVMe boot drive?
You can migrate your existing operating system to an NVMe boot drive by using software tools that clone your existing system drive to the NVMe drive, ensuring a smooth transition and preserving your operating system, applications, and data. It's recommended to back up your data and follow the instructions provided by the migration software to successfully transfer your system to the NVMe drive.
Related Articles
- SSD Not Showing Up in Windows 10 – Fixed it Easily
This article will share 4 fixes on SSD not showing up in Windows 10, 11, 8, 7. No matter your SSD not showing up in Disk Management, Device Manager, or SSD not showing up in Windows 10 install, you can follow to troubleshoot. - 4K Alignment: Align SSD after Clone in Windows 10, 8, 7
How to align SSD after clone? In this post, you'll not only learn about the reason for SSD 4K alignment but also, learn how to align SSD after clone with some powerful ad-free third-party disk manager. - How to Delete or Create Windows Server 2022 Recovery Partition
What is Windows Server 2022 recovery partition and its purpose? Is it safe to delete the recovery partition to expand your storage? What if you don't have one, but want to create one to use when there is a problem with the system? Read on to find the answer. - Adjust Partition Size with Free Partition Software
If you're unable to adjust the partition size due to Extend Volume being greyed out or the available shrink space being 0 in MB, Qiling Disk Master can be a helpful tool. It allows you to resize, move, merge, and split partitions, making it a useful solution for managing disk space and adjusting partition sizes as needed. - How to Delete Everything on a USB Flash Drive [Completely]?
This post shows how to delete everything on a USB flash drive (completely), even when you can't delete files from USB due to write protection or something else. - How to Delete Files from External Hard Drive in Windows 10/8/7?
In this post, we will show you how to delete files from external hard drives in Windows 11, 10, 8 and Windows 7. You will learn 4 methods to remove files on external drive successfully.