2 Free Ways to Schedule Hourly Backup in Windows 10/8/7
Case: I want to perform Windows backup every hour
To schedule an incremental backup every hour between 7am-7pm, you can use a tool like `cron` on Linux/macOS or Windows Task Scheduler. You can create a cron job or task that runs the backup command every hour within the specified time frame. For example, you can use the following command in cron: `0 * * 7-19 * /path/to/backup/command` (assuming the command is located at `/path/to/backup/command` and the backup should start at the top of the hour). This will run the backup command every hour between 7am and 7pm.
To perform hourly backup on a Windows PC, you can use the Task Scheduler to automate the backup process. This involves creating a new task that runs a command or script to initiate the backup at the desired interval. You can also use third-party backup software that supports scheduled backups, such as Qiling Disk Master, which can be set to run hourly backups. Additionally, you can use the Windows built-in tool, Windows Backup, to schedule hourly backups.
To schedule automatic backups every hour in Windows 10/8/7, you can use the Backup and Restore utility to schedule daily backups, but if you need hourly backups, you can use the Task Scheduler to create a task that runs a batch script to run the backup command every hour. Alternatively, you can use third-party backup software that supports hourly backups.
- Way 1. Hourly backup user folders in Windows 10/8 via File History
- Way 2. Hourly backup files or OS in all Windows PC via freeware
Way 1. Hourly backup user folders in Windows 10/8 via File History
Since Windows 8, File History has allowed users to automatically back up personal files, similar to Apple's Time Machine. To use it, you simply need to select a target drive, specify what files to back up, and how often to do so.
This tool is convenient, but has some limitations - it can only back up to external drives or network locations, and is primarily designed for user folder backups, not system recovery. Additionally, it may sometimes fail to meet expectations.
If you're running Windows 10/8.1/8 and want to automatically back up folders to an external drive or network location every hour, you can use File History.
If you want to protect really important files/system/entire PC, or schedule hourly backups in earlier OS, consider using specialized backup software for better support.
The approaches to access File History in different OS:
In Windows 8: Control Panel > System and Security > File History
In Windows 8.1: Start screen > Search for "File History" directly
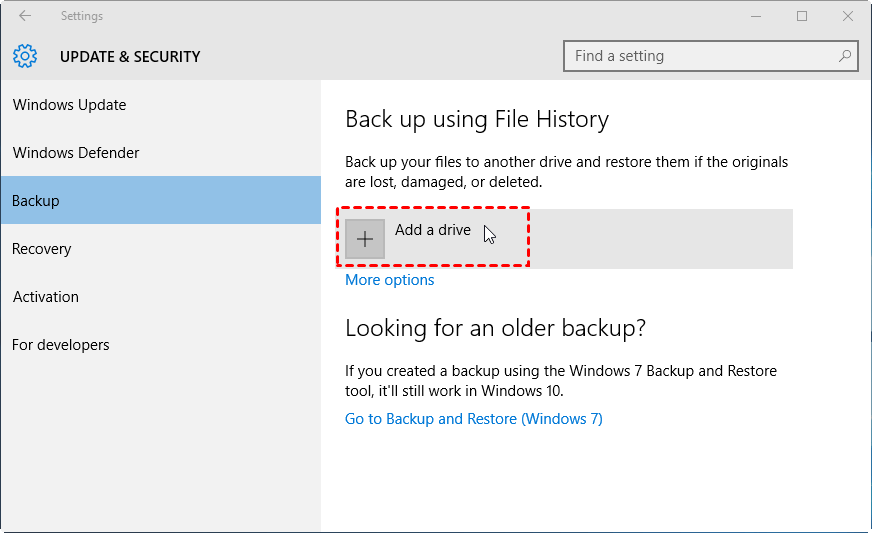
In Windows 10:Go to Start, then select Settings, then Update & Security, then Backup, and finally Back up using File History.
To set up a backup, start by opening the Settings app on your Windows 10 computer. From there, navigate to the "Update & Security" section and select "Backup" from the menu on the left. You can then choose the drive where you want to store your backups, and select the types of files and folders you want to include in the backup.
How to do hourly backup via File History:
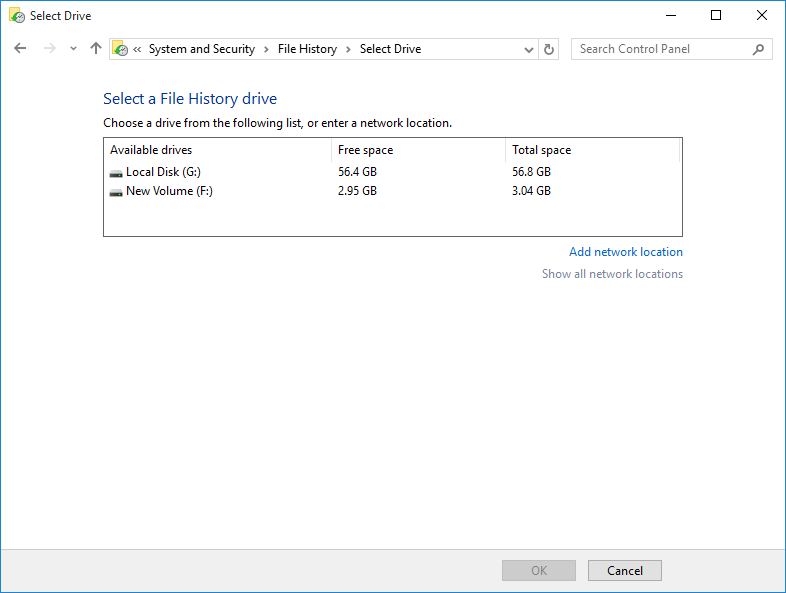
1. Connect your external drive and click "Add a drive" to specify it as the target.
To manually specify a network location, go to More options, then See advanced settings, followed by Select drive and finally Add network location.
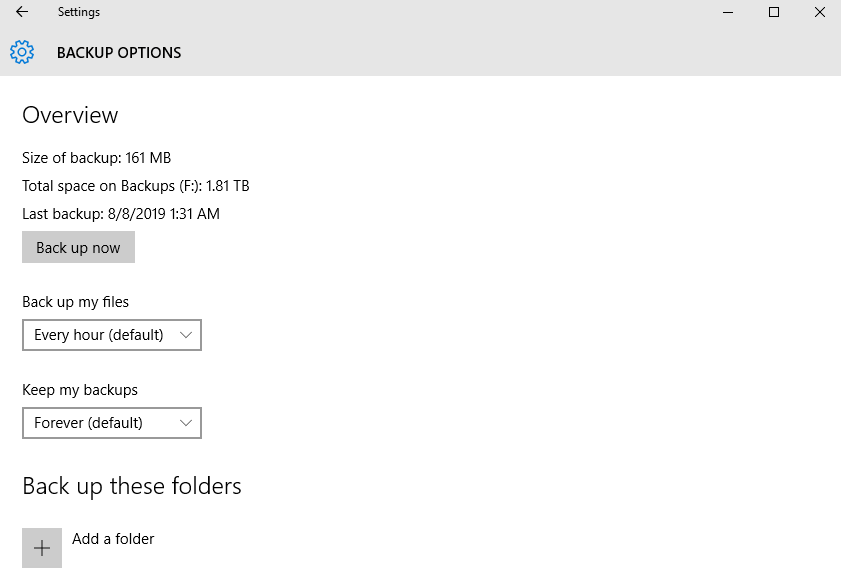
2. To enable automatic backups of your files, toggle the switch next to "Automatically back up my files" to the "On" position. This will initiate the backup process. For further customization, navigate to the "More options" section, where you can configure additional settings to suit your needs.

3. The default frequency is every hour, but you can also run it every 3 hours, every 30 minutes, etc. as you like, and choose how long to keep the backups.
In the next section, you can click "Add a folder" to specify additional folders you want to back up, or exclude folders you don't want to back up.
5. Now that the backup is set up, you can stop it or reset it by clicking on the "Stop using drive" option below.
Way 2. Hourly backup files or OS in all Windows PC via freeware
Qiling Disk Master Standard is a powerful yet easy-to-use freeware that supports Windows 10/8.1/8/7/Vista/XP, and can be applied to various devices such as internal/external drives, NAS/network share, USB, and cloud services.
It includes file backup, cloud backup, partition backup, system backup, and disk backup modes, with the option to schedule backups at intervals such as every hour, 2 hours, 3 hours, etc. within a specified time period.
In addition to full backup, you can also perform incremental and differential backup to copy only changed files.
Qiling Disk Master has different editions for different user groups, and the complete free Standard edition already contains the basic functions needed to perform hourly backups. You can download it to try it out.
You can use the Windows Server edition to back up Windows Server every hour.
How to schedule hourly backup via Qiling Disk Master:
1. Launch the software, go to the Backup tab and choose File Backup or System Backup, depending on your preference.

Tip: You can backup files to Qiling Cloud using the Cloud Backup feature, which offers 1TB of free storage for 15 days after registering a Qiling account.
2. Click "Folder" or "Files" to select the data you want to back up.
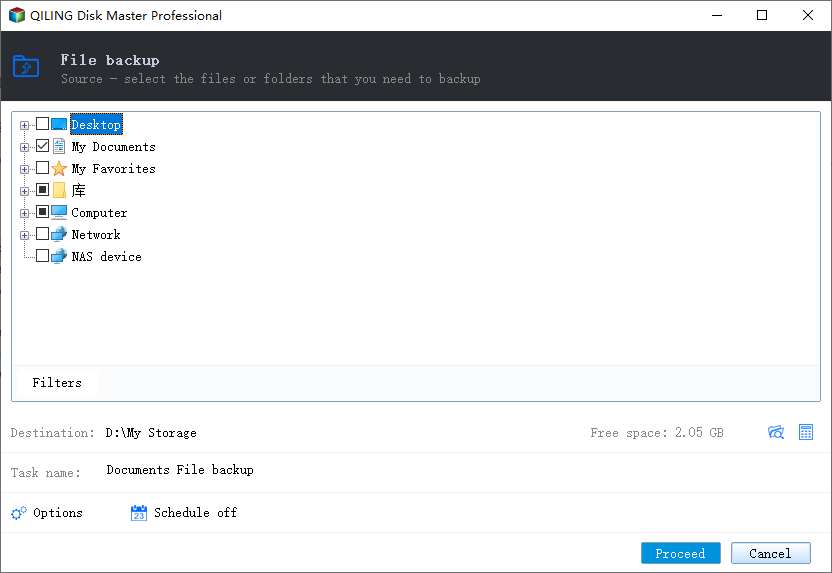
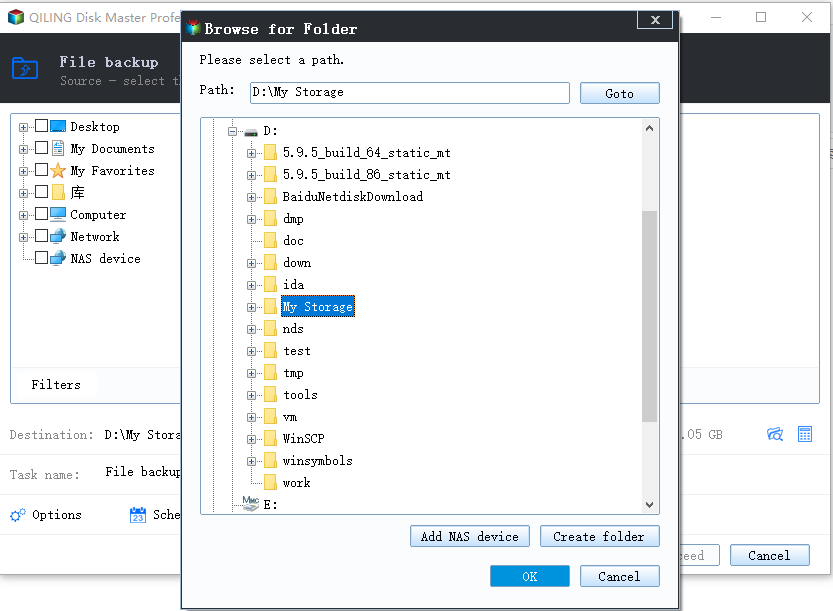
3. To specify a destination, click on the small triangle next to the "Save as type" dropdown menu, and select either a local drive, such as "This PC" or "Desktop", or a network location/cloud drive by clicking on the small triangle and selecting "Select a network location" or "Select a cloud drive".
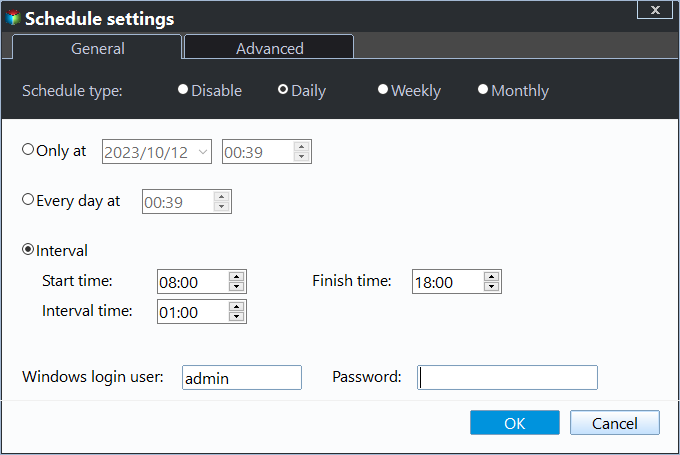
4. To schedule a task, click the "Schedule" button at the bottom of the screen. This will open a new window where you can select the desired schedule settings. By default, the task will be scheduled daily, and you can choose to specify the start and end times by selecting the "Intervals" option.
You can schedule backups to run at specific intervals during a designated time period, such as hourly backups from 12am to 11:59pm or only during certain hours like office hours.
You can also set up Weekly or Monthly backup, or upgrade the Professional edition to unlock Event triggers and USB plug in backup.
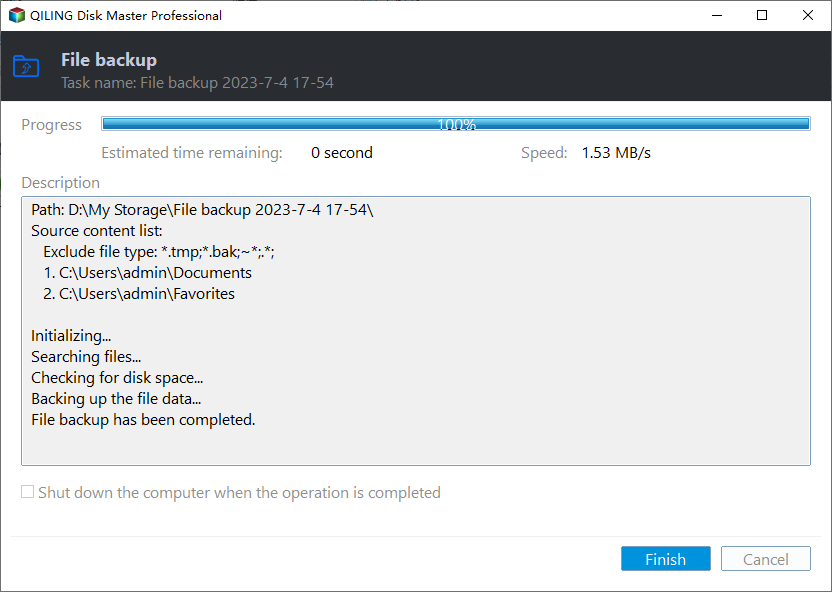
5. Click Start Backup to execute the task.
Other Useful Features:
◉ Select backup mode: In the Pro or higher editions, you can choose between manual or scheduled full, incremental, and differential backup modes.
◉ Auto deletion To optimize storage space, consider implementing a backup scheme that automatically deletes old backup images after a certain period. This can be done by configuring your backup software or service to purge backups older than a specified timeframe, such as 30, 60, or 90 days.
◉ File filter To include or exclude files with specific file extensions, you can configure the file filter settings to select which types of files to include or exclude from the backup.
Summary
To protect critical data in Windows 10/8/7, you can set up automatic backup with a tight schedule, such as hourly backups. Qiling Disk Master can help with its complete schedule options, and for even more frequent backups, you can use its real-time sync function for continuous backup.
This tool includes a powerful disk clone feature, allowing you to transfer the OS to a new disk without reinstalling, or copy data from one hard drive to another with ease.
Related Articles
- How to Manage Windows 10 Backup Options to Protect Your Data?
How to manage File History backup options in Windows 10? How to configure settings of Backup and Restore? In this post, I'll show you the way to do Windows 10 backup settings, and also an alternative with more backup options. - Create a Schedule to Backup User Files in Windows 10/8/7
This article will show you how to create a schedule to backup User files in Windows 7/8/10/11 and provides you with 2 helpful ways. - How to Schedule Daily Backup in Windows 7? [2 Free Ways]
How do you make sure not to lose data during frequent operations? From Windows 7, you can schedule daily backup with a built-in tool, which has some limitations. So you can try the second way as well... - Windows Backup Encountered An Error When Writing Data to the Backup Target [Full Guide]
This article gives you full knowledge about windows backup encountered an error when writing data to the backup target and how to fix it. We recommend you use Qiling Backup to perform system backup and recovery for its powerful functions and user-friendly interface. - Solved: Lenovo NOVO Button Not Working in Windows 10, 8, 7
NOVO button not working for system recovery in Windows 10, 8, 7? Find solutions here and get better way to perform Lenovo system recovery. - How to Solve Lenovo OKR Button Not Working
lenovo onekey recovery not working problem may be caused by system upgrade, boot partition resizing, recovery partition damage or deletion, etc. The best way to solve this is to find an alternative of Lenovo OKR.