C Drive Clone Software for Windows
Cloning C drive can migrate Windows to a larger SSD, replace a failing system disk, or keep a bootable copy for upgrade. The target disk must be prepared carefully because clone operations overwrite it.
Understand the problem
A system clone must include boot-related partitions, not only the visible C drive. GPT, MBR, UEFI, and Legacy mode also affect whether the cloned disk can boot.
- Confirm the exact disk, partition, drive letter, file system, boot mode, or Windows version before changing settings.
- Back up or recover important files before formatting, deleting, resizing, converting, reinstalling, or cleaning a drive.
- For boot or installation tasks, check BIOS or UEFI mode, disk style, boot order, and device compatibility first.
Use Windows built-in tools
Prepare before cloning.
- Check whether Windows uses UEFI or Legacy boot mode.
- Confirm whether the source disk is GPT or MBR.
- Connect the target disk and back up anything on it.
- Remove unnecessary files from C drive to reduce clone size.
- After cloning, set the new disk first in boot order.
Use Qiling tools for guided steps
 Qiling Disk Master
Clone C drive and related boot partitions to a new disk with a guided preview.
Function. Clone the drive with a guided wizard
Step 1. Connect the new SSD or hard drive to the computer and make sure it has enough capacity for the used space on the current Windows system disk.
Step 2. Open Qiling Disk Master and choose the disk clone function. Select the current Windows system disk as the source disk.
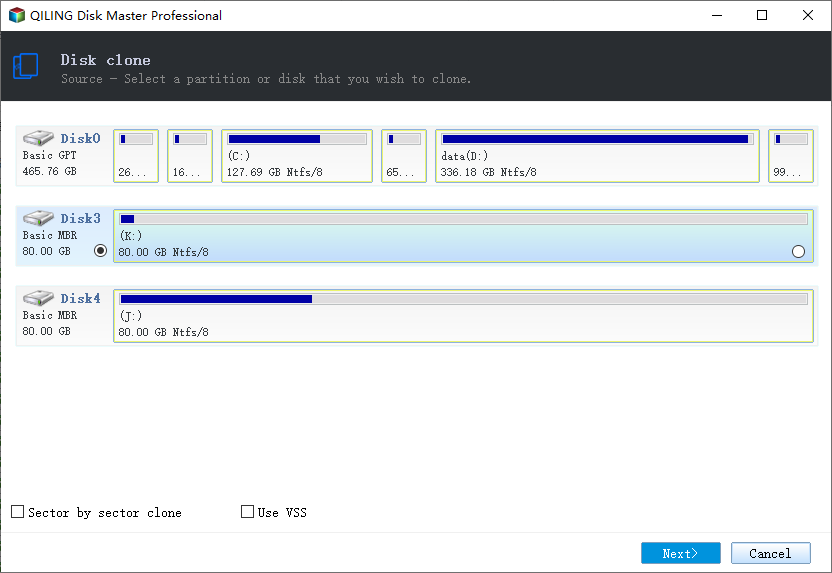
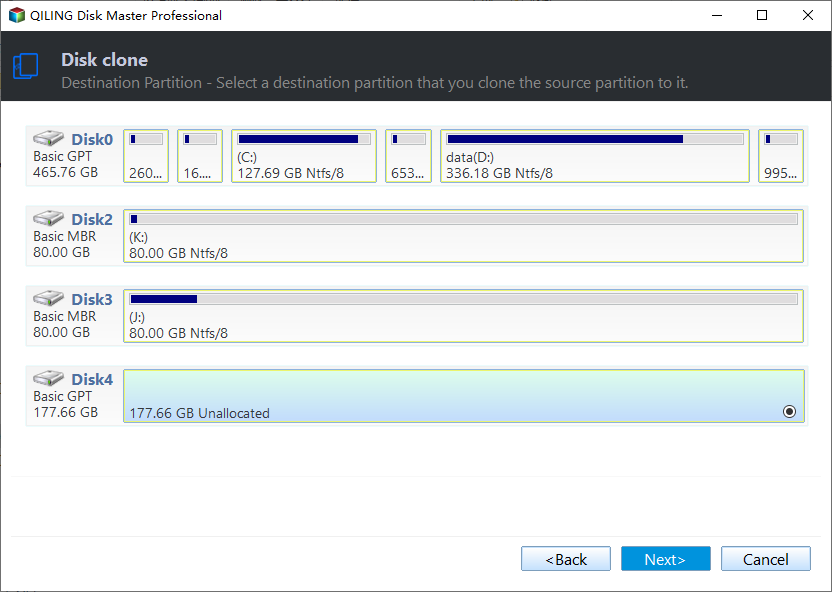
Step 3. Select the new SSD or hard drive as the destination disk. Confirm that any existing data on the destination has been backed up.
Step 4. Review the clone preview. If the destination is an SSD, keep SSD alignment enabled for better performance.
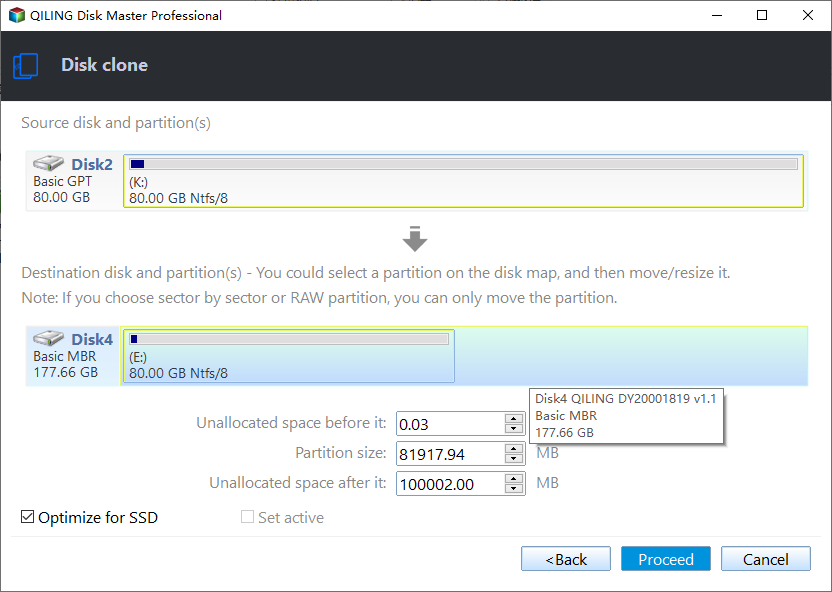
Step 5. Click Proceed and wait for the clone to finish. Then test boot order or file access based on the clone purpose.
Check the result
Boot from the cloned disk and confirm Windows, programs, activation, and user files work. Keep the old disk unchanged until the clone is verified.
Related Articles
- Clone Hard Drive Windows 10
Clone a Windows disk to a new drive for upgrade or replacement. - Clone HDD to SSD Windows 10
Move Windows from HDD to SSD with boot and alignment checks. - Mirror, Clone, or Back Up C in Windows 10?
Understand what each copy method preserves and include the boot partitions when migrating Windows.
Products
Articles & Tutorials
- Data Recovery
- Data Backup
- File Recovery
- File Backup
- File synchronize
- System Backup and Restore
- Disk and Partition Clone
- Technical articles
- Disk Master Help
- Windows Deleted File and Disk Recovery Tutorials
- Windows File and Data Recovery Tutorials
- More Windows Tutorials for Install, Security, Files, and PC Tips
- Windows Boot, Repair, and Recovery Environment Tutorials
- Windows Backup Tutorials
- Windows Restore Tutorials
- Windows Clone and Migration Tutorials
- Windows Server Backup, Recovery, and Management Tutorials
- Windows Disk, Partition, and Storage Management Tutorials