Guidance: How to Migrate Windows 11 to External Drive
Can I migrate Windows 11 to external drive?
You can migrate Windows 11 to an external drive, but it's not a straightforward process. You'll need to create a system image of your current Windows 11 installation and then restore it to the external drive. This will move your operating system, programs, and files to the external drive. However, it's recommended to ensure the external drive is properly configured and has enough space to hold the system image. Additionally, you may need to reinstall some drivers and software after the migration. Would you like me to guide you through the process?"
When need to migrate Windows 11 to external drive?
You want to migrate Windows 11 to an external drive when you want to free up space on your primary drive, for example, if your primary drive is running low on storage space and you want to keep your Windows installation and programs on the external drive. This can be a good option if you have a lot of files and programs that you don't need to access frequently, and you want to keep your primary drive clutter-free. Additionally, migrating Windows 11 to an external drive can also be useful if you want to create a portable version of Windows that you can take with you on the go, or if you want to have a backup of your Windows installation in case something goes wrong with your primary drive.
✐ To avoid losing data due to a sudden hard drive crash, backing up your data in advance is a good idea.
✐ When you're planning to switch to a new computer, you can migrate your Windows OS to an external hard drive in advance to make the transition smoother and more efficient.
✐ When you decide to upgrade your current hard drive to a newer one with better performance, you'll want to consider the type of hard drive you need, the capacity you require, and the interface it will connect to. This will help you choose the right one for your computer or device, ensuring that it meets your needs and provides the desired performance boost.
✐ To start Windows 11 on another PC, you can create a Windows 11 bootable USB drive, which will allow you to install and run Windows 11 on that PC.
To migrate Windows 11 to another hard drive, you'll need to create a complete copy of your current setup, including the operating system, basic applications, and system-related files. This can't be done by simply copying and pasting, as you'll need to replicate the entire system. You'll need to master the proper way to transfer Windows 11 to another hard drive, which involves creating a complete copy of your current setup.
A reliable OS migrator to migrate Windows 11 to external drive
To migrate Windows 11 to an external drive, we recommend using Qiling Disk Master Professional, a comprehensive Windows OS mover that can help you successfully transfer your operating system to an external drive.
Based on the factors, we consider it a top choice for migrating to Windows 11.
► It's safe: no malware or ads are bundled.
► The software is user-friendly, offering detailed usage tutorials and a clear graphical user interface that makes it easy to navigate and understand.
► It works universally: can be used in Windows 11/10/8.1/8/7/Vista/XP.
► The software is comprehensive, offering both Server Edition and Unlimited Version, catering to different user needs. It provides the Server Edition for users who want to migrate Windows Server to another hard drive, while the Unlimited Version is designed for multiple users who want to enjoy the hard disk or Windows OS migration benefits.
You can use the "Migrate OS to SSD" function to move Windows 11 and system-related files to an external hard drive, or use the "Disk Clone Wizard" to migrate the entire disk.
In addition to disk management functions like allocating free space and merging partitions, the tool also offers features such as PC Cleaner and deleting large files to help free up disk space.
Step by Step: How to migrate Windows 11 to external drive
To move Windows 11 to another drive, start by downloading and installing Qiling Disk Master Pro, a tool that helps you clone and transfer Windows. Once installed, follow the software's instructions to clone your Windows 11 installation to the new drive, making sure to select the correct drive and partition. This process will create a bootable copy of Windows on the new drive, allowing you to boot from it and start using your operating system on the new drive.
● Part 1. Preparation
I've kept the core information and steps from the original text, but removed the unnecessary details and rephrased it to make it more concise and easier to read. If you'd like me to add or remove anything, please let me know!
✿ Connect the external hard drive to your PC with a USB adapter.

✿ If the external hard drive is new, you need to initialize it and set the partition style to GPT.
✿ Ensure the external hard drive has sufficient space to store Windows 11 and its associated files.
✿ Keep the power connection steady, as an unexpected power outage can cause the migration to fail.
● Part 2. Migration process
After completing the preparation tasks, move Windows 11 to another drive by following these steps: Boot from the Windows 11 installation media, then select the language, time, and keyboard layout. Next, click on "Repair" and then "Troubleshoot," followed by "Advanced Options" and "Command Prompt.
Step 1. Click "Tools" tab page, and choose "System Clone".
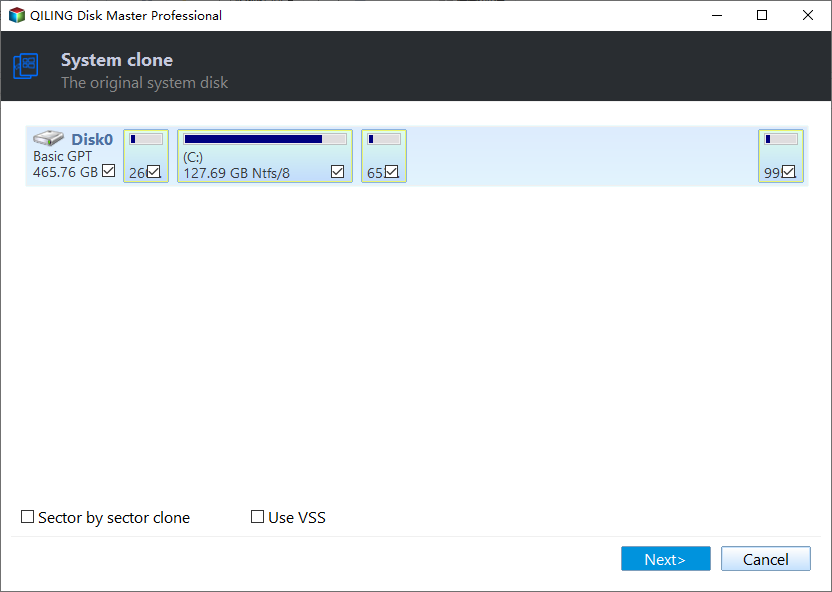
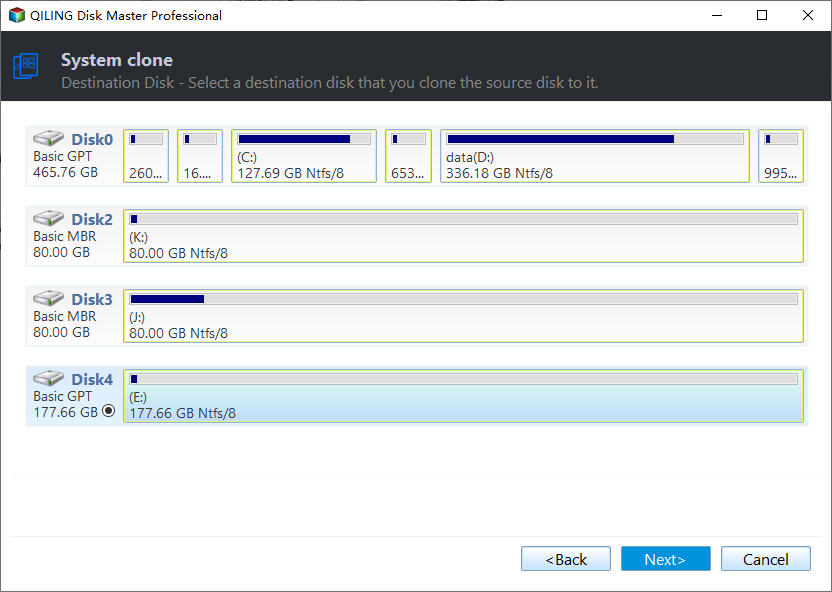
Step 2. Select disk space and tick "I want to delete all partitions on this disk 2 to migrate system to the disk", click "Next".
Step 3. To resize the partitions, drag the little circle to the desired size and then click "Next".
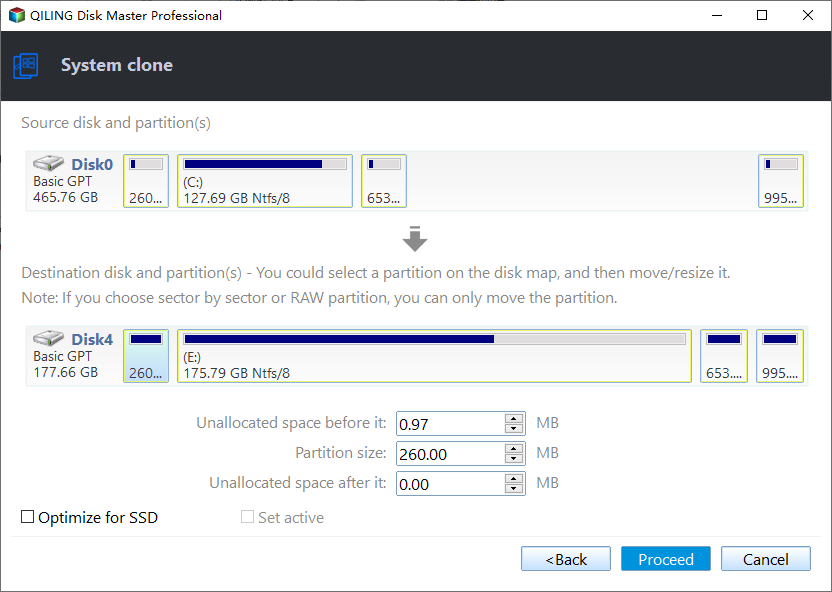
Step 4. Click "Proceed" to move Windows 11 to external hard drive.
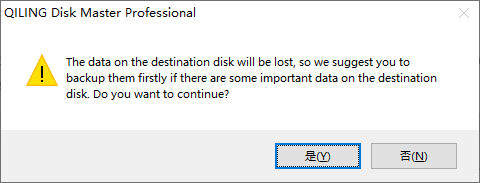
Step 5. To boot up Windows from the new hard drive, click "OK" after reading the note.
● Part 3. Task after the migration
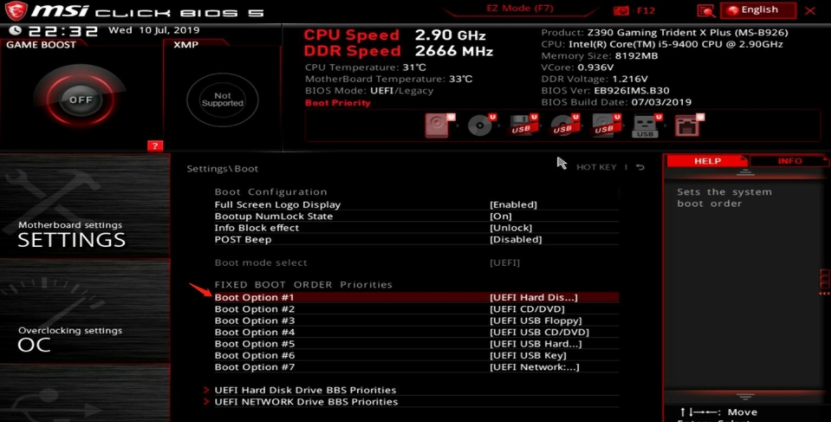
To set the new hard drive as the boot drive, follow these steps: ensure the new drive is properly connected to the computer, enter the BIOS settings by pressing the designated key (usually F2, F12, or Del), navigate to the boot order section, select the new hard drive as the primary boot device, save the changes, and exit the BIOS settings. This will allow the computer to boot from the new hard drive instead of the original one.
To access the UEFI setup and change the boot order to an external hard drive, restart your PC and immediately start pressing F1, F2, F3, F5, or Esc, depending on your system, until you see the UEFI menu. Once in, navigate to the "Boot" option and select "Change boot order" to set the external hard drive as the primary boot device. This will allow your system to boot from the external drive instead of the internal hard drive.
[Bonus tip] Move Windows 11 license to external drive
To migrate Windows 11 license to another hard drive, you can follow these steps: First, make sure you have a valid Retail or Volume license for Windows 11. Then, go to Settings > System > Activation, and click on the "Change product key" button. Enter your new product key, and Windows will activate the license on the new hard drive. Note that this process will not affect your existing Windows 11 installation, and you can continue to use it on the original hard drive.
Step 1. To open the Command Prompt as an administrator, press the Windows key and type "cmd" in the search box, then click on the result and select "Run as administrator" from the context menu.
Step 2. To delete the license key from the current computer, type `slmgr /upk` in the Command Prompt and press Enter. This will remove the license key.
Step 3. To delete the license key from the registry, you can type "slmgr /cpky" and press "Enter" in the Command Prompt. This will remove the license key, effectively deleting it from the registry.
Note: To prevent a product key from being used on more than one device, manufacturers take steps to ensure that each key is tied to a specific device. This may involve using the device's hardware ID, such as the serial number or MAC address, to verify the key's legitimacy.
Step 4. To activate Windows, type `slmgr /ipk xxxxx-xxxxx-xxxxx-xxxxx-xxxxx` and press Enter, replacing `xxxxx-xxxxx-xxxxx-xxxxx-xxxxx` with your actual Windows product key. (This command is the license key.)
Step 5. Type "slmgr /dlv" to verify that it is activated, then press "Enter".
Step 6. To check if Windows is activated, type "slmgr /xpr" and press Enter, and if it is activated, you will see "the machine is permanently activated".
To conclude
If you're unsure about migrating Windows 11 to an external drive, this post has the solution. In addition to that, it also explains how to move your Windows 11 license to an external drive, providing a comprehensive guide for your needs.
Related Articles
- Excellent Tool: Transfer OS to New Hard Drive without Reinstalling
If you wish to transfer OS to new hard drive without reinstallation Windows 11, 10, 8, and 7, you can download the Qiling Disk Master Professional. Its "Migrate OS to SSD Wizard" can help you move Windows OS to a new hard drive and boot from it successfully. - How to Move Windows 11 to Another Drive without Data Loss?
How to move Windows 11 to another drive like an SSD so you needn't reinstall the OS? If you still can find a proper tool for it, luckily, in this post, a powerful third-party disk cloner will be provided to help deal with the OS migration easily. - Reliable HDD to SSD Cloning Freeware for Windows 10/8/7
You may need HDD to SSD cloning freeware to migrate data when upgrading the disk. Luckily, Qiling Disk Master Standard can clone HDD to SSD on Windows 11, 10, 8, and 7 without losing data. - How to Migrate Hard Drive to SSD without Reinstalling OS?
You can migrate your hard drive to an SSD without reinstalling your operating system using Qiling Disk Master Professional, which makes the process easy and safe. - Fixed: Samsung SSD Clone Failed in Windows 11, 10, 8, 7
If your Samsung SSD clone failed, what can you do to safely fix the error? Here is the answer to save your SSD. - Seagate Cloning Software: Migrate Data to Seagate Drive Easily
This post will introduce you great and overall Seagate cloning software for Windows 10,8, 7, and show you how to complete disk copy under the help of it.